Qidi X-Max 3: First impressions

TL;DR

If you have some 3d printing experience, I expect this printer to be a reasonable choice. I’m getting high quality prints, and support has been responsive, and given useful answer to at least some of my questions. The documentation is rather sparse at this time, and Linux support is initially rudimentary, but it looks like that is improving.

If you have never used a 3d printer before, you’ll probably want a little patience, and/or a friend with some some 3d printing experience, to help fill in the information gaps. But this is clearly meant for people with experience already.

Either way, the biggest obvious missing feature is an integrated webcam for remote monitoring. They are selling one as a $40 add-on, though the installation instructions are somewhat lacking. This printer has lots of fans and can be loud, so you might value the ability to monitor prints without being physically adjacent to the printer.

I wouldn’t recommend this printer at the $1399 list price, but for the $999 I paid, I’m satisfied.


I’ve ordered the 325mm x 325mm x 315mm Qidi Tech X-Max 3 printer. Supposed to ship in “late August” so I guess any day now. In theory it’s a pre-order price that will go up at some point by $400; in practice, they are competing against printers like the Creality K1 max that’s $100 less than the X-Max’s “pre-order” price, so I have some doubts about it hitting full list price. We’ll see.

I was happy to pay that $100 premium over the K1 not only for the slightly larger build volume, but also because Qidi appears to be trying to live up to open source obligations whereas Creality is thumbing its nose at Klipper and others, refusing to release their changes to GPLed software. Again.

I misremembered; it’s about the same size bed as the mostly-scratch printer I was thinking of replacing it with (this one: I'm slowly building a rather different printer on top of the skeleton of my Tronxy X5S), and for which I have several PEI sheets already. So I should be able to interchange those existing PEI plates with the HF plates that the X-Max 3 ships with, depending on what I’m printing and what surface I want.

Except for not using an AC bed heater, it ticks most of the boxes I listed here about two years ago last time I was looking at 3D printers:

It uses DC for the chamber heater and heated bed, where I would have used AC for both, and the extruder body is not an open source or industry standard design. But it gets a lot right, and maybe this will (unlike the SK-Tank) be the printer my family can Just Use, as well as the printer that I can finally use to print ABS, thanks to the enclosure and carbon filter.

It also has other upgrades I’d been thinking about putting on my existing printers, like a ceramic hot end.

The reviews of the earlier version of the family were very not good. But they pulled it off the market and re-designed it, and the reviews of the more recent models have been better.

The medium-size version X-Plus 3:

The X-Max 3:

Lots of comparisons between the X-Max 3 and the Creality K1 Max, Bambu, and more:

3 Likes

I look forward to reading about your experience with it.

2 Likes

Update: The price is still at “pre-order” $999, but mine is shipping today (got the tracking number). It’s being shipped FedEx ground from CA, so should get here in about a week. I hope in time to play with over the labor day holiday weekend. :crossed_fingers:

I ordered a couple spare parts with it (extra silicone socks, extra hot end), and they didn’t toss them in the printer box; they are shipping separately by USPS.

3 Likes

This is probably not quite ready to be someone’s first printer, given the out-of-the-box experience.

I think it has potential to be a workhorse printer.

Unpacking and first impressions

Unpacking instructions are provided both in the printed manual and in the on-screen interface after the printer boots. But there are a few potentially important points at the beginning of the manual, like making sure that both power supplies are set to the right mains voltage. (My US-sourced unit was correctly, for the US, set to 115V on both the power supplies.) These are on the bottom of the printer and kind of hard to see.

The printer was very well packed, as reported in multiple reviews. It was heavy and had external corner protectors, so I expected the box to be appliance-style “cut along the bottom and lift the box off” but it wasn’t. Just a normal box to lift the printer out. There were also internal plastic corner protectors guarding the styrofoam, and air channel padding around the body of the printer, protecting it.

The sample filament is their “PLA Rapido”, unlike some reviewers who received engineering filament of some sort. Oh well. I guess people want to print fast benchies. I expect (but do not vow) to continue my streak of never having printed a benchy. The USB stick ships with sliced models calibrated for their “PLA Rapido” filament.

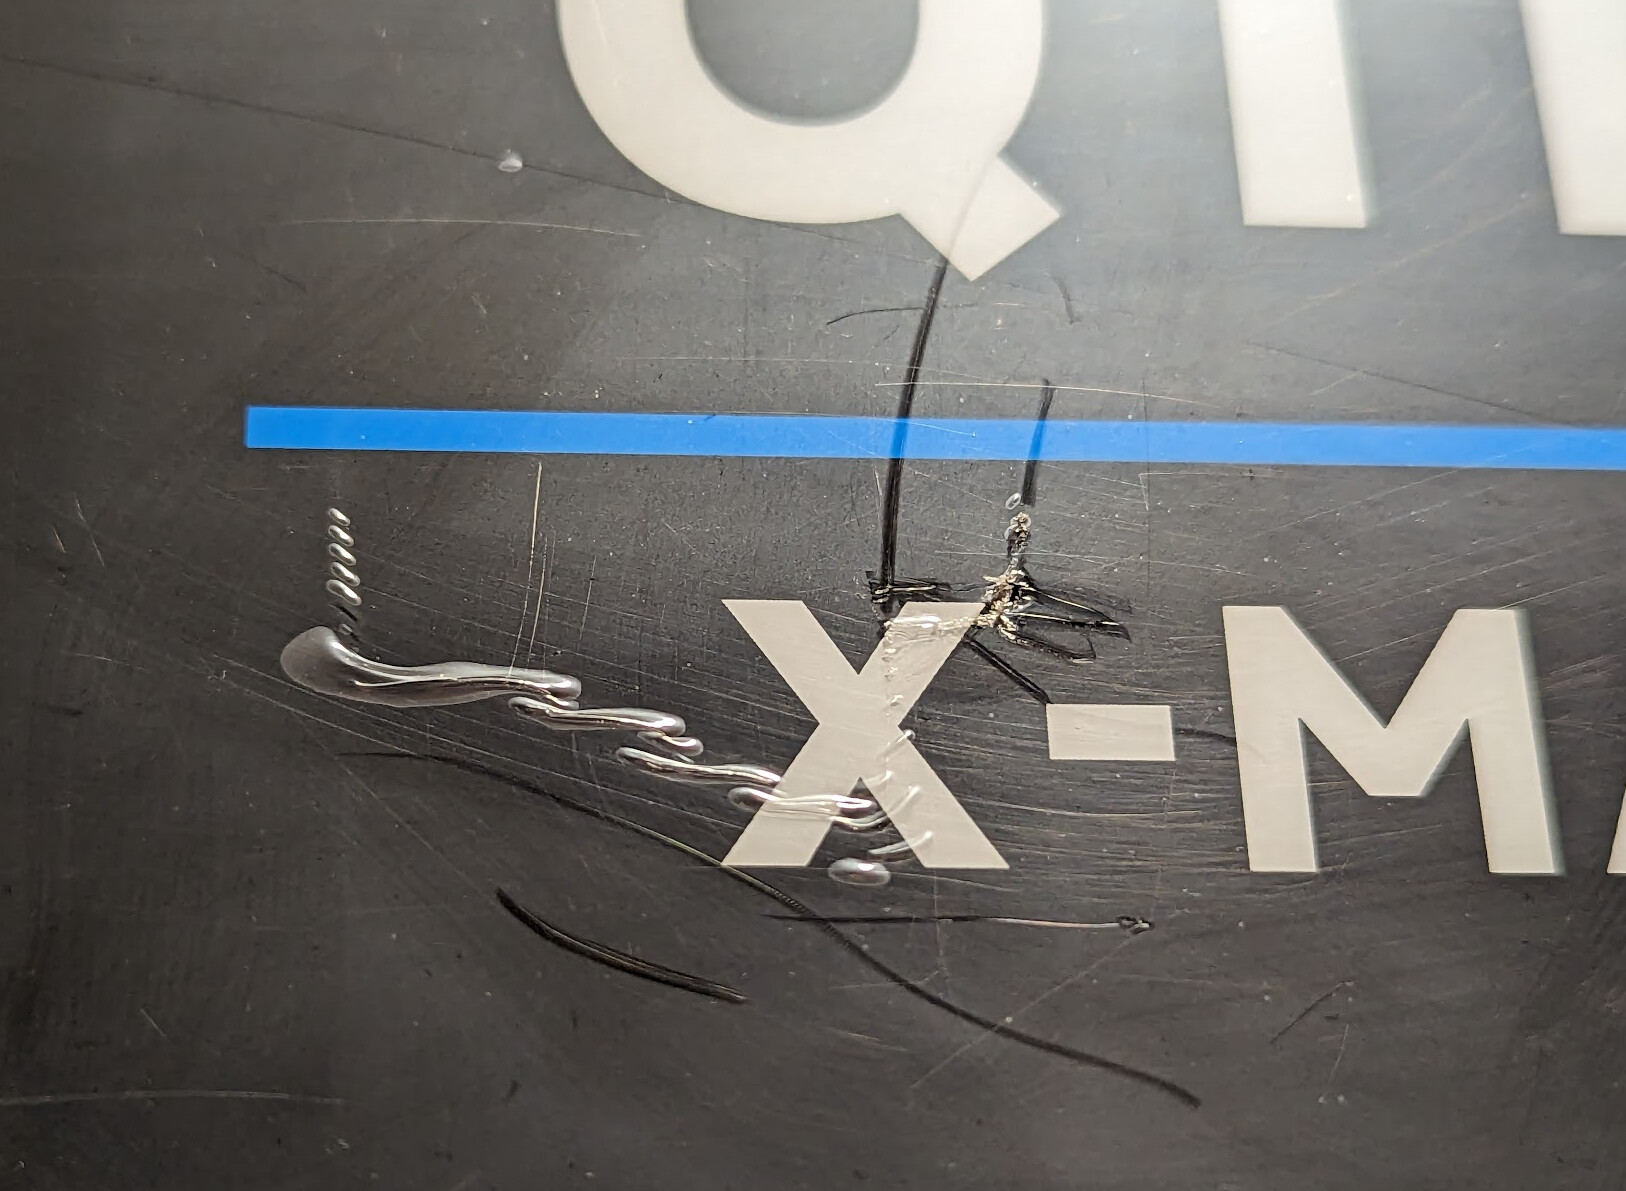
My printer has a cosmetic defect on the front panel label from it being poorly applied. Actually, it doesn’t. Not only was there a protective film over the display, but there was also protective file over the panel around it. It was just tricky to find a place where it would start peeling easily. It looks great now.

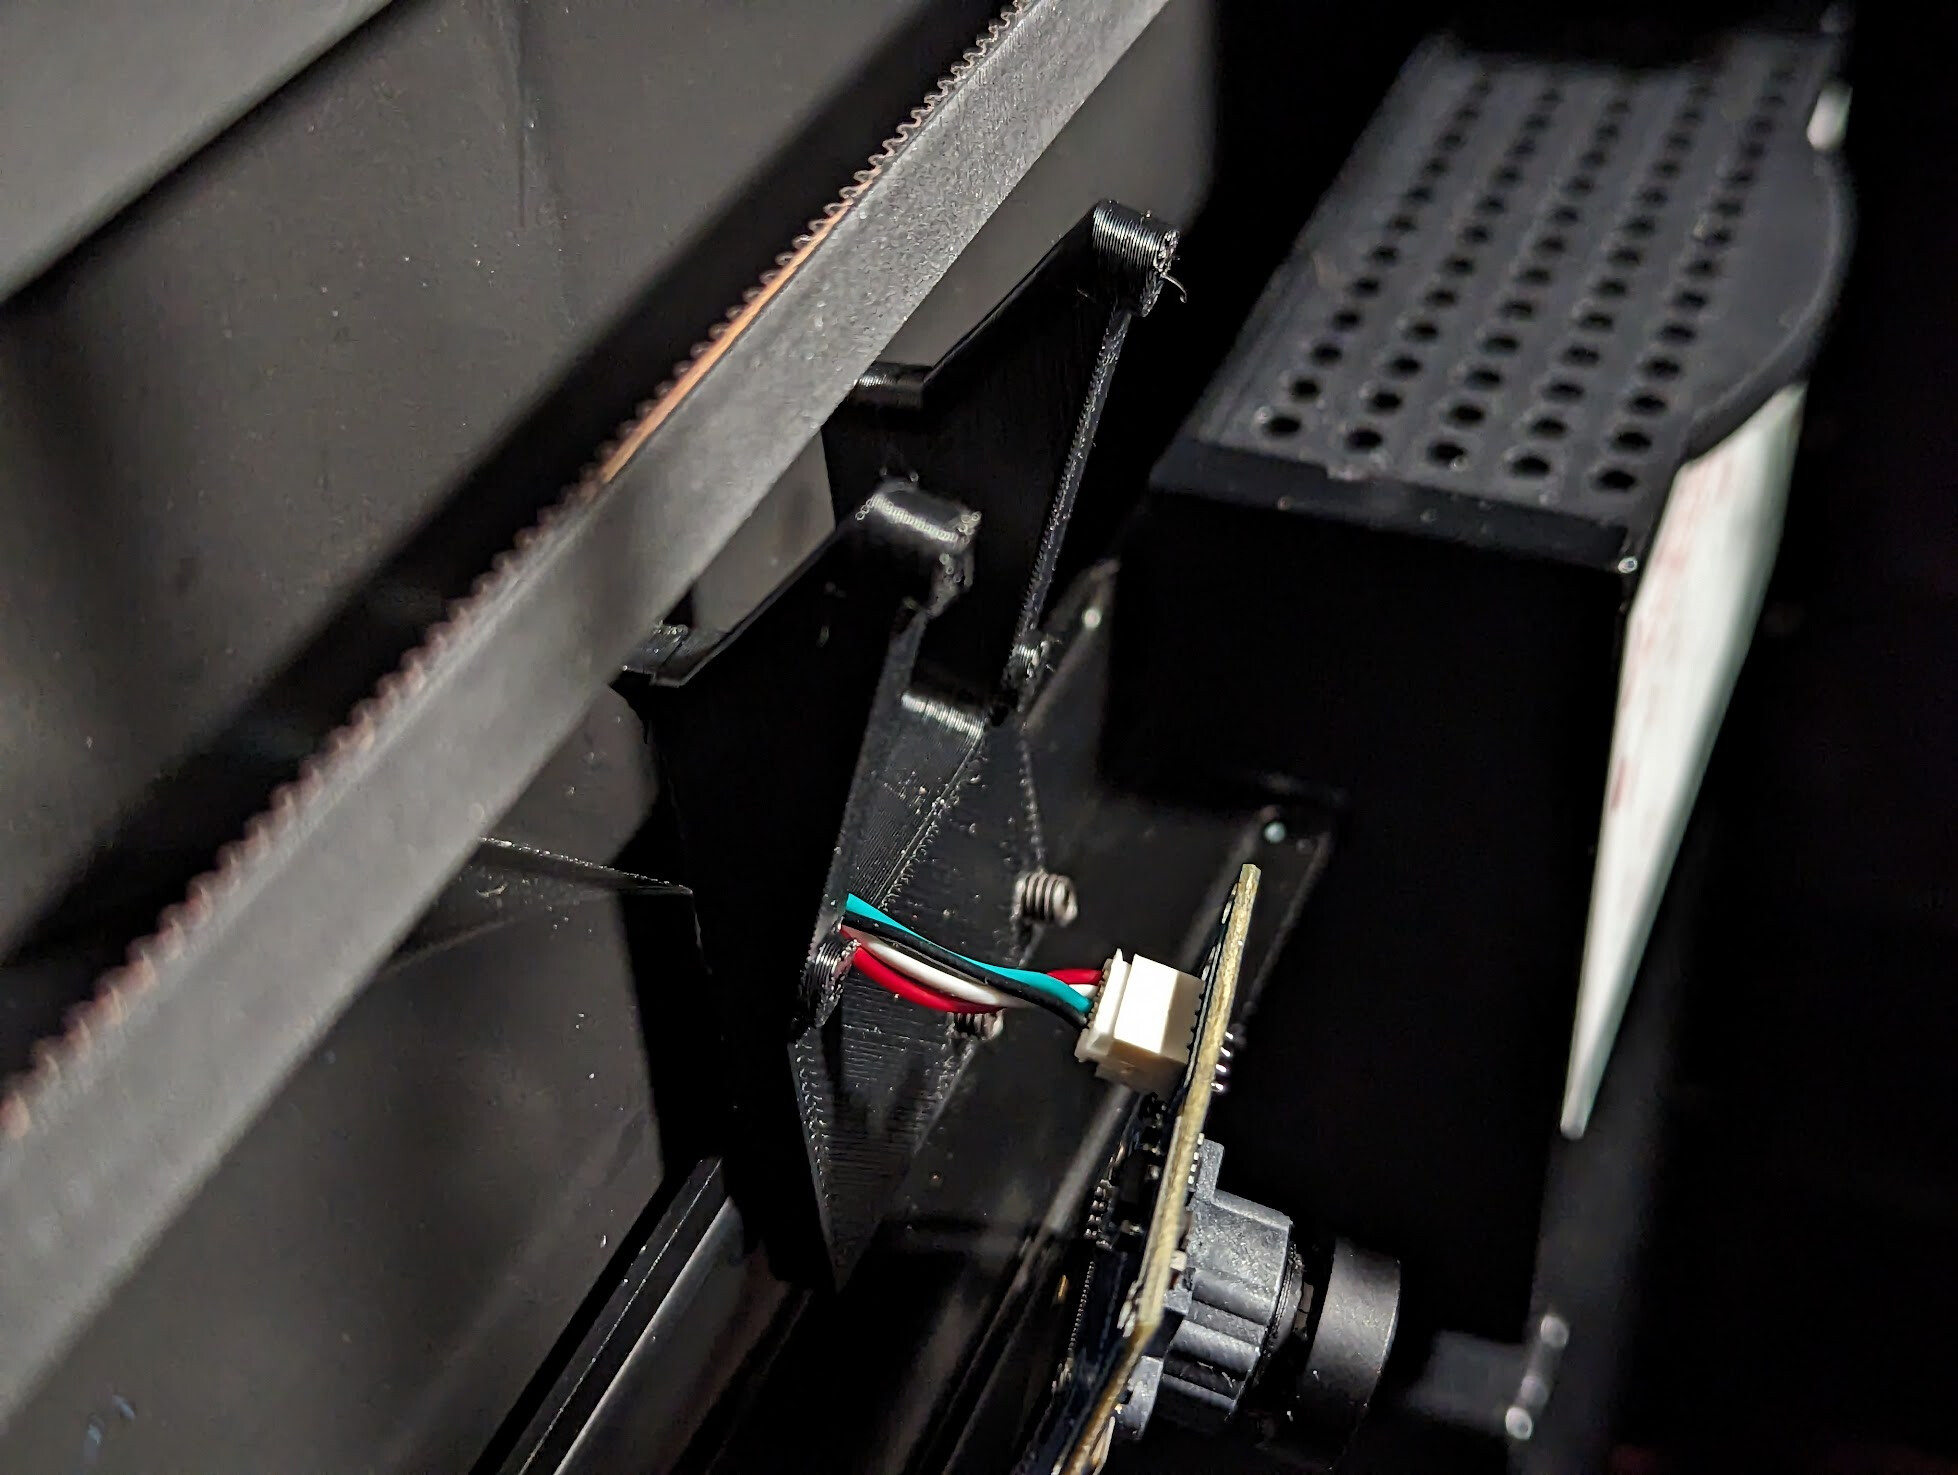
It looked like this before I asked support and they explained to me that it was just one more protective film to pull off:

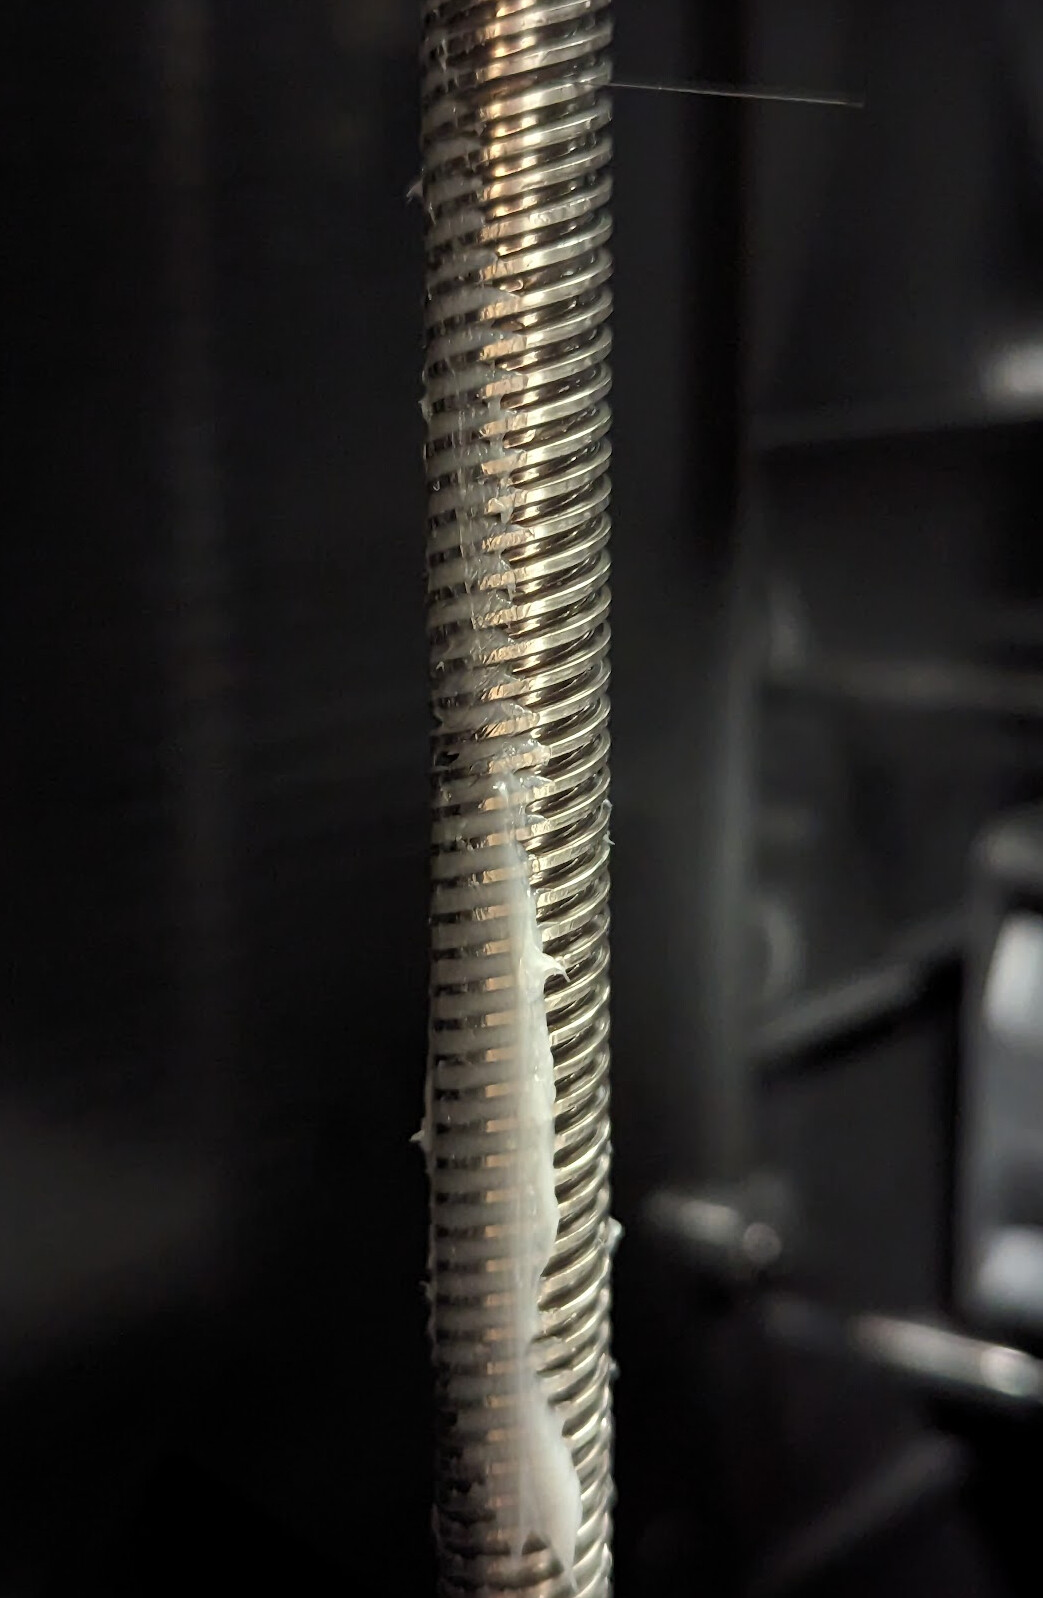
The Z screws had grease squeezed onto them though not run in. The grease did not get onto packing material.

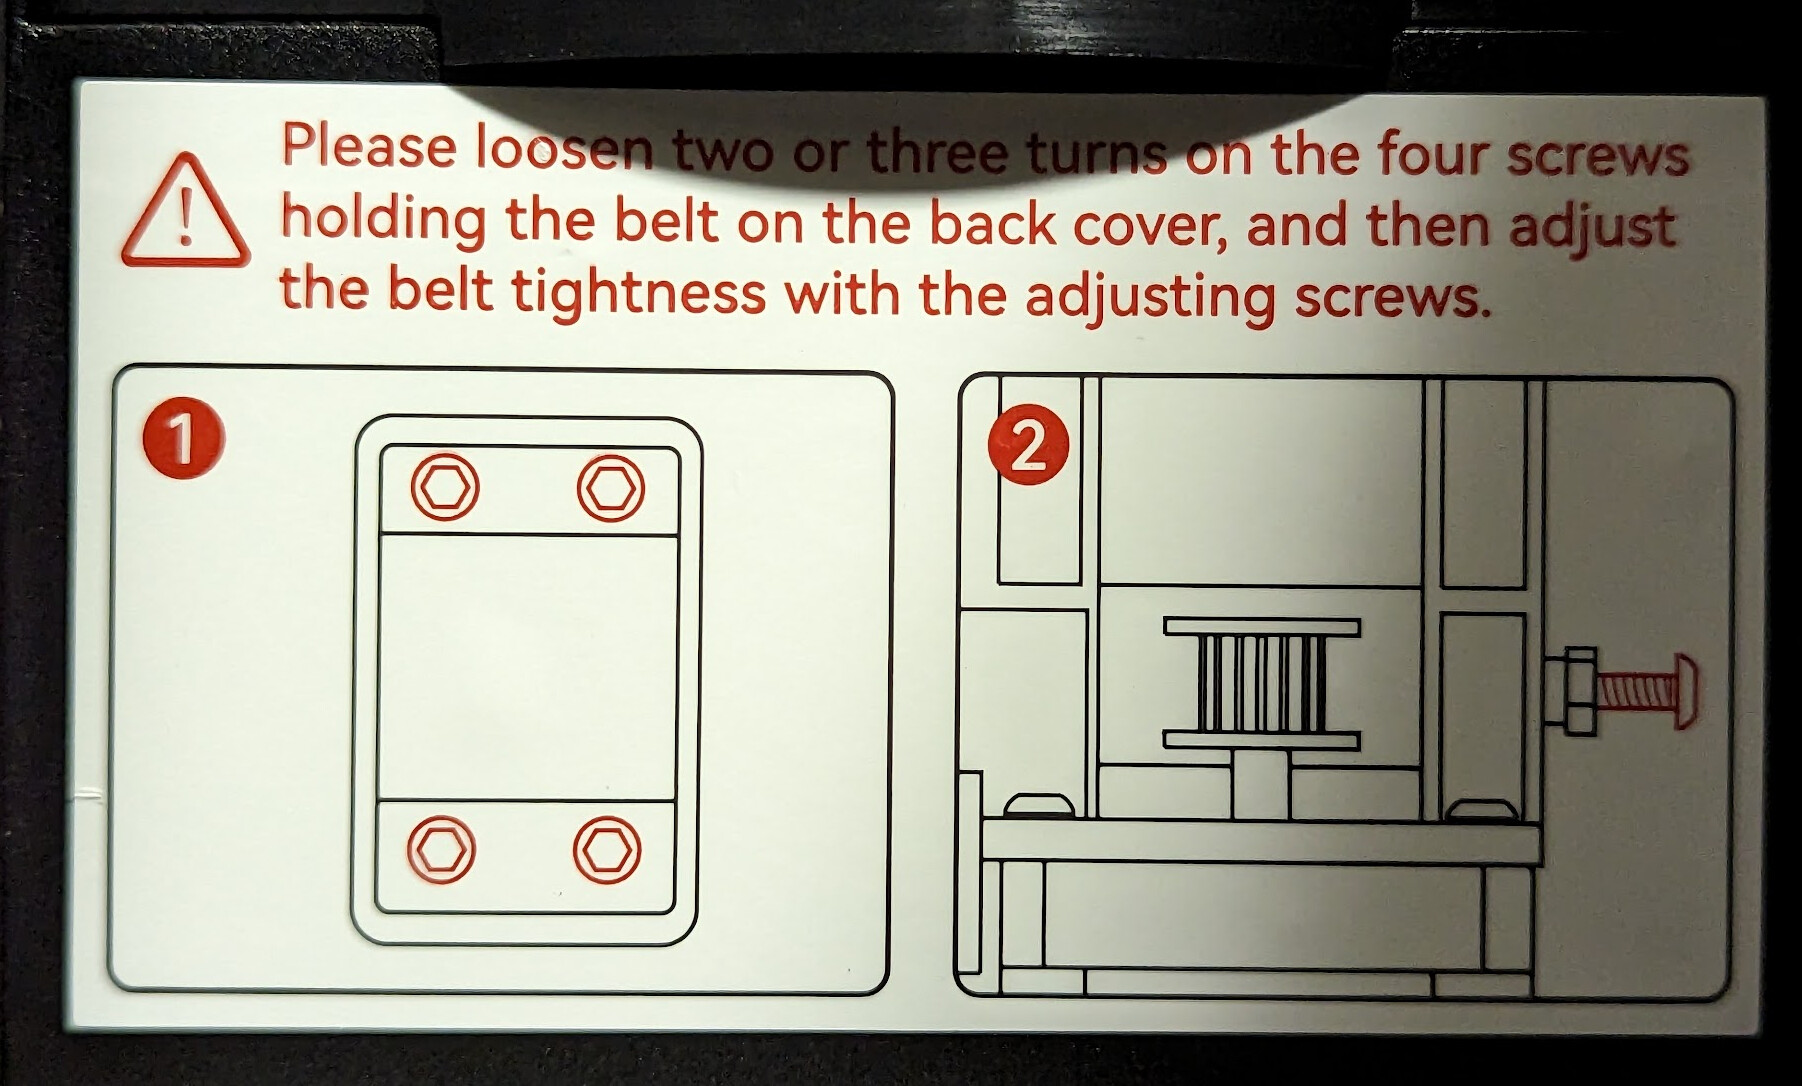
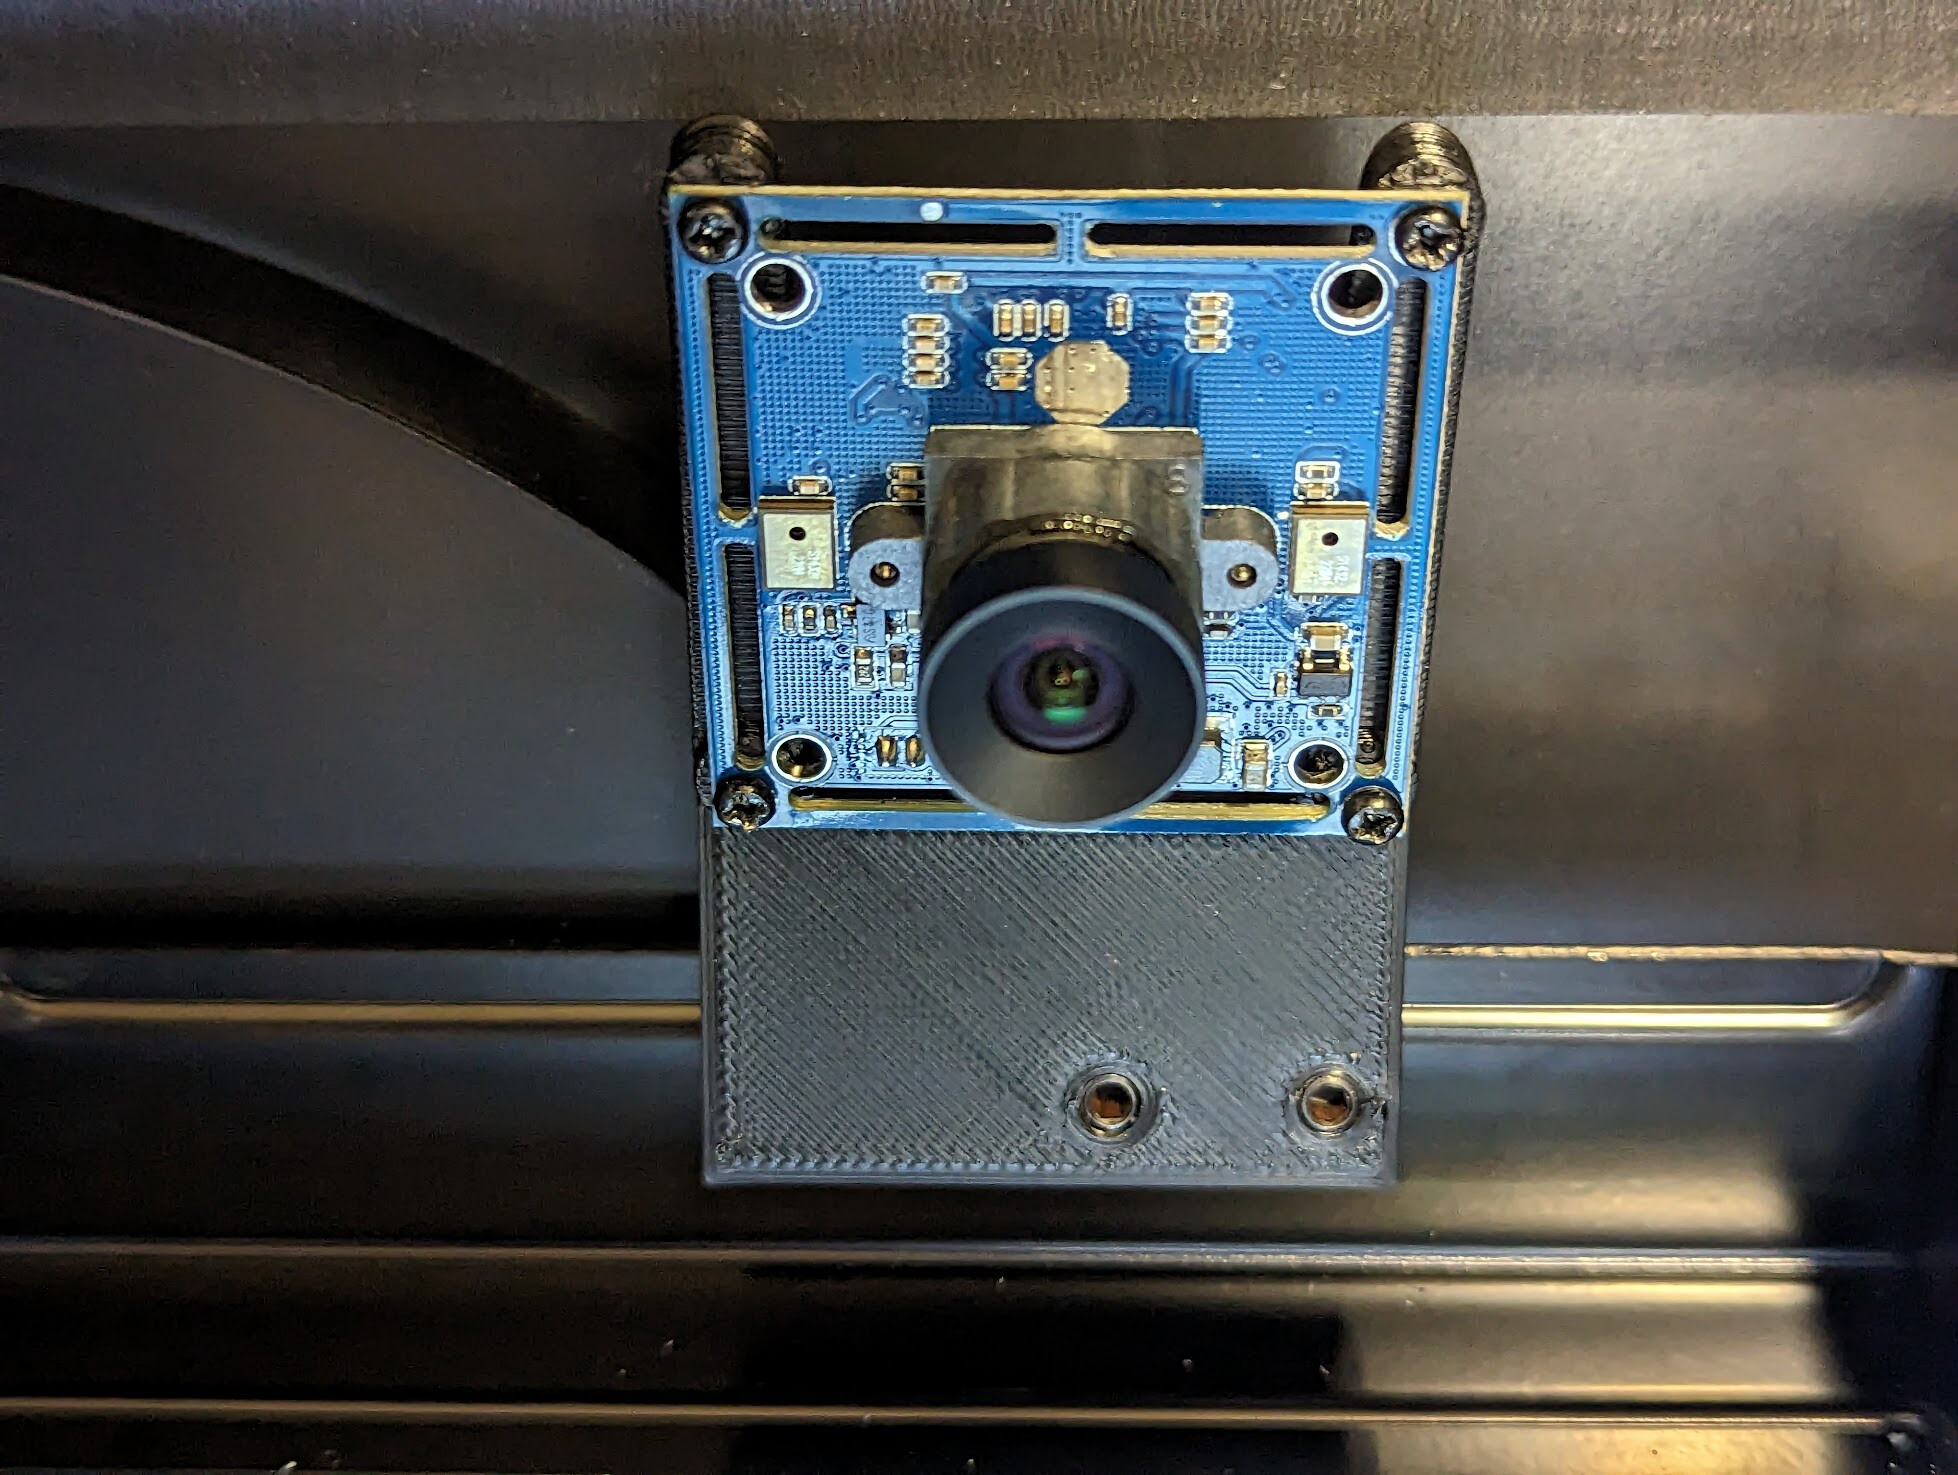
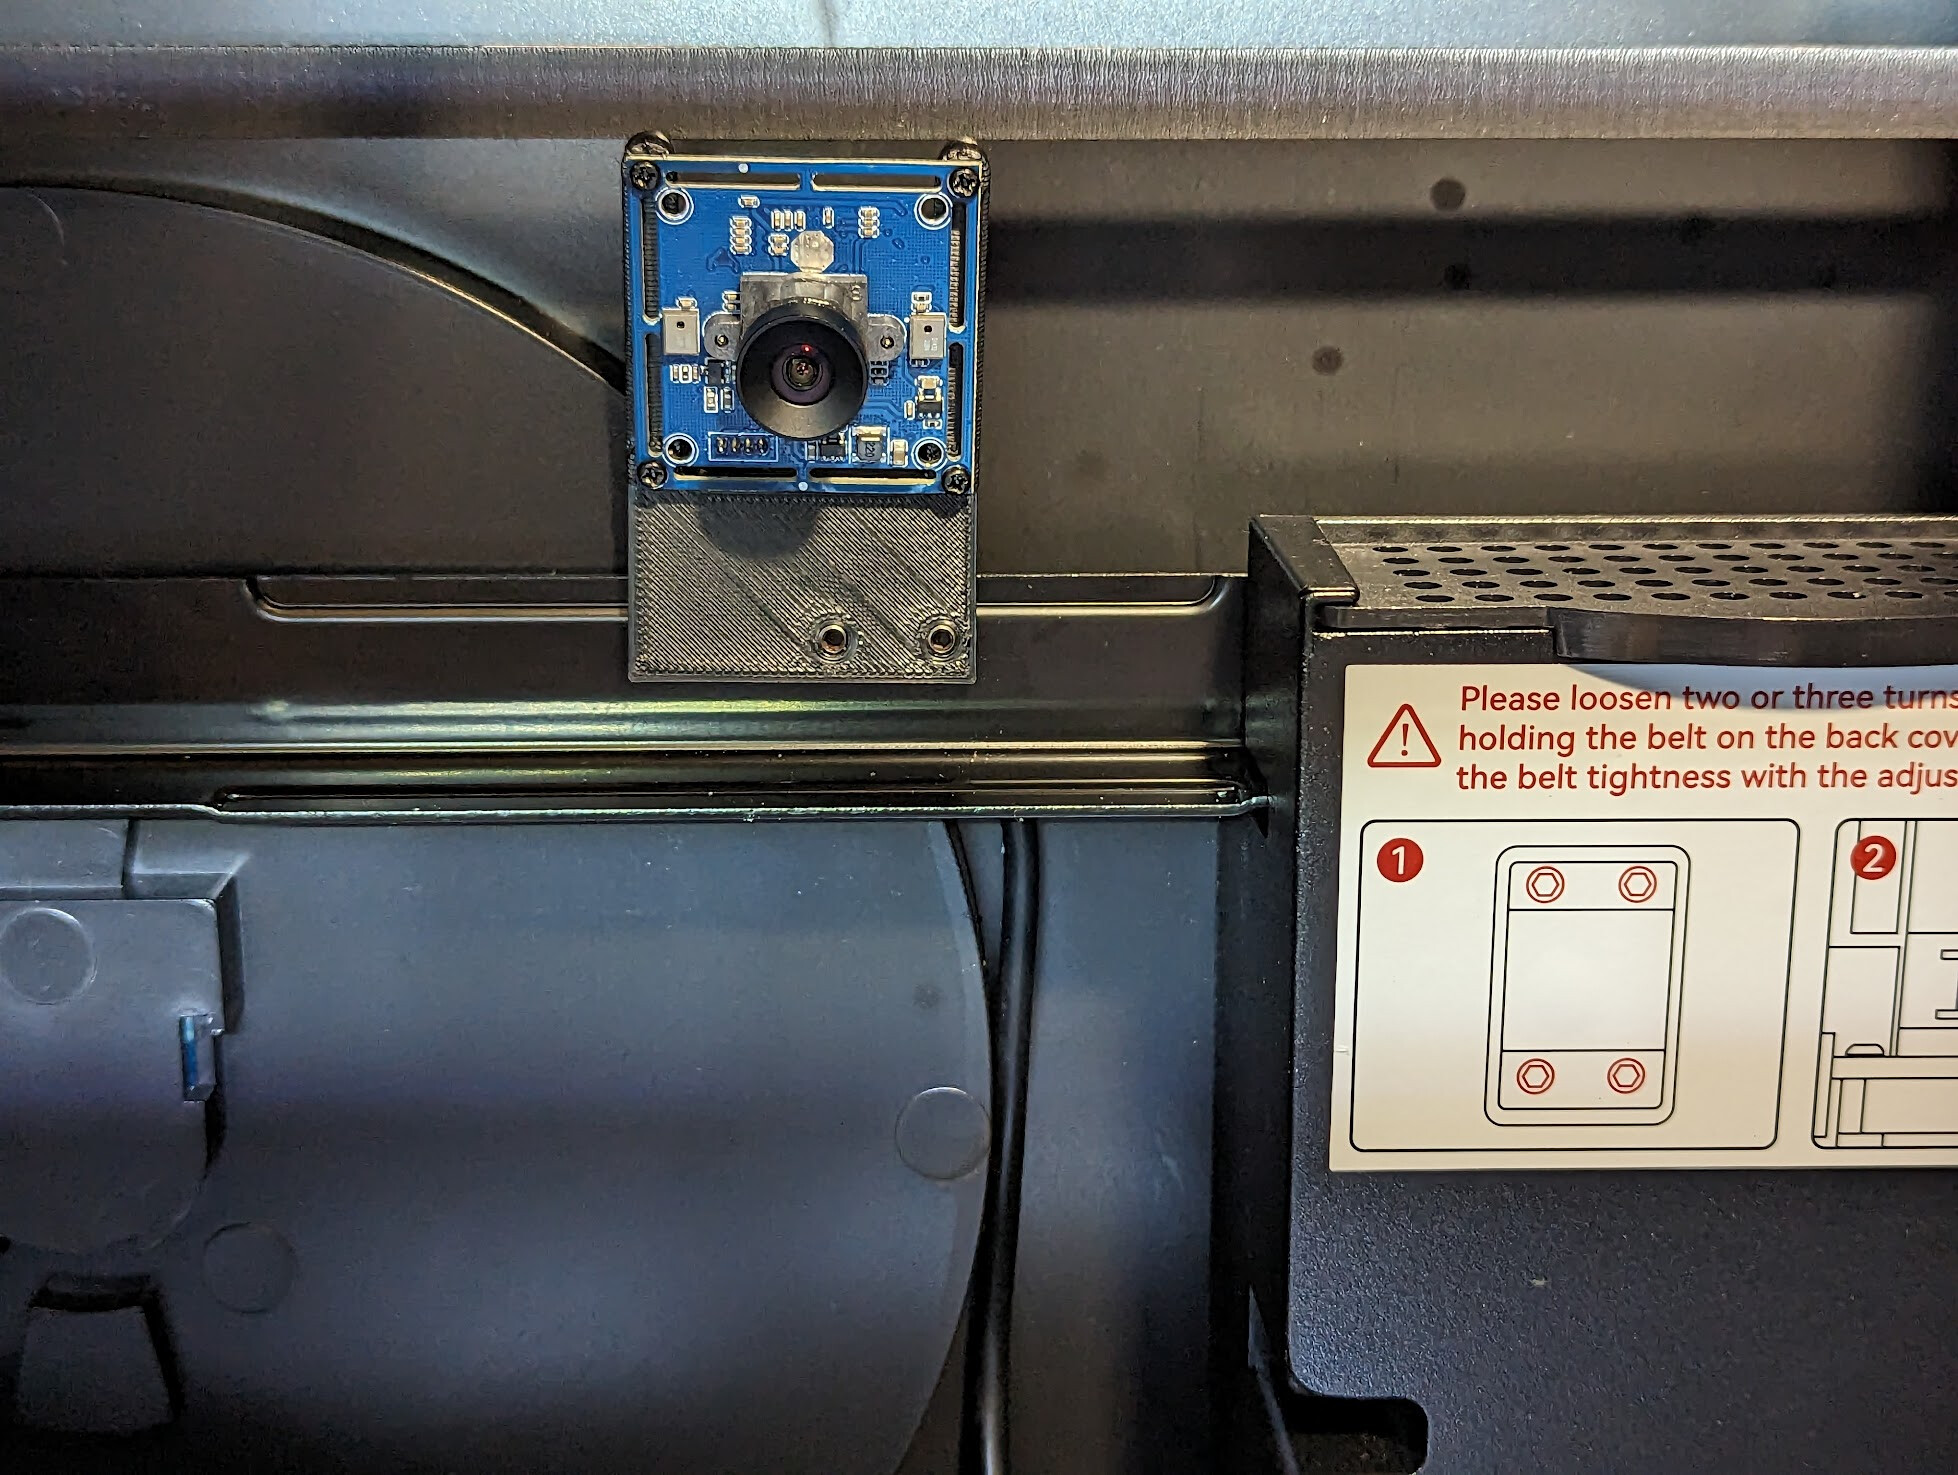
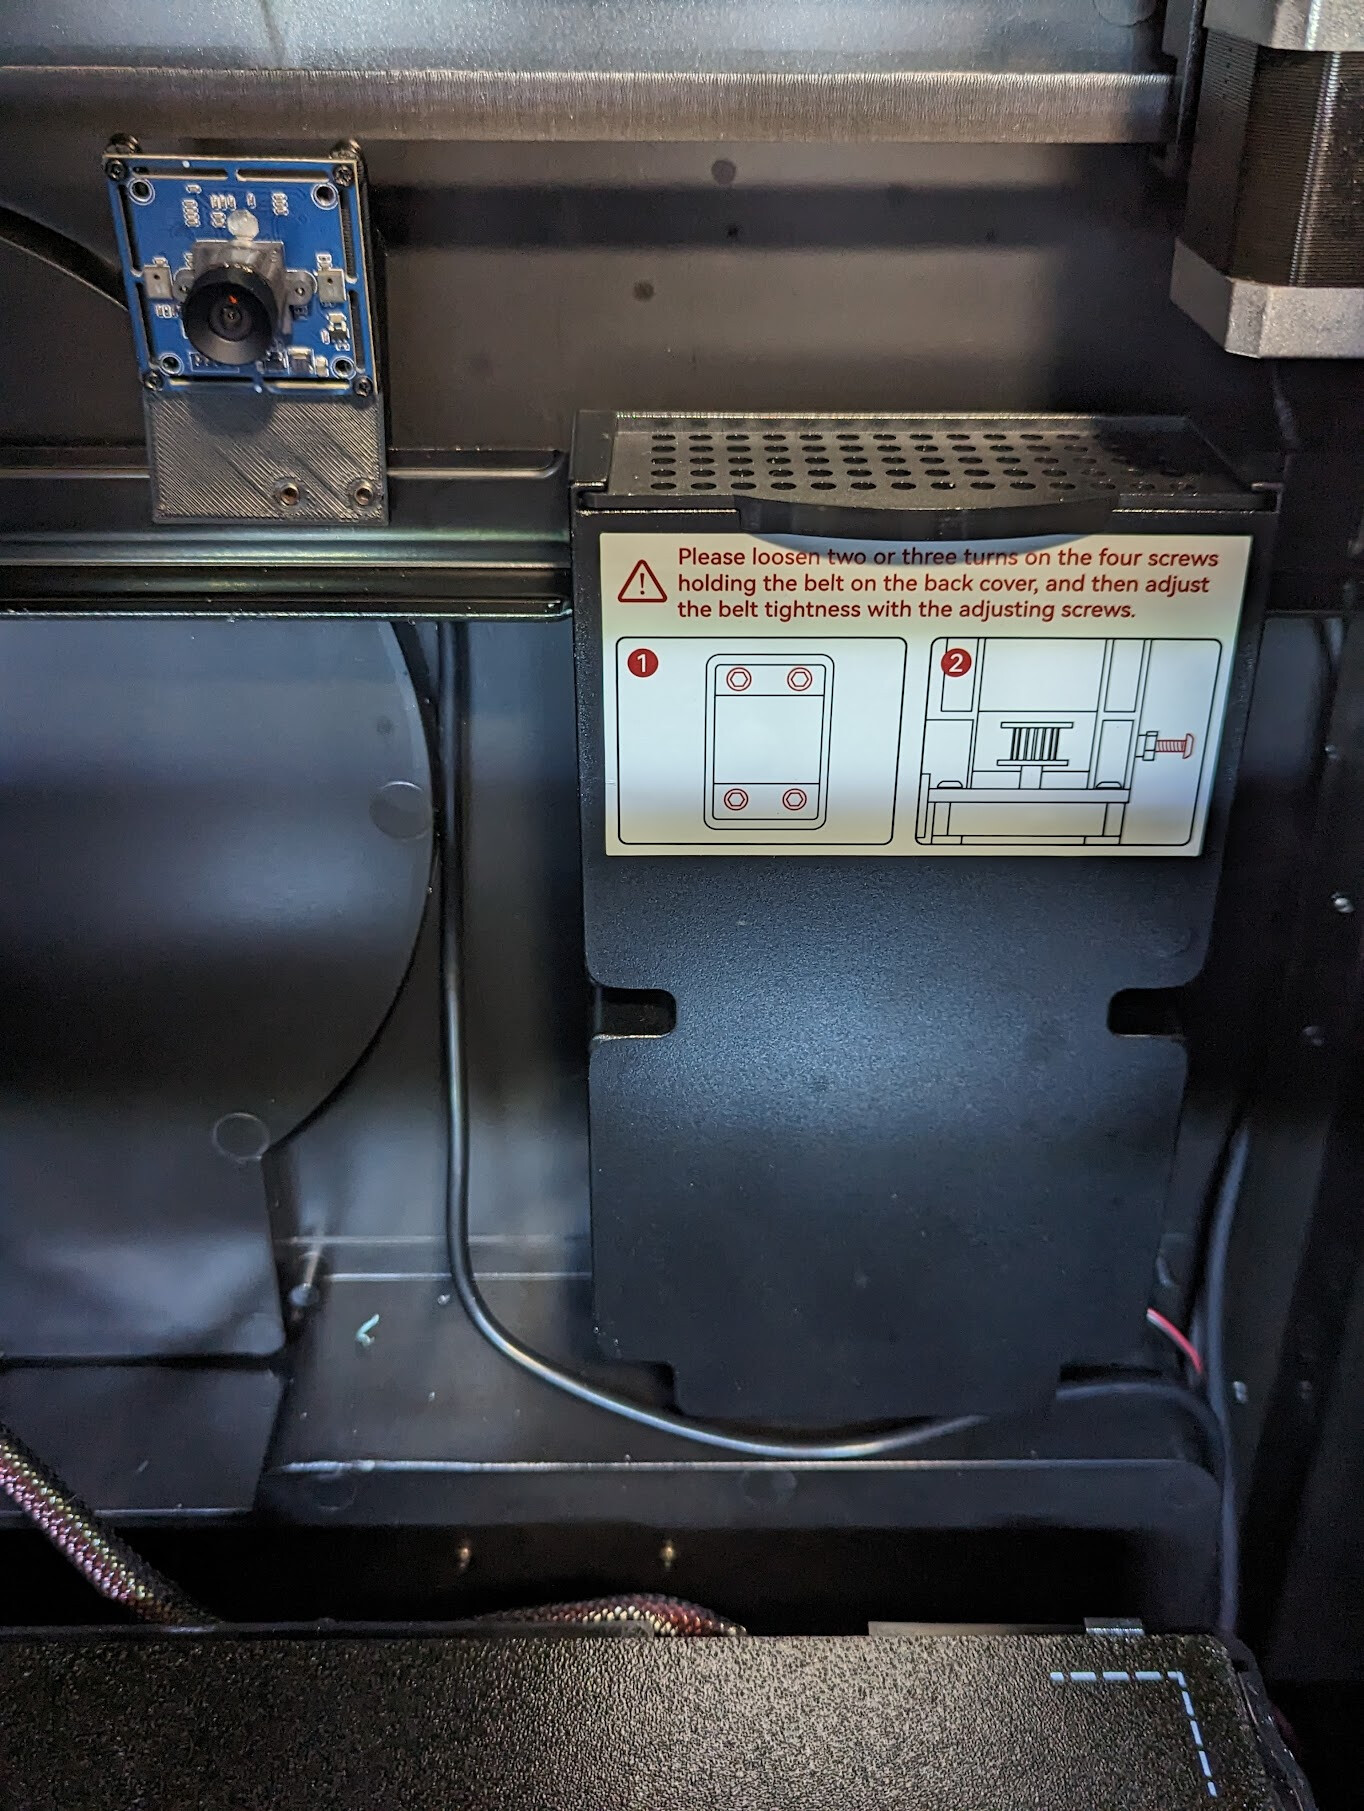
Inside the printer is a sticker telling you to first loosen the belts via the back and then tighten the belts via hard-to-reach screws inside the chamber, but there is no guidance on how tight to make them. Both of the belts on my unit seems to have roughly appropriate tension, so without more specific guidance, it didn’t seem worthwhile to fix what wasn’t obviously broken.

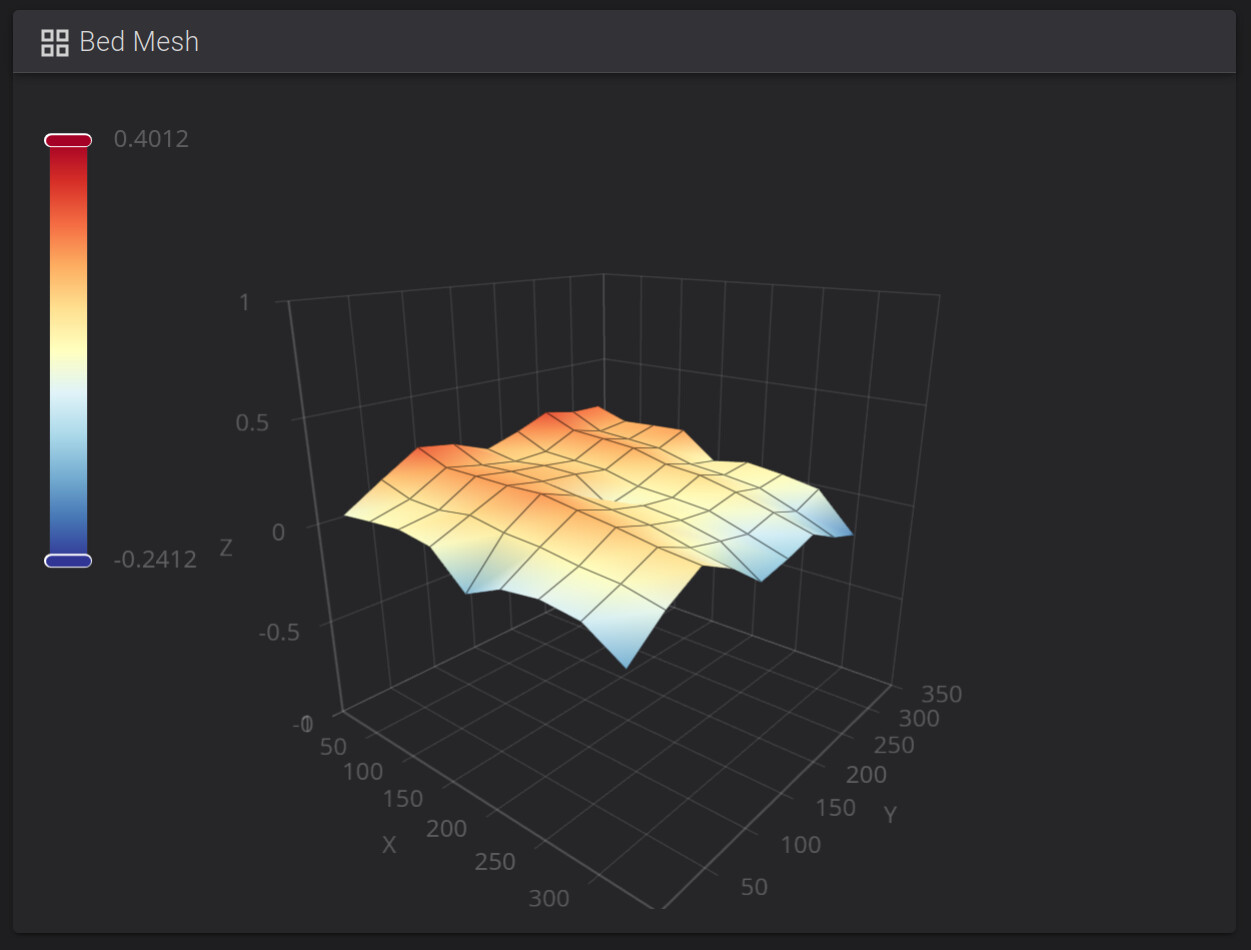
The bed is not quite as flat as the printers I have built myself with cast aluminum toolplate. Not bad, but there’s a small bit of potato-chipping. It’s hard to use steel feeler gauges with a magnetic bed, so I was limited to my coarser brass feelers, but my thinnest .006" feeler could just barely slip under a straightedge corner to corner in one direction; a bit more than .1mm. Enough to need to compensate for unflat bed to print, but probably flat enough for most objects that should sit on a flat surface. But not enough for me to make an oversized fly cutter and fix it up on my mill. :nerd_face:

Initial power-on experience

I powered it on and went through the guided tour.

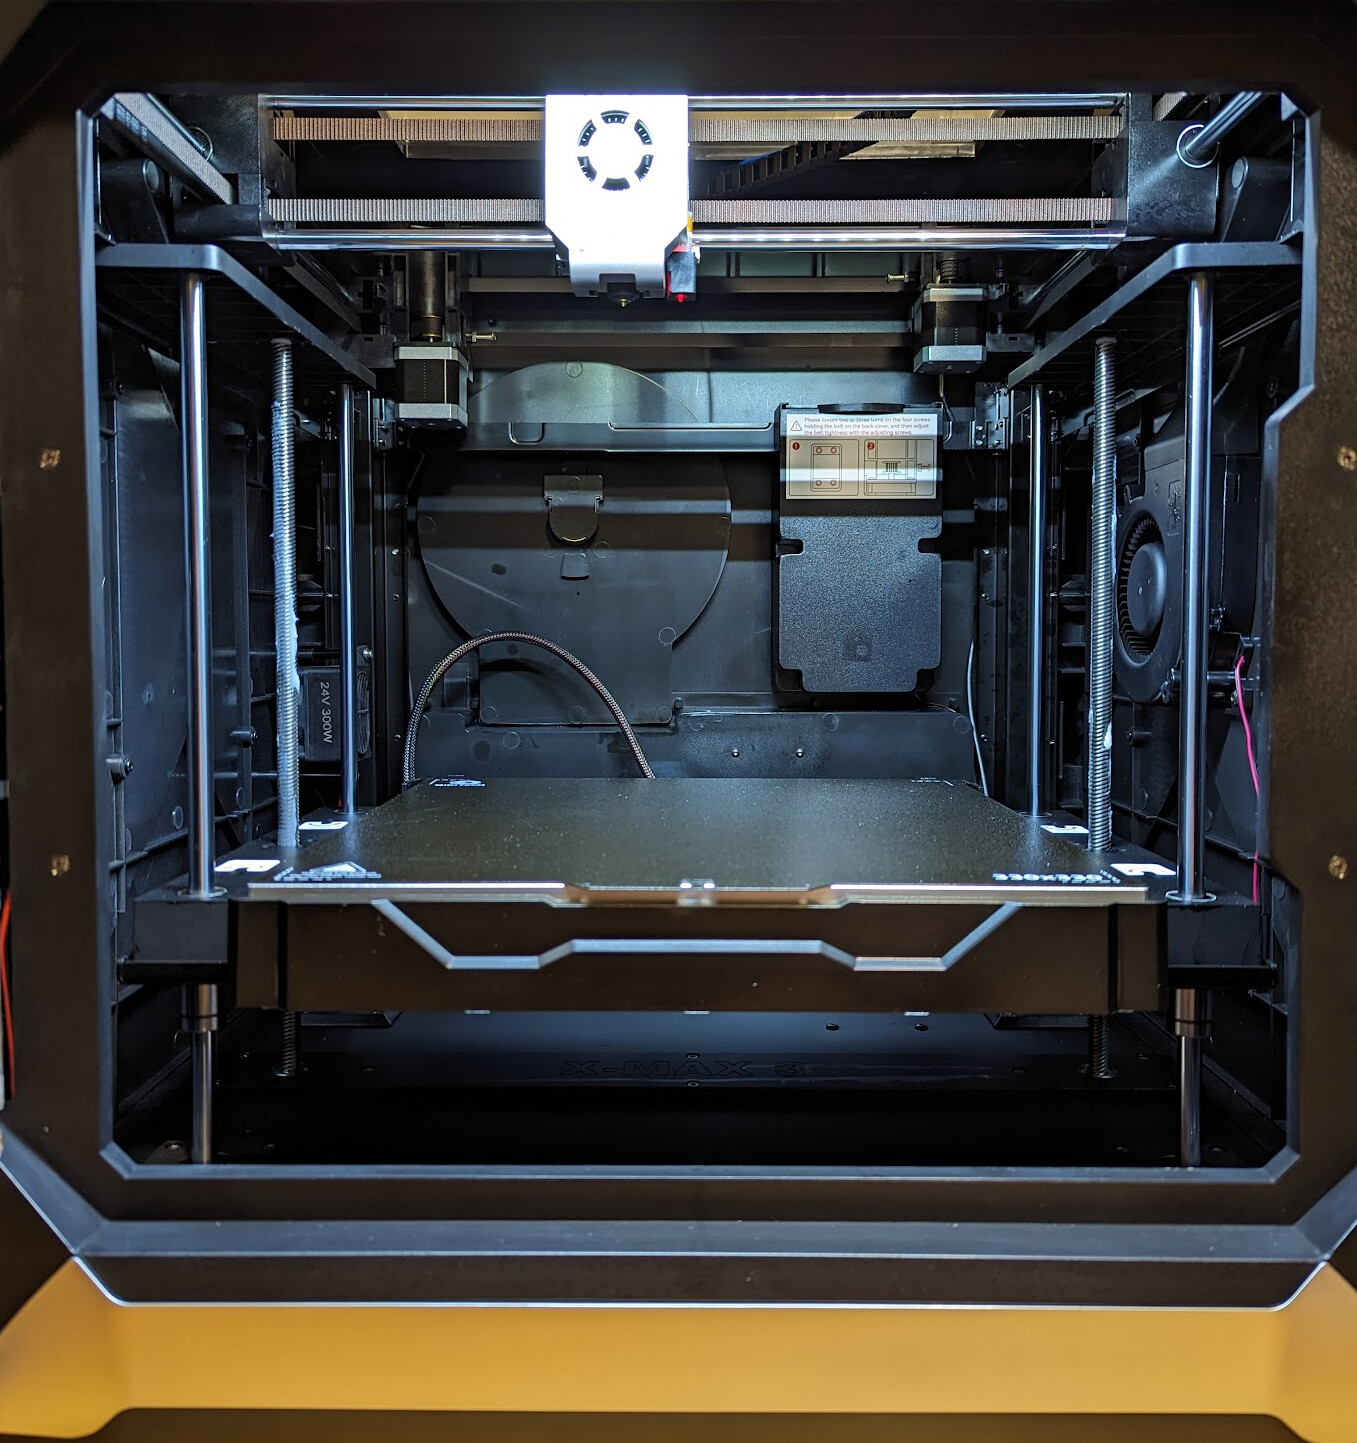
The interior is well lit.

When it preheats the bed, it is clearly sensing temperature on the bottom, and when I hit 60° showing on the screen, and the bottom of the bed (“HOT ZONE DO NOT TOUCH”) was hot to the touch, the top surface was still cold to the touch. Preheating will be important for consistent printing, I suspect. I waited a few extra minutes after the screen said the bed was hot before proceeding to set nozzle height. (I’m used to noticeably faster heating from high-power AC silicone heaters. Especially in the printer this is replacing, which has a 750W AC bed heater.)

The printer comes with a special “leveling” sheet. I measured it with a micrometer in multiple places between .24 and .26mm thick. The printer doesn’t come with any convenient storage for it, though. It would be nice if they had included a pocket for it on the machine, since the printer’s default configuration is meant to have used it to set the nozzle height.

At the end of the configuration process, after it does an 81-point bed probing, it does input shaping in X and Y. If you’ve done this before, you know what to expect. If not, you are in for a treat. :smiling_face:

“congrats!guide tutorial finished.” means "touch the “Guide tutorial finished.” button. This finally lets you discover, say, that the printer isn’t running the most recent firmware, and the calibration process you just did was a throwaway, because it needs to be re-done after you update the firmware…

Setting up WiFi doesn’t seem to do much at first glance. There is nothing in their “official wiki” manual, maintenance, or troubleshooting about the network. It doesn’t have a web browser running on port 80 on the IP address it displays, and there is no information in the manual, such as it is, about a password for the SSH server that is listening.

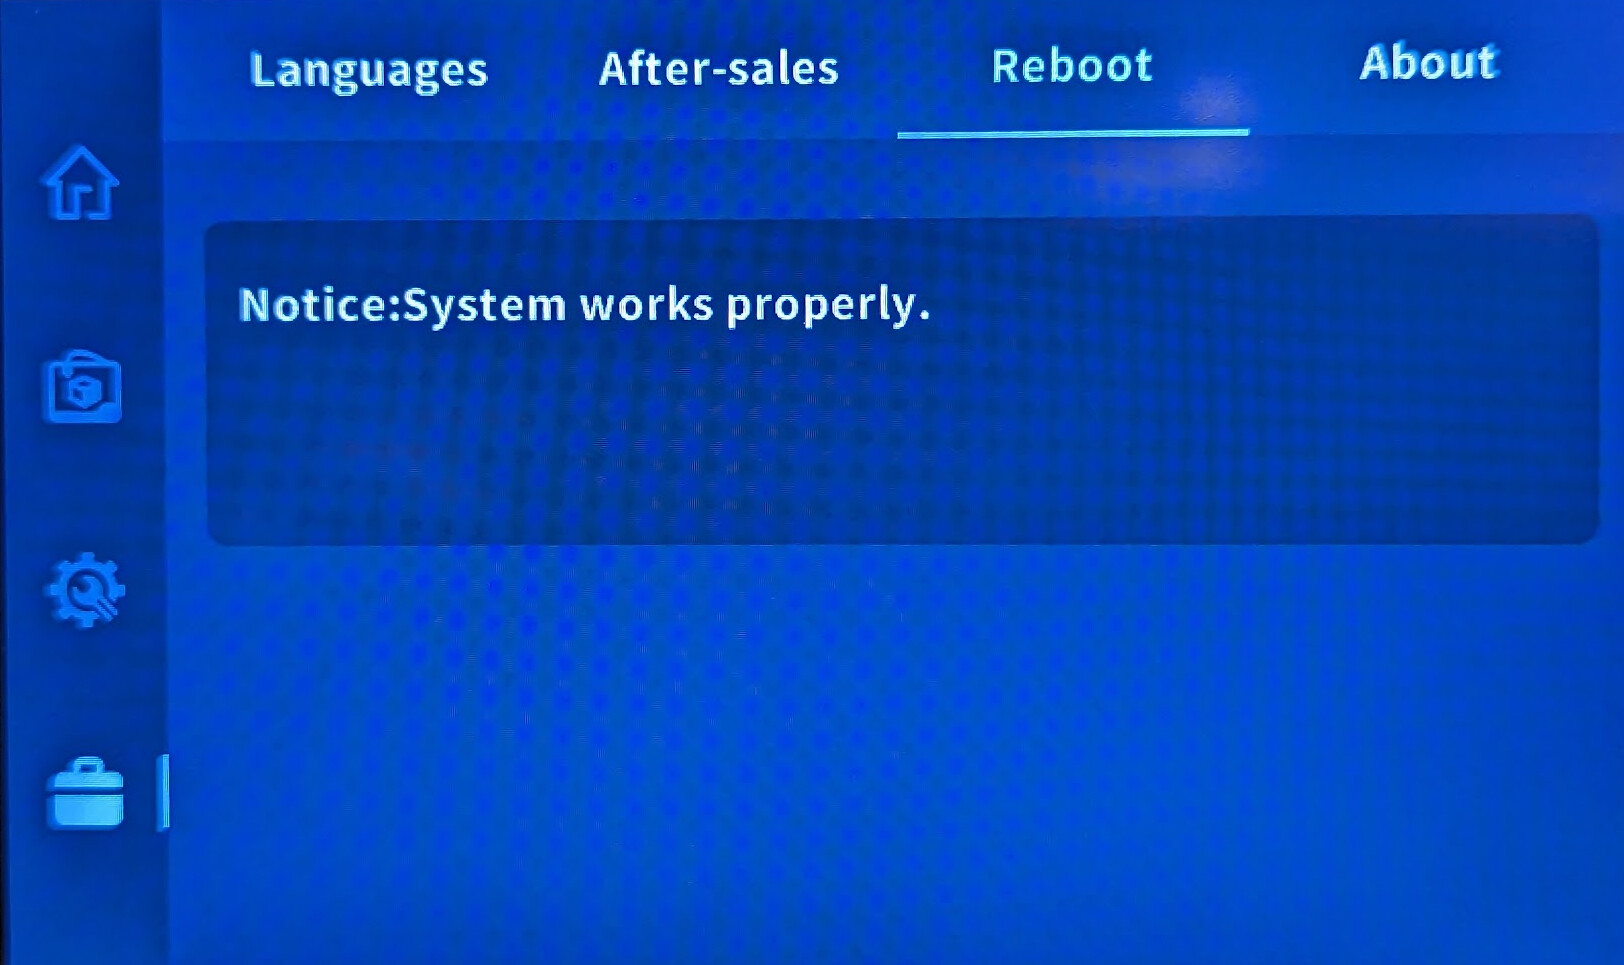
Telling it to reboot from the UI just says “Notice:System works properly.” which is… less than helpful.

Updating Firmware

If you follow the Release Notes link, it also includes a firmware download zip file, so you might not notice that the Download link is actually to a google drive folder with a document that says to unzip the firmware update zip file onto a USB drive such that the QD_Update directory from the zip file is in the root of the USB drive. After you do that and insert the stick, the About tab will have an “Update files detected” and an “Updating” button to start the update. Then it says “Update finished and turn off power supply, then reboot after 20 seconds.” This doesn’t mean that update is actually finished, it means it is just getting started!

Shortly after rebooting to update, it drops to a text screen and writes a 20MB image at 115200bps. That’s a speed I remember from a long time ago, and it seems gratuitously slow. If this is using the boot loader to write to the eMMC, they must be using the slowest possible mechanism.

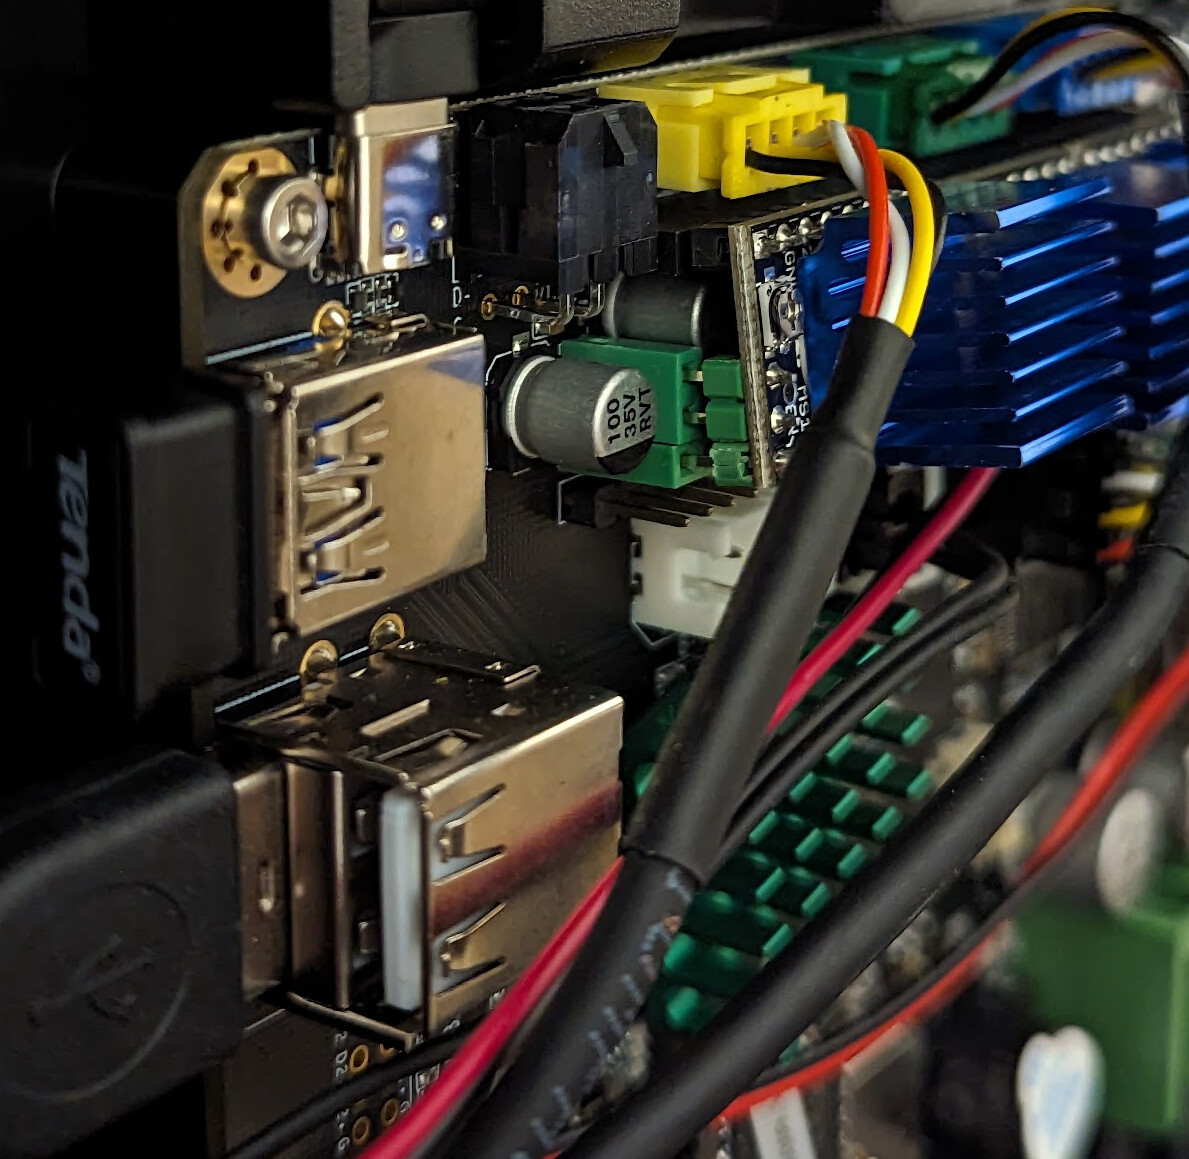
I think I want to buy an extra eMMC module. Most of them I see come with microsd adapters. That seems like it could be useful.

The update documentation says to redo auto bed leveling and input shaping after the update, but has a screenshot that doesn’t match the UI, so incautiously following the manual might lead to not doing the right things.

Updating firmware forgets at least a lot. This includes WiFi, but oddly doesn’t seem to include the SSH host key, which makes me think that they are baking a single SSH host key into the firmware, shared between all users instead of generating it at first boot as they absolutely should. :grimacing:

Linux support

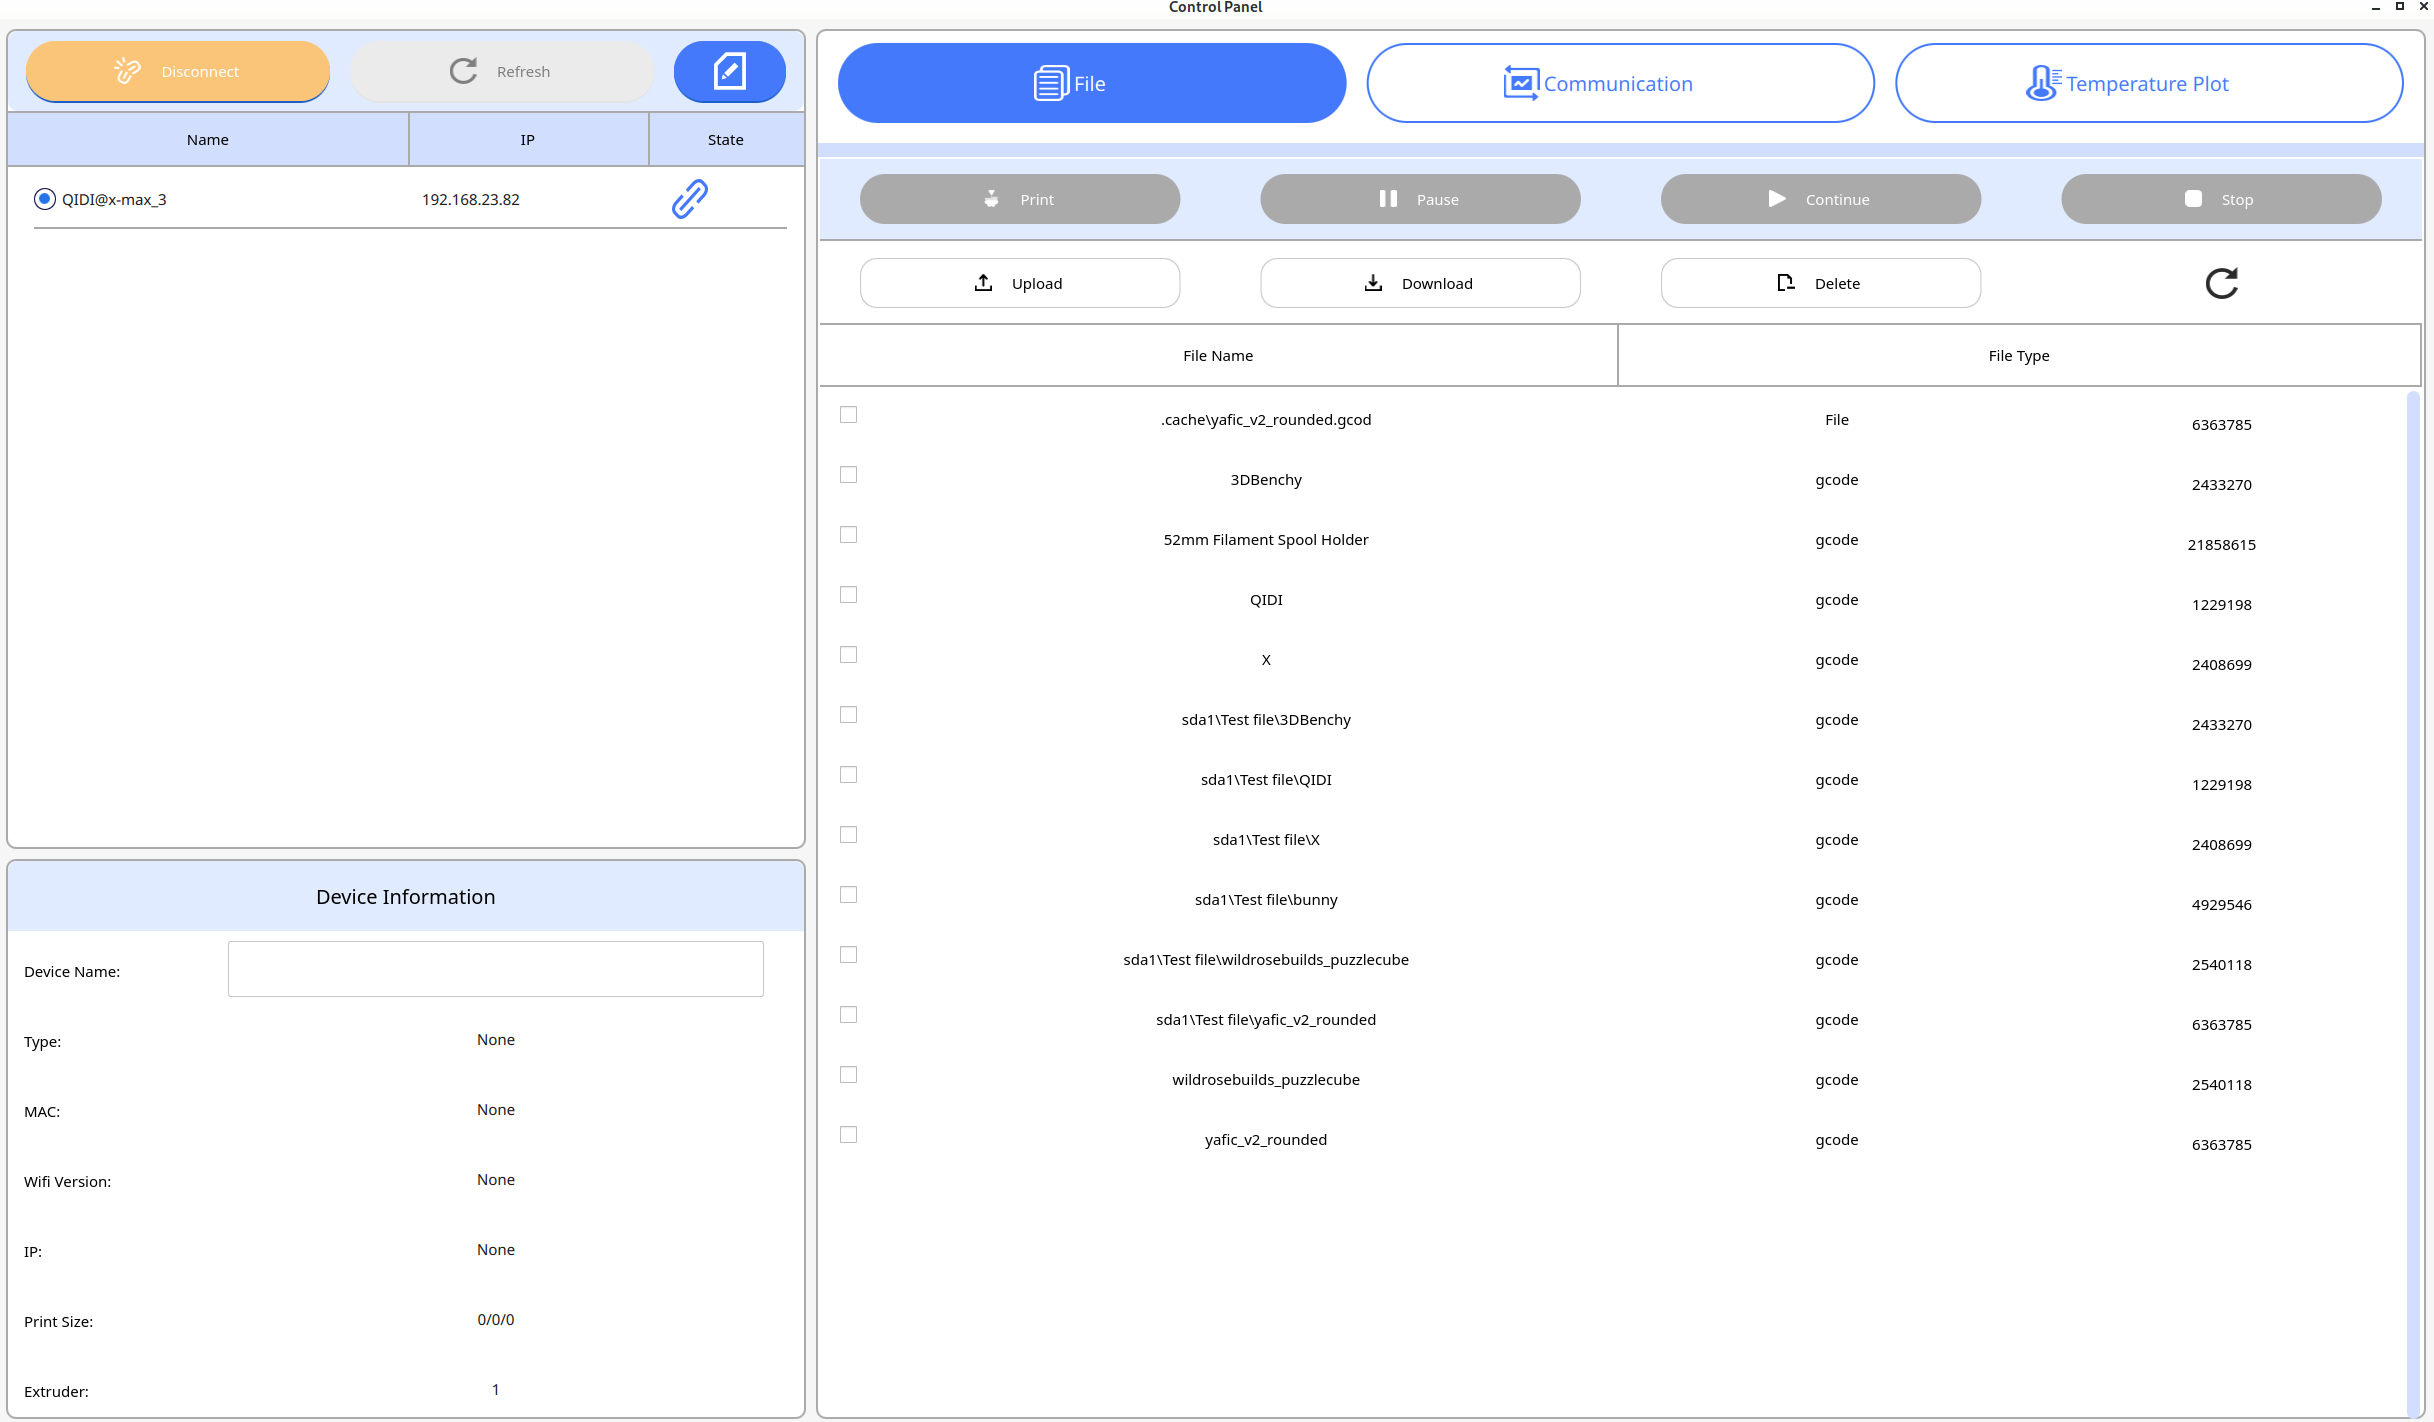
They ship a Linux Appimage slicer. In it, I can see my printer in Extensions → Control Panel, and then Connect. On the other hand, it goes out of its way to use backslashes for directories, on a printer that is actually running Linux. :sob:

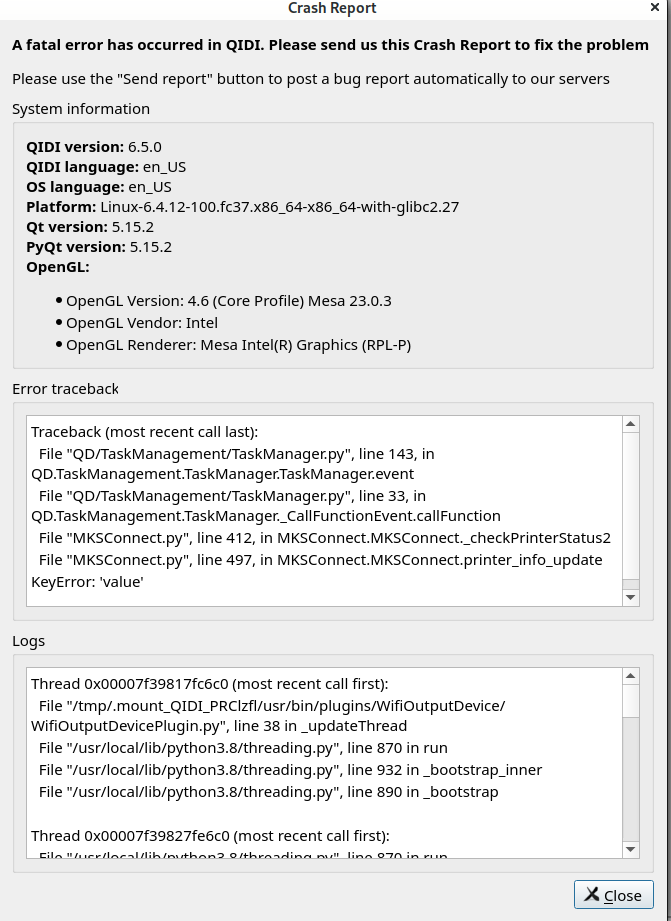
Then, a few seconds later, it crashes:

And, that version number, 6.5.0, and the python in the stack trace — that all looks like their old Cura-based slicer. Their QIDISlicer included on the USB stick for Windows (1.0.3) and mac (1.0.2) has version numbers associated with their PrusaSlicer-based slicer.

When I look at Releases · QIDITECH/QIDISlicer · GitHub there are no Linux builds.

I’m definitely disappointed. They advertised Linux support on their website, and that’s also in the manual I received.

nmap shows only SSH open, and they are not using the typical pi/raspberry username/password.

So right now all I can do is fire up a Windows VM, and I guess copy gcode to a USB stick to move it until they tell me how to enable fluidd as a web UI. I thought my days of doing that were long over. :sob:

Ultimately I don’t actually care about running their slicer if OrcaSlicer works at least as well. I do care, very much, about network access from the browser.

Summary so far

I don’t regret buying it, but it’s less turnkey than I had expected even from a vaguely skeptical watching of all the video reviews…

5 Likes

Great rundown and I sure hope someone at the shop reads your post. There were some things which were kinda goofy like doing all the setup only to then get on the network and be told to update and do the setup all over again.

And the bit about providing an old version of Cura in an appimage and claiming they support Linux. wrong, wrong, wrong.

I tried to find the nightly of OrcaSlicer because it won’t start on my Kubuntu 22.04 system and it needs 10GB of free RAM to do the build which my little 4GB MacBookAir doesn’t have and my big laptop with 16GB of RAM is still on 20.04. I def want to try OrcaSlicer having moved to Prusa Slicer from Slic3r maybe 4 or so years ago.

Oh, more or less all the video reviewers I watched (though not clough42) commented on the upgrade dance, so it’s not like they don’t know.

This is a pre-order, so I expect to be an early adopter. Some wrinkles are OK!

Support got back to me with answers to my questions.

Fluidd is listening on port 10088 (out of the default range nmap scanned) and works.

The root password is “makerbase” (manufacturer of the board, obviously) and they caution that changing anything will void the warranty. One of the youtube reviewers did that, and they sent him a replacement emmc module. I followed up asking about whether making nginx listen on port 80 would void the warranty; after that I plan to ask about the password and using ssh-copy-id for passwordless login.

I didn’t pull the back cover to look at the control board. The images on their site don’t look like an MKS SKIPR board, but the printer.cfg file says “This file contains common pin mappings for MKS SKIPR” so it’s probably a custom variant. But that does mean that the emmc modules for the MKS SKIPR and MKS Pi will probably function in this printer. I haven’t found them for sale in the US so far; found one place in the UK that sells them for £10 though.

They provided a link to the 1.0.4 version of their slicer for Linux — it tried and failed to download the 1.0.5 version.

Now that I can see fluidd, I can see the bed mesh.

Out of flat by almost 0.7mm. I wish they used cast toolplate for the bed.

2 Likes

I printed one of their pre-sliced example prints, the articulated print-in-place yafic v2 rounded fidget toy. Because it was sliced with the profile for their “PLA Rapido” and I was printing with standard PLA, I slowed it down arbitrarily to 60%. (Later I compared their profiles and it looks like 75% would have been fine, since they list a max printing speed of 260 mm/s for PLA Rapido and 200 mm/s for generic PLA.)

It worked; there were two trivial defects on internal parts that I trimmed away with a blade. The surface finish was good, and it has survived some fidgeting.

1 Like

I wish the control board cooling fan were thermostatically controlled; it’s rather noisy for an idling printer. Or… merely turned on only whenever any print function were active. I have my workhorse printer configured that way.

Huh. 0.7mm variance isn’t great. I’d be tempted to put it in the mill for an encounter with a fly cutter. :smile_cat:

I am trying so hard to restrain myself and stick with stock, at least while this unit is in warranty (one year).

I have my SK-Tank for doing experiments. And now that I retired (at least for now) the printer that I had in my enclosure to replace it with the X-Max 3, I put the enclosure I built over my SK-Tank. So I have two enclosed printers now.

Honestly what I’d really consider first would be to take the same-size toolplate bed from the retired printer and put it and the SSR controlling it into the X-Max 3 — but not right now.

1 Like

That’s good news in that they are at least keeping the Linux build uptodate with the other platforms.
There is a javascript error in OrcaSlicer which prevents it from running on a bunch of Linux systems and the fix is in the 1.7 beta so until I can find the nightly build link I can’t try it out. 1.6.2 of OrcaSlicer just dropped on the 29th.

I wonder whether there is any relationship between that and the fact that support just told me that there isn’t a 1.0.5 build of QIDISlicer for Linux. :thinking:

Updated the earlier comment: The cosmetic defect was actually not a defect, it was just another layer of protective film and I didn’t realize it. Support was fairly quickly helpful. Looks great now.

I’m currently printing an item of my own design in generic ABS, sliced with the QIDISlicer and their profile; the only changes I made were to layers and perimeters appropriate for this particular print, and choosing organic supports. It didn’t heat the enclosed chamber, so I did a quick web search and guessed; I overrode the chamber temperature to 50° though the front panel during preheat and then again as printing started.

QIDISlicer came up in Generic ABS mode, which happened to be exactly what I wanted for this first print of my own design, but I forgot to think about whether there were speed overrides in the filament settings.

image

That made me worry a bit until I looked at “Max volumetric speed” which should limit speeds within that max.

So far it’s printing fine. I haven’t seen any evidence of shrinkage or lifting.

With 0.2mm layers, the 17.5mm³/s max volumetric speed is limiting me to 215mm/s when printing — I see that when printing perimeters and infill instead of the configured 300mm/s and 270mm/s respectively. So it looks like that works.

The “don’t change anything on the firmware or you break the warranty” is a little annoying when the printer has the wrong time zone and no configuration that I’ve found for fixing that. Because of that, it says that this print will take two more hours to finish, and that will come two hours in the past.

1 Like

I’ve found a listing for what I believe is a compatible eMMC module that could be used for experimentation, and then replaced with the original without harm.

https://www.friendlyelec.com/index.php?route=product/product&product_id=209

On the up side, it’s a cheap $10.

On the down side, it’s out of stock…

Edit: As far as I can tell, Makerbase have it for $14 (plus shipping) as “Suit 9” in the following listing:

I am very satisfied with the quality of that ABS print. It’s as high quality print a print as I’ve ever done, and it was done at high speed.

This is a good printer for me, and I’m glad I bought it.


I removed the motherboard cover, to prepare to try installing the 3rd-party webcam board that is supposed to arrive today. They even included the right hex wrench to do that in the tool kit. :heart:

I’m glad I did, because one of the stepper drivers was slightly loose.

I let their support know about that minor issue. I don’t know that it would have vibrated out eventually, but I feel better with it fully seated.


I realized last night that there is one bag in the set of parts that is not described in the manual. They clearly included all the parts that the manual said to expect, but there’s an extra, opaque anti-static bag. I then realized that there is no mention anywhere in the documentation of the carbon filter, even where it is in the printer. So I am guessing that the bag contains either the carbon filter or a first replacement carbon filter, and I have asked support about it.

1 Like

And a quick response from support: Yes, the bag contains the carbon filter material, and it goes in the box that has the sticker that says to reset belt tension.

https://drive.google.com/drive/folders/1n12Rp5OjGLMc1FEHfwtl19hRfjSF-M0y

1 Like

I bought a webcam on a bare circuit board. (I won’t link to the particular unit I bought because it was advertised as 3MP but is actually 2MP.) I couldn’t mount it at the front looking towards the back because it would interfere with the print head, which comes very close to the front of the case at its most forward extent. Therefore, it’s in the back.

I’m still working on adjusting its location vertically. It actually has a better view of printing from the back, except that the lights in the front create glare. I can’t even easily add lights to the back to compensate, because I can’t figure out where the LED strip is fed from. It might actually be fed by the board with the display at the front.

The main oddity of mounting it in the back will be looking at myself through the front door of the printer if I’m sitting right in front of it.

Hooking up the webcam electrically was no problem. The printer came with the right hex wrench to remove the cover for the control board area. (Be careful, there’s a fan on that connected to the cover; don’t drop it.) The control board has an open USB2 port, and there are are holes from the recess for the control board into the printer enclosure with wires routed through them, so it was easy to just plug in the USB cable, route it through the hole and around the carbon filter box, and up to the webcam.

Then I just went into the fluidd interface, clicked the :gear:, went to the camera interface, enabled the default camera, rotated 180° because I had to install it upside down for cable routing reasons, and it just worked.

There’s a great spot for the camera there, these boards are cheap, and I wish they had just included one, even as an add-on option for which the printer was designed. Then they could have included the possibility for LEDs at the back, as well, making it truly plug and play.

Right now it’s held in place temporarily with a command strip. I’m planning to make a mount that connects to the metal rail in the back of the enclosure to which the camera attaches with screws. Pretty sure the command strip will fail before long as this printer shakes while printing rapidly.

I might also try to print some sort of glare shield or diffuser for the LEDs at the front.

I’ve been printing ABS now yesterday and today. I’ve used IPA (99% but it probably doesn’t matter) liberally to clean the “HF” build plate it comes with and I’ve had no adhesion failures with the bed at 100°C and the chamber heated to 50°C. Printing in PETG, I had been very comfortable removing a 60°C build plate with bare hands (YMMV). A 100°C build plate? Not so much. :fire:

I’ve been removing the plate with a folded paper towel to protect my hands from the heat, closing the printer back up to keep it warm for the next print, and cooling the build plate until the print starts to pop off. I’m using a nylon “razor” blade to remove purge lines and any stray bits of support brim without damaging the surface.

They say that “HF” means PEI with Manganese added. I’m curious whether anyone else knows more about this. The only adhesion failure I have had so far was when I tried using one of my smooth PEI surface sheets to print ABS. I’d like to be able to print a less deeply-textured surface sometimes. Maybe I’ll have to make some ABS slurry with clear ABS to print on my smooth plate? Or maybe I just need to slow down the first layer more when printing on the smooth plate with ABS.

1 Like

I found some tiny screws in my spare screws supply that fit through the webcam board holes, and which were clearly meant to screw into plastic, and used those. They appear to be 2 mm wood/plastic screws, and are about 6mm long. So I just made holes to screw them into directly instead of using, say, heat-set inserts.

As I went through prototypes for my webcam mount, my FreeCAD model got unnecessarily complicated. If I decide to make any more changes, I’ll probably just start over from scratch. But for now, it works.

Prototypes:

Final version mounted in the case, upside right (not rotated 180°) now that it’s not against the rail, with two M4 set screws clamping it to the back rail:

The wiring routes around the carbon filter and around through a hole in the back to the control board:

The webcam plugs into the empty USB-A port on the control board:

Sadly, they didn’t populate another USB port next to it; it looks like they could have cheaply added more USB ports which would have easily allowed more cameras with more views, because there is an unpopulated set of through holes to solder another connector in place. Oh well, a hub would solve that problem if I had it.

The camera end of the wire uses a different connector:

Like I say, this FreeCAD model is over-complicated, but it’s time for me to focus on printing something else now. Like a glare shield for the LEDs to keep the built-in LED light strip from blinding the camera.

QidiWebcamBracket.FCStd (231.5 KB)

2 Likes

I haven’t linked to the camera I bought, because it was listed as 3MP but is actually 2MP, so I’m annoyed with the vendor for a false listing. I paid for 3MP and got 2MP. But it does seem to have enough resolution to do the job; a 2MP would have been fine.

I was also annoyed because it was listed as being good for lightburn which requires close focus, but the fixed focus wasn’t obviously adjustable close, so the pictures were blurry.

I asked for help on Mastodon, and as a result of the advice tried again to twist the lens to focus it, and after the camera had been in the chamber for the day, most of the time at 50°C, I was able to break it free and move the focus.

It doesn’t have enough DoF to cover the whole bed, but it’s way better than it was, and probably good enough. :+1:

1 Like