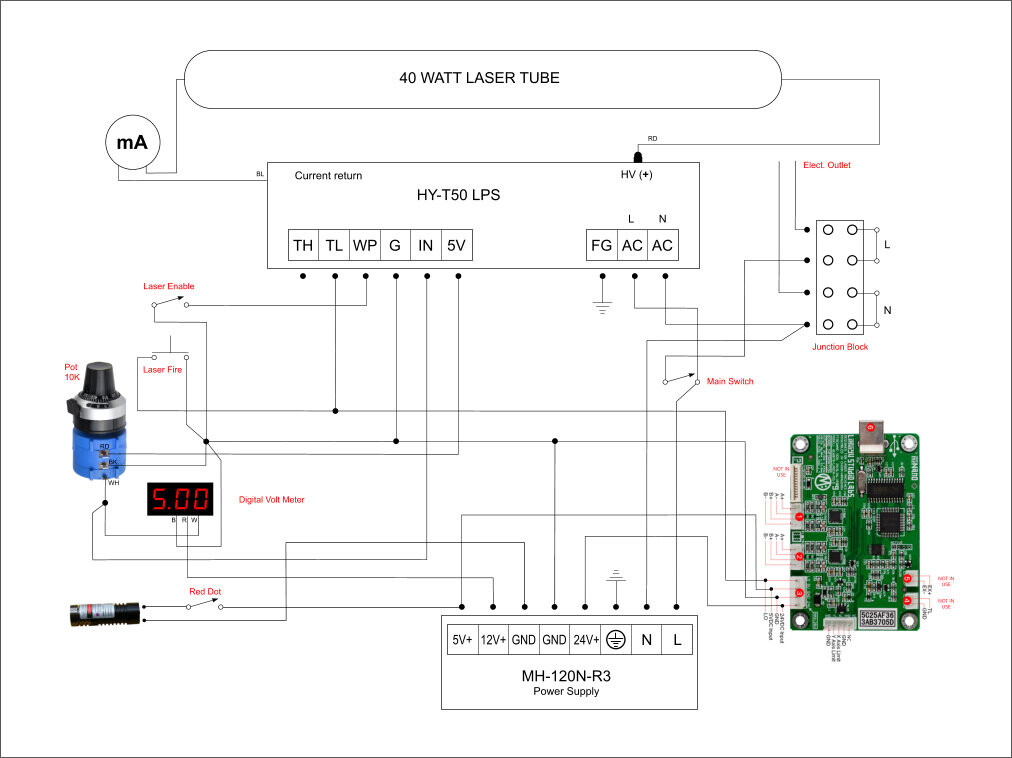
That gauge is either 5V or 12V, and your PSU has 5V and 24V available. If the gauge is 5V you are OK to tie it in to the 5V rail of the PSU as it does not draw much current. But if it is 12V you will require a separate power supply for it.
3 Likes
Looking at the picture, it appears to be connected to the 5V lines that would connect from a PC power supply, the yellow line is the 12V from a PC power supply.
3 Likes
Can you point us to the specs for that temp meter?
With more information we can be more specific.
I would not load down the 5V of the LPS any more, it is already running at a marginal level.
Sooner or later you will need more power choices for accessories.
I recommend coming up with a power strategy for your machine.
I do not use a nano but if it were I the power strategy would be
- I would add a multioutput Power Supply like this: https://amzn.to/39wpM8I
- 24V to nano for stepper motors
- 24V reserved for lift table steppers
- 5V to nano for logic
- 12V for cabinet lights, air assist & pump: control relays, temp controllers etc.
At the same time I would install fuses in these supplies.
1 Like
Don, thanks for the advice. The only info I have regarding specs is what was contained in the ebay posting. That is to say, very little.
Wow no specs!
BTW I never buy anything whose basic spec is missing
Wait…
Hidden in a mystery link on the description page:
http://vi.raptor.ebaydesc.com/ws/eBayISAPI.dll?ViewItemDescV4&item=271757785983&category=48624&pm=1&ds=0&t=1543377429000&ver=0
- Temperature unit: °C or °F(Plug/unplug the jumper cap to switch the unit)
- Temperature Range: From -30°C to 110°C / -22°F - 230°F (°C/°F switch)
- Accuracy: ±0.5°C
- Sensor type:NTC (10K/3435)
- Water-proof sensor probe
- Working Voltage: DC 4 -25V
- Working Current: Max. 20mA [20ma additional load on LPS may be ok]
- With a 4-pin connector for PC use
- Red line connect the positive, black line connect the cathode.(With reverse polarity protection)
- Working Temperature: -20°C-60°C
- Widely used in car water temperature detection, air conditioning, refrigerator temperature detection, water heater temperature detection, computer chassis temperature detection, etc
Size:
- Mounting size: 45mm(L) x 25mm(W)
- Front panel size: 48mm(L) x 28mm(W)
- Product size: approx. 48mm(L) x 28mm(W) x 17mm(D)/ 1.9’‘x1.1’‘x0.67’’
- Power cable length: approx. 50cm/20’’
Note: If you add this to the LPS 24V it’s less likely to be a problem. After adding it I would measure the 24VDC while running a job.
4 Likes
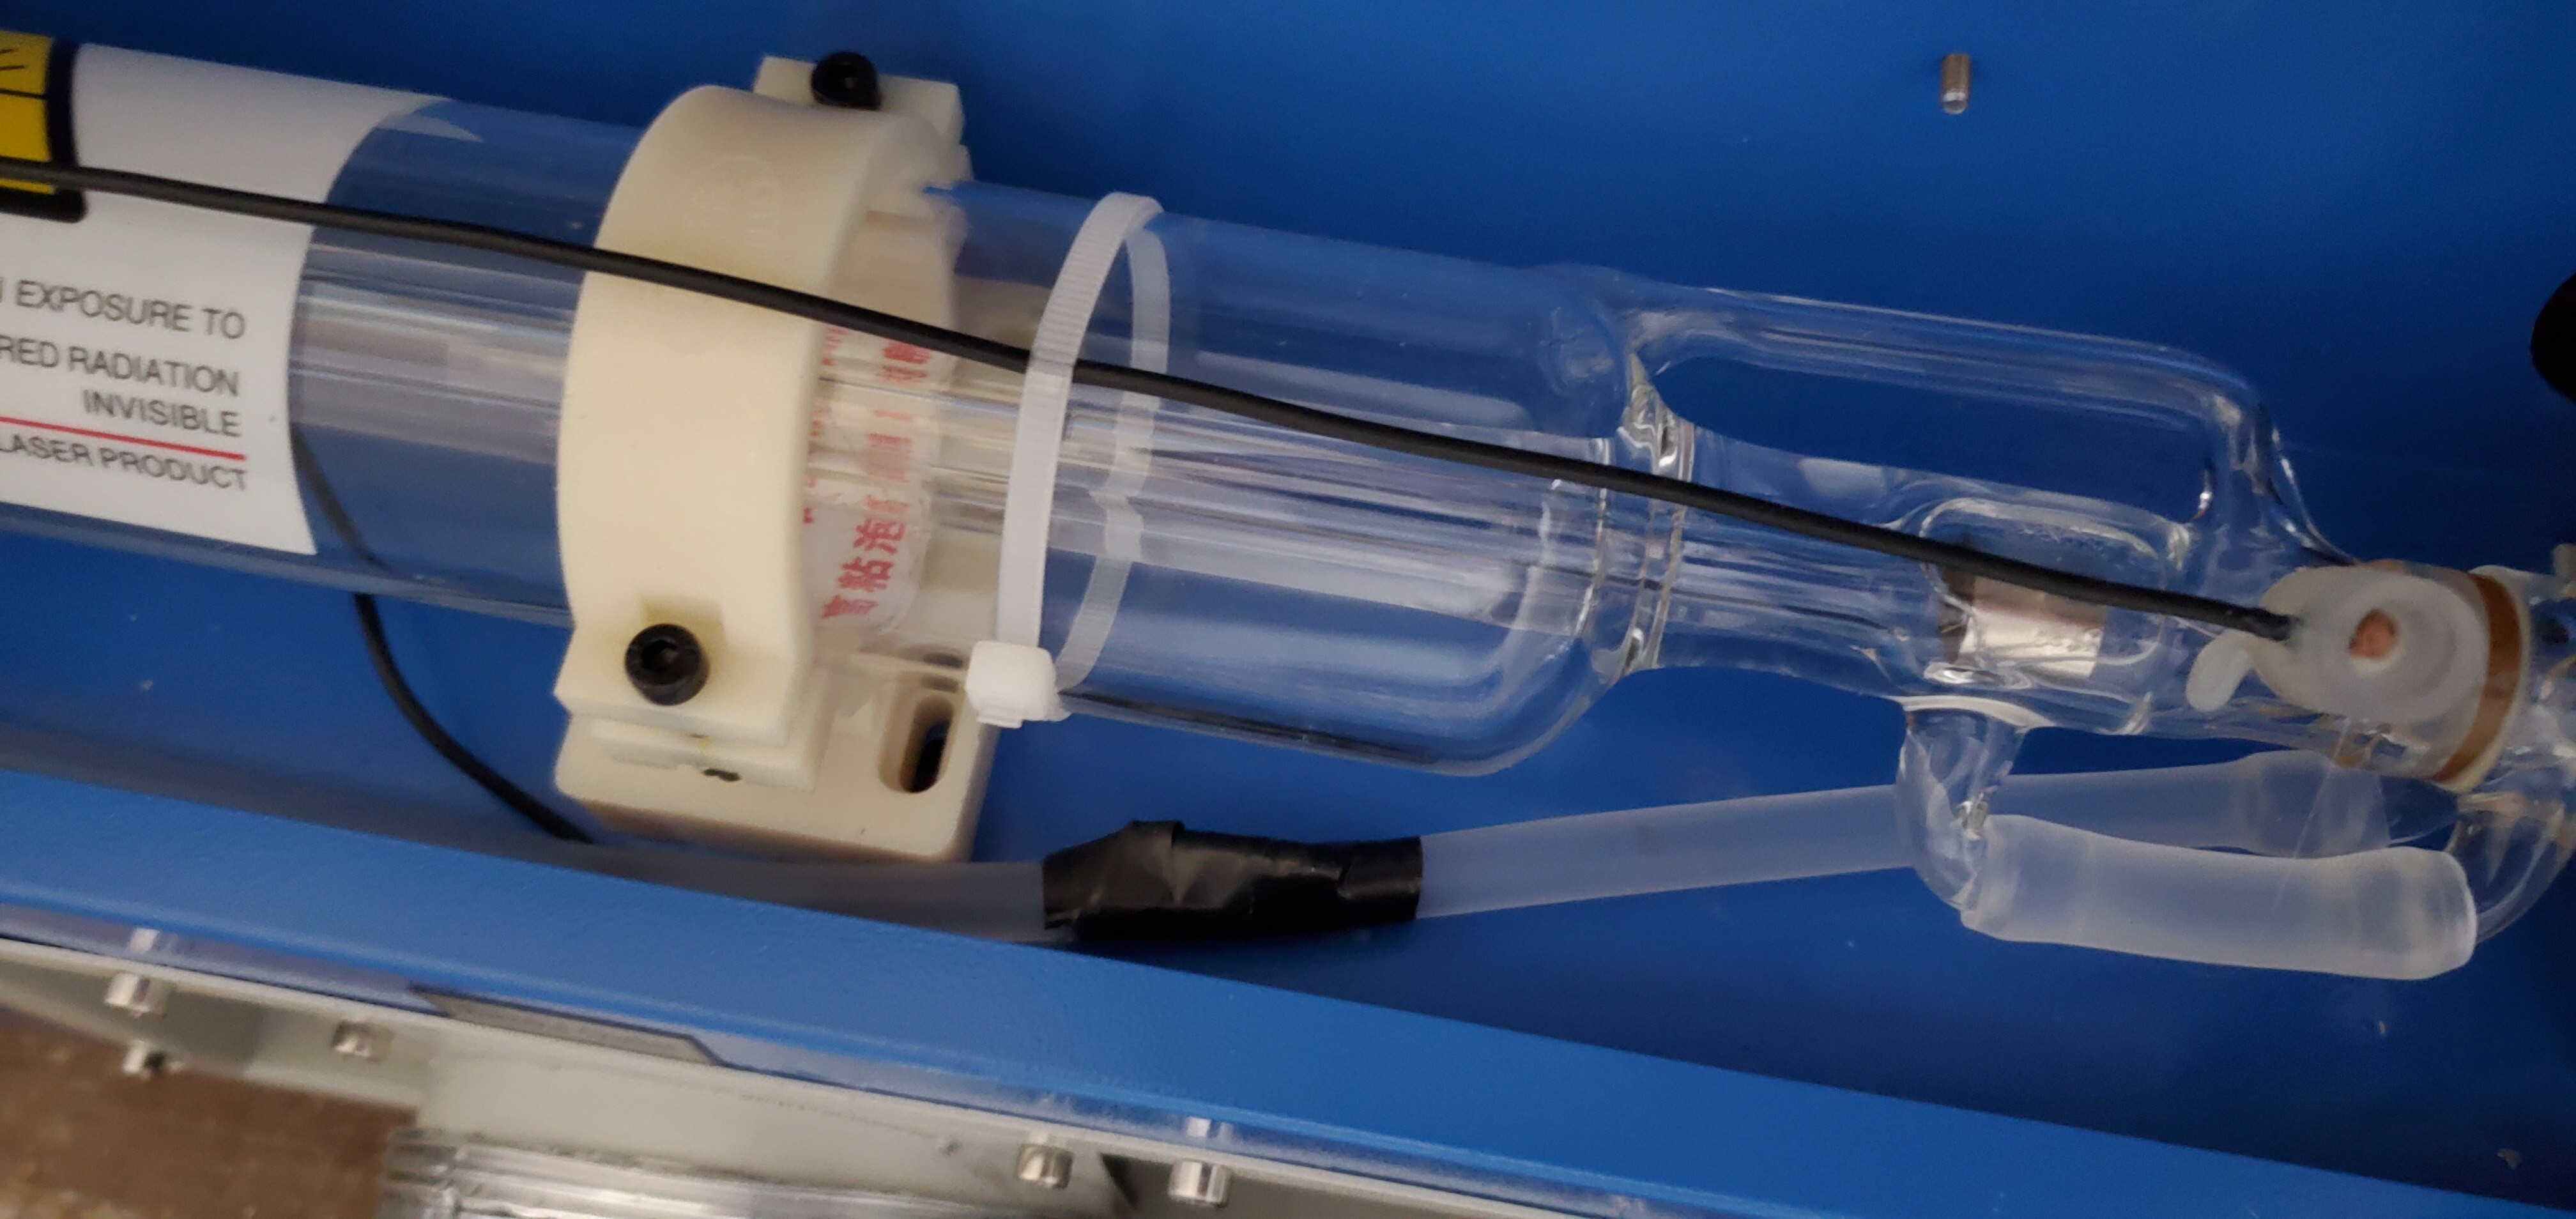
My machine came with a temperature gauge but no indication of what temperature it is displaying. I traded the eye that and discovered that it is attached to the cooling discharge line. Not sure how accurate it is with it being tied to the silicone tube but it’s better than nothing, I guess. So working on putting the sensor in the cooling tote. After two hours at 14mA, my water only went up three degrees C. I check with a temperature probe by hand.
1 Like
The thermocouple attached to the outlet water hose is typical stock placement in K40s. Seems to reasonably accurate in my experience.
2 Likes
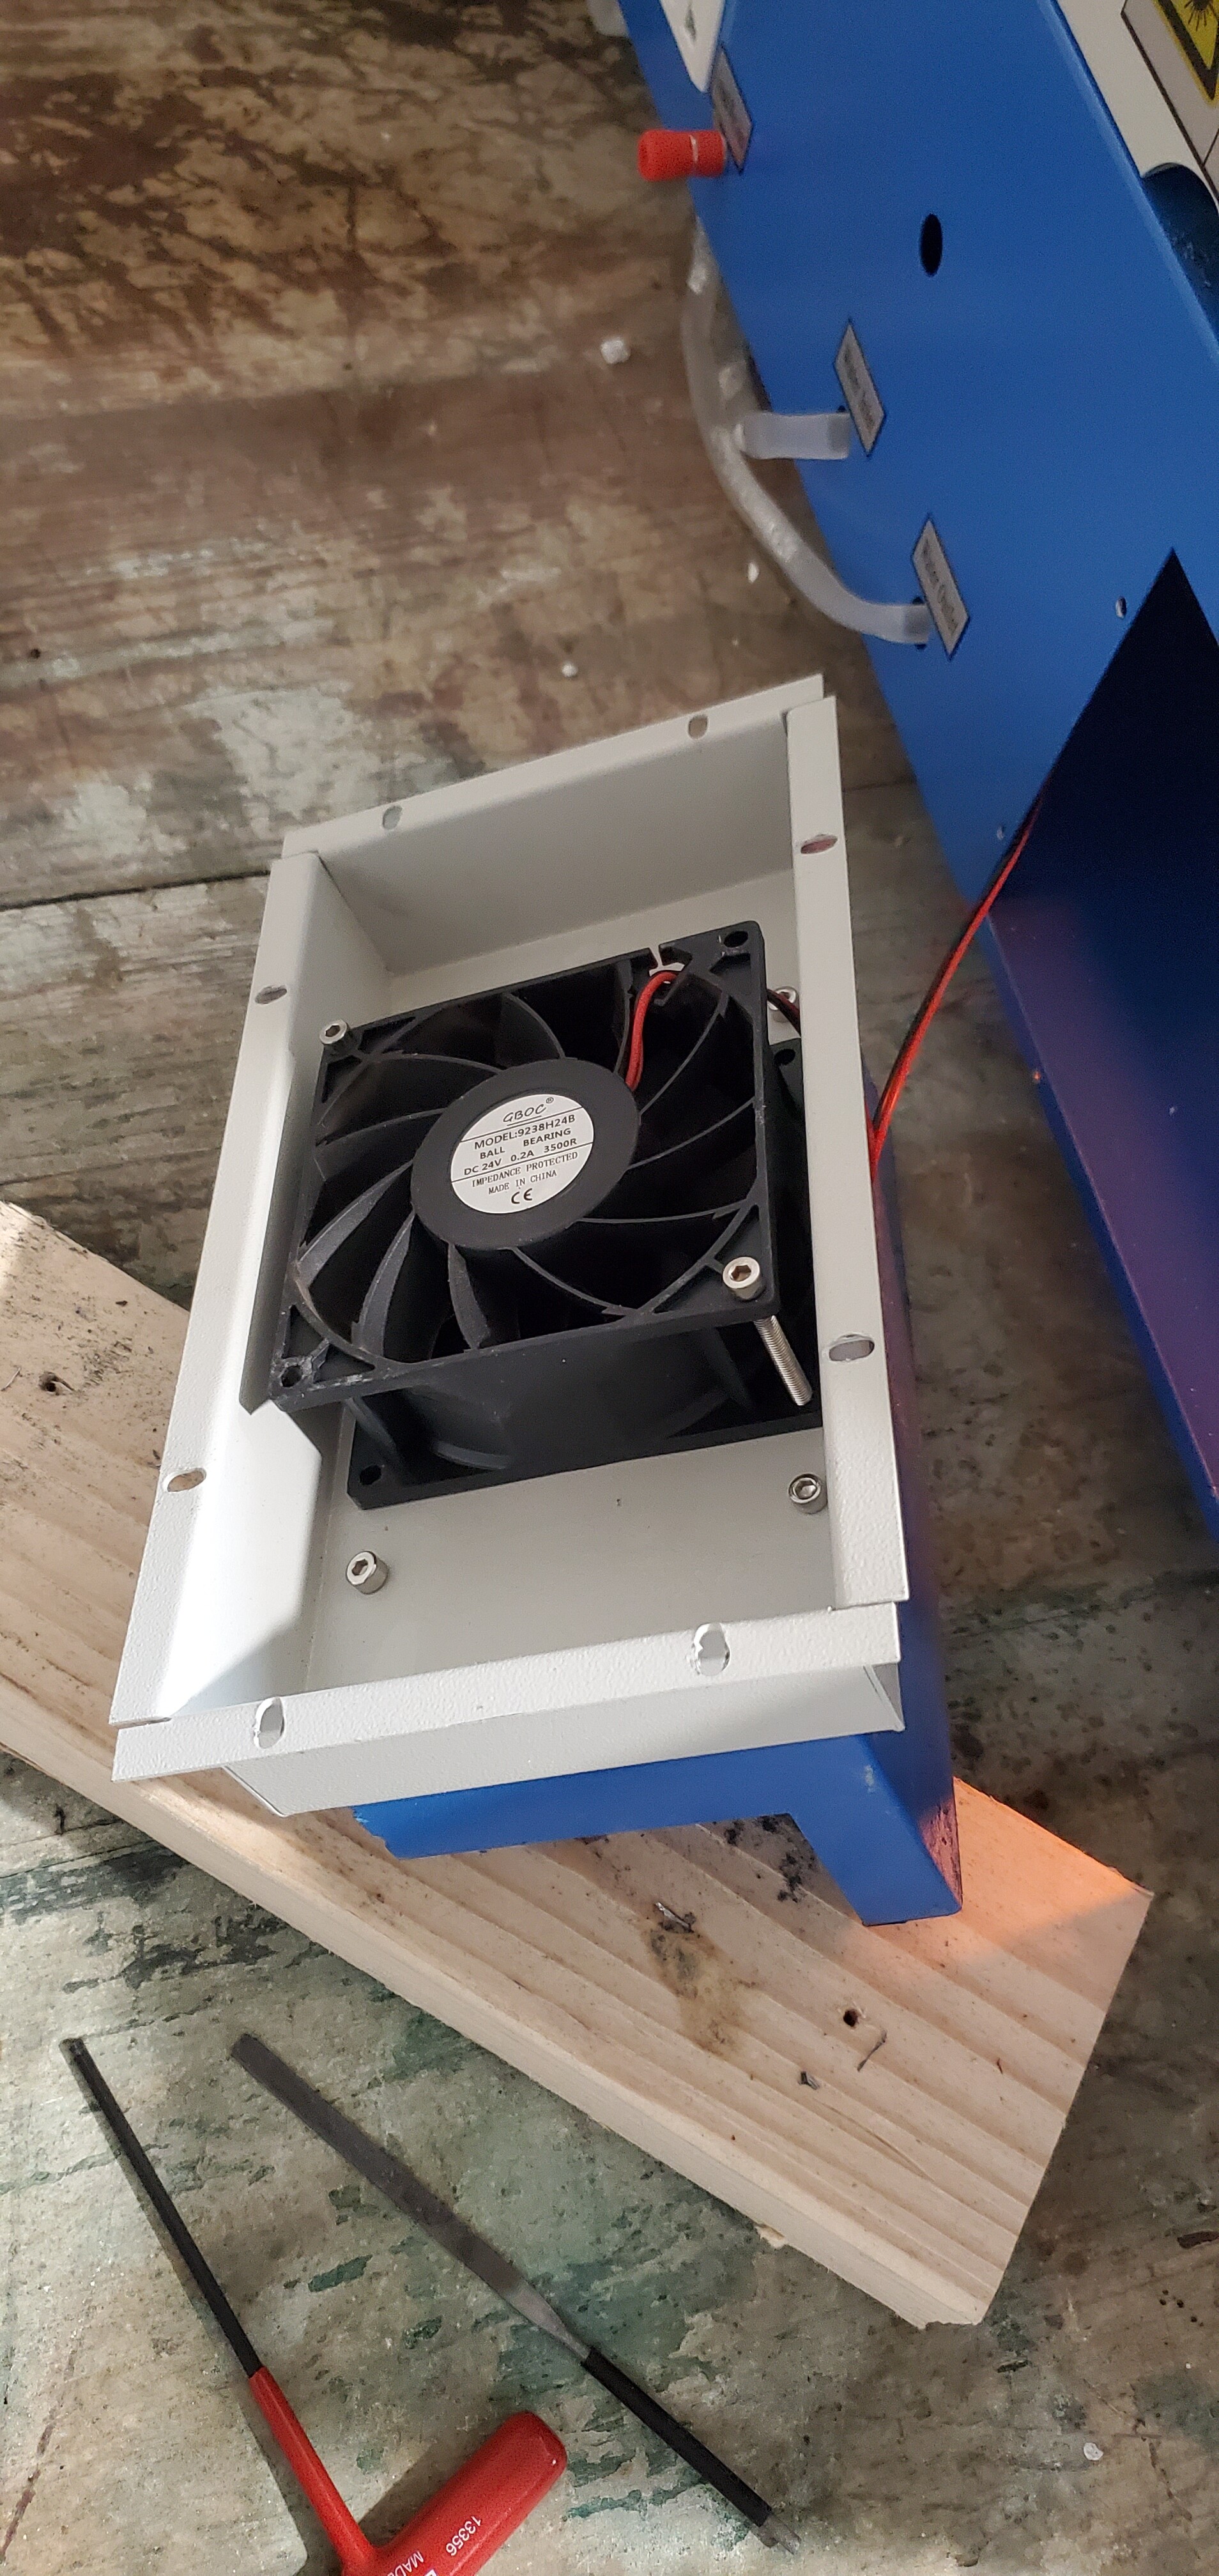
I took out the exhaust today to get a better look. I have attached photos below. Weird bit: fan mount is 3.5in.
The exhaust is easily removable through the back of the unit by removing eight M3 machine screws. The fan can then be removed via four more screws. This should make upgrading much easier.
Once I am able to get a hole cut in the wall, I will mount a six in exhaust fan and rigid duct. That will have a lot more kick than the included one. But, with that said, I have had no issues with fumes or smoke even cutting (unsuccessfully) 1/4 poplar.
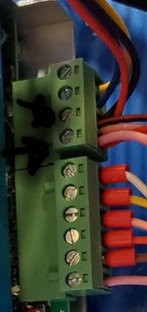
I also realized that the fan is powered in the places marked in the below photo. I’m thinking that is too much for this PSU.
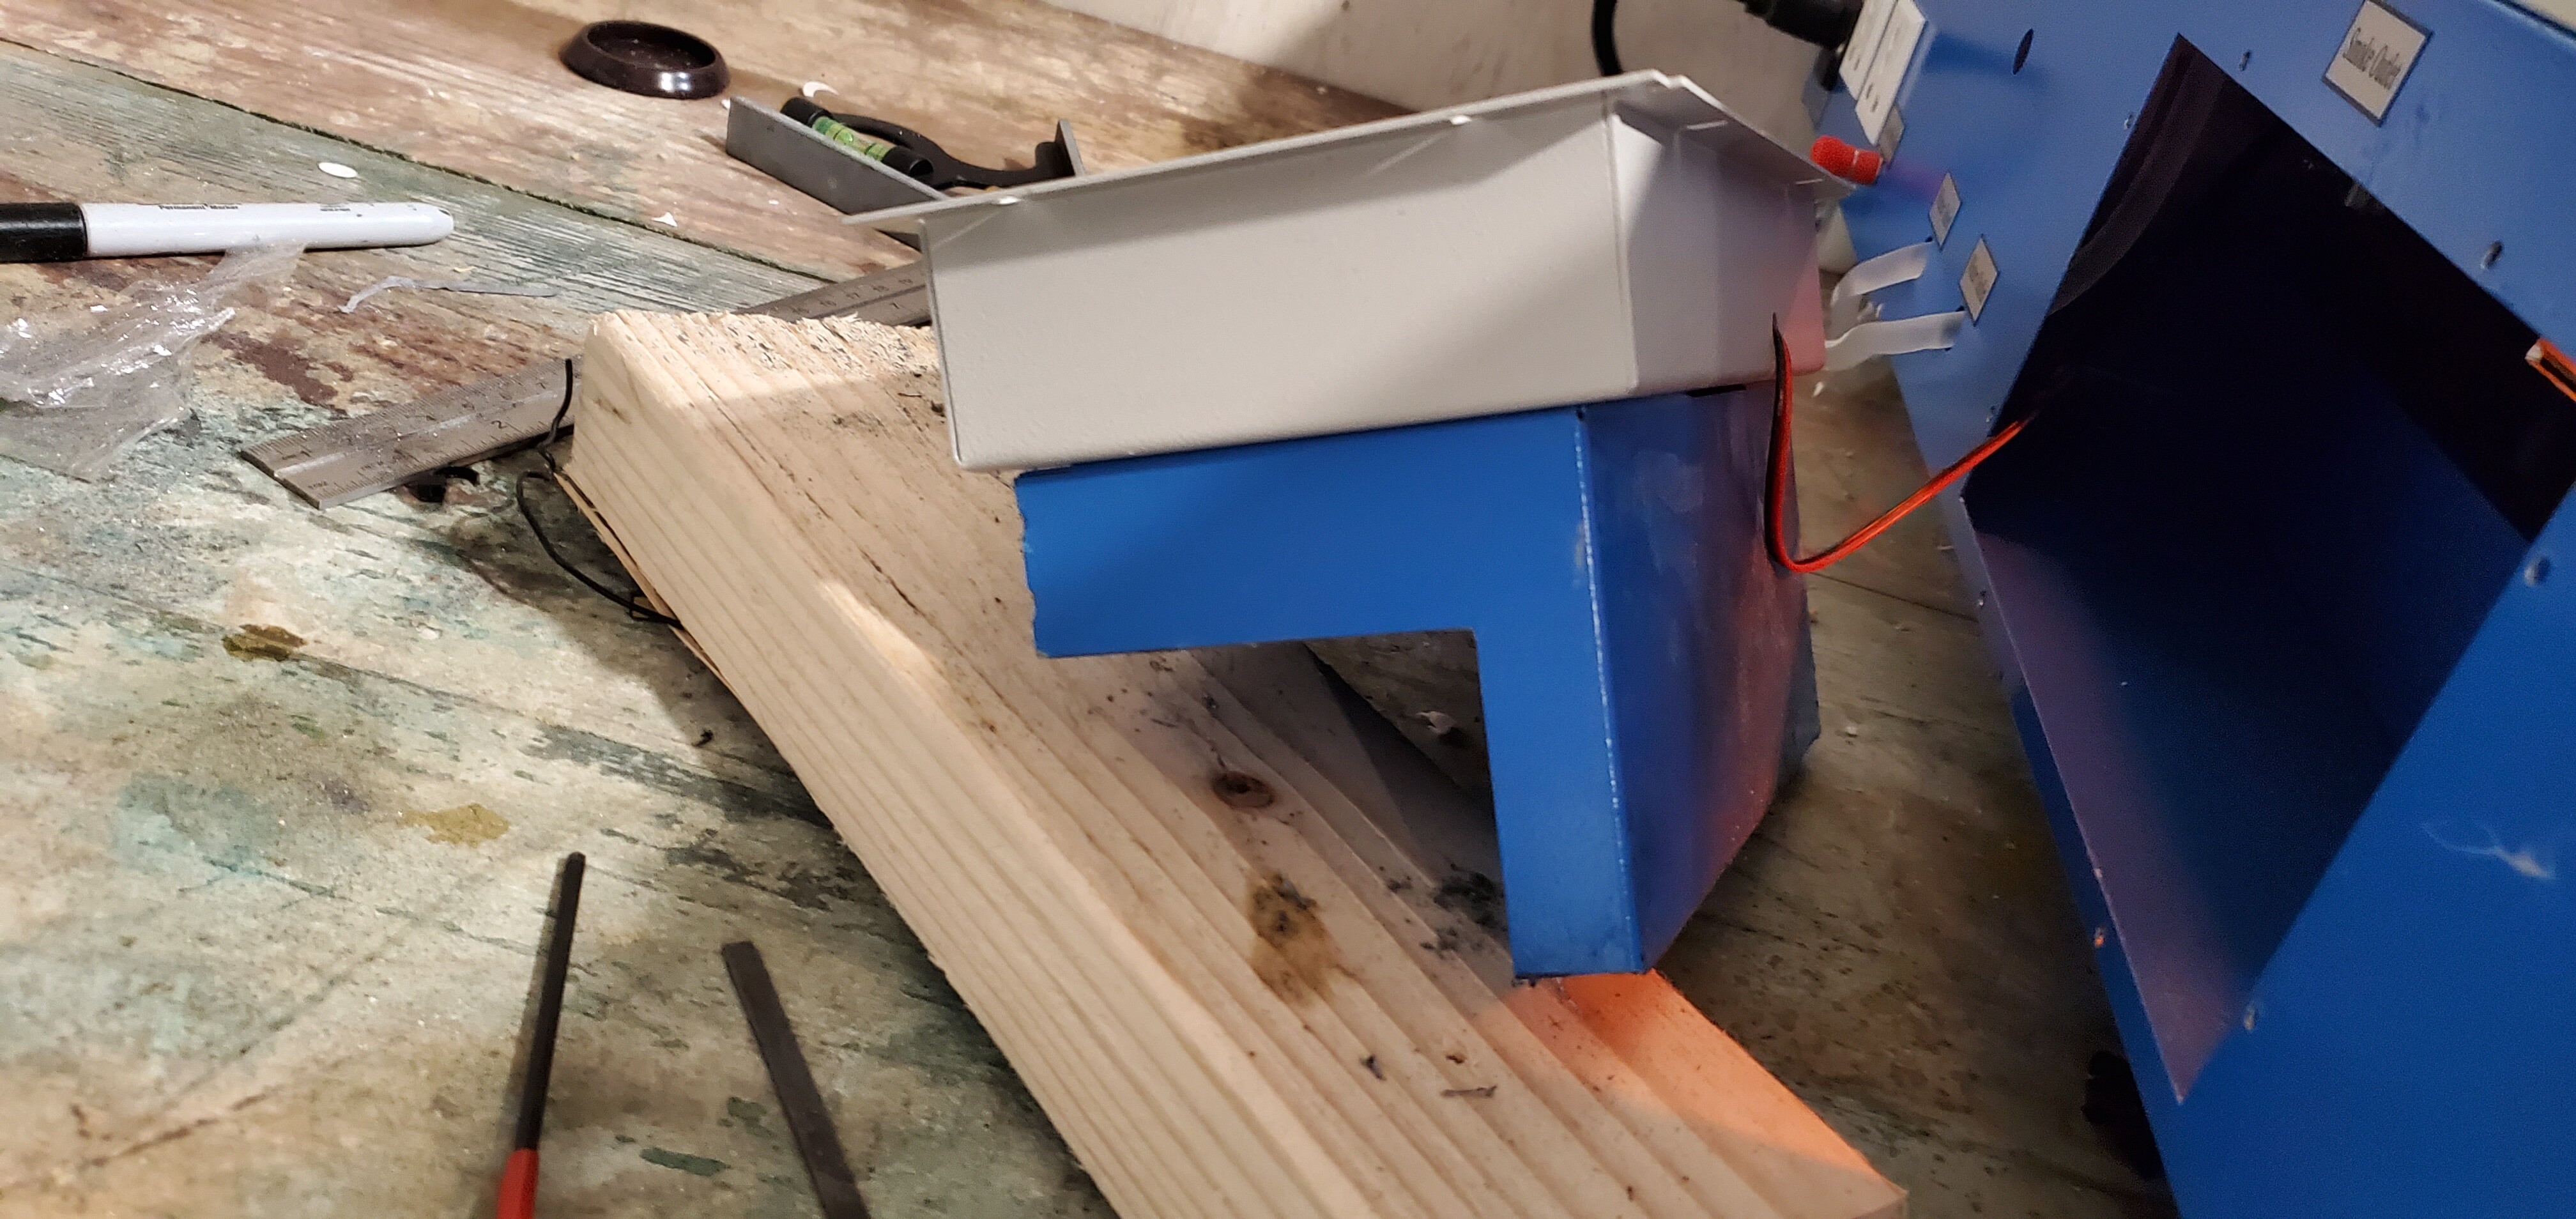
Has anyone seen an adapter/flange for this style port before? I have seen lots of them for the normal style but not this kind. I want to go up to a six inch exhaust if possible. I lack the metal working skills or a 3d printer to design and make my own adapter.
There are range hood flanges that are rectangle-to-round but they are very unlikely the right size. But that’s where I’d start looking.
Um, otherwise, lacking metal working or 3d printer, maybe consider just getting a 6" round flange and aluminum foil tape and taping it in place? I’m going to be using aluminum on masonite for the sides of my rather larger laser, and I’m going to just cut a round hole in it and put a flange in the hole and secure it.
1 Like
@NedMan you have this kind of setup on your machine?
This method seems overly simplistic and not very accurate but then again I have not looked at the thermal conductivity of silicon and done the math. I don’t plan on doing so either cause some things just don’t feel right.
Silicone Heat Resistance
…Silicone has a low thermal conductivity, which means that it transfers heat at a low rate compared to other materials. This low thermal conductivity can also be described as high thermal (heat) resistance. In addition to simply resisting heat, silicone also exhibits thermal stability, or the ability to maintain its properties and structure over a wide temperature range.
… a typical unfilled silicone rubber has a thermal conductivity of approximately 0.2 W/m·K and even a highly filled silicone elastomer can barely exceed 0.4 W/m·K.
This machine has been moved to the garage. I have used these HVAC ducts for years and they have held up mechanically. I cannot advise on levels of contamination as I don’t use the machine that much. This approach eliminated having to do any sheetmetal design.
I like that I can easily remove the corrugated duct and move the machine.
2 Likes
I have the original temp probe on the outlet tubing and one in the bucket. Didn’t think about the thermal conductivity of silicone tubing being that low, but I’m not using silicone tubing personally. I guess it would be better to put it directly against the laser tube?
1 Like
I have on in the bucket and one on the tube surface but do not remember the delta.
I just was curious about the temp on the tube surface. I planned (but never did) to add a fan to the laser tube compartment.
Your setup would tell us what the temp drop across the water tube is.
1 Like
I bought a Mean Well RT-85D today. I will figure out how to install it now. @donkjr or @keen do you guys know of any guides on how to do this properly? I have never messed with this kind of PSU before.
Spec page:
https://www.meanwell-web.com/en-gb/ac-dc-triple-output-enclosed-power-supply-output-rt--85d
I bought it from Mouser:
https://www.mouser.com/ProductDetail/MEAN-WELL/RT-85D/?qs=%2Fha2pyFaduh1222kbRzZLmciUebFz%2Blg1hrPjEYsUI8%3D
Should we break these posts up (this is becoming a really long thread) so the subjects will have more of a focus and are easier to share?
1 Like
Is this the kind of thing you are trying to do? Just the DC supply part. I think this is a different LPS than yours
See this thread:
That is fine. I just didn’t want to take over the board.
It’s totally OK to have new topics. It doesn’t take over at all. Also, mods can also split existing comments out to a new topic, so if you ever feel like you got carried away in a topic and want it split out, you can just ask. 
3 Likes