Thanks, so I did the ‘z offset’ in the calibration setting on the printer… I basically used the included calibration paper (which is .25mm thick) as the instructions stated. Anything else I should do?
Also, in the slicer software I found where I can select under ‘filament settings’ > ‘Advanced’ and I can select PETG but it doesn’t seem to change any of the default speed or temp settings…were you referring to this or something else for their generic PETG settings?
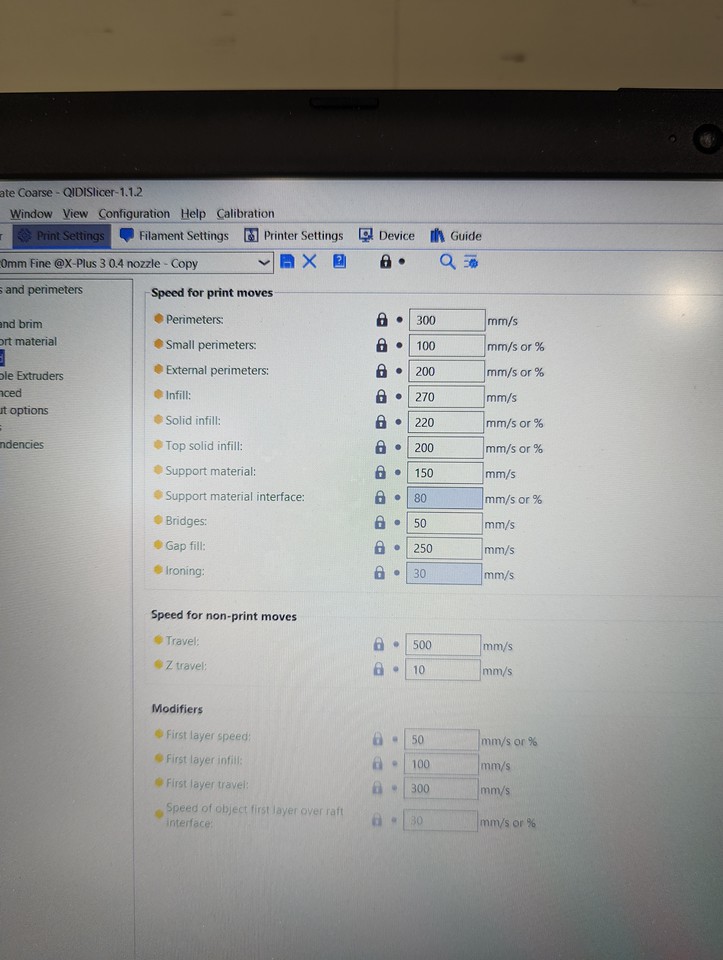
The second thing I did was set all the speed settings to 60mm/s as per what I found when I looked up recommendations for PETG online. Hope I’m doing this right…
Those speeds are maximums and are not part of the filament settings, and are restricted significantly by the “Max volumetric speed” in the Advanced Filament settings. You could try turning that down lower?
I find the baby-stepping UI on the X-Max 3 not intuitive. I think the arrows don’t have the same meaning on the front panel as they do in fluidd (which is what shows in the slicer device tab), and it’s not clear to me under what circumstances the setting persists. (The confusion is between, say, z increasing and the bed moving down, so is “up” arrow “z goes up” or “bed goes up”?) I believe I’ve seen it persist from one print to another and not survive a reboot, and I don’t know what can cause it to be reset.
@REKLLC have you found that UI on the front panel?
Yes, while printing; that’s what @Jammy was referring to. I have used that to adjust “baby-stepping” when printing a different filament or switching print surfaces. My mega-thread Qidi X-Max 3: First impressions has some details.
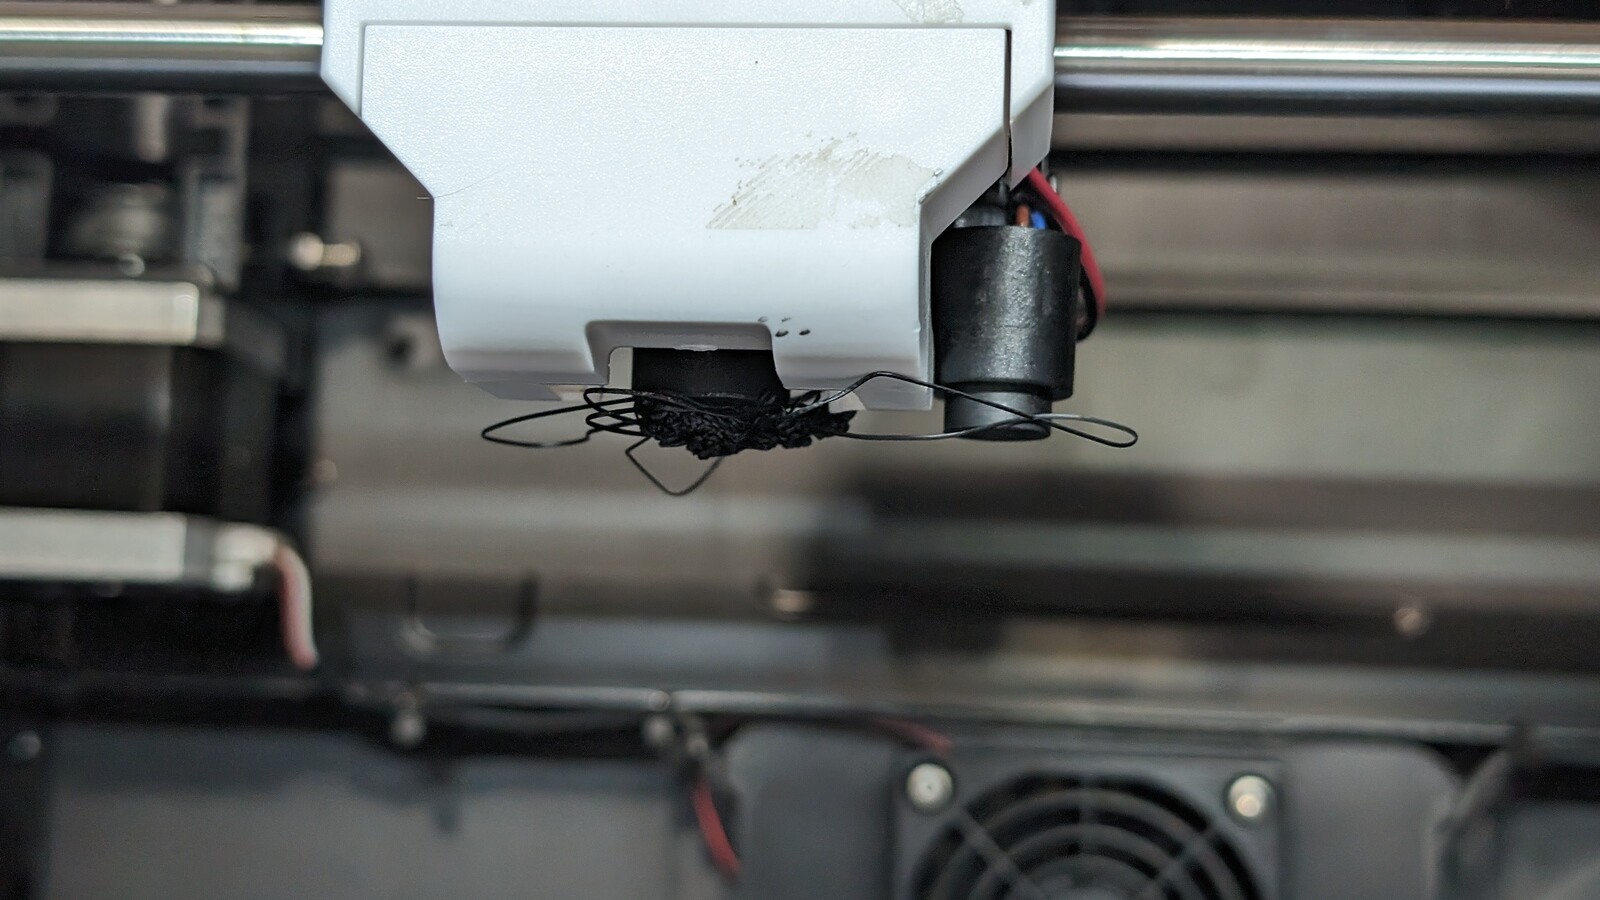
I have had no success printing on the back side of the provided “HF” bed sheet, and the white lettering adheres to prints on the lettered side. When I complained about that to Qidi, they provided me with a free (except for shipping) “smooth” bed sheet.
Ah gotcha. Well I’m using qidi slicer for the program… What should I check for in it?
Also, just to be on the safe side I did a manual leveling of the bed before doing the software bed auto level calibration. So I’m pretty confident it’s trammed well
I’m not sure what you are asking here. Doing “baby-stepping” is on the printer.
That can be through the fluidd interface that is in the device tab in the slicer. It’s the bottom of the Tool panel. The up and down arrows below the EXTRUDE button.
Thanks yep I copy what you are saying about the baby steps on the machine
I was referring to where you stated “What does the bed mesh look like in fluidd?” isn’t fluidd a different slicer program? Sorry I’m confused on this point haha
So in the slicer software it says my z offset is ‘0’ but I’m pretty sure that should be a number right? I went through the z offset calibration to set it where it should be. Any way for me to confirm what it should or shouldn’t be?
Also, I’m a bit confused as to whether the ‘print settings’ for speed are what the printer mainly goes by or the ‘generic petg’ settings when you select material…?
where should I select material from between these 2?
When you select the second one (Generic PETG @XPlus 3 0.4 nozzle) it is a whole profile of settings being applied. This will include temperatures, cooling settings, and max volumetric speeds, among other things.
I don’t know what, if anything, the PETG “Filament type” setting does on the Qidi printers.