Ruled out the x axis as the cause.
Complete redesign of the x axis with nice linear rails.
Working on fitting all new corner brackets that will make the frame more rigid. Either this will make it worse because it’s more rigid, or it will fix a weak link somewhere along the chain that has been making it resonate at just the wrong frequency.
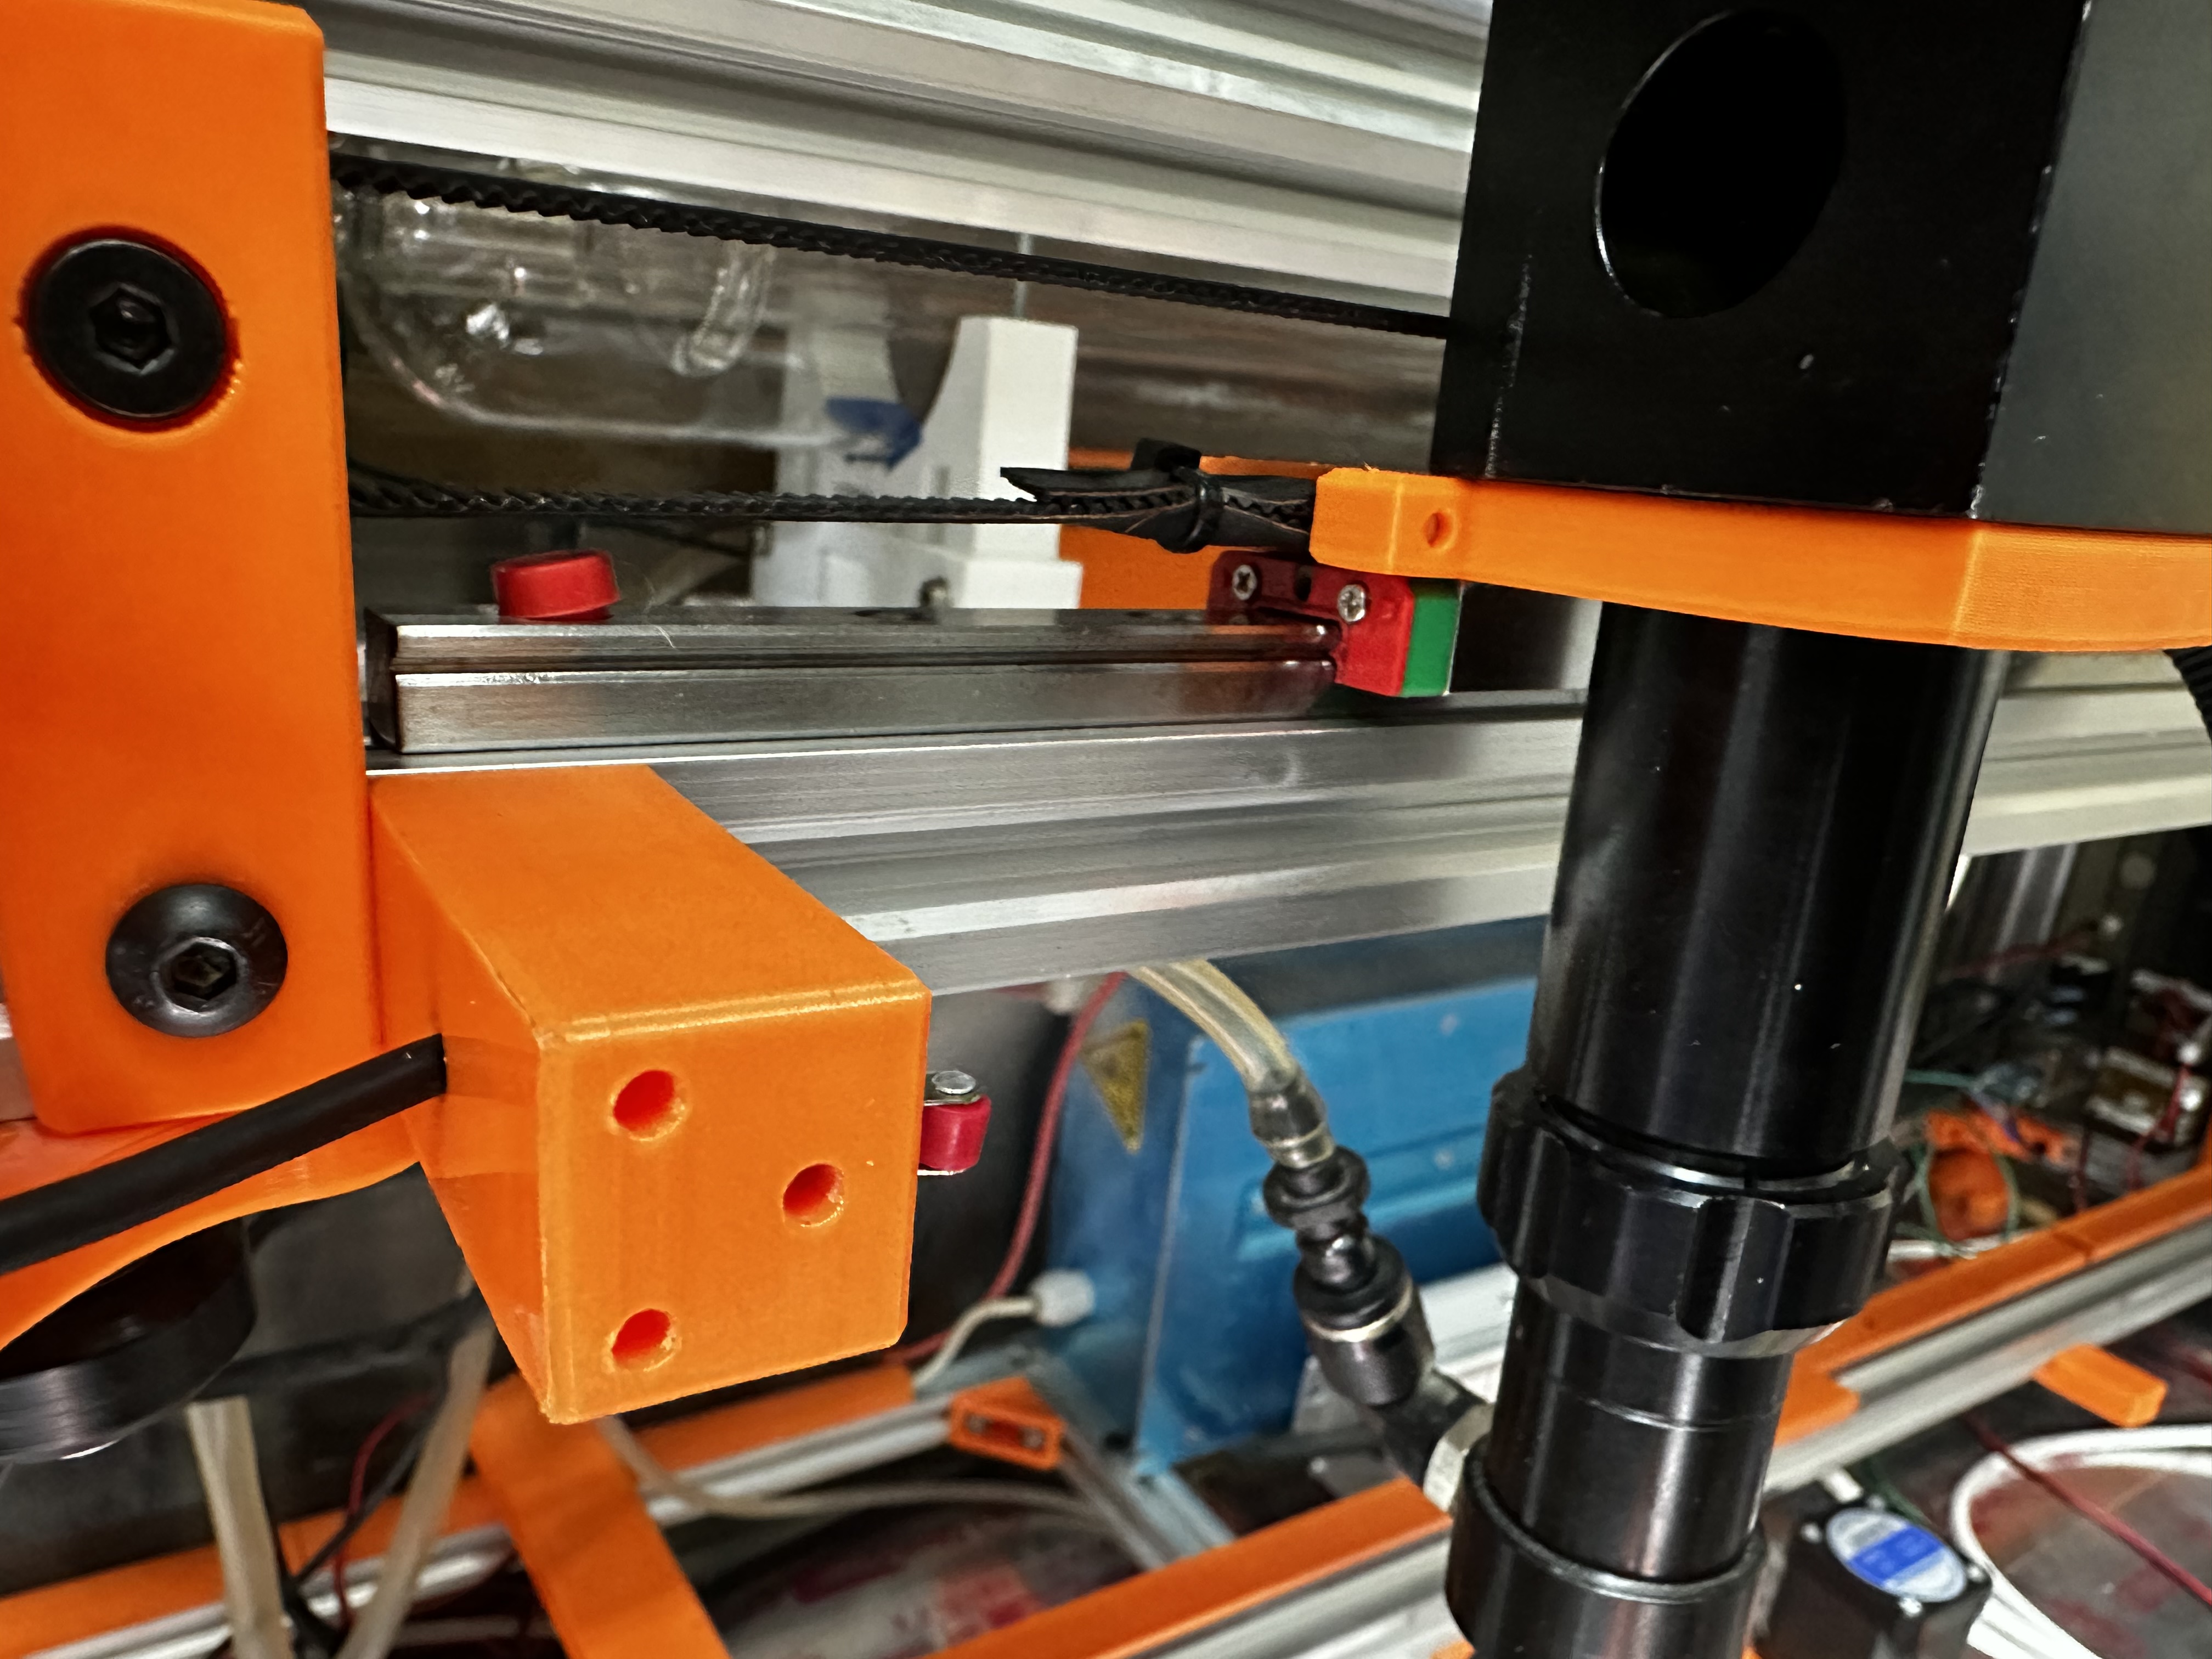
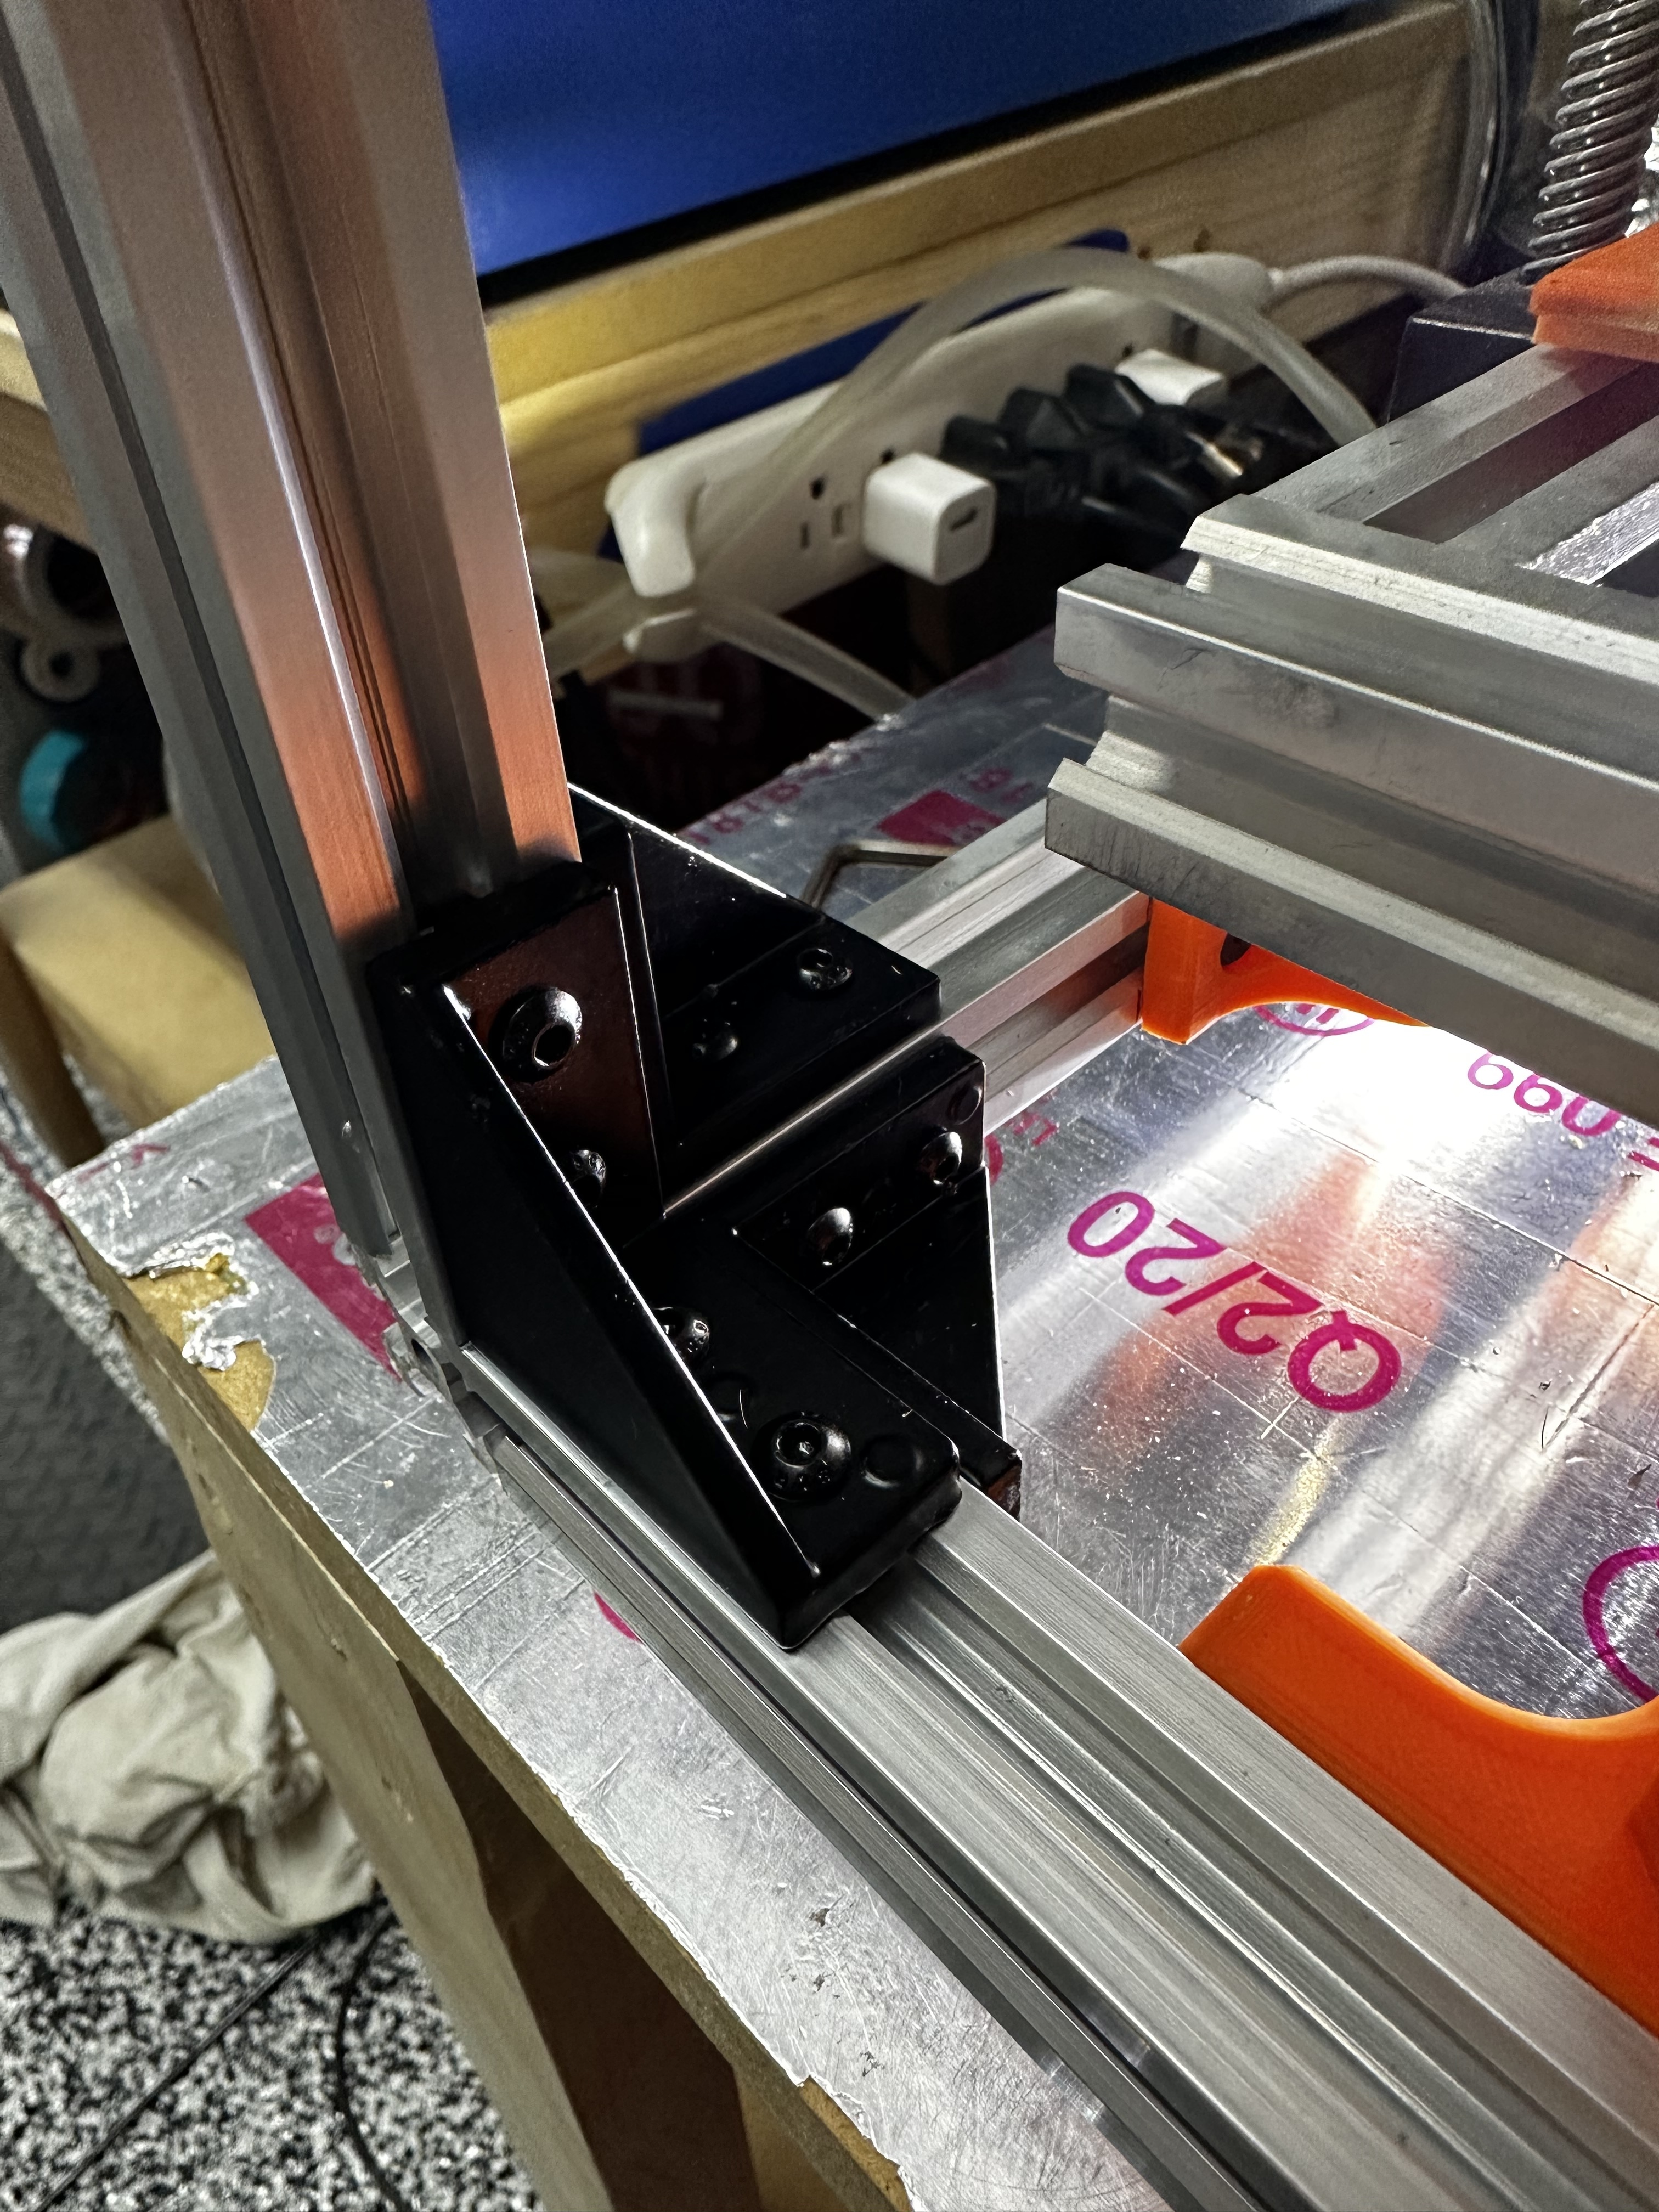
I got roughly 28 new brackets installed, bigger and stronger. Squared up the frame better than it has ever been. 4 new T shaped brackets to stabilize the main gantry system that the X and Y axes ride on. Changed out 4 adjustable 3D printed feet with 20 rubber feet. I also redesigned the mount for mirror #2, it is substantially more stable and simple.
I forgot the third possibility, no change whatsoever. Engravings look exactly the same. Wasted a solid 16 hours tearing apart the entire machine to do these “improvements”. Serious blow to my motivation.
It has helped narrow it down a little bit though. Things I haven’t changed/could still improve upon:
Things I have tried:
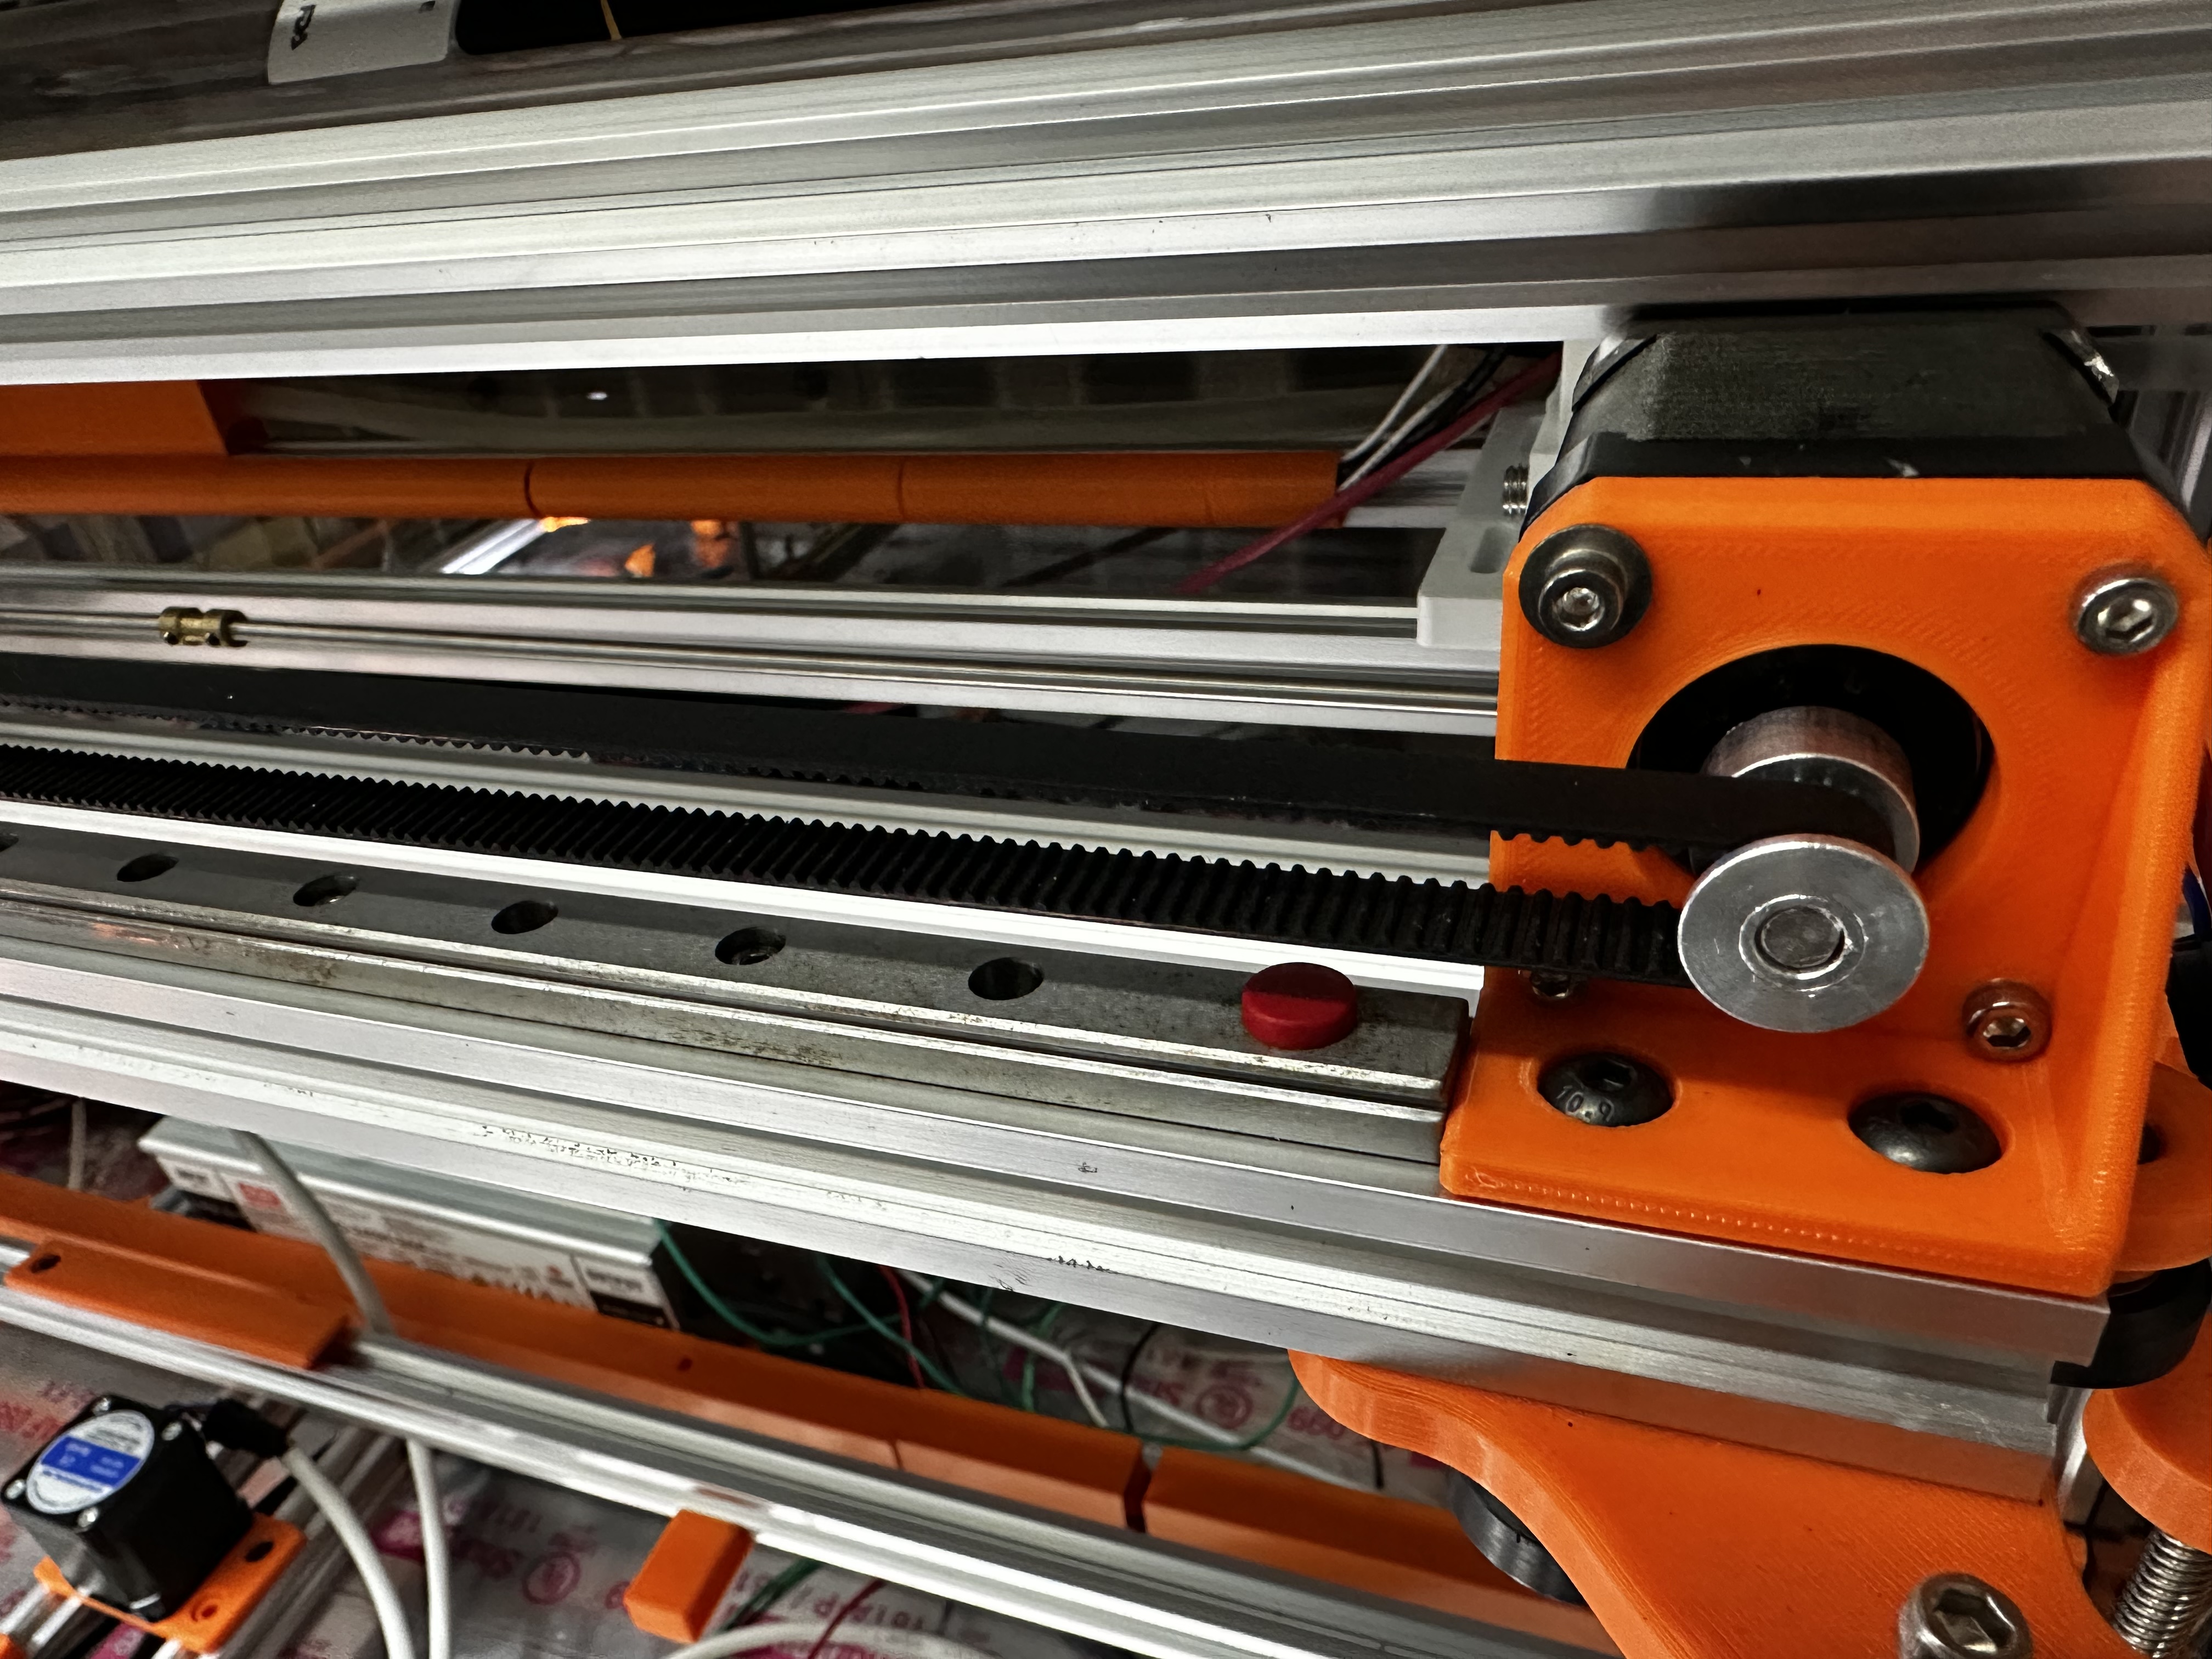
just an observation: your X axis drive pulley looks like it’s a rather small diameter and was it ruled out that the period of the curtain waves was not the same period as the belt? Also, are these pulleys pressed on or do they use grub screws? Grub screws can cause an offset in the pulley imparting a wobble as it rotates.
So long as the number of teeth are accounted for in the calculation for steps per mm, does the diameter of the pulley matter? or what would the diameter of the pulley effect besides steps per mm?
Not specifically. Do you have some instruction on how to do this?
They do use grub screws. The inner diameter of the pulley matches very closely with the shaft of the stepper. I will check tonight if there is wobble in the pulley as the x axis moves along.
You had implemented Russ Sadlers inverted belt mechanism but you didn’t watch his video explaining why? Did you notice how he talks about small diameter pulleys and goes over what belt type is good and bad for small pulley diameters? https://www.youtube.com/watch?v=QFLq14vY2zQ
and this Russ Sadler video talking about the same Curtains issue and his solution and again, why:
https://www.youtube.com/watch?v=B87ifTPKN8c
FYI, it’s how the teeth of the belt interface with the drive gear which causes some variation in belt/pulley position and a very small gear will show this more than a larger diameter gear. But also you’d have seen there are different styles of belts and the gear drive must match the belt design. I was rather perplexed when you’d implemented the inverted belt system and then removed it… The video not only explained why it is a desirable design but also that it works. But if your drive gear design does not match your belt design you’ll still have poor control and if your drive gear pulley wobbles from not being pressed on but being grub screw with wobble the improved inverted belt system will still not fix your problem…
And look at what this fellow had because of time belt interface issues and yes I know this is not the design you have, it’s just showing you the results of poor belt/pulley interfacing. https://www.youtube.com/watch?v=7BrQZQDj_0Q
Instructions? you measure the period of your curtain cycle and you measure your tooth to tooth belt distance and compare.
if it is wobble of the drive gear due to an offset wobble then your period of the curtain will match the period of a single rotation of the drive gear. ie it won’t be ~2mm if you are running GT2 belts(2mm tooth spacing) but will be closer to the diameter of the gear at the belt to gear interface.
Still not sure about this. The curtains are 6 mm apart. I have a GT2 belt. Periods are time related. The distance between the gt2 belt nubs doesn’t have a time component to it. How can there be a period?
I was able to capture a video of the x axis pulley rotating. I don’t have a basis for comparison, but this does t really look like it is wobbling:

Edit: That video RDWorks Lab 83 was amazing. I never saw that video. Much more respect towards Russ than I originally had.
You said before that there was no change when you ran at different speeds. If they are time related then they should be different distances apart at different speeds, and also would be unlikely to line up like that.
How many teeth on that GT2 pulley?
There are 16 teeth on the pulley. Also please don’t take my word for whether or not they change with speed, my opinion is biased. I read through this entire thread the other day and looked at all the photos I have posted. I think this post is the most interesting visually:
If it was electronic and based on the speed, the pitch would be different.
6mm is 3 teeth; I asked about the pulley wondering if the pitch of the pattern was an even divisor of the number of teeth on the pulley, but no 3 doesn’t divide evenly into 16.
@dougl @mcdanlj
A while back I mentioned I thought I might be fighting multiple demons. I think I may have identified some of them.
Firstly, I understand that the teeth and pattern spacing didn’t line up perfectly. I gave a number of 6mm, which is my best guess (I think it was difficult to identify which spacing to measure because there are actually overlapping patterns). Lets say it was 8mm or 4 teeth, that would be in sync with the pulley rotation and fall in line very will with Russ’ explanation.
That being said I switched the X-Axis pulley to a 36 tooth pulley and seem to have some better looking burns. Thanks @dougl , I think you found one of the harder to identify issues. There are still two other issues that have been overlapping with the pulley issue the entire time.
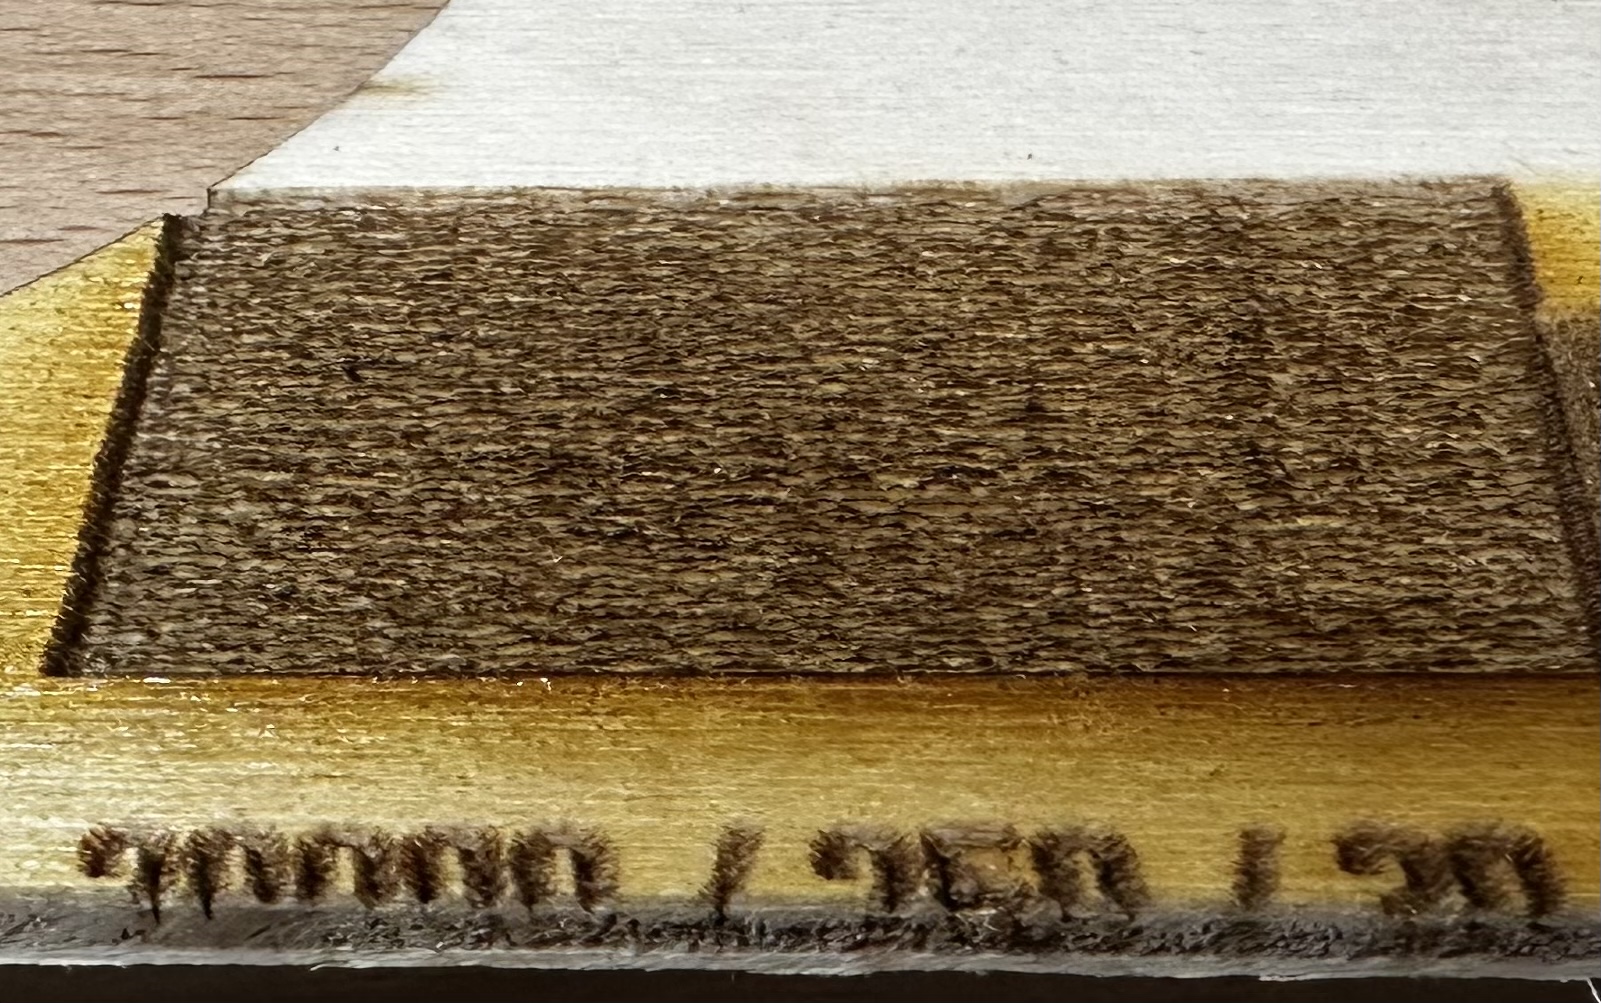
Oddity 1 (solved):
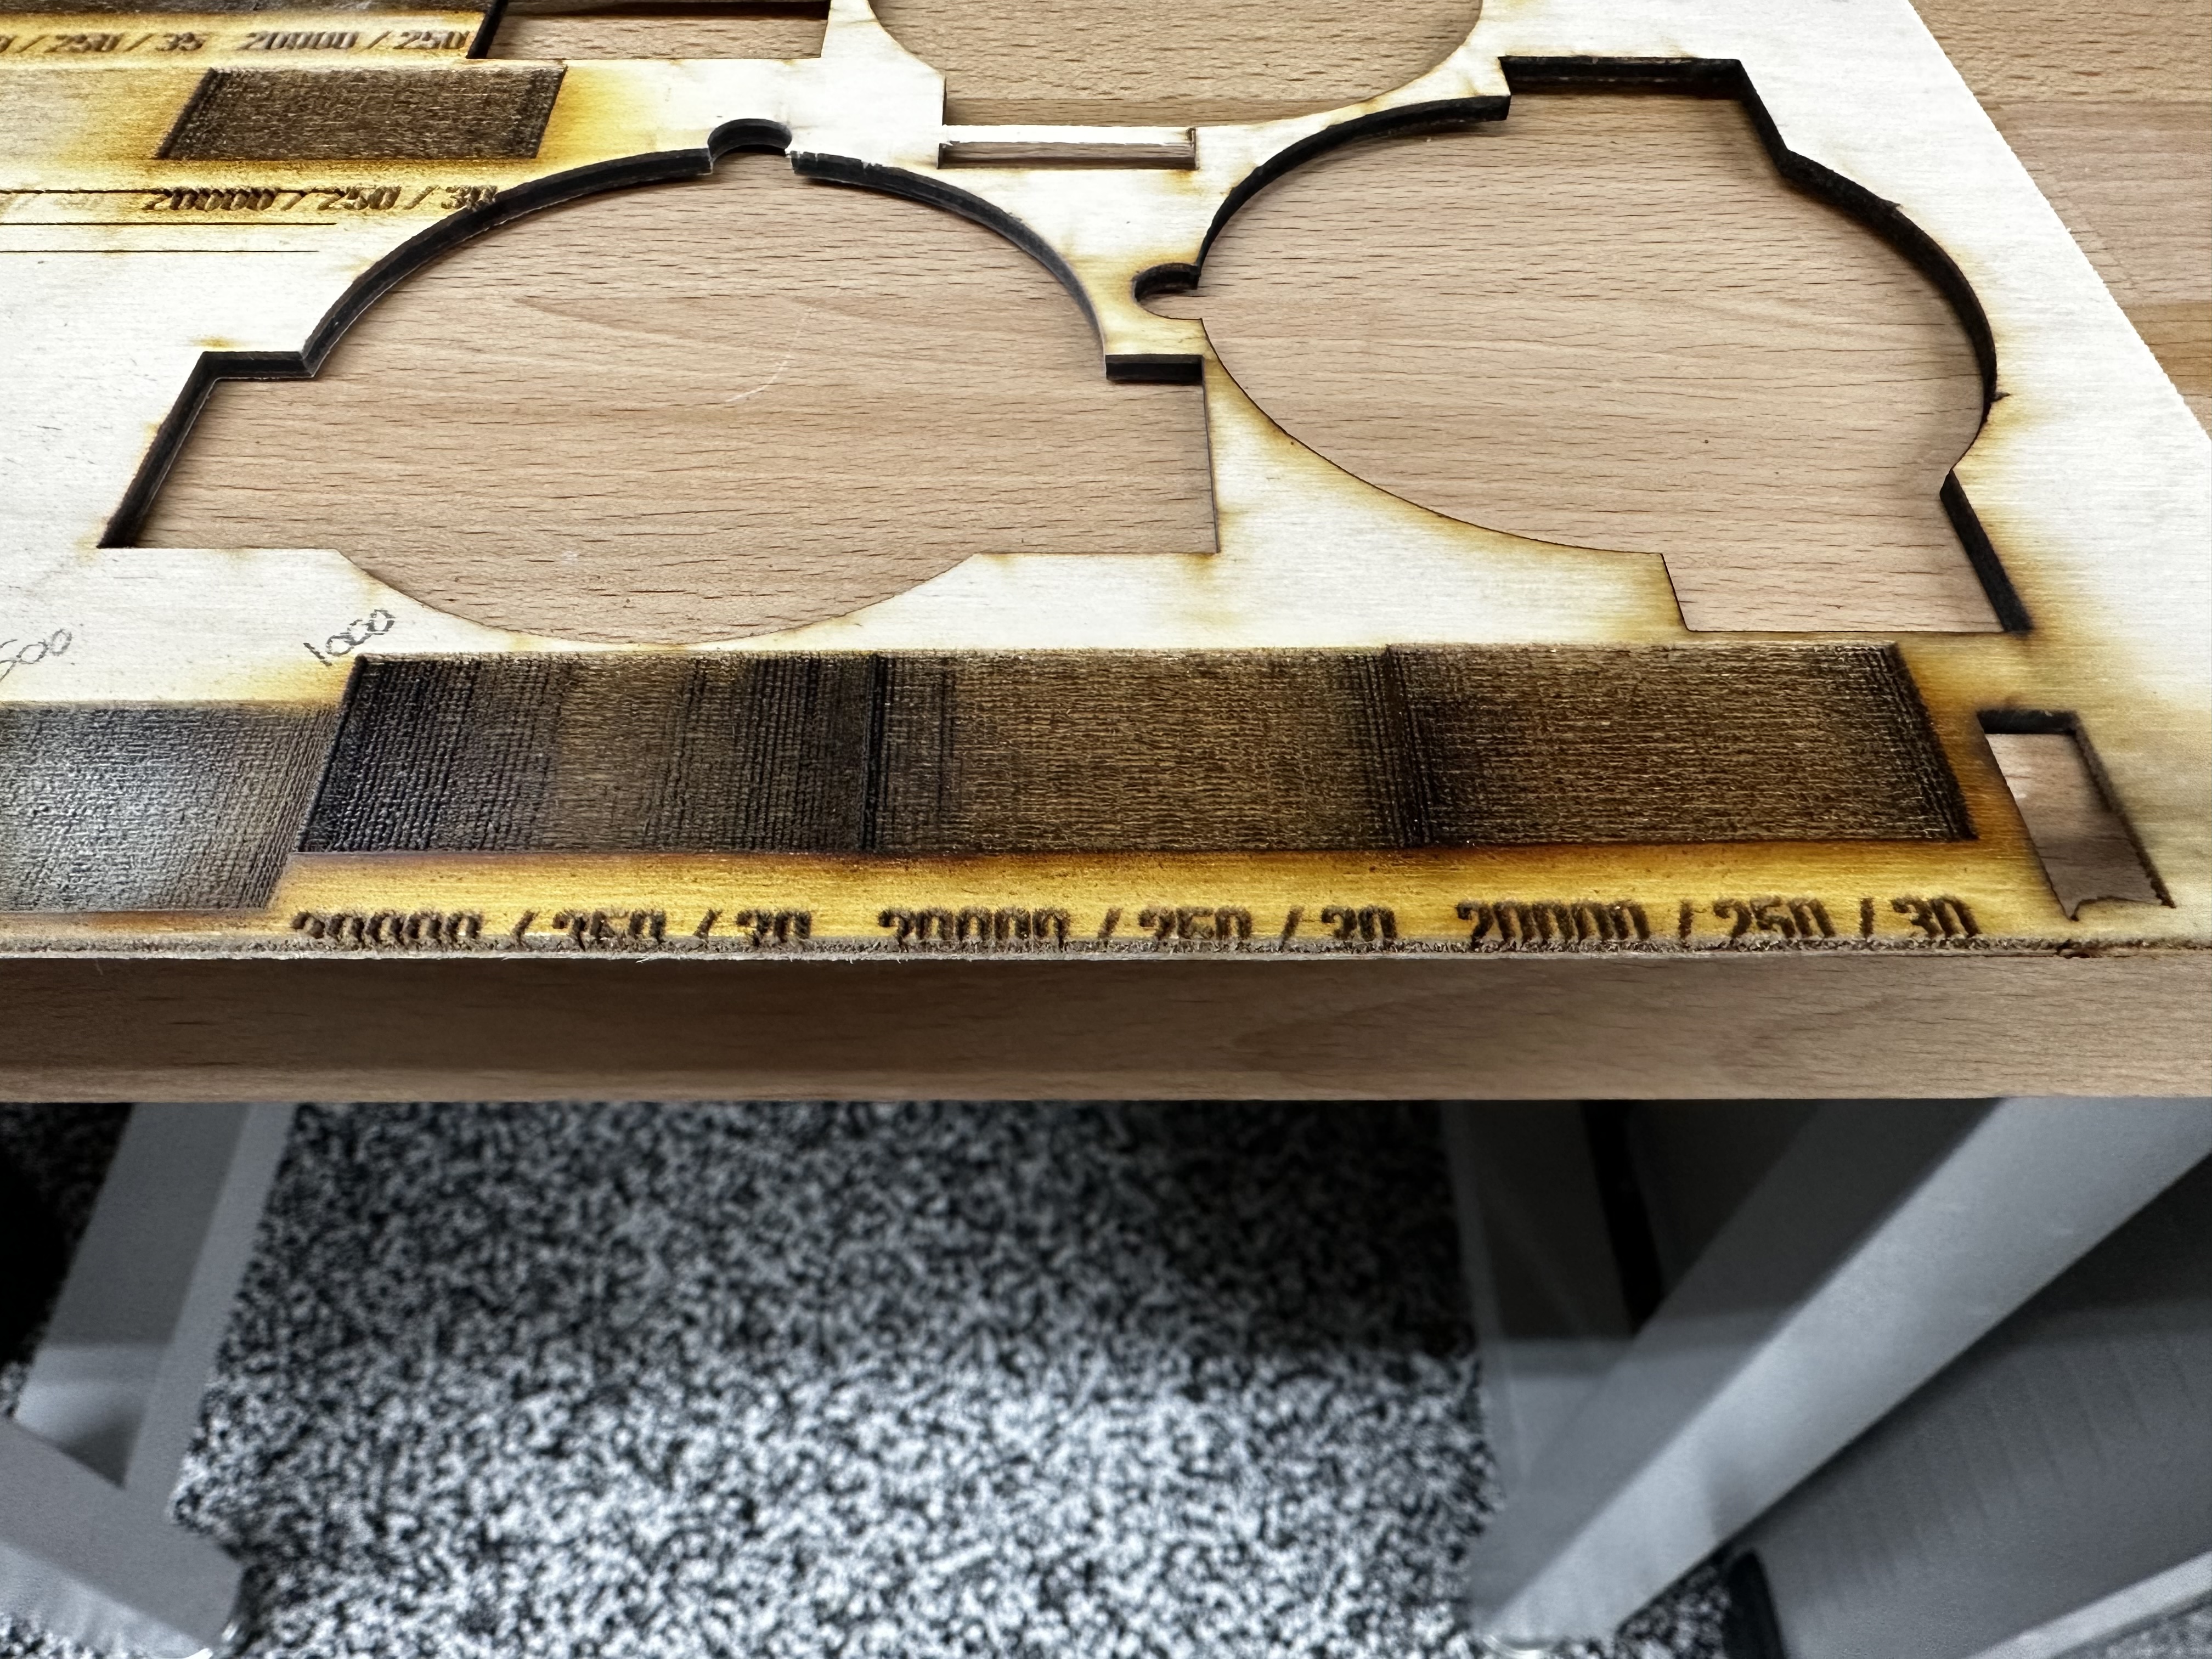
Possible glue trowel marks / weirdness in between layers of plywood:
I have overcome these lines by avoiding burning right in between layers of the plywood.
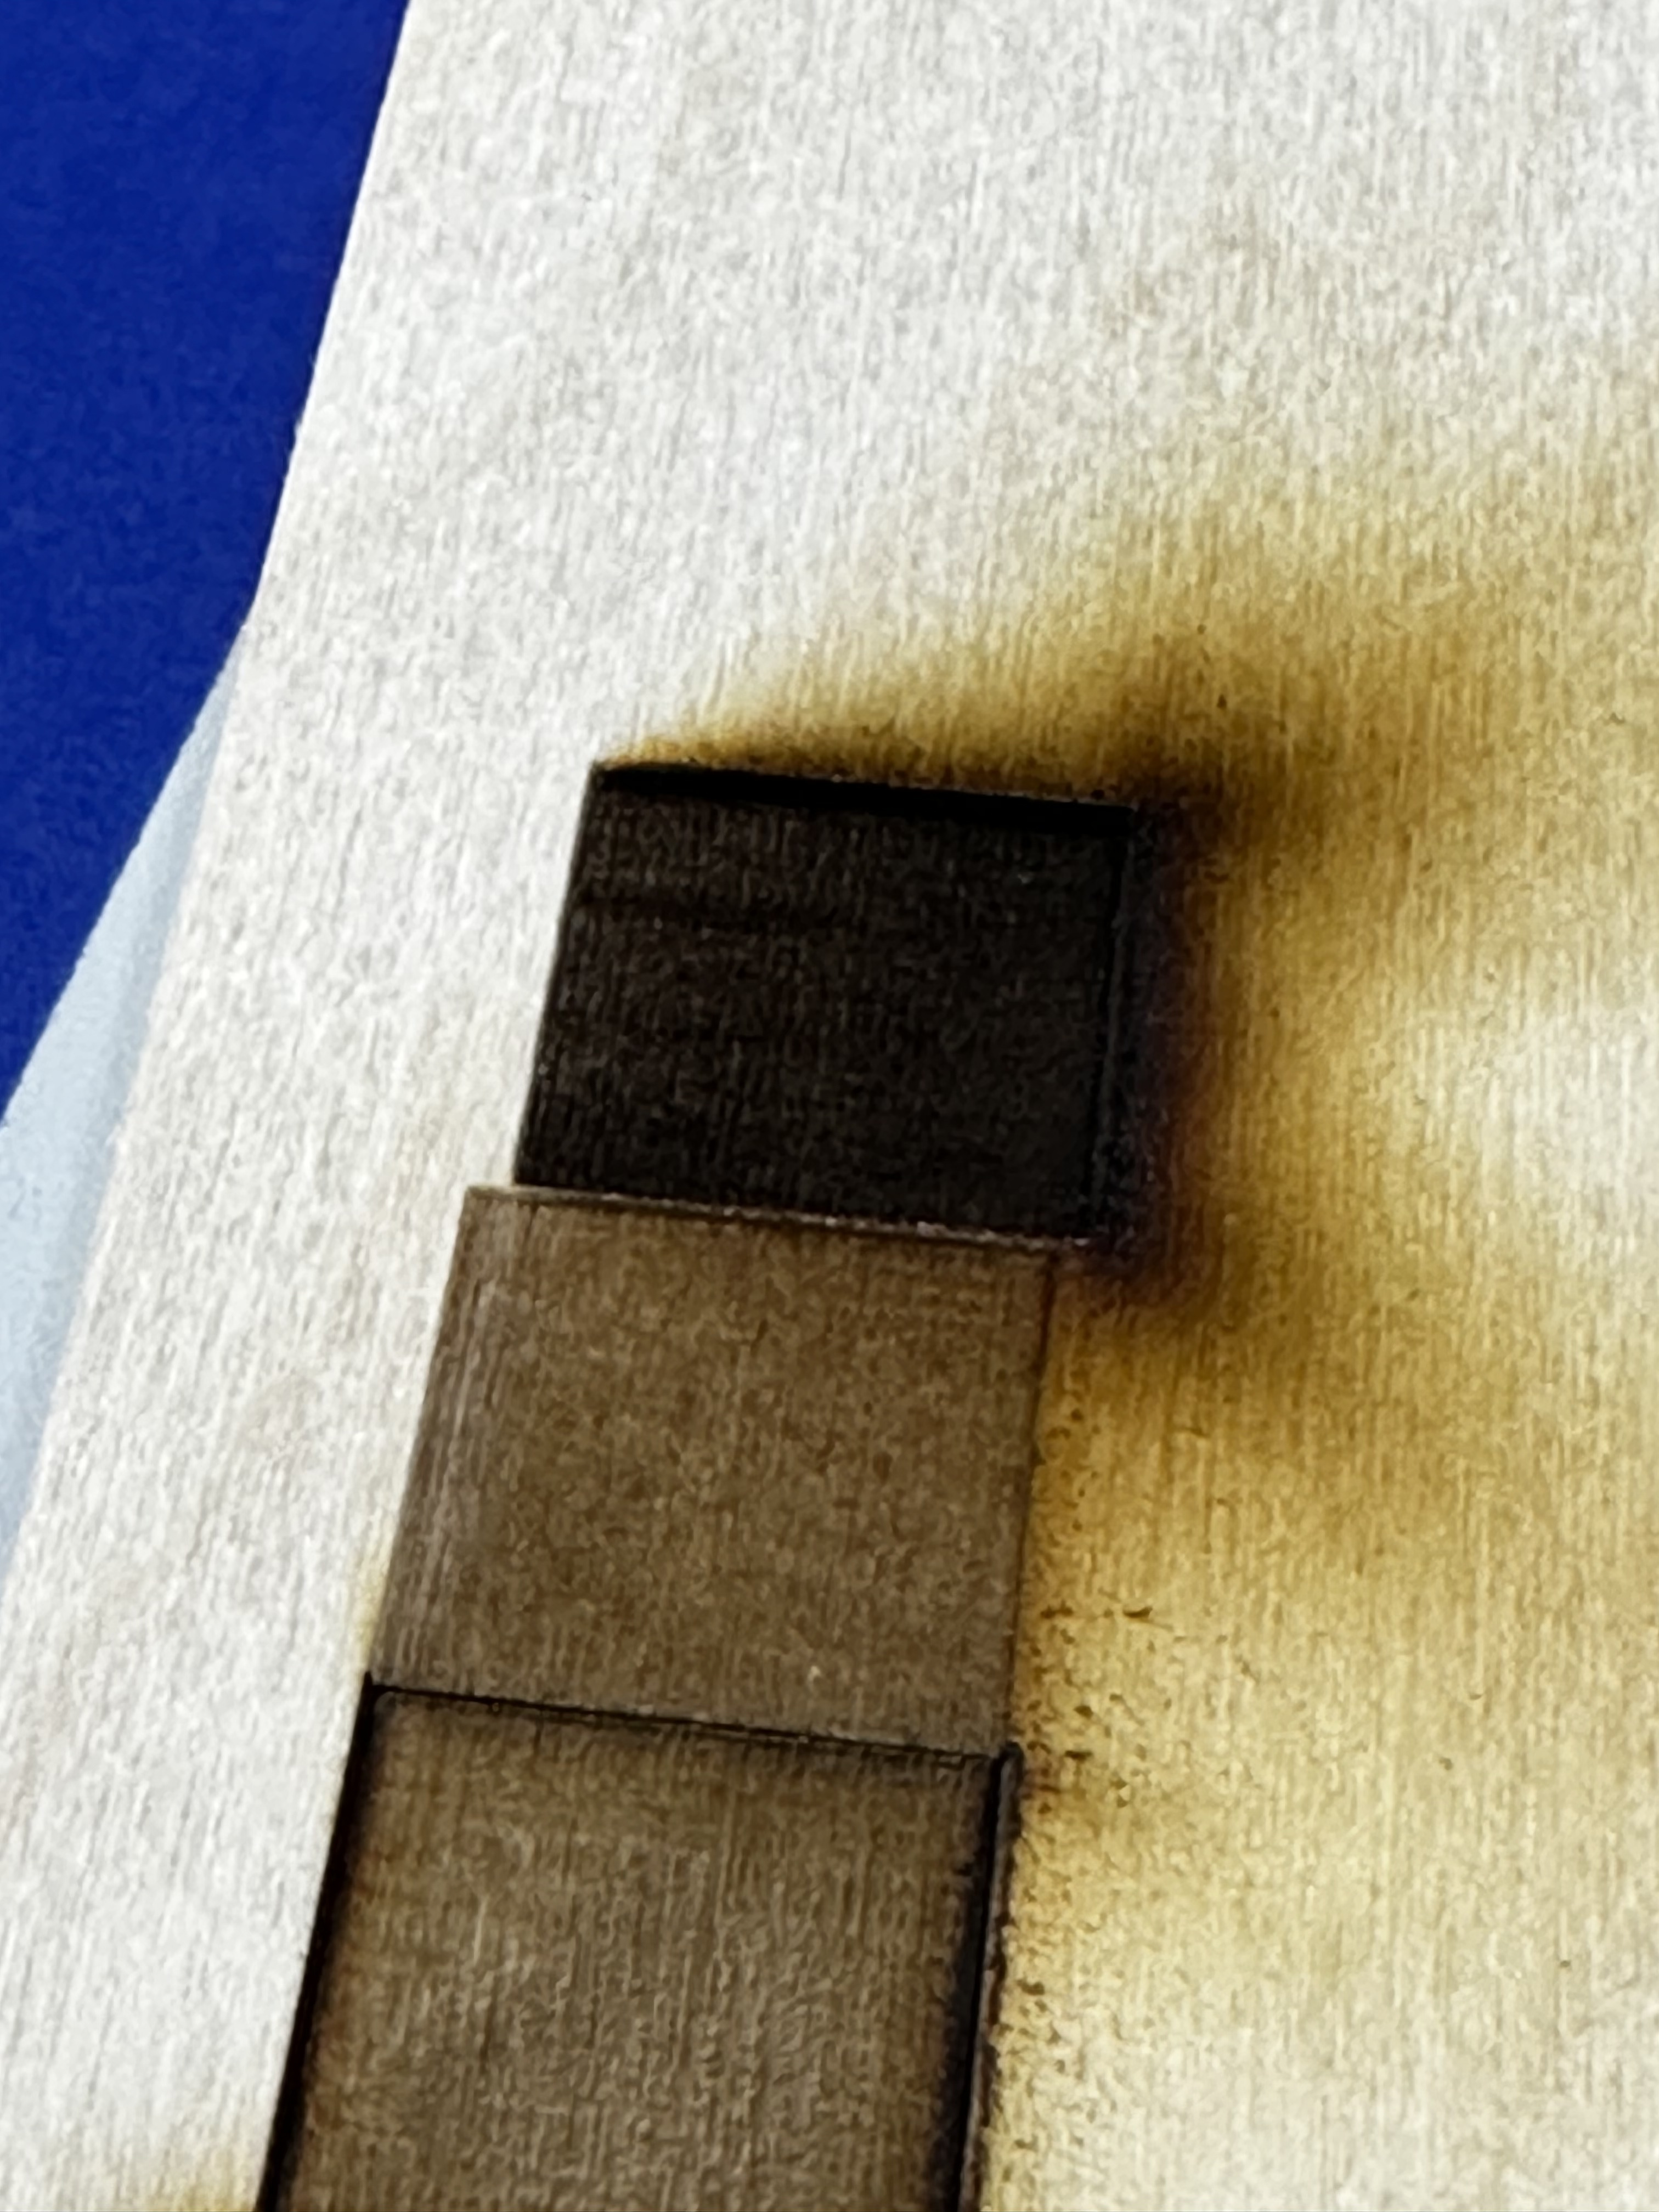
Oddity 2:
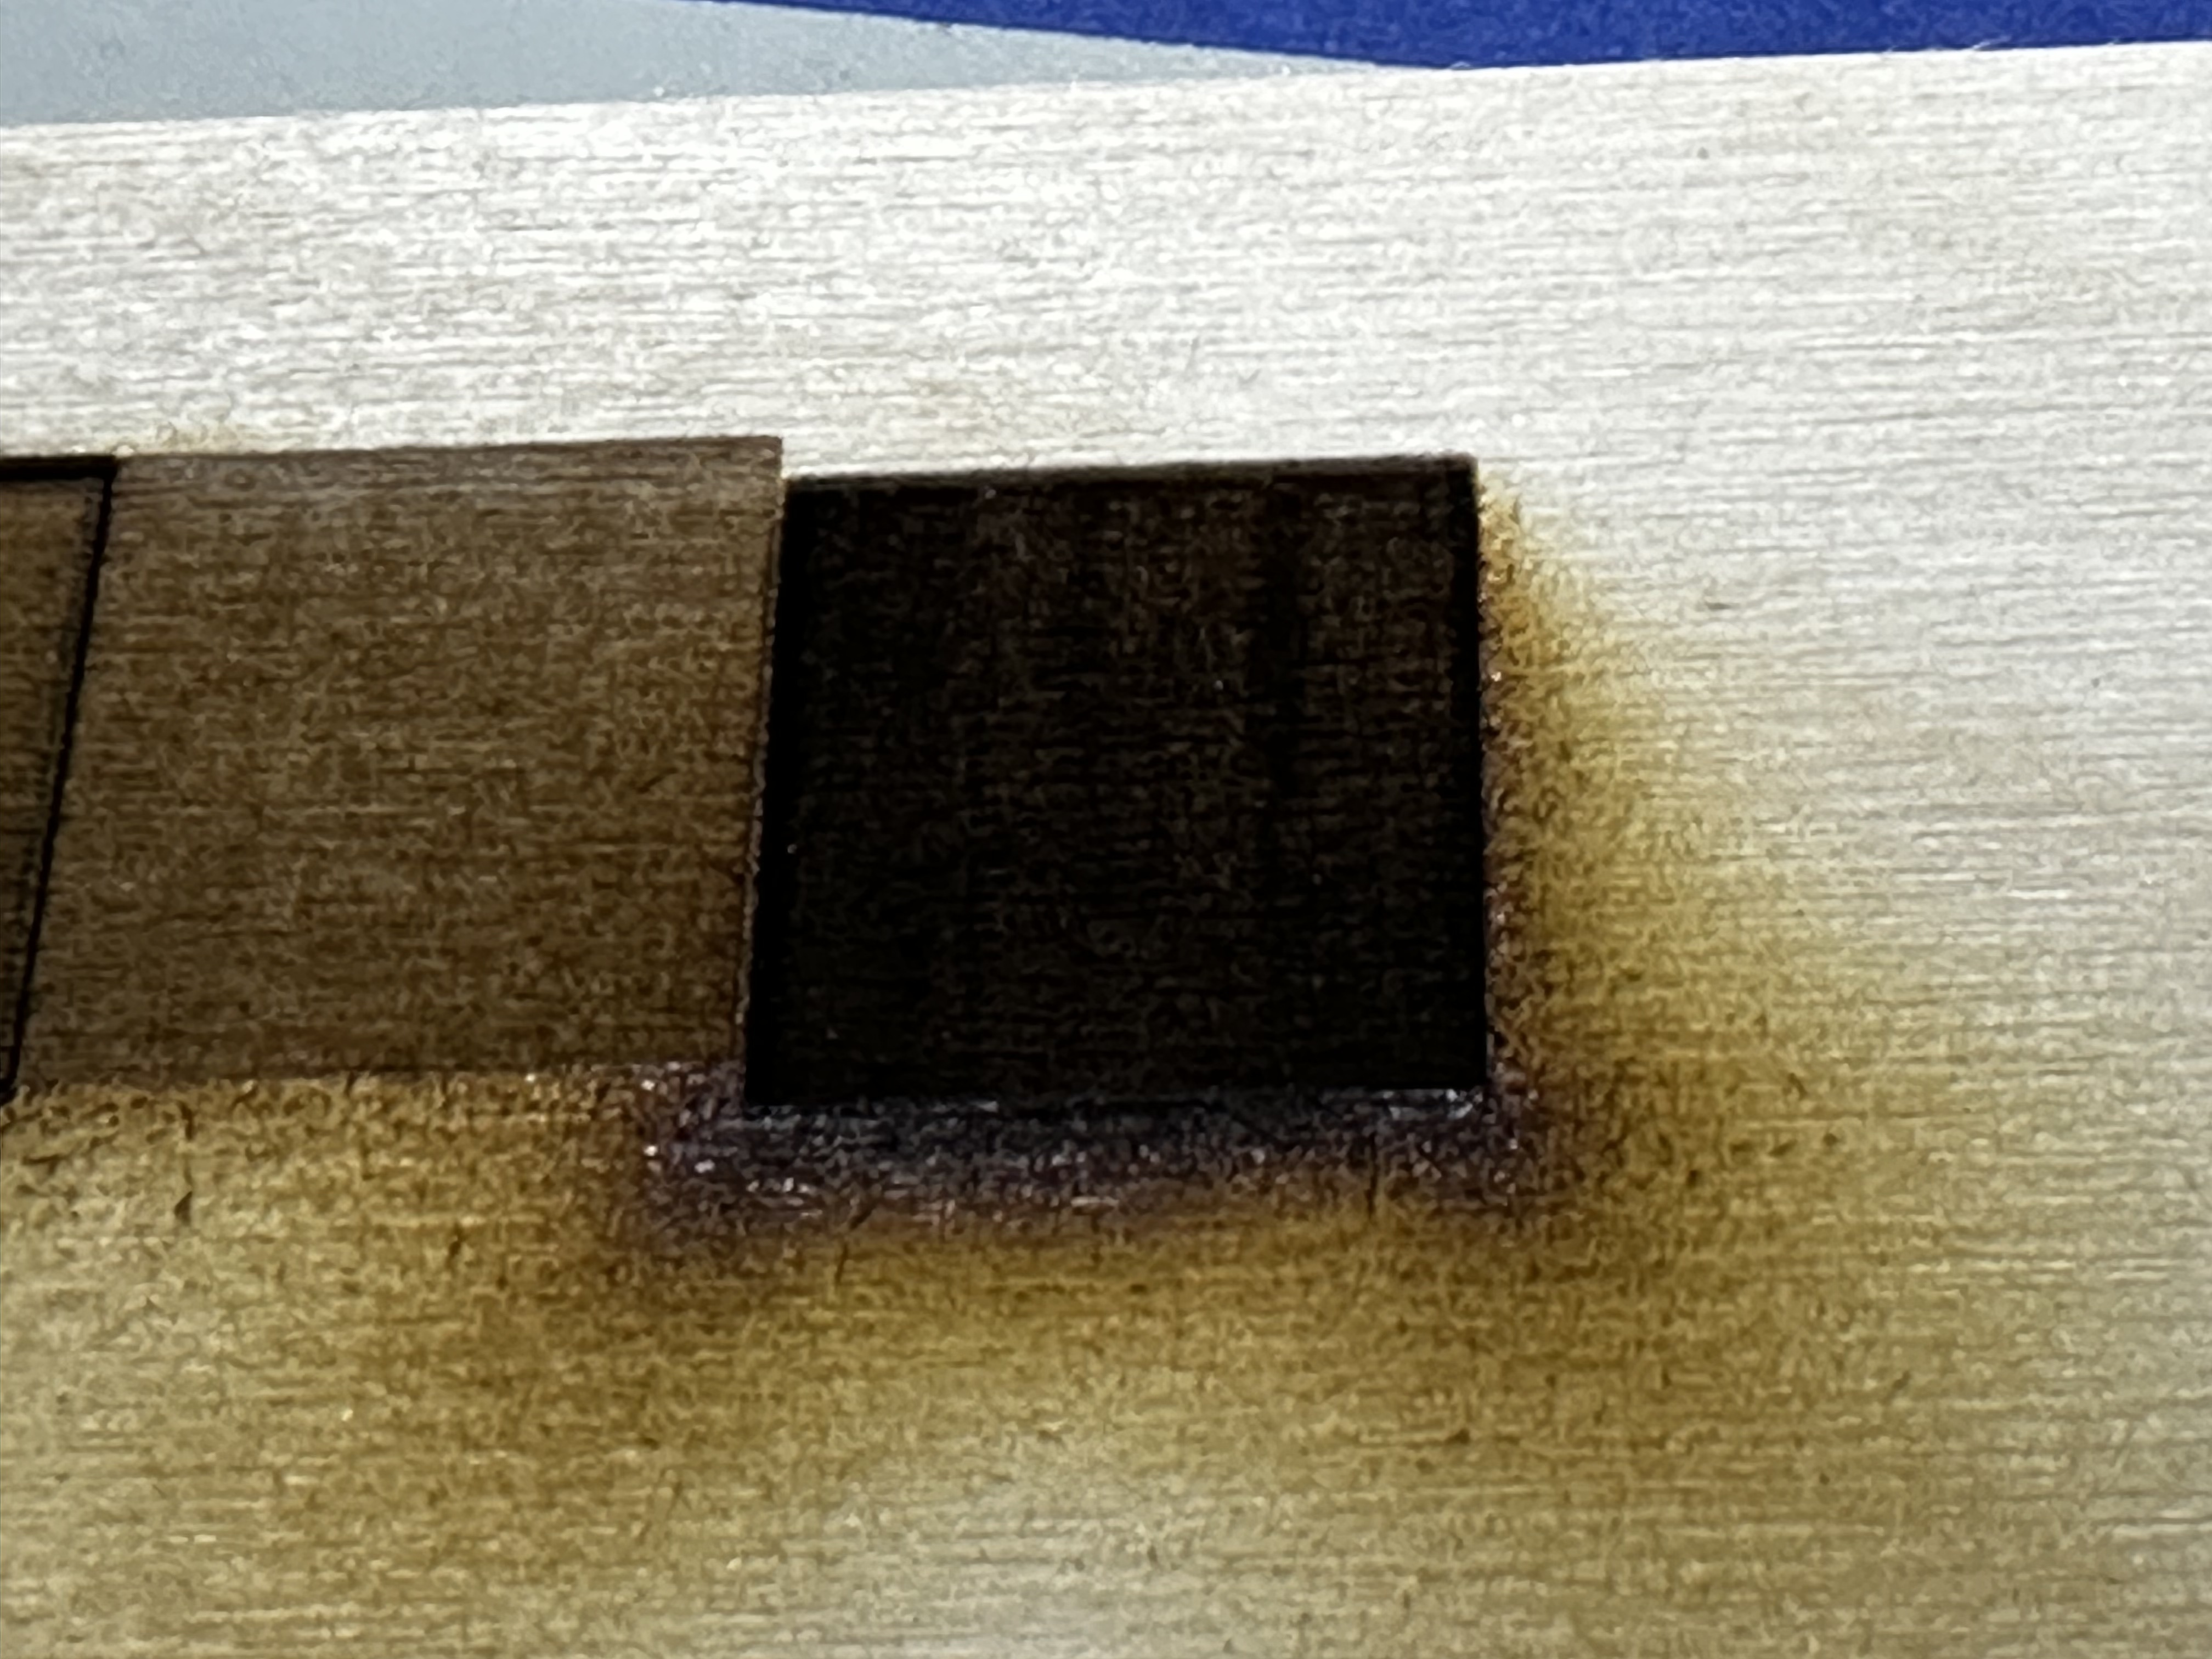
Non linear laser power:
I then did a burn with a very large overscan to see if the burn remained consistent without power level changes:
So the question is, are there any good ideas on how to make the laser power more linear? I know that FluidNC has the speed mapping options, but are there any good ideas about how to find the numbers to set them at? Is there something I can do with the potentiometer that can help here?
Edit: fixed grammar and spelling
Have you seen this plywood supplier for plywood designed for laser cutting? The blog entry linked here is great for understanding.
Wow, they really went through a lot to get to a final solution. Adjusting my laser power has very easily solved the problem of hitting in between where the oddities are.
I just gotta get laser power scaling properly and I think my overall problem will be solved.
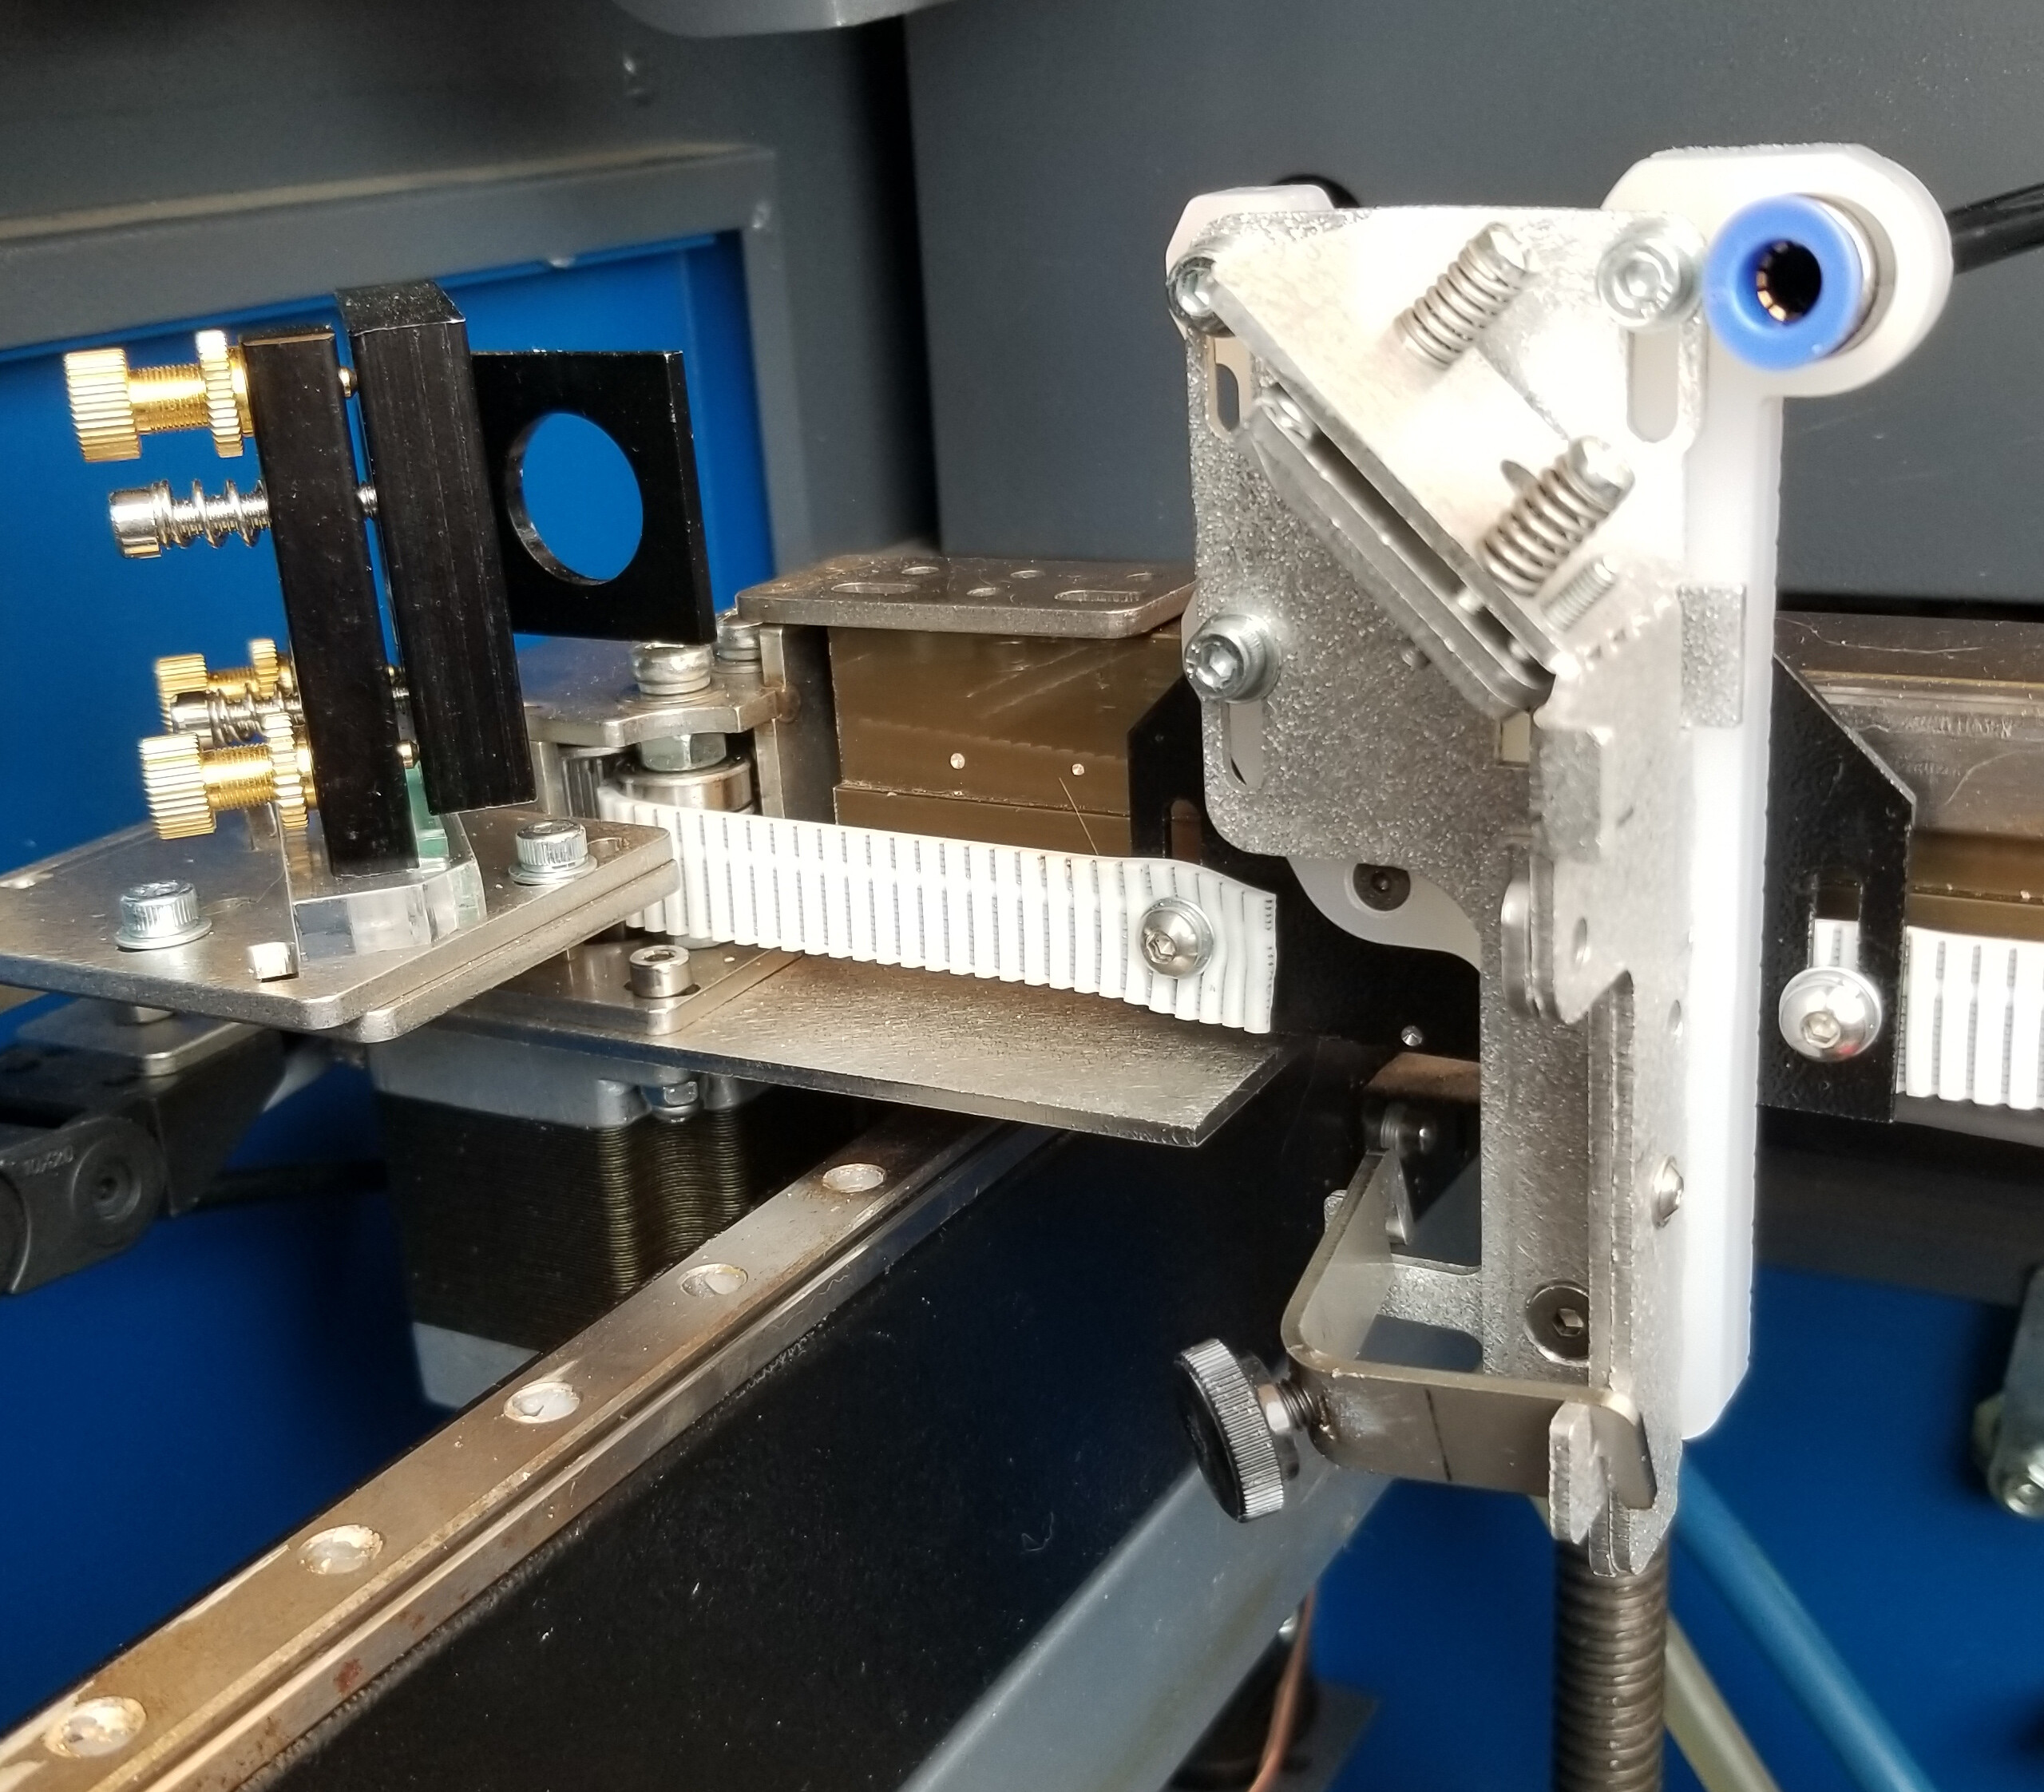
I had this same issue. I installed the ‘rack and pinion’ by Russ and it solved the issue… China Blue 50W
Good luck
![]()
It’s a very long thread but way back near the beginning the OP stated he’d installed the same mechanism but said it didn’t change anything so he removed it and put the machine back to the stock configuration. ![]()
I read that … I would think you’d keep it knowing that it does correct a know problem.
If he has the same issue, then it’s being misdiagnosed or ?
I know on mine, I could lay the belt on the engraving and see they matched perfectly…
Best of luck to him…
![]()
agreed, we spent lots of time on this one too…
In Russ’ videos he mentions three main solutions to this problem that I picked up on:
@dougl Mentioned that my X axis drive pulley in particular had a small diameter. This was the easiest thing for me to try. Which I did, and I saw a pretty big improvement.
I also had vibrations in my bed and plywood layering issues. These three things stacked up against me pretty badly.
I have managed to get the laser power scaling adjusted correctly and am getting some decent burns out of the laser now:
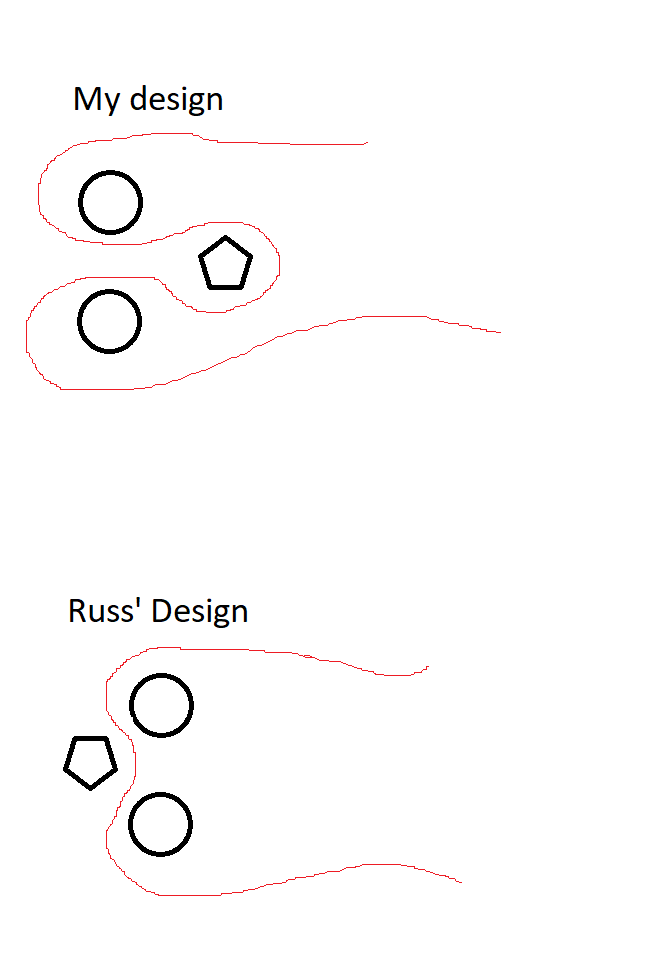
After having watched Russ’ videos a few more times, I noticed my design has a slight but very important design difference. The motor pulley in my design still has the belt wrapping around the pulley versus Russ’ design has the motor pulley pressing against the belt pulley:
Don’t fix what aint’s broke then! ![]()
Glad this is resolved for you! I’m not sure which post you should mark as the solution but maybe that most recent post you just made that summarizes all your changes? That will communicate that you aren’t looking for more diagnosis here. ![]()