Currently I am cutting 3mm MDF at 30% power, 20 mm/s, 3 passes.
I have made test at 40% power:
-10 mm/s 1 pass - brown border
-10 mm/s 2 passes - blackest border
-20 mm/s 2 passes - not as black as 10x2, but darker than 10x1
In this 3 scenarios, the cut is ok (almost identical). The burn (stain?) “outside” the hole is almost identical also. Just change the color of the burned internal border.
Should I stick to 30%, avoid as pest the 40% power? Better more speed?
I don’t use MDF but your cutting speed seems high. For 3mm ply I cut it in a single pass at 10mm/s and about 8mA power.
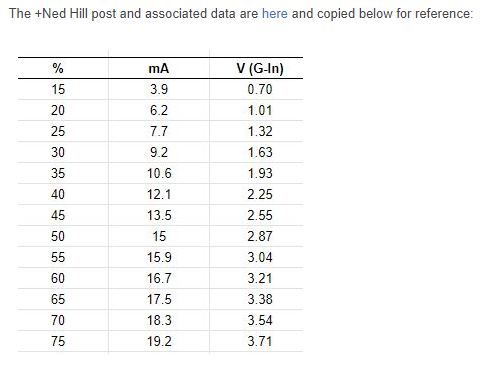
If you haven’t already, you need to at least temporarily hook up a multimeter to the laser and establish your max power relative the %power digital setting. it’s recommended not to exceed ~ 16mA on the tube for the best life time on the tube. You can’t assume 100% is 16mA as most people with digital controls find that 16mA occurs at a much lower (i.e. 50%) %power setting.
The stain you see with cutting and engraving is typical and mostly unavoidable with settings. The only way to avoid it is to use masking or sand off the staining. I always use vinyl lettering transfer tape masking which you can get in a bunch of different widths (I use a 8.5" width) .
I have very positive experiences with MDF and HDF. If it is an ok quality I use the same parameter which also applies to plywood in the same thickness, + approx. 10%.
For 3mm MDF, my parameters are approx. 750 mm / min at 8-10 mA (approx. 35% in LightBurn) For 4mm the power settings are the same but speed is only 650 mm / min. (of course everything only with a single pass)
Without an ammeter you should not work with a CO2 laser, wrong settings will sooner or later ruin your tube.
I have a well-functioning exhaust and am not worried about the remnants of toxic fumes. The surface the laser leaves behind is actually “closed” in a nice way. I like to finish my items with bivogs, it looks great.
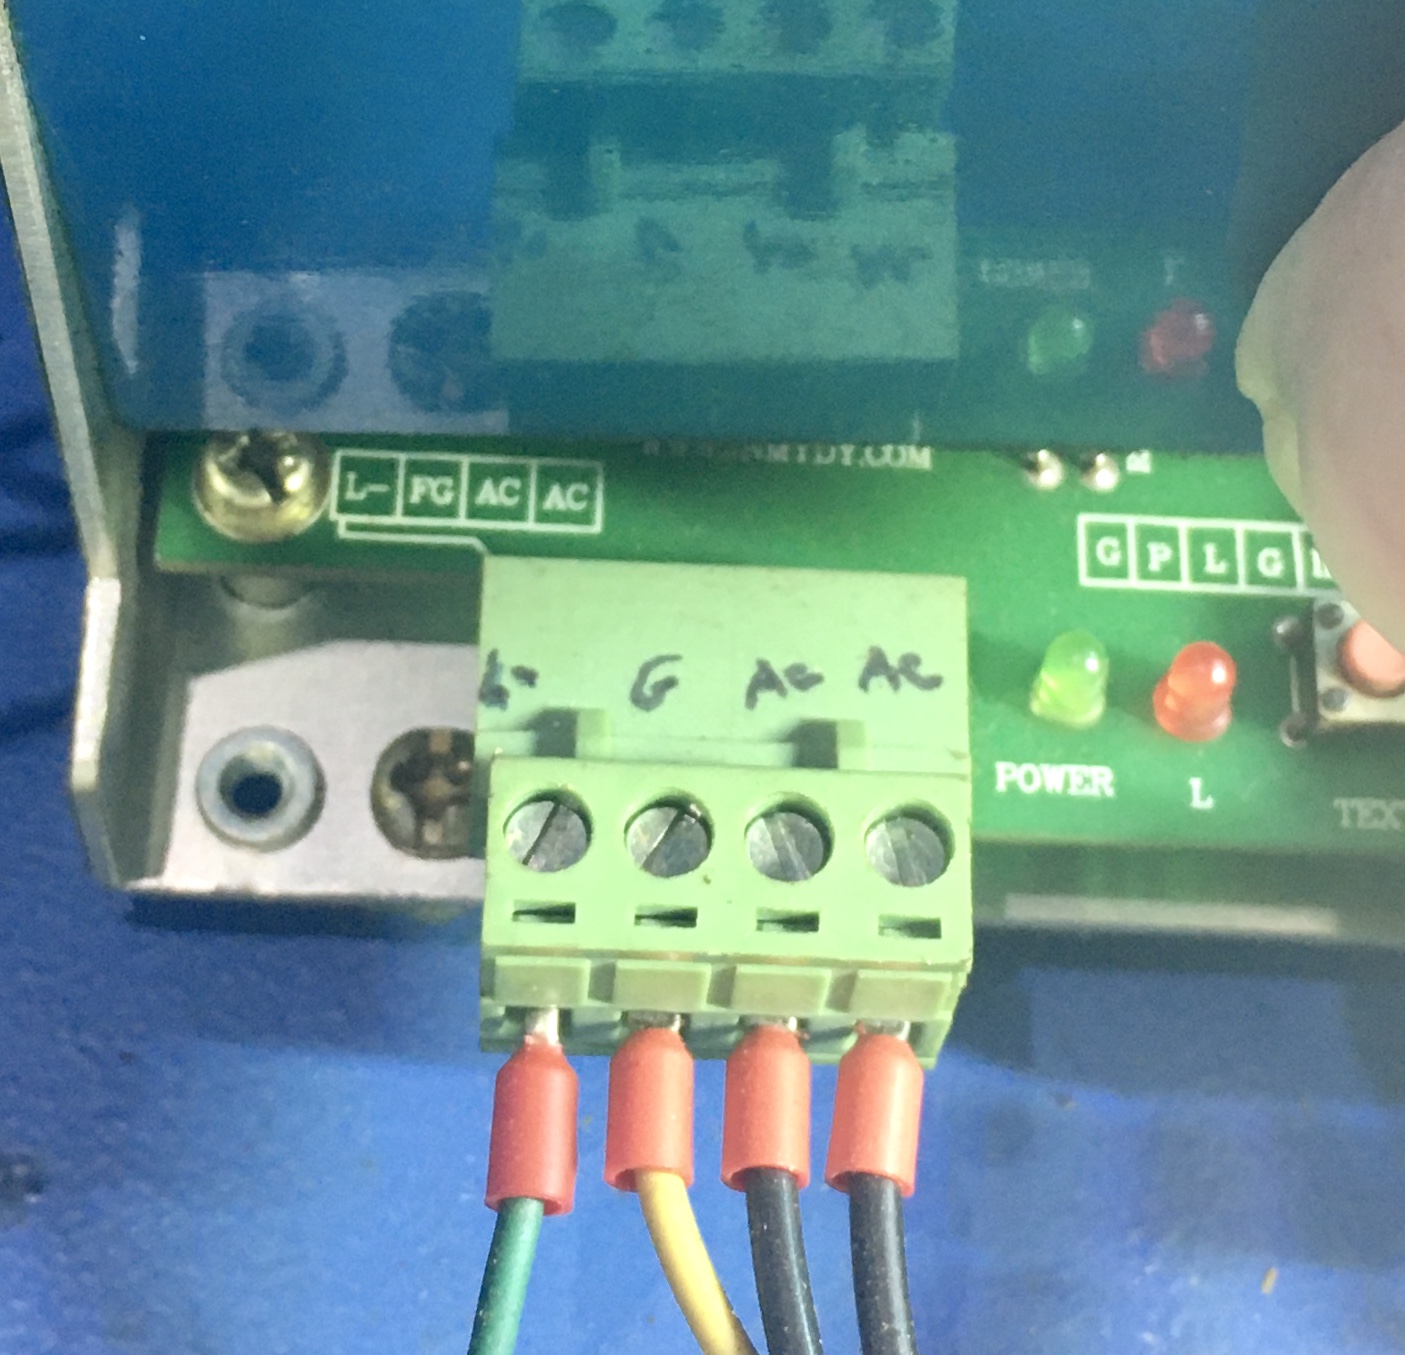
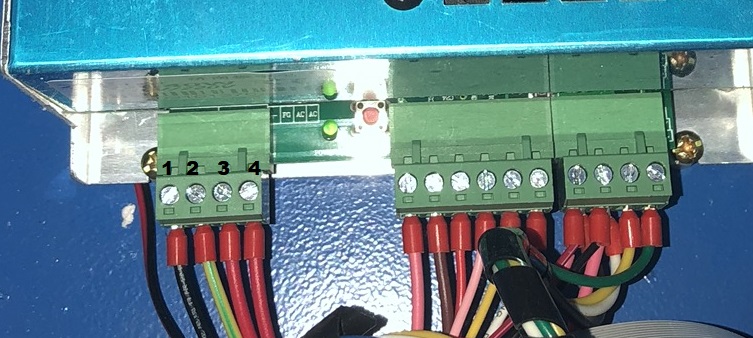
The cathode side of the tube goes to the L- pin on the laser power supply (LPS). Measure the current by hooking the meter in series between the cathode wire and the L- pin. That is, remove the L- wire from LPS and hook one lead of the meter to the wire and the other lead to the L- pin.
Set the % power and hold down the test fire button with the laser on. Record the current.
when someone says “in series” instead of “across” it means the meter has to be connected like a link.
Think of a link of 3 people each holding one hand of the other person creating a series of connections.
To measure in series you have to unlink the chain and make your meter one of the links which makes a chain again.
BUT, for current measurements, the meters often have a different place for the red wire on the meter. It’ll be marked 2A or 10a or something like that and then you need to also put the meter in mA or A setting. And you don’t want to put your fingers on any of the metal connections or even near them so it would not be a good idea to hold with your fingers the connections. The high voltage of the laser tube output can hurt you very much…
You should find a couple of instructions on how to install a mA meter onto a K40 and read them a couple of times. Apply the same safety precautions as you’ll find in those instructions.