I’m new to 3D printing and learned a lot from forums, articles and youtube videos. My printer is a creality K1 (new revision) and I tried to print one of my own models (an easy one, just a cap for the mount of my ikea curtain).
With PLA it was all fine an perfect, but with eSun PETG I ended in some trouble. I tested some calibration and figured out the correct parameters (245°, 115% flow ratio, 75° build plate, reduced cooling ~50%, 3mm retraction distance, 40mm/s retraction speed).
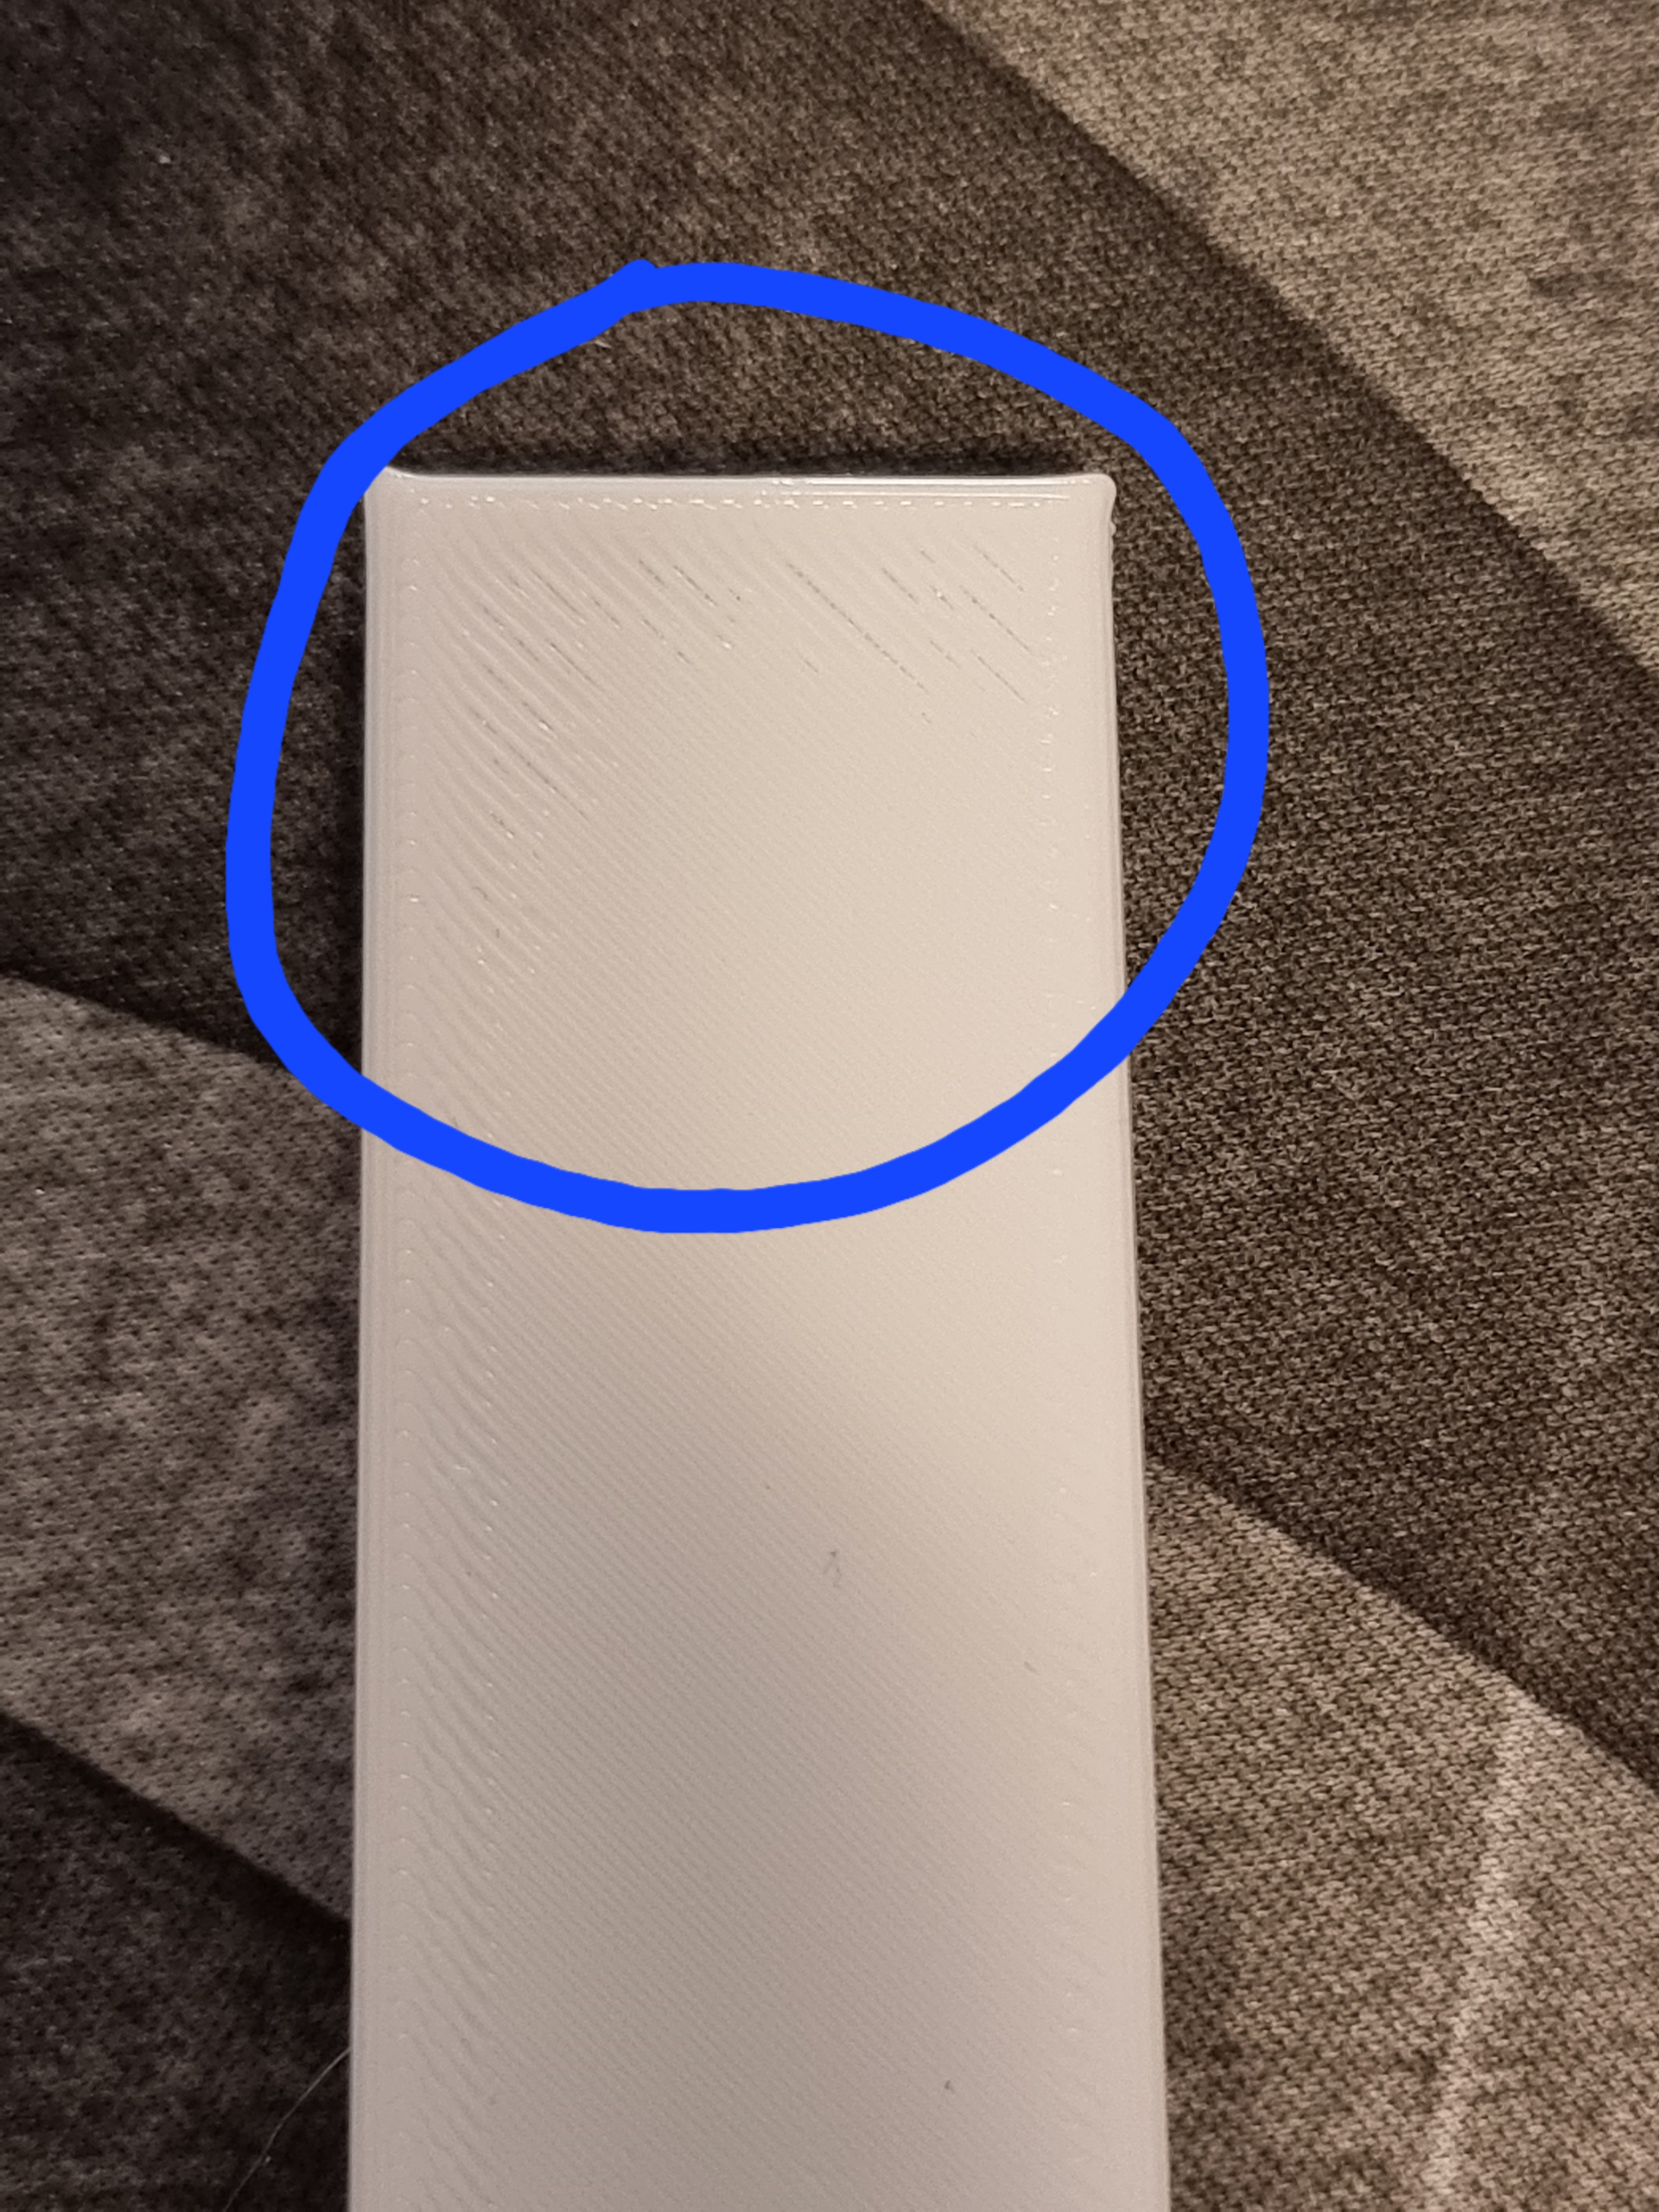
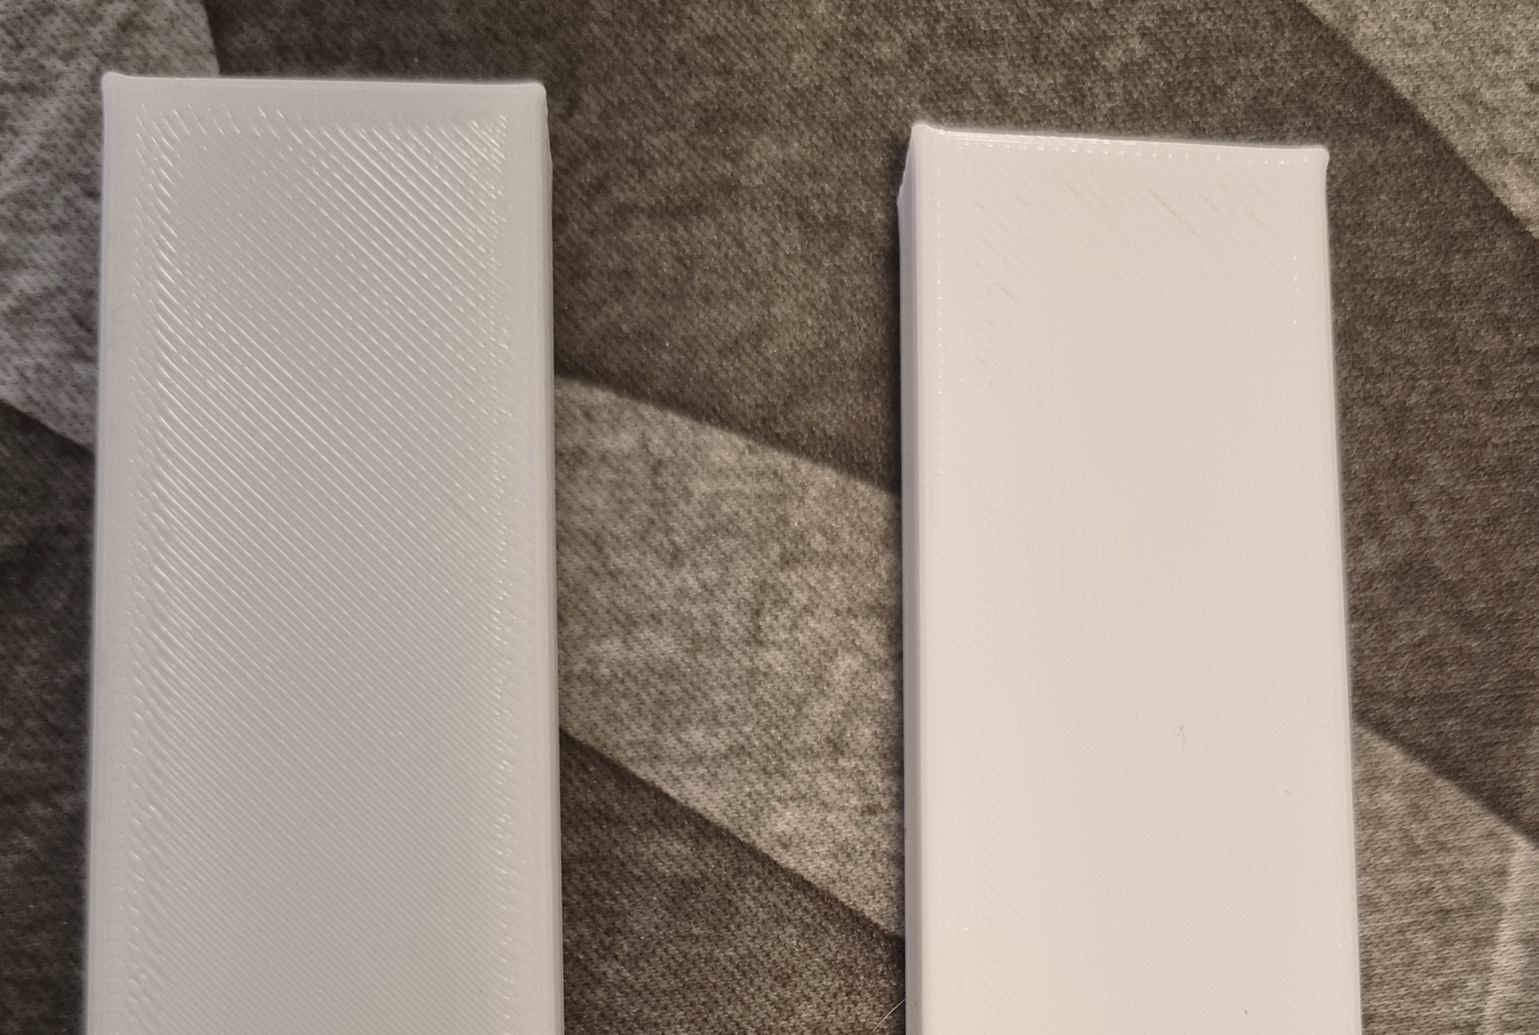
But the first diagonal lines from my top layer always looks “unclosed”. I dont know why. So I put the same model 3times on the plate and just the one in the middle has these strange “unclosed” lines (please take a look on my pictures, I marked what I mean).
Hi Michael, thank you for welcoming me and your answer!
This is a great hint! I googled a little bit around and found some youtube videos about “fixed k1 bed”
Unfortunately the K1 software is a little bit crippled, I’m working on it to get access to all features of the base klipper system.
I will answer until I tested some things in this direction - thank you so much!
Does it give you access to edit the Klipper config? If so, in the [bed_mesh] section you should see probe_count: with two numbers; those are the X and Y axis number of points to probe.
I’m not sure if the config ist fine.
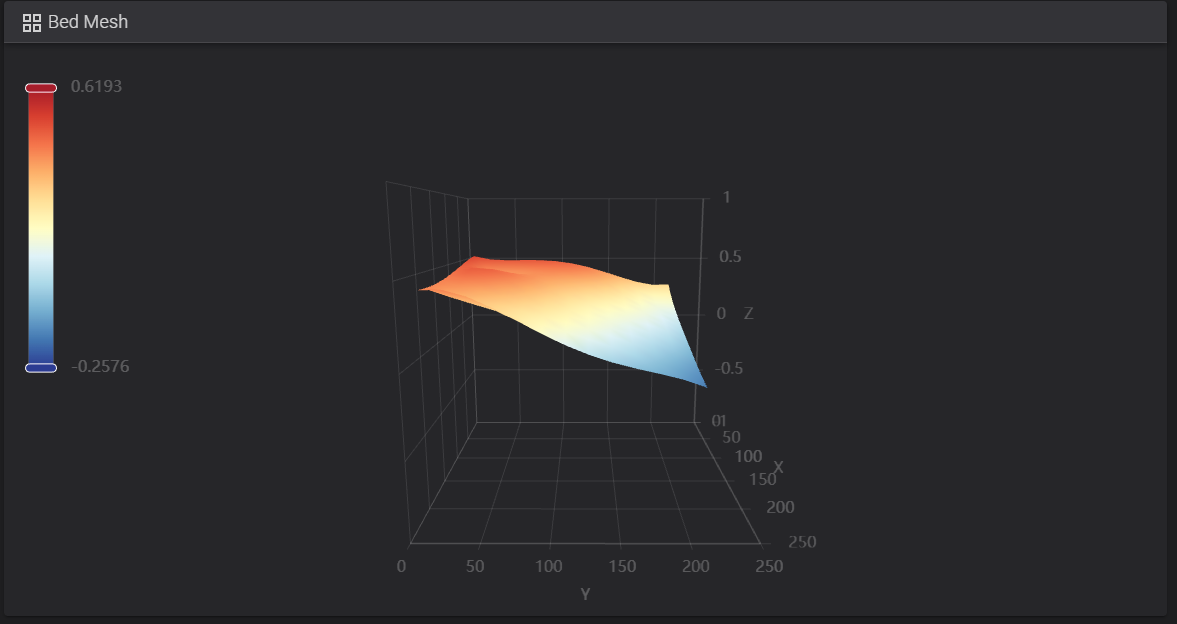
I also opened my printer yesterday and fixed the tension of the three screws in hope to fix the bed level a little bit.
My smaller printer (330x330 bed) uses probe_count: 9,9 and my larger printer (350x350 bed) uses probe_count: 11,11.
If the bed is skewed, it will cause a bit of trapezoidal skew in your printed parts.
The word “level” is misleading, because it can imply that “relative to gravity” is important.
You want the bed to be as close to perpendicular to the Z movements as possible. In machine terms, this is called “tram”. So adjusting your bed so that at least on average it is “level” in the bed mesh view will help make more accurate prints.
In my opinion, a difference of three millimeters is horrible, and whoever is suggesting it is OK must be in the pay of someone with an interest in selling utter junk. 0.3 millimeters is bad but usable with a sufficiently accurate bed mesh, as I see it.
If that picture is after adjusting the screws, it’s worth continuing that process. That looks like it’s not really over 1mm out of flat, just substantially tilted. After it looks “level” (technically, tram) in the bed mesh view, then I’d suggest seeing whether you’ve already solved the problem. It is possible that the skew is contributing to the effect. If not, then I would suggest changing 5,5 to 7,7 or even 9,9 and testing whether it makes any improvement. Make sure to “save and restart” when making that change; it isn’t active until you restart klipper.
Hi Michail thank you for your explanation! Makes sense to me.
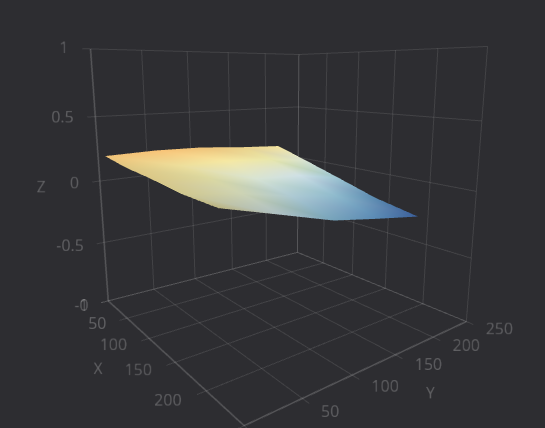
I played a little bit aroudn and opened the printer to manually adjust the the “level”. Now Fluidd shows up a variance of 0.4049. Not sure if it good comparable with others, but it’s better as before.
In germany its quite late, so I will start some test prints later on. Maybe I will also open the printer again to fix the last “mile”.