Changed my VPN to US and it loads 
2 Likes
It occured to me that you could use some combination of ductwork components from the home store.
I use a floor plenum to duct the back of my k40.
3 Likes
thanks for that I will look into doing that.
I do have the new laser installed along with the 3D printed cover. This end of the machine is tucked away in a corner and I work from the opposite end of the machine so will never be within 3 feet of the tube while its operating.
I have had it working briefly this morning, will test a little more later. I installed a mini gerbil board so just figuring out the best way to test fire the laser through light burn to align all of the mirrors (should have done this before I installed the board I guess!)
… said the laser operator that got hit by lightening ![]()
2 Likes
 you just never know do you. “I’ll just reach for that…”
1 Like
Hold my beer and watch this!
1 Like
Thanks for the help 
So, I have everything set up. HV connected with proper HV connector and then wrapped in HV self amalgamating tape.
When cutting, its silent - no noise. When engraving there is an arc / screech sound. Does anyone have any ideas? It happens with every pulse of the laser when engraving but not cutting!
What coolant are you using? If it’s not distilled water replace it.
Can you tell me where the sound is coming from?
Sounds like the LPS HVT.
Did you replace the LPS??
Self-amalgamating tape … ?
Turn out the lights and see if you can see arching anywhere.
Be mindful of the laser beam and HV.
You may have to open covers while it is running.
You may have to take the cover off the LPS.
This stuff - its rated for 35Kv/mm, figures that should do the job. Esp given that its only an extra layer of protection on top of the connector already designed for HV.
I’m using distilled water with some algae prevention in.
No, I haven’t replaced the LPS as yet, it is giving good power and cuts through 3mm ply in a single pass on 50% power. One more observation is that the noise is when its on lower power, on high power (ie the cut) there is no noise at all.
I have some proper laser glasses so will open the cover later to see if there is any arcing. It’s hard to tell where the sound is coming from, I have tried to figure that out but I just can’t tell where it’s source is.
1 Like
How low of a power are you using for engraving?
I went down to 10%
FWIW self-amalgamating tape is typically silicone-based. It’s an easier way to get a consistent thickness of silicone than liquid silicone caulk. Smart move by @renegadeltd
1 Like
At low powers the LPS may make crackling noises in normal operations.
This would be currents in the range of 4-10ma.
1 Like
I’d imagine that’s what it is then, I have an ammeter coming so can take a look once installed
3 Likes
Does anyone happen to have pictures of the connectors (on the board) as I have a feeling an issue I am having with homing is to do with one of the connectors on this. I had a wire which was dangling and an empty connection slot; assumed the two went together but now not so sure.
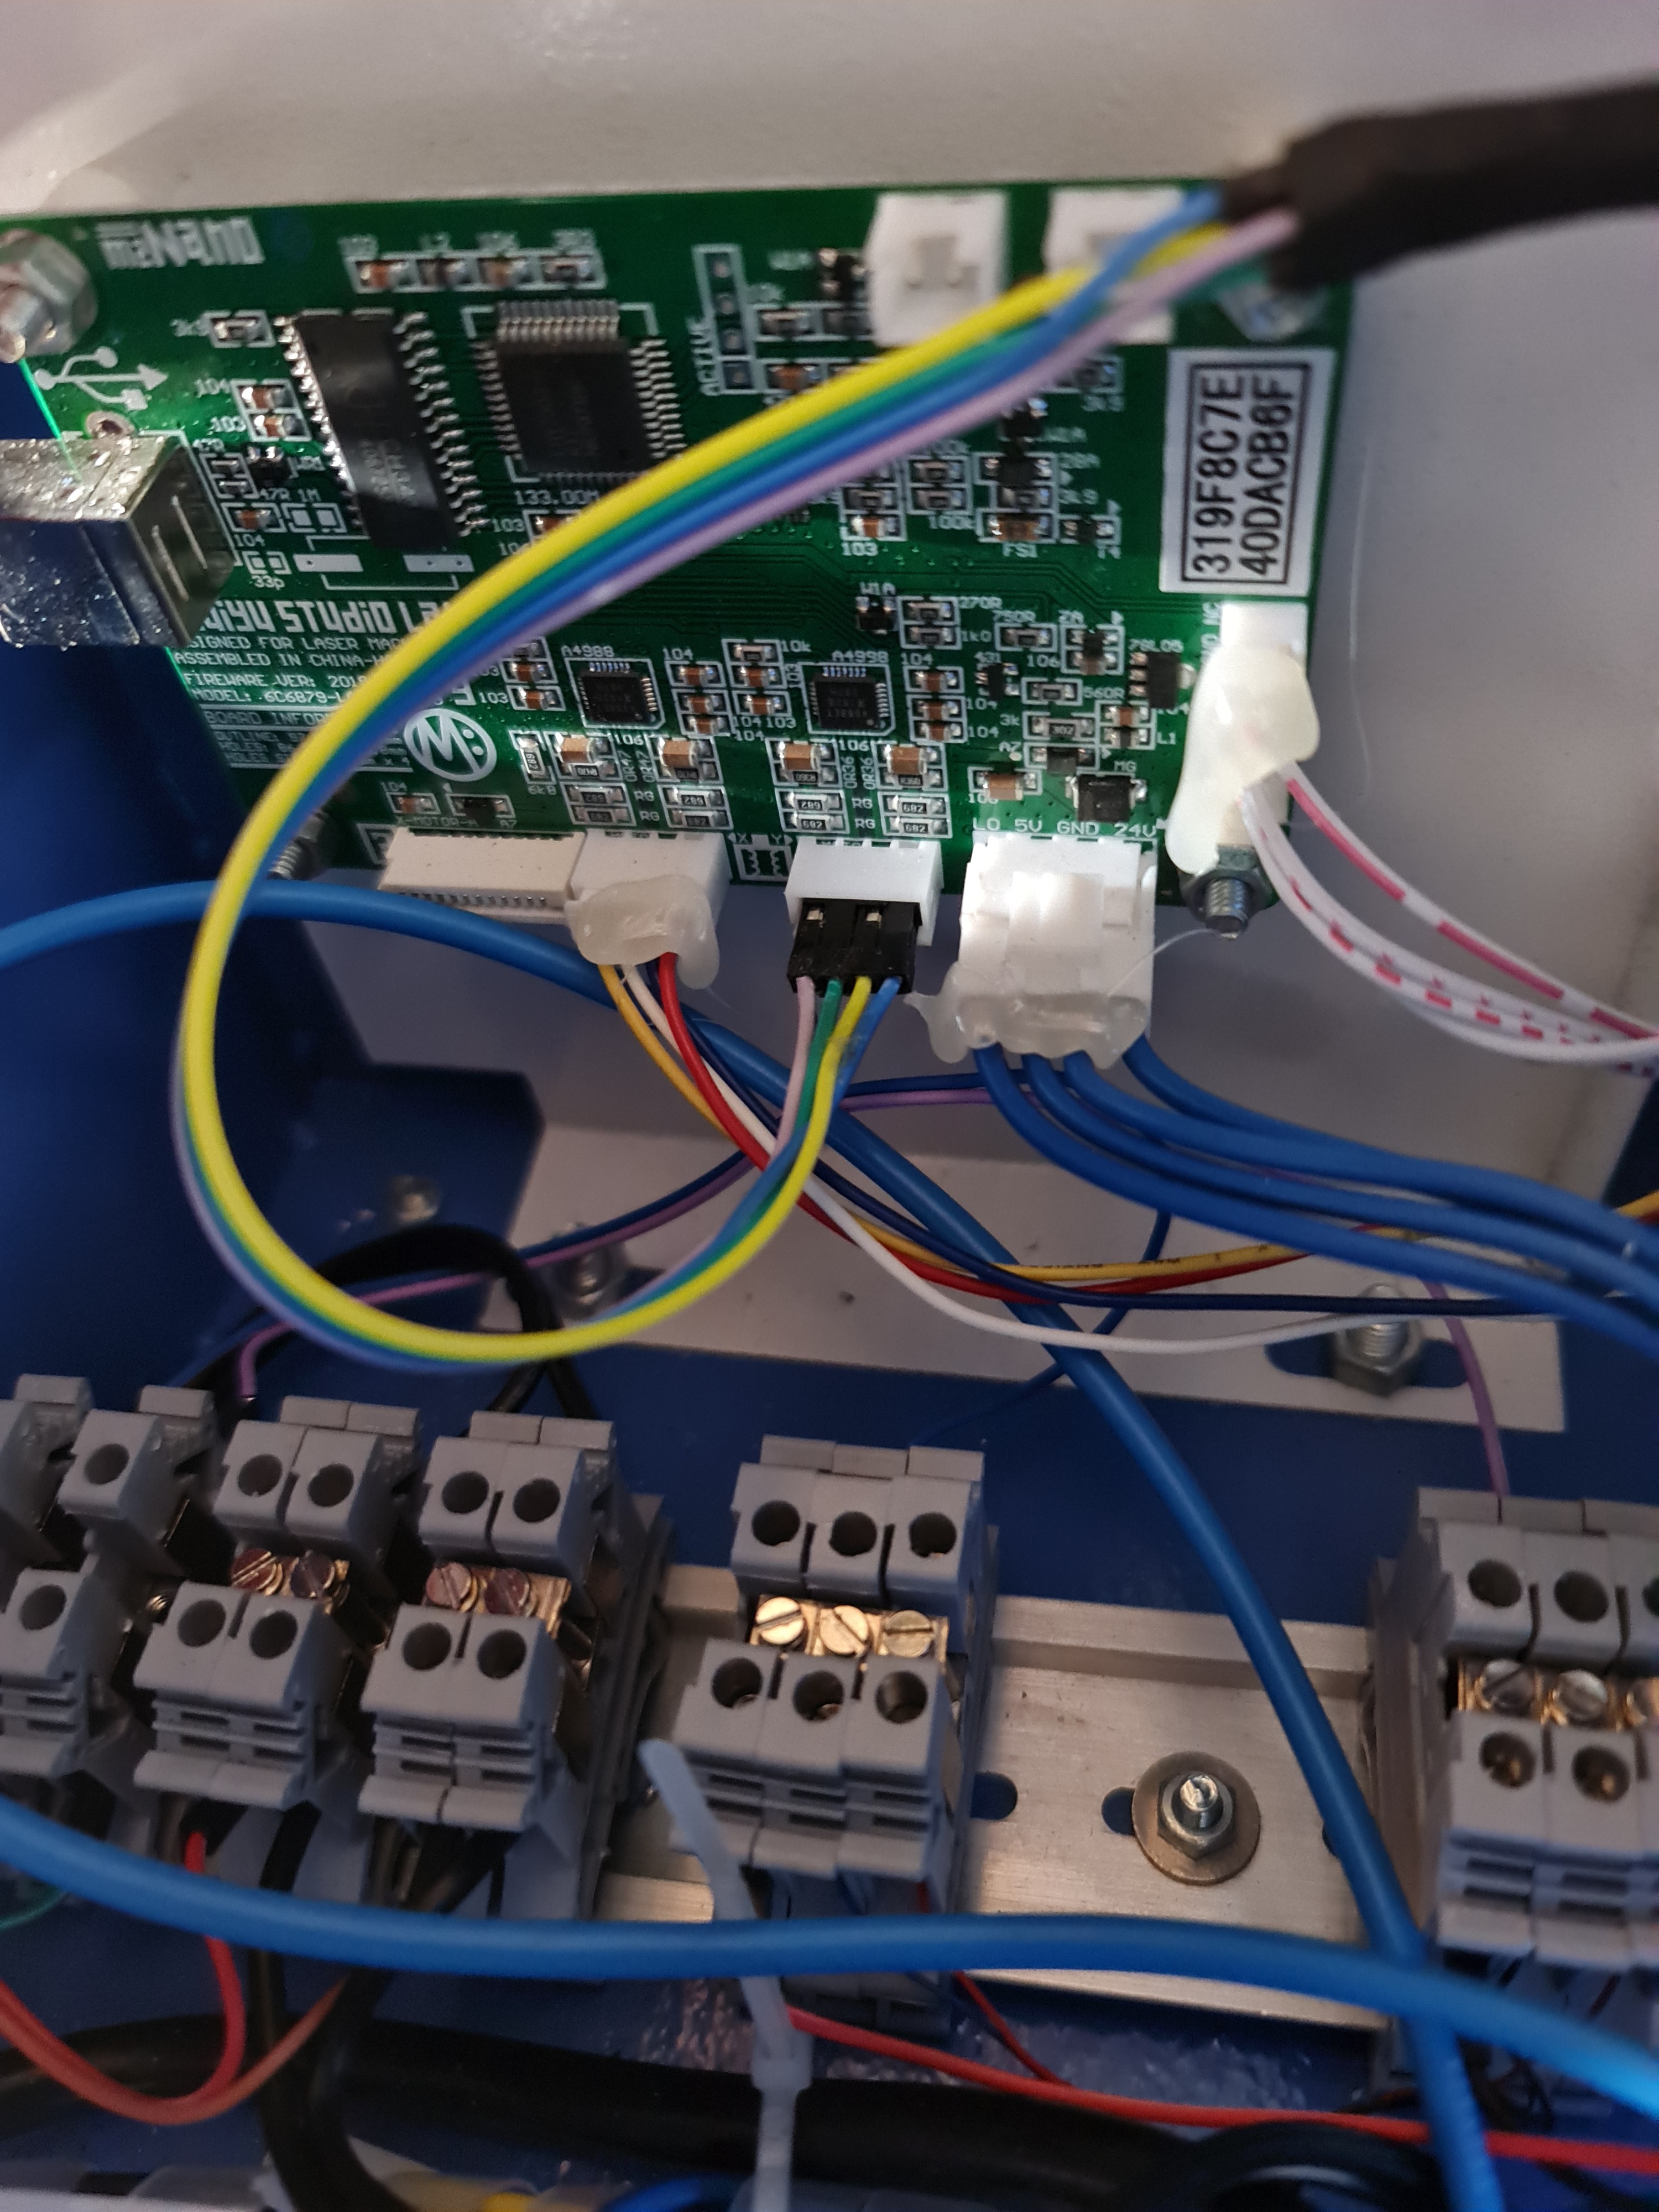
thank you for the picture. The cable block I am referencing is the one on the right - which I believe controls the limit switches.
There are two wires which go into 1 connection and I had one wire out of the block and an empty slot in the right hand GRND slot so I put it in there. Just wondered what the normal set up for that connector is as I think it has a direct impact on my issue
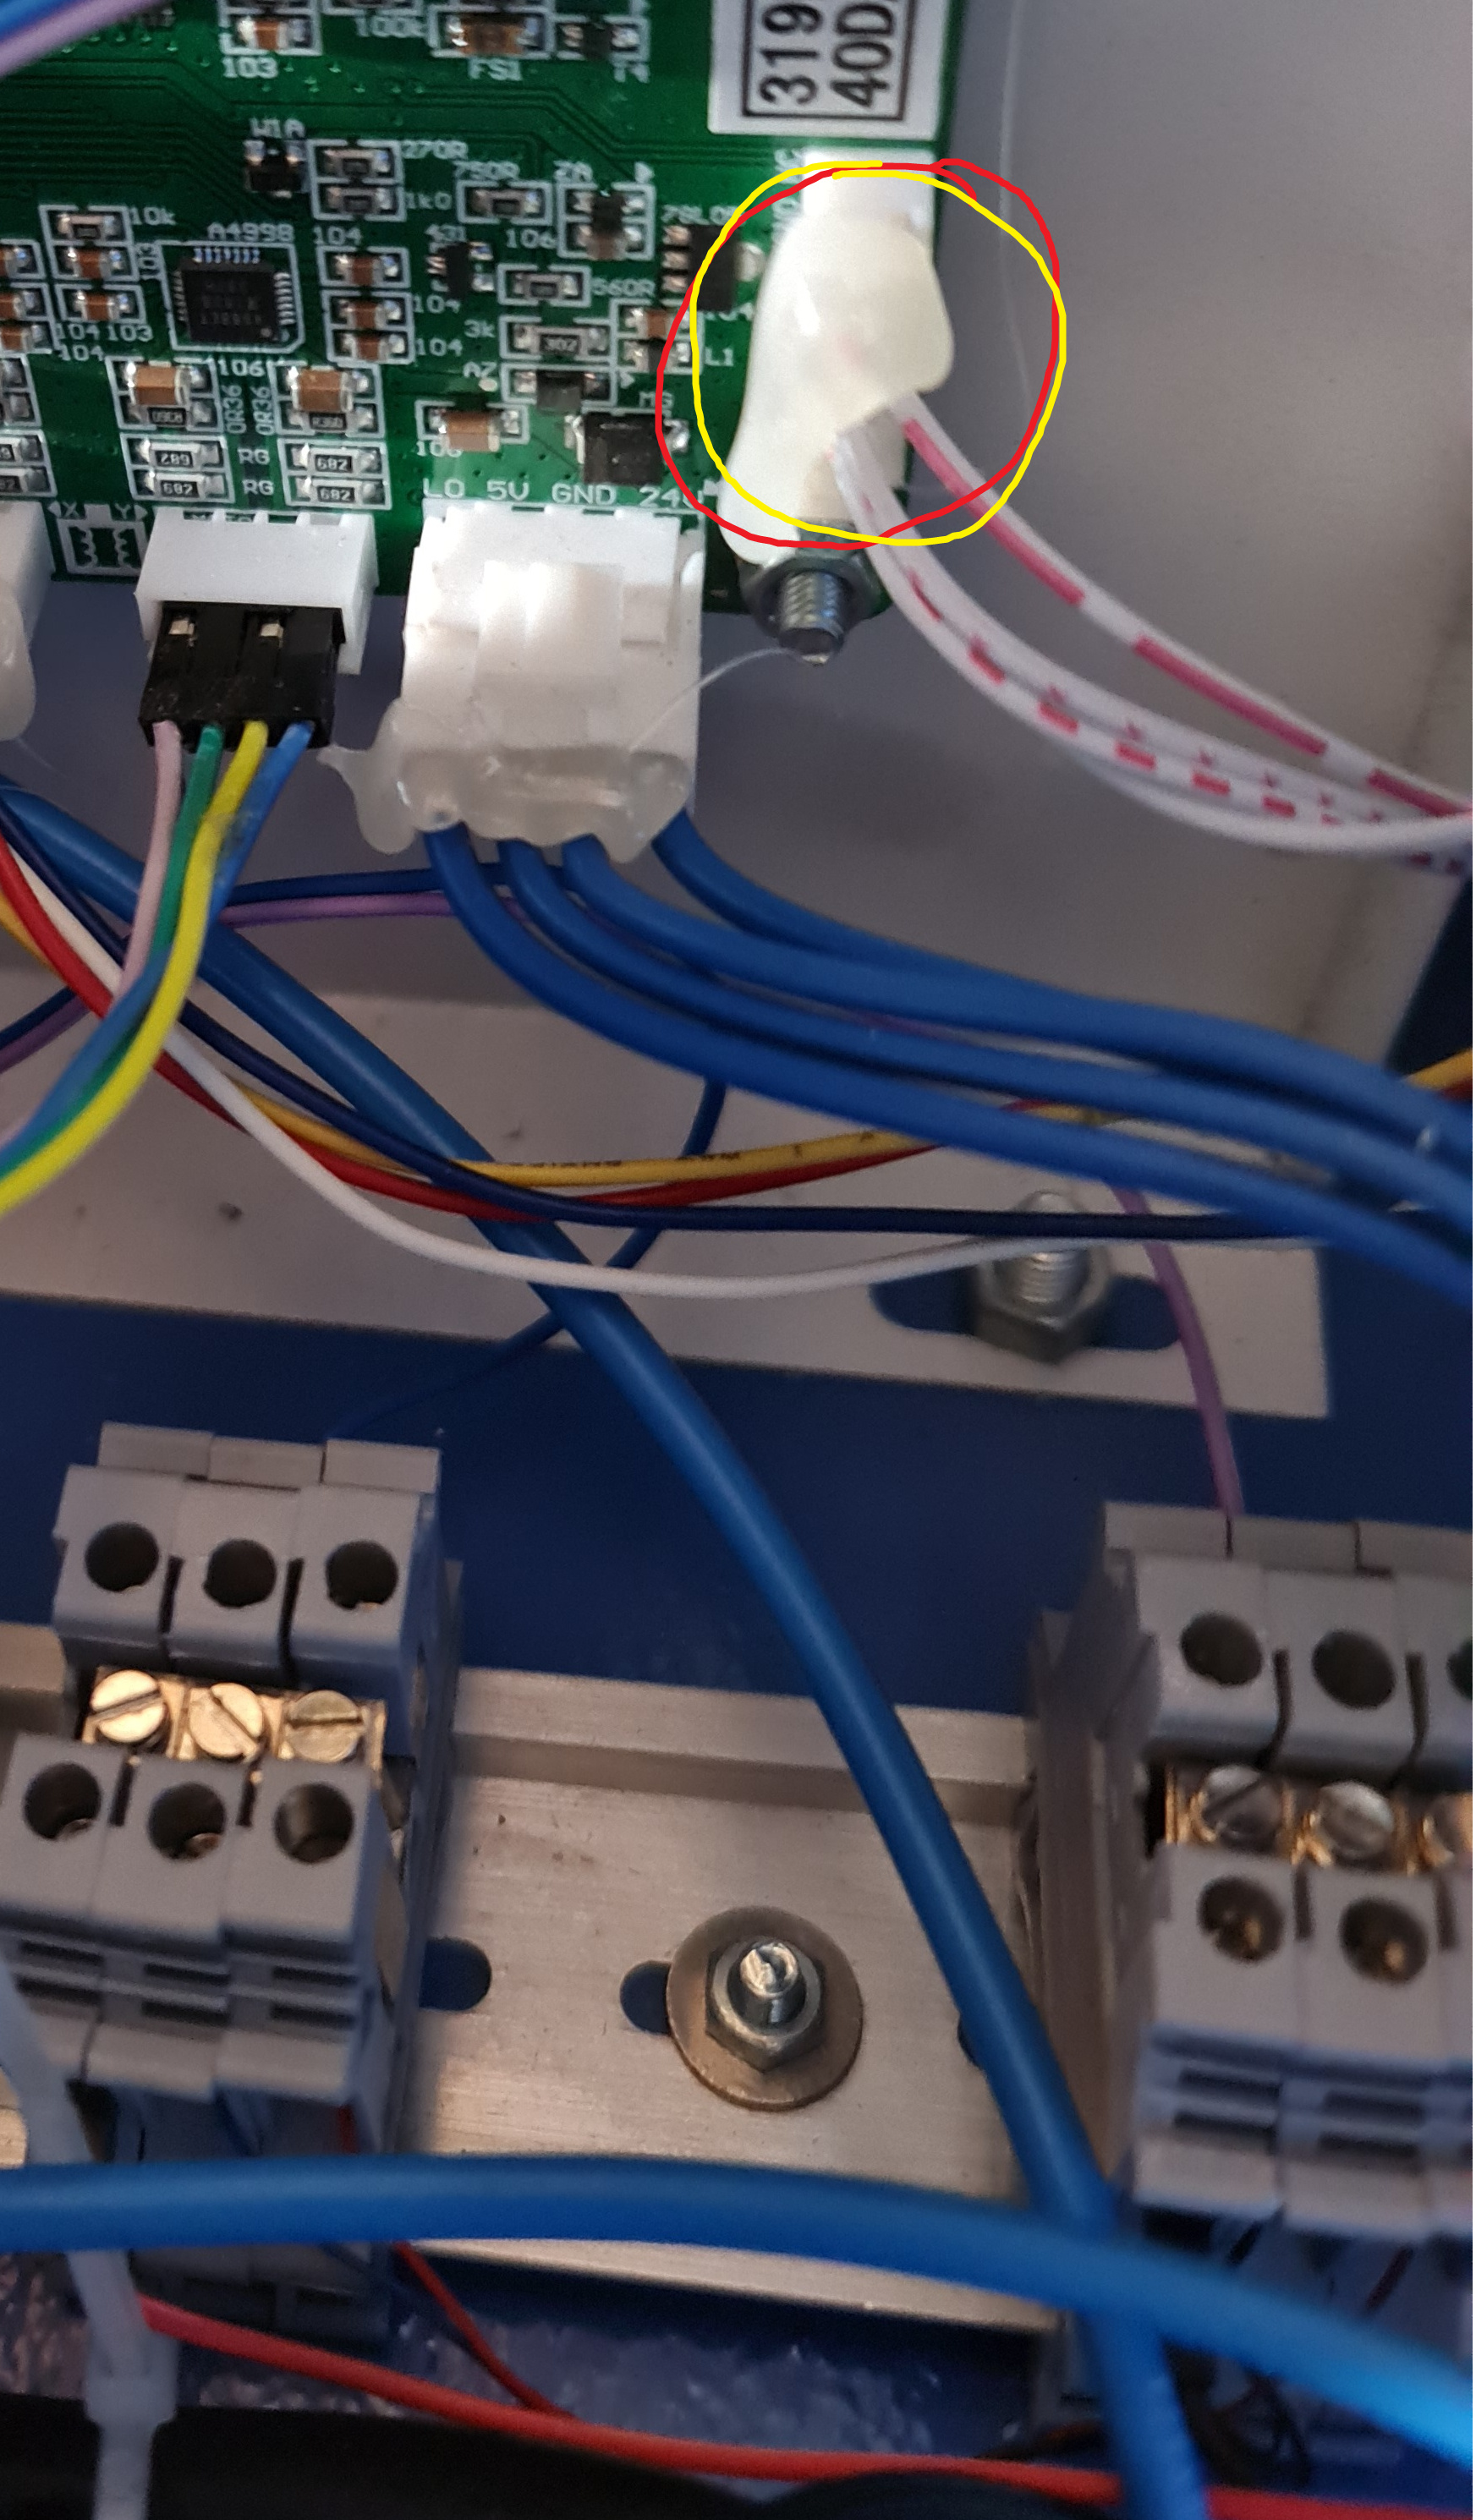
Do you want a picture closer to those connectors? Problem is, all the wires are the same colour 
If you could get one that would be amazing! I know right, it doesn’t help too much them all being the same colour! But if I can se ehow its set up I can work it backwards and see if I put this cable in the right place or not