My parents are using an inexpensive phone as an entertainment center device, and asked me for a phone stand that would hold that particular phone at the right angle to face directly at my mom when she stands a comfortable distance away from the place that they want to keep it.
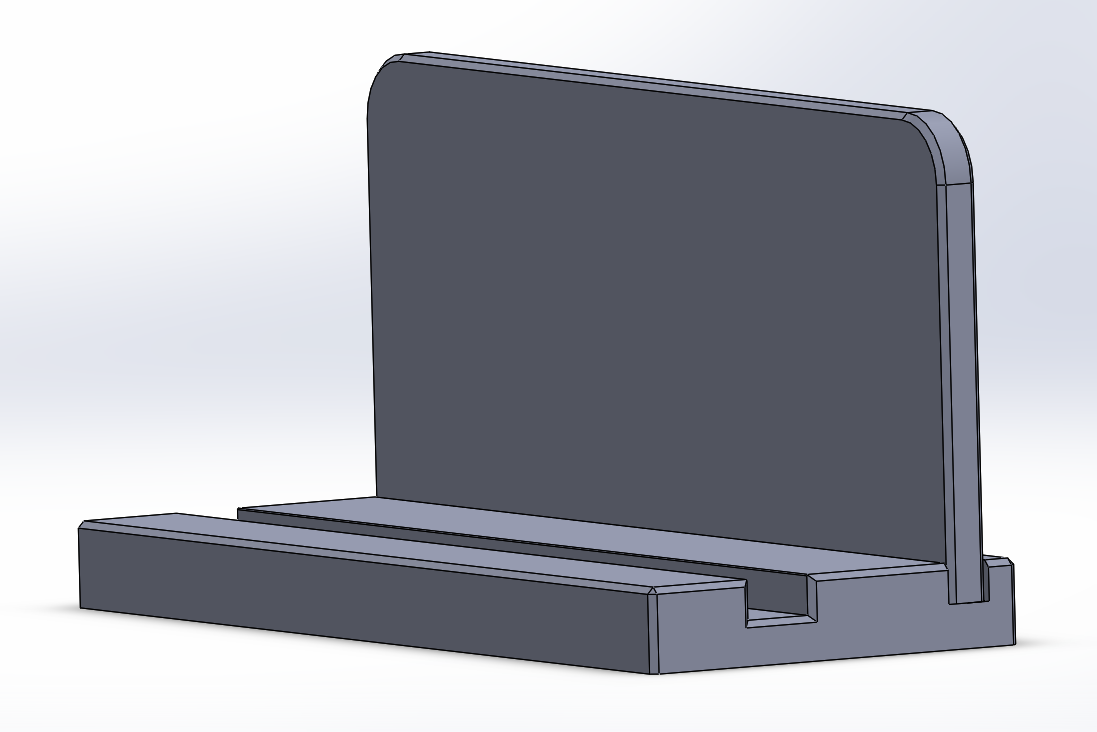
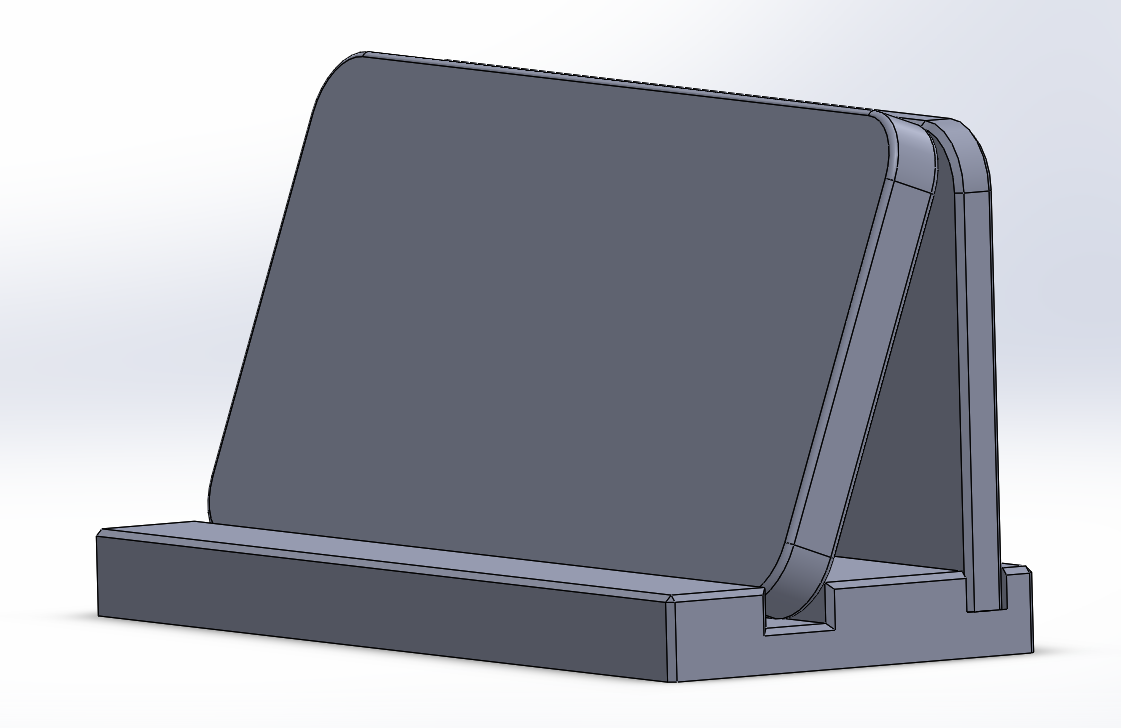
I made a parametric design in Solidworks that takes the eyeball distance and elevation as two primary parameters, and the phone dimensions as the other three primary parameters, and gives a phone stand that can be printed with minimal included supports (no slicer-generated supports needed).
Because I’m boring, all my models are greyscale. Sorry.
I exported STEP and x_t, but that won’t give you the ability to tweak the parameters. I’ve done plenty of parametric designs in OpenSCAD but I want chamfers and fillets, and those are hard to do in OpenSCAD. I occasionally plug the Experimental Aircraft Association’s deal with Dassault for the Academic (aggressively non-commercial) Solidworks license — support more than half a century of some of the most serious maker culture on the planet (experimental aviation, what’s more serious than regularly trusting your life to your making?) for about $40/year to get an academic license to Solidworks. (I wish it ran on Linux, but I’ll take it…)
It’s not like my dad doesn’t own a radial arm saw.
This will actually sit on an entertainment center made from oak harvested on my grandparents farm, cut by the family, and milled by my uncle on his sawmill.
So to properly stand out, it will need to be 3D printed, milled from aluminum, or some of each!
First print failed; my supports were modeled at .25mm wide which meant that at less than 0.4mm they were under-extruded. Also, this was my first attempt printing PLA on my new textured PEI sheet, which I was using windex on for PETG as a release agent, and forgot to wash it off with IPA before trying to print, so bed adhesion was practically nil. Finally, I think that for PLA onto PEI a 70⁰ bed was too hot.
Pity about the bed adhesion; the lightly textured PEI leaves a wonderful surface on the print!
0.4mm wide support worked much better. However, that was the only success.
Getting used to printing on this new PEI spring steel sheet makes me feel like I’m starting over from scratch with 3d printing. That was a near disaster; I think I barely escaped a ball of melted filament when part of the print broke loose. Now trying with the highly-textured side of the sheet, and I set the 0 z-height .125 mm closer to the sheet (¼ turn of an M3 screw, which is .5mm/turn) to squish the filament more into the pattern to see if that helps.
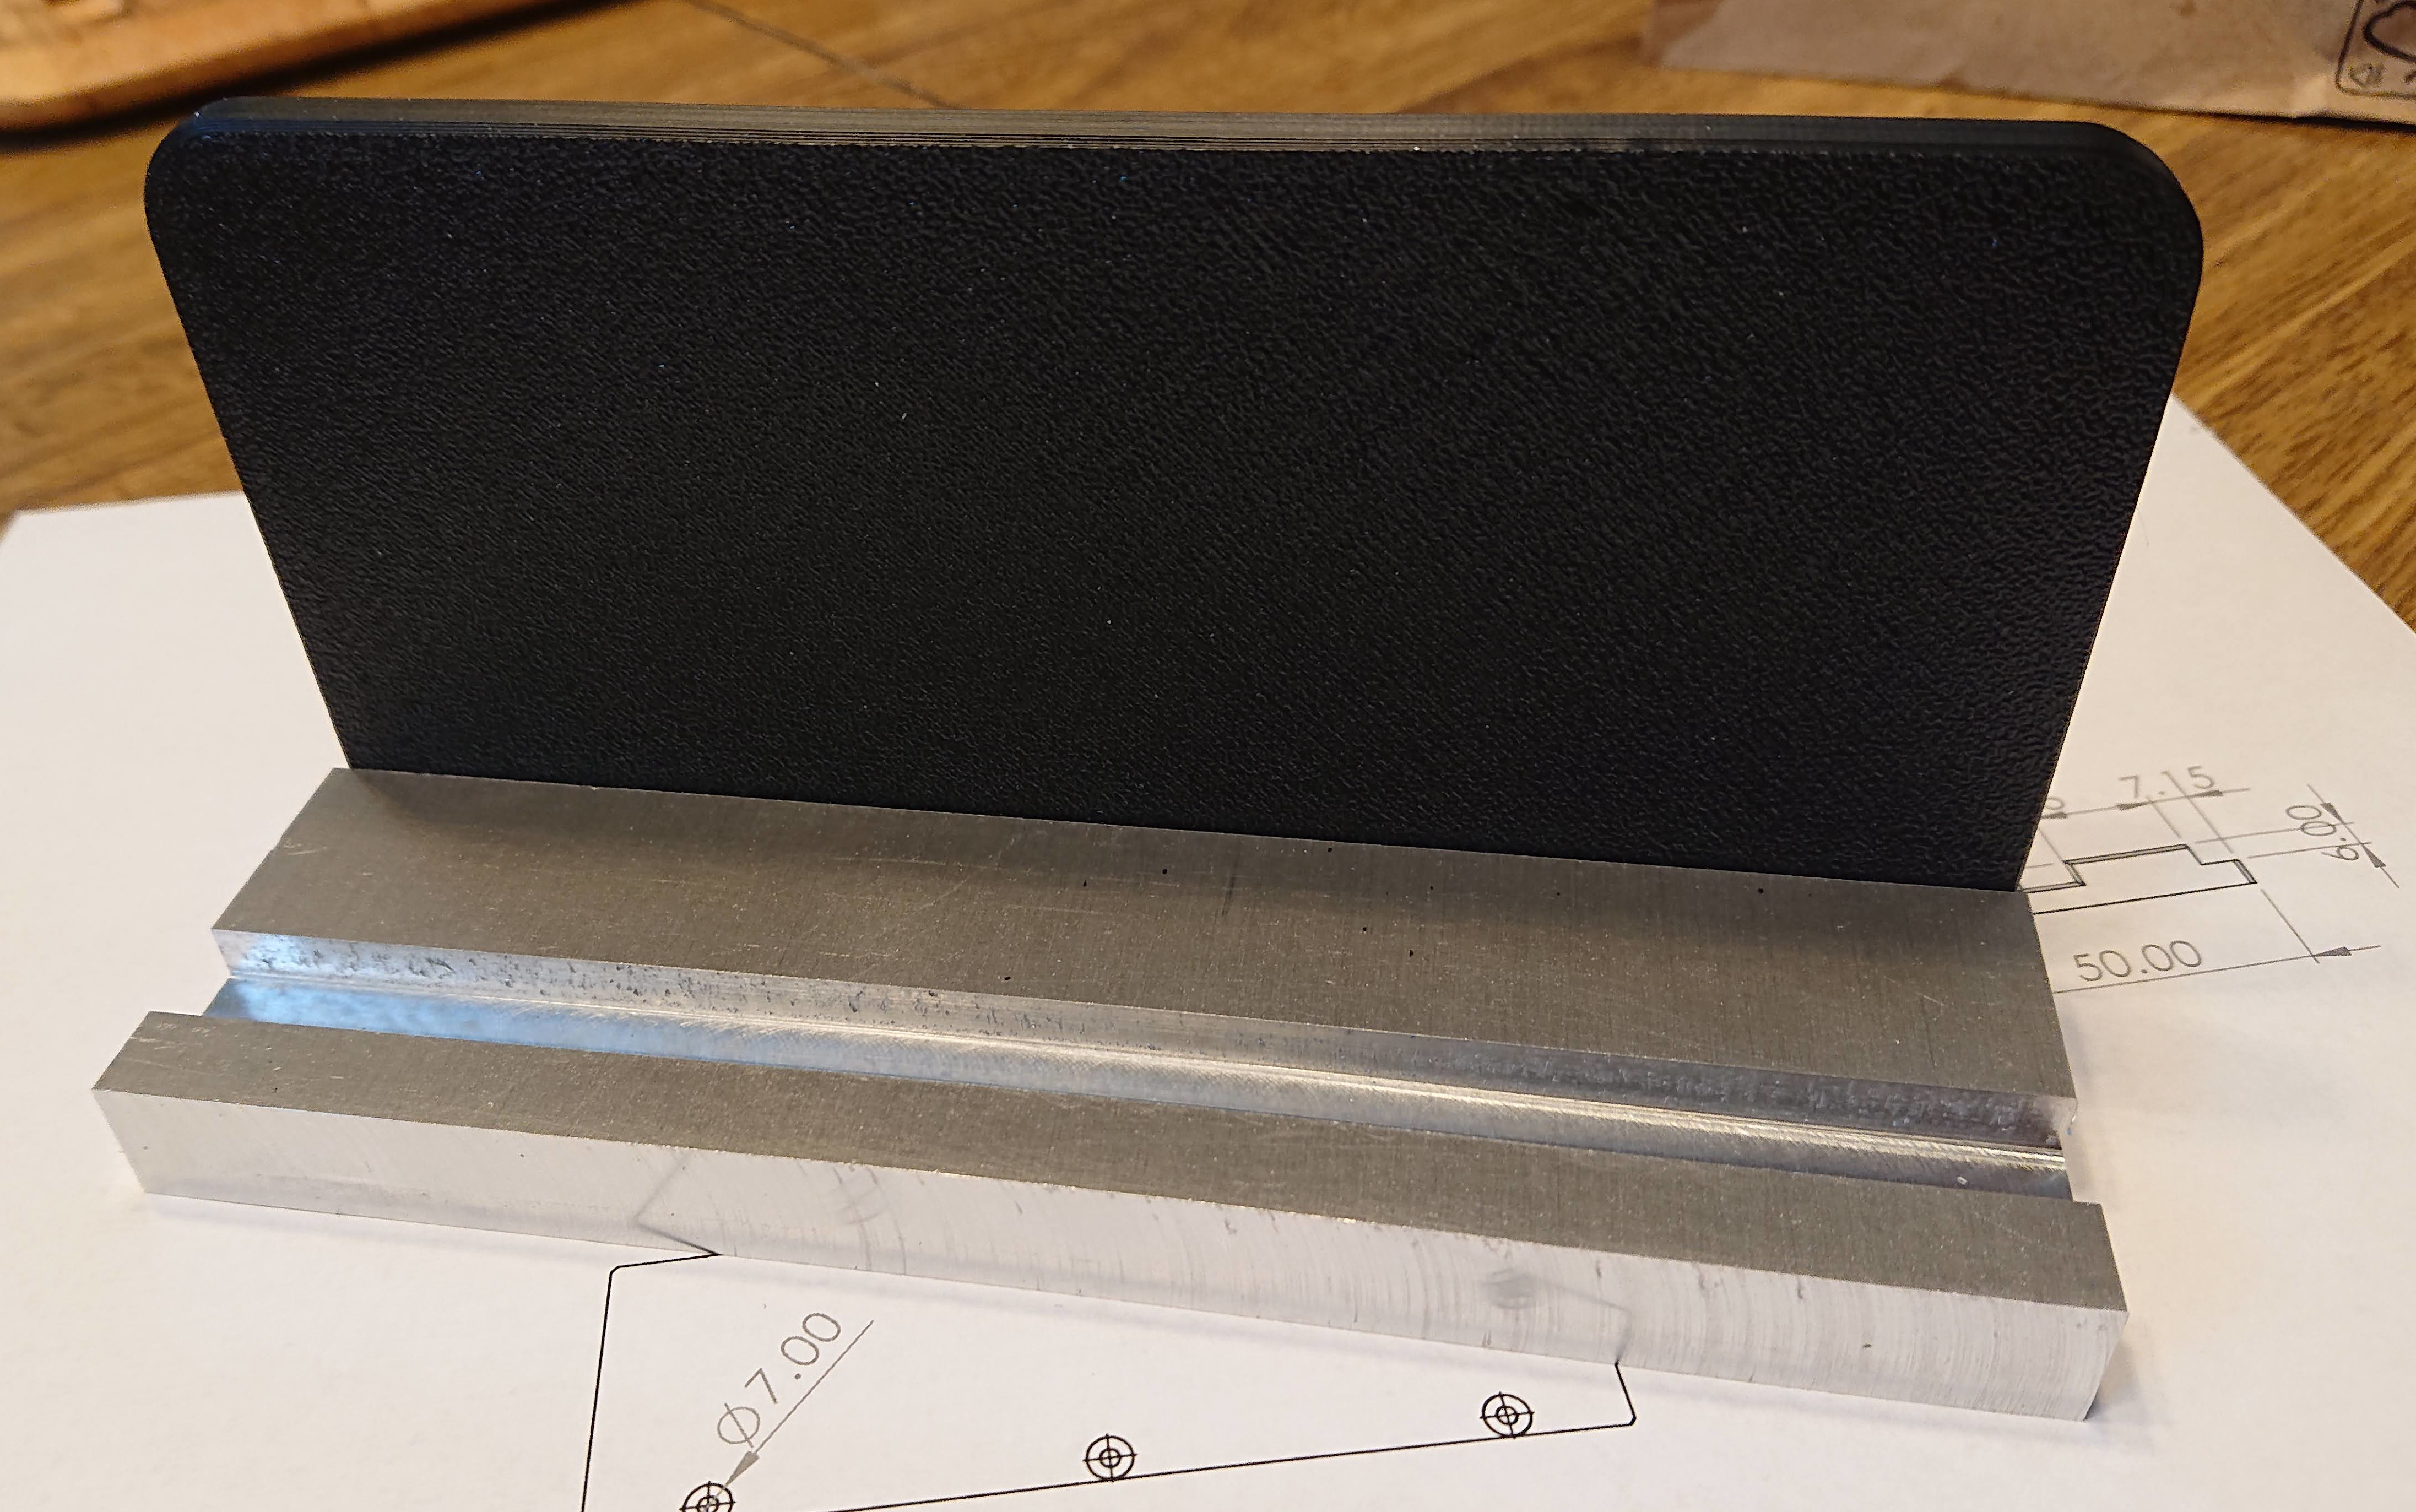
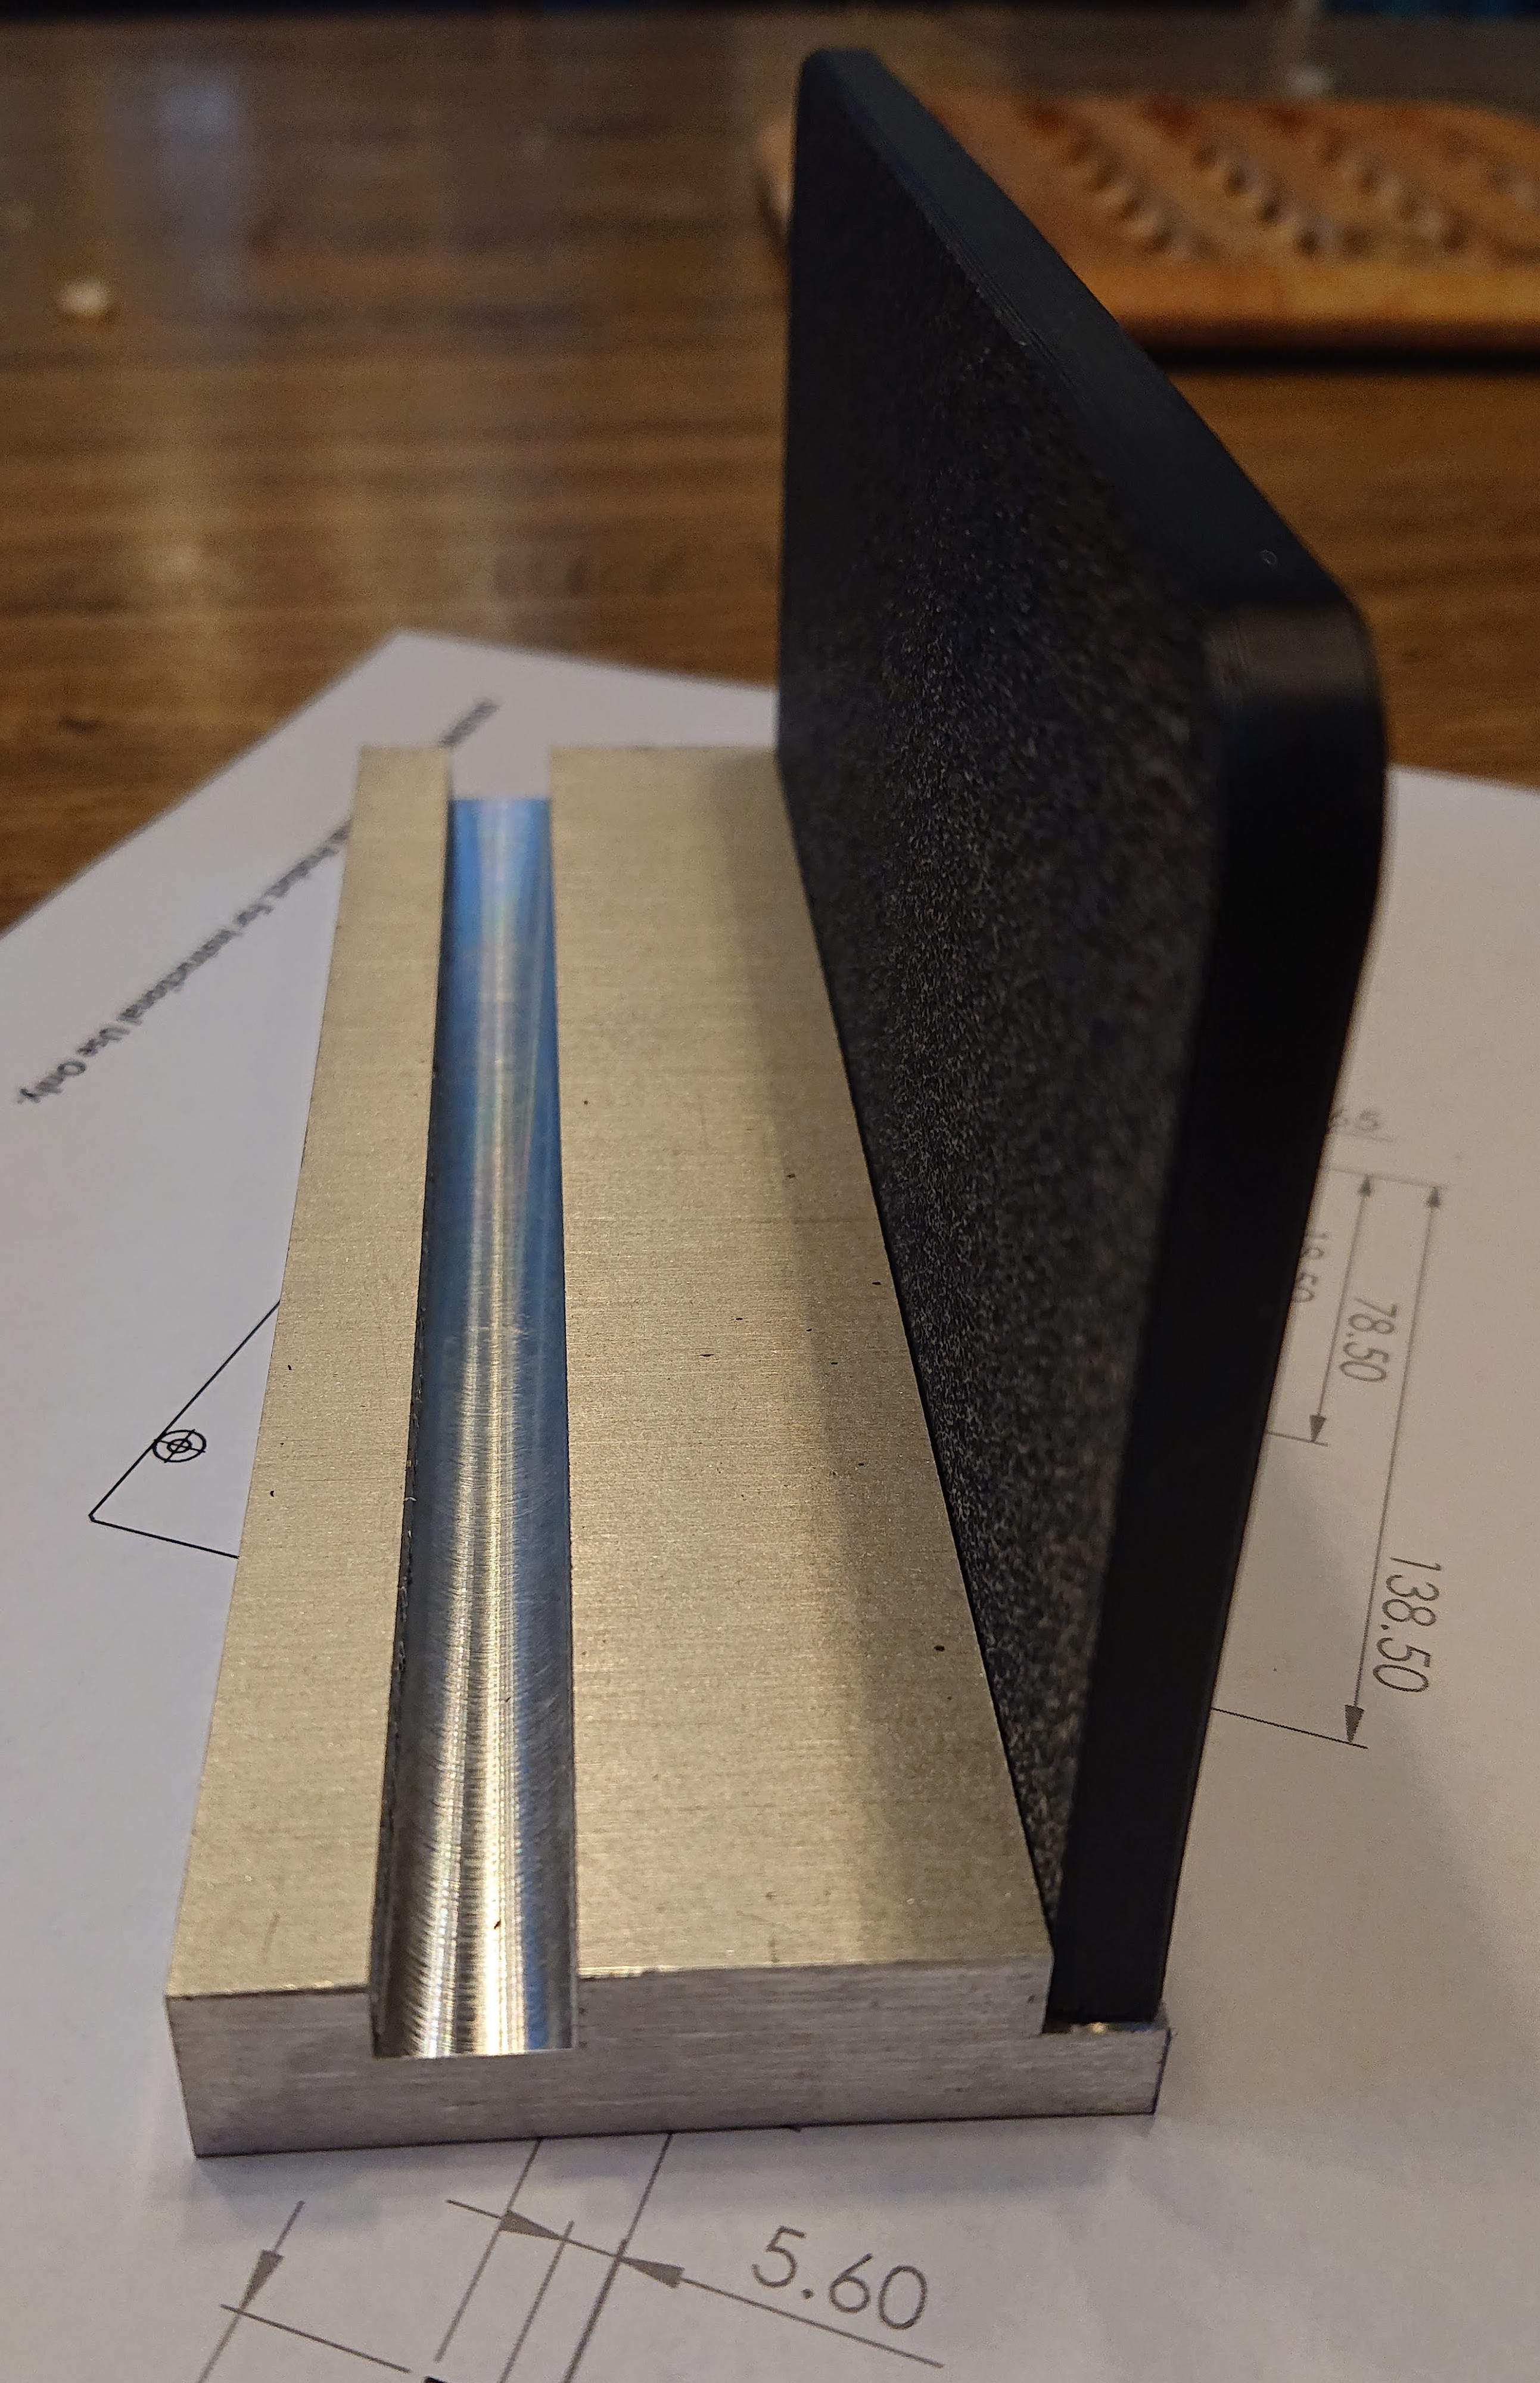
That was better, but one piece of the base still broke free from the bed during printing, spoiling the base but not the back. I should probably make the base heavier for stability, so while I’ve redesigned it and pushed the new design that won’t have this particular problem, I’m going to mill out a chunk of aluminum and use the 3d-printed back that looks fine from the last print for the back. That way the back won’t get in the way of WiFi reception, and two-tone textured black and sanded aluminum should look nice.
I’d heard so many nice things about printing on PEI on spring steel it didn’t occur to me that anything might have been easier on glass. PETG with windex as a mild release agent on PEI has worked great. But I haven’t figured out PLA on PEI and I’m starting to get the impression that I’m not the only one.
In the end, I suppose that chopping off a piece of aluminum and cutting a slot in it with an end mill isn’t that much more complicated than doing the same thing with a chunk of wood and a table saw, though it takes a little longer. The reason for the back and the weighted base is that this phone isn’t being used as a phone, it’s being used as a music player and is intended to live semi-permanently in the stand.
I couldn’t find any good light, and this is a hard contrast to photograph well anyway, and these pictures are before I took it back apart and broke down the corners to mail it, but…
I mailed the parts, including the three M3 flat-head countersink screws, to my parents. When the package arrived, I learned that they didn’t have a metric hex key set. Oops.
But just as they finished searching fruitlessly for a metric hex key, the piano tuner arrived, and he had the necessary 2mm hex wrench in his kit. Serendipity!