MoBeam Initial Testing

I got to spend some time with my MoBeam (VG-7X) yesterday.
Here are the results in a nutshell with links to more detail:


Completed focussing using my USB camera. Indeed the focus is 30mm NOT 30cm :wink: . The dot ended up more round than I expected. Will measure DOF next.
I had to cut the mounting slide I made nearly in 1/2 to accommodate adjusting the lens. Thinking of a simpler mounting now that I know the FL.


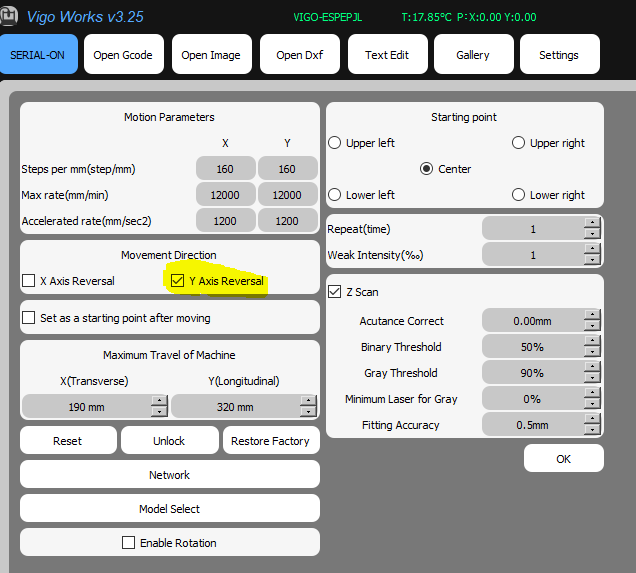
There was a software update. The VigoWorks app updated ok [its an .exe] but the firmware will not. Uggh! no place to go to get release notes or get help! I wonder if they fixed the proprietary Grbl problem in this release and connection to lightburn. I may never know.


VigoWorks seemed to work OK [except firmware upload] but it’s pretty rudimentary, single-threaded, and accompanied by poor documentation for the operational settings.
Laser temperature is displayed in the app, reminding me that if I change controllers I will have to account for diode thermal shutdown. There is a thermal signal on the interface which I think is an analog value.


The carriage X &Y were reversed, doh! cables were backward. Both X & Y moved 1/2 the expected distance. Doubled the step settings and it now works correctly. The default settings were loaded by VigoWorks based on selecting this model unit. Seems the default settings for this model are wrong in VigoWorks.


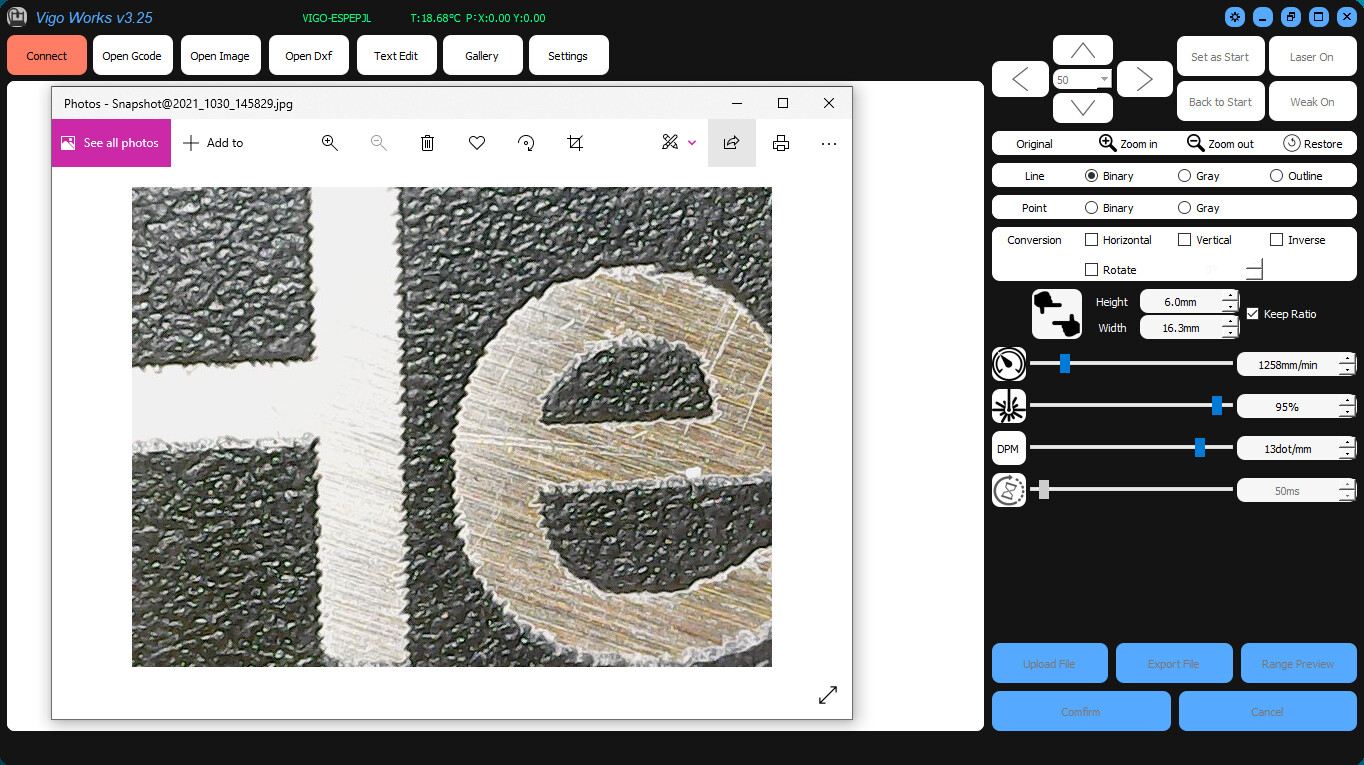
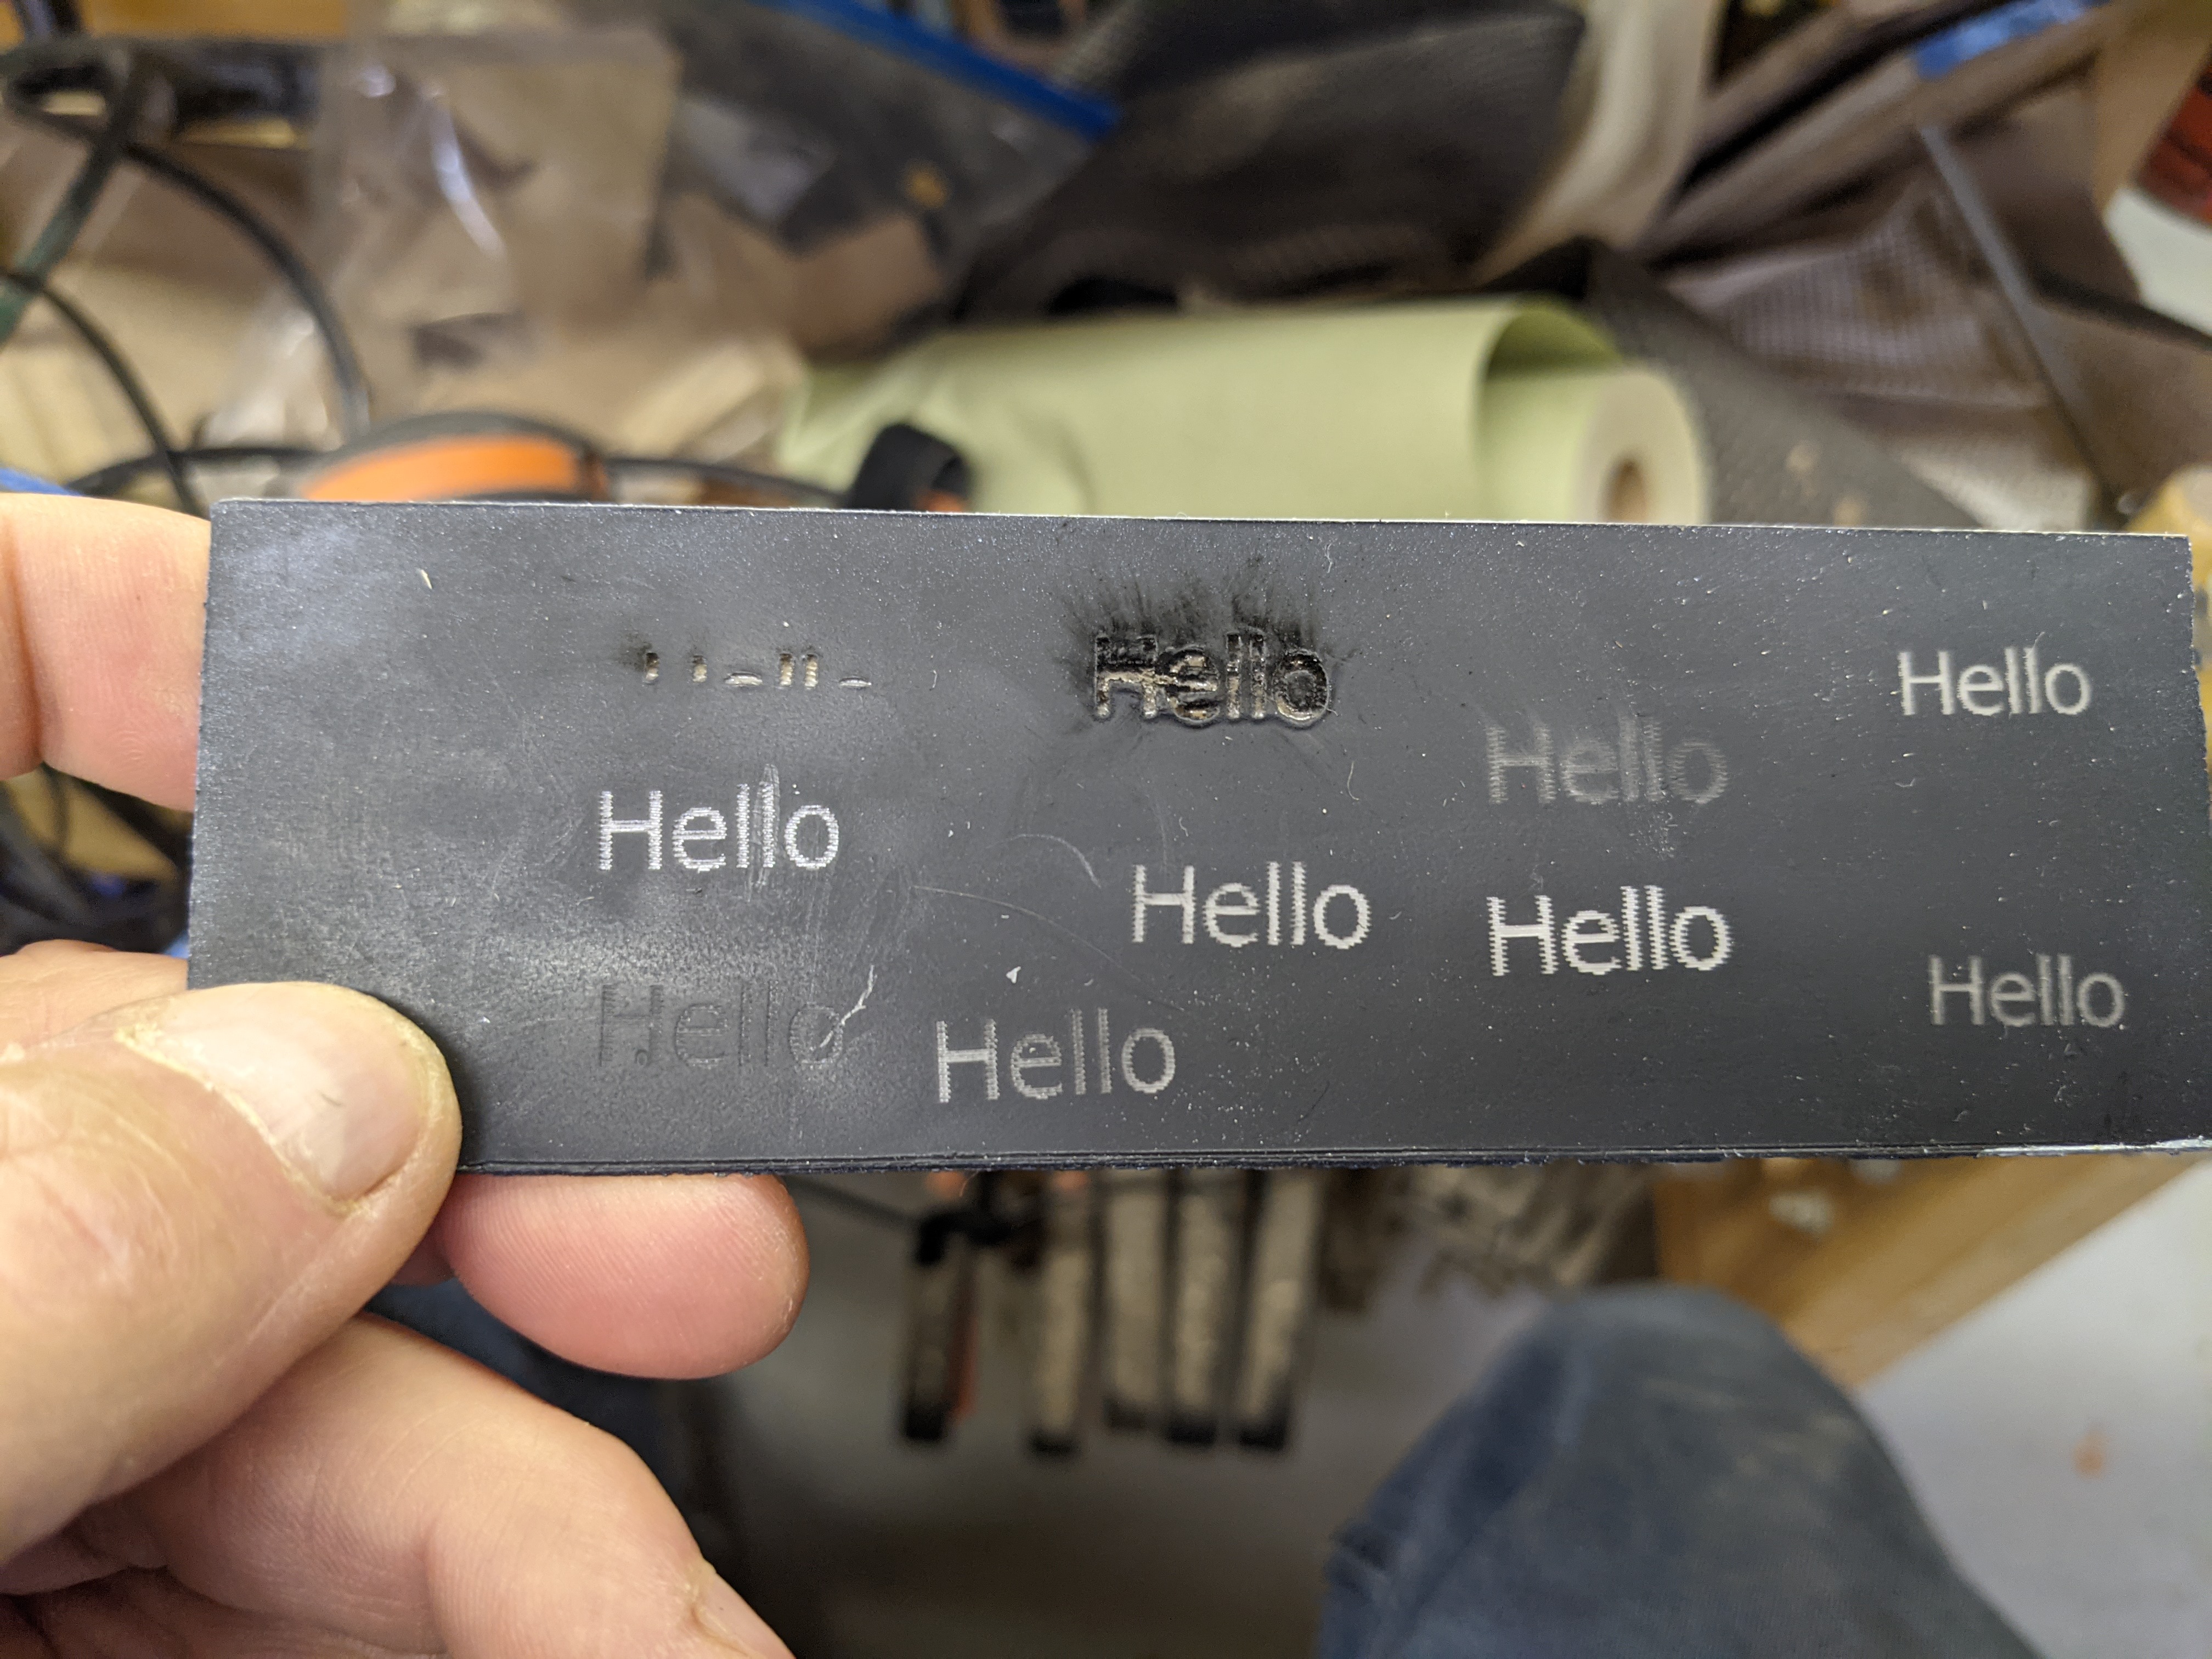
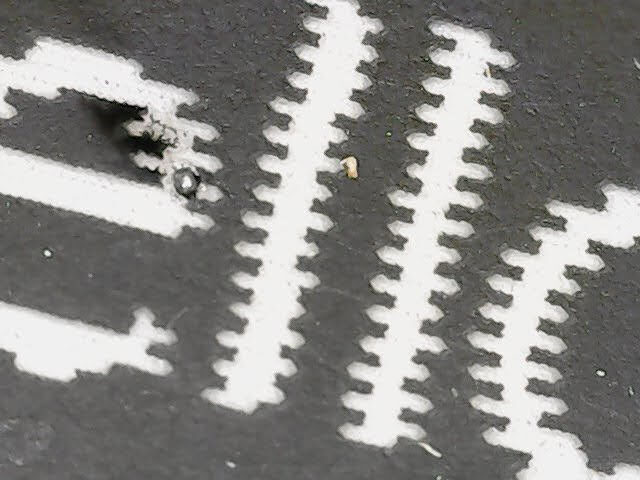
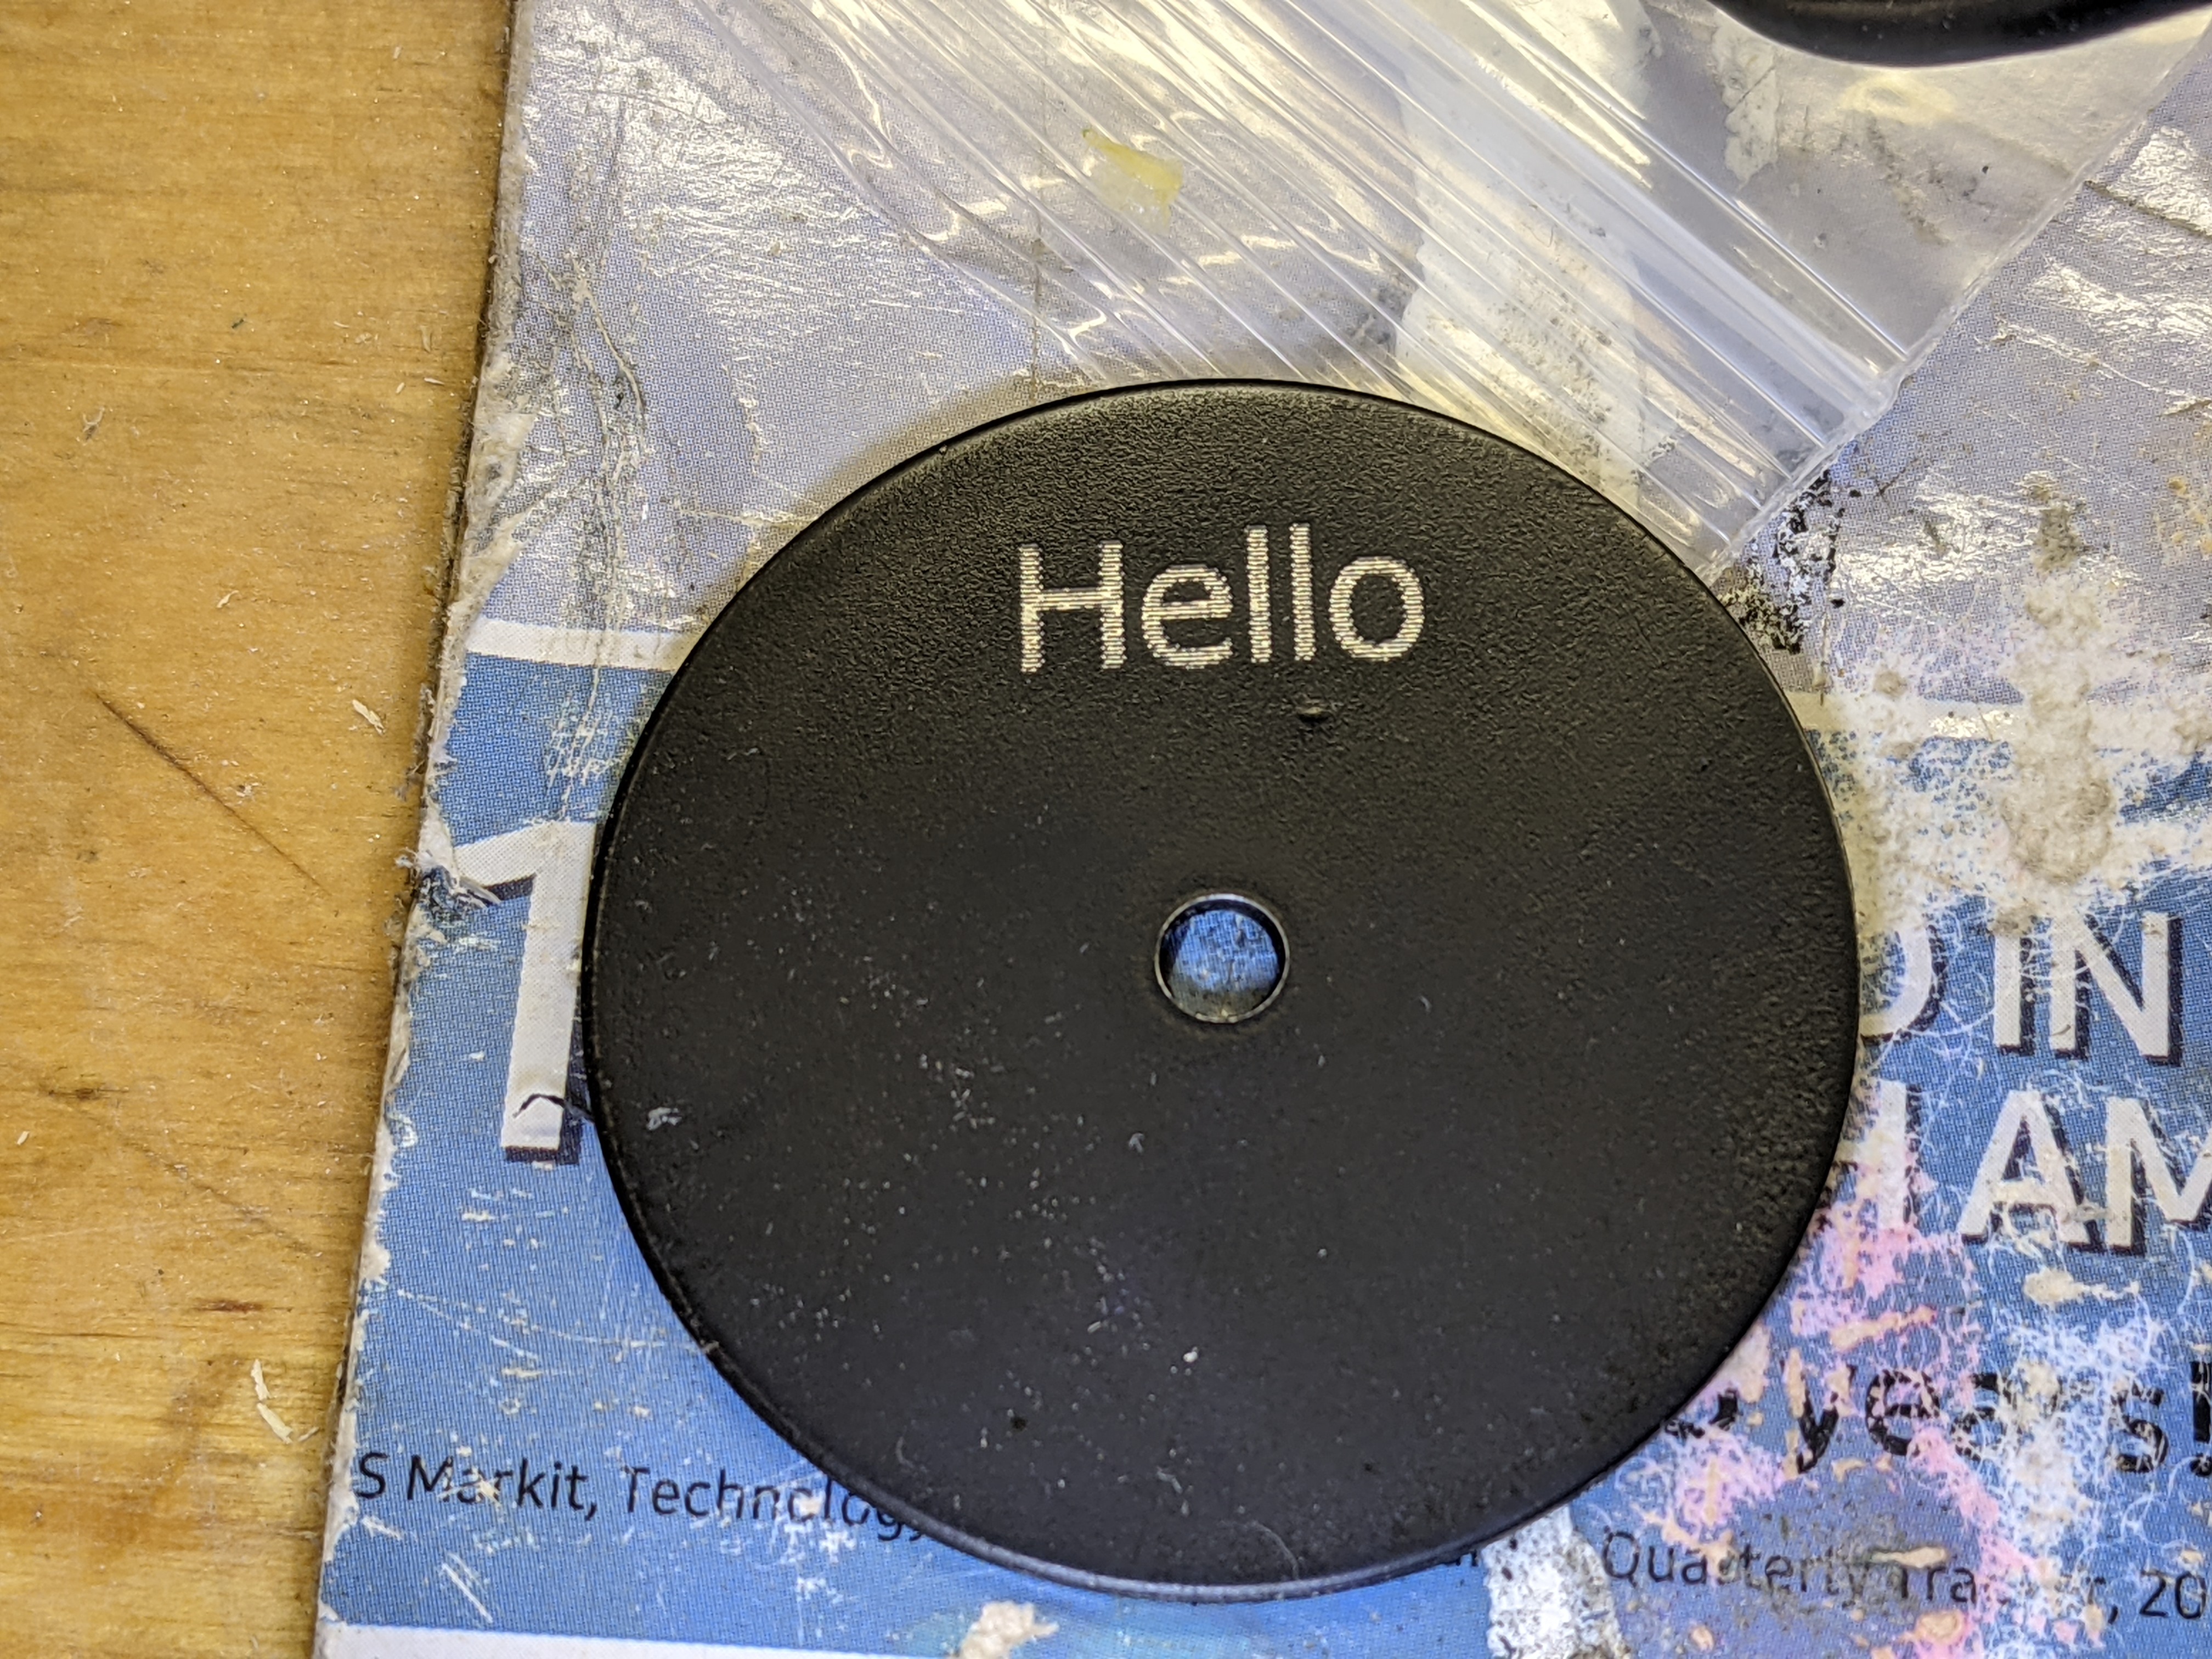
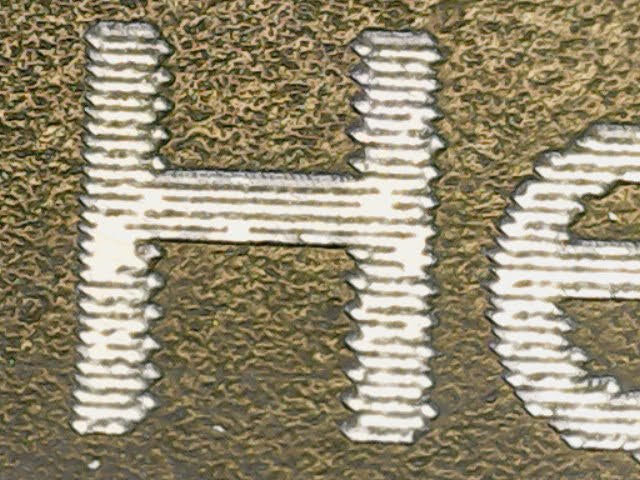
Text imaging worked surprisingly well on the first try. I was kinda impressed with the power. The USB microscope was valuable for looking closely at the results. Engraving on wood looked good. Engraving on coated plastic and metal showed scan line perturbations. Not sure of the source for this error some look like positioning errors others could be from poor overlap from incorrect image settings etc. I checked the carriage’s mechanical stability and slowed down the job but the error did not change.

Acrylic painted coated with flat black on front white on back:


Snapshot@2021_1029_173030
Scans look like they start offset.


Metal (steel) painted with flat black. Post cleaning with soap and water.


Snapshot@2021_1029_175758
Clear banding but scans look alternately short/long and not fully ablated.

Google research revealed that others that are engraving coated surfaces are running much higher power than I was.

Clipped from a YouTube video running on the same machine + painted Al. The image seems to be crisper. Engraved near full power and slightly different dot settings than my run.
Witham_Tecnique


I like the simplicity of this machine. In general, it performed better than I expected. I want to use this to make labels for my RV and engrave areas of wood projects. At first attempt, I think this will be a good mobile shop tool when I get its settings, control, and safety to be rational.

3 Likes

As always a great write up and detailed information. Looks like you are spot on! :wink:

Yes I am beam-ing with satisfaction …

1 Like

It must be your laser focus! :rofl:

1 Like

Update from this afternoon’s work.


The X &Y cables were swapped and that explains why the Y-axis default setting is REVERSED.

I tried updating the firmware via WIFI and IT WORKED. I say that because it no longer asks me if I want it updated and I think I saw some LEDs blinking strangely. BTW it seemed to just update automagically without asking me to select a file. Where did it get the file from? Does VigoWorks only update OTA and you have to use the flash tools if you are serially connected?


I tried etching the painted metal with settings closer to what others are using and WOW what a difference. I think the big factor is the dots/mm which I changed from 4 to 13 dots/mm.


A new wrinkle is the diode temp display. At idle the machine runs 17.4 deg/c I have seen it go up to 19 deg/c during etching at 90%. The room is 22 deg C. I would think it would eventually reach room temp and then scale above that?

Also, the DC value on the temp pin was 1.8V but never seemed to vary which also is irrational. That voltage also did not correlate with any temp charts I found.

I am guessing the laser module interface is:

Red: 12V
Black: Ground
White: PWM
Blue: Analog temp


2 Likes

regarding temp on diode laser modules, I noticed on the Orturs that they vary the module cooling fan speed based on PWM value. That kinda drove me nuts and probably means the cooling lags the control some. Therefore what I did was wire the 12V fan directly to the 12 to the module which was turned on/off with the module usage.

The other thing I found was that with the fan at the top and the diode module at the bottom end of the heatsink, if you check the airflow in the heatsink fins you can see the air dams up and start flowing out of the fin channels before it gets down to where the diode module is. Therefore, I put a cover over the fins to keep the air in the heatsink channels. Shorter heatsinks will have different characteristics but worth checking.

1 Like

Hmm. ESP32 probably flashes more consistently OTA; a common complaint with ESP32 dev modules is problems flashing over a serial connection… It does a flip/flop OTA flash that is safe; it’s one of the really nice design features.

2 Likes

Guess I am lucky, never having experienced a problem with ESP32 serial updates in my projects. I haven’t used OTA updates but most of my home devices do and that two-partition method has been reliable.

My main frustration* is that there is no documentation that explains how an update is done, no way to see what version the firmware is running, and no place to go to get help. Vigotec exists but there is no point of contact anywhere I can yet find. I am starting to think that Vigotec** is a manuf/sales arm for NEJE systems and has little technical expertise.

*not a new frustration for us makers!
**The Vigotec and NEJE machines and laser modules are suspiciously similar

3 Likes