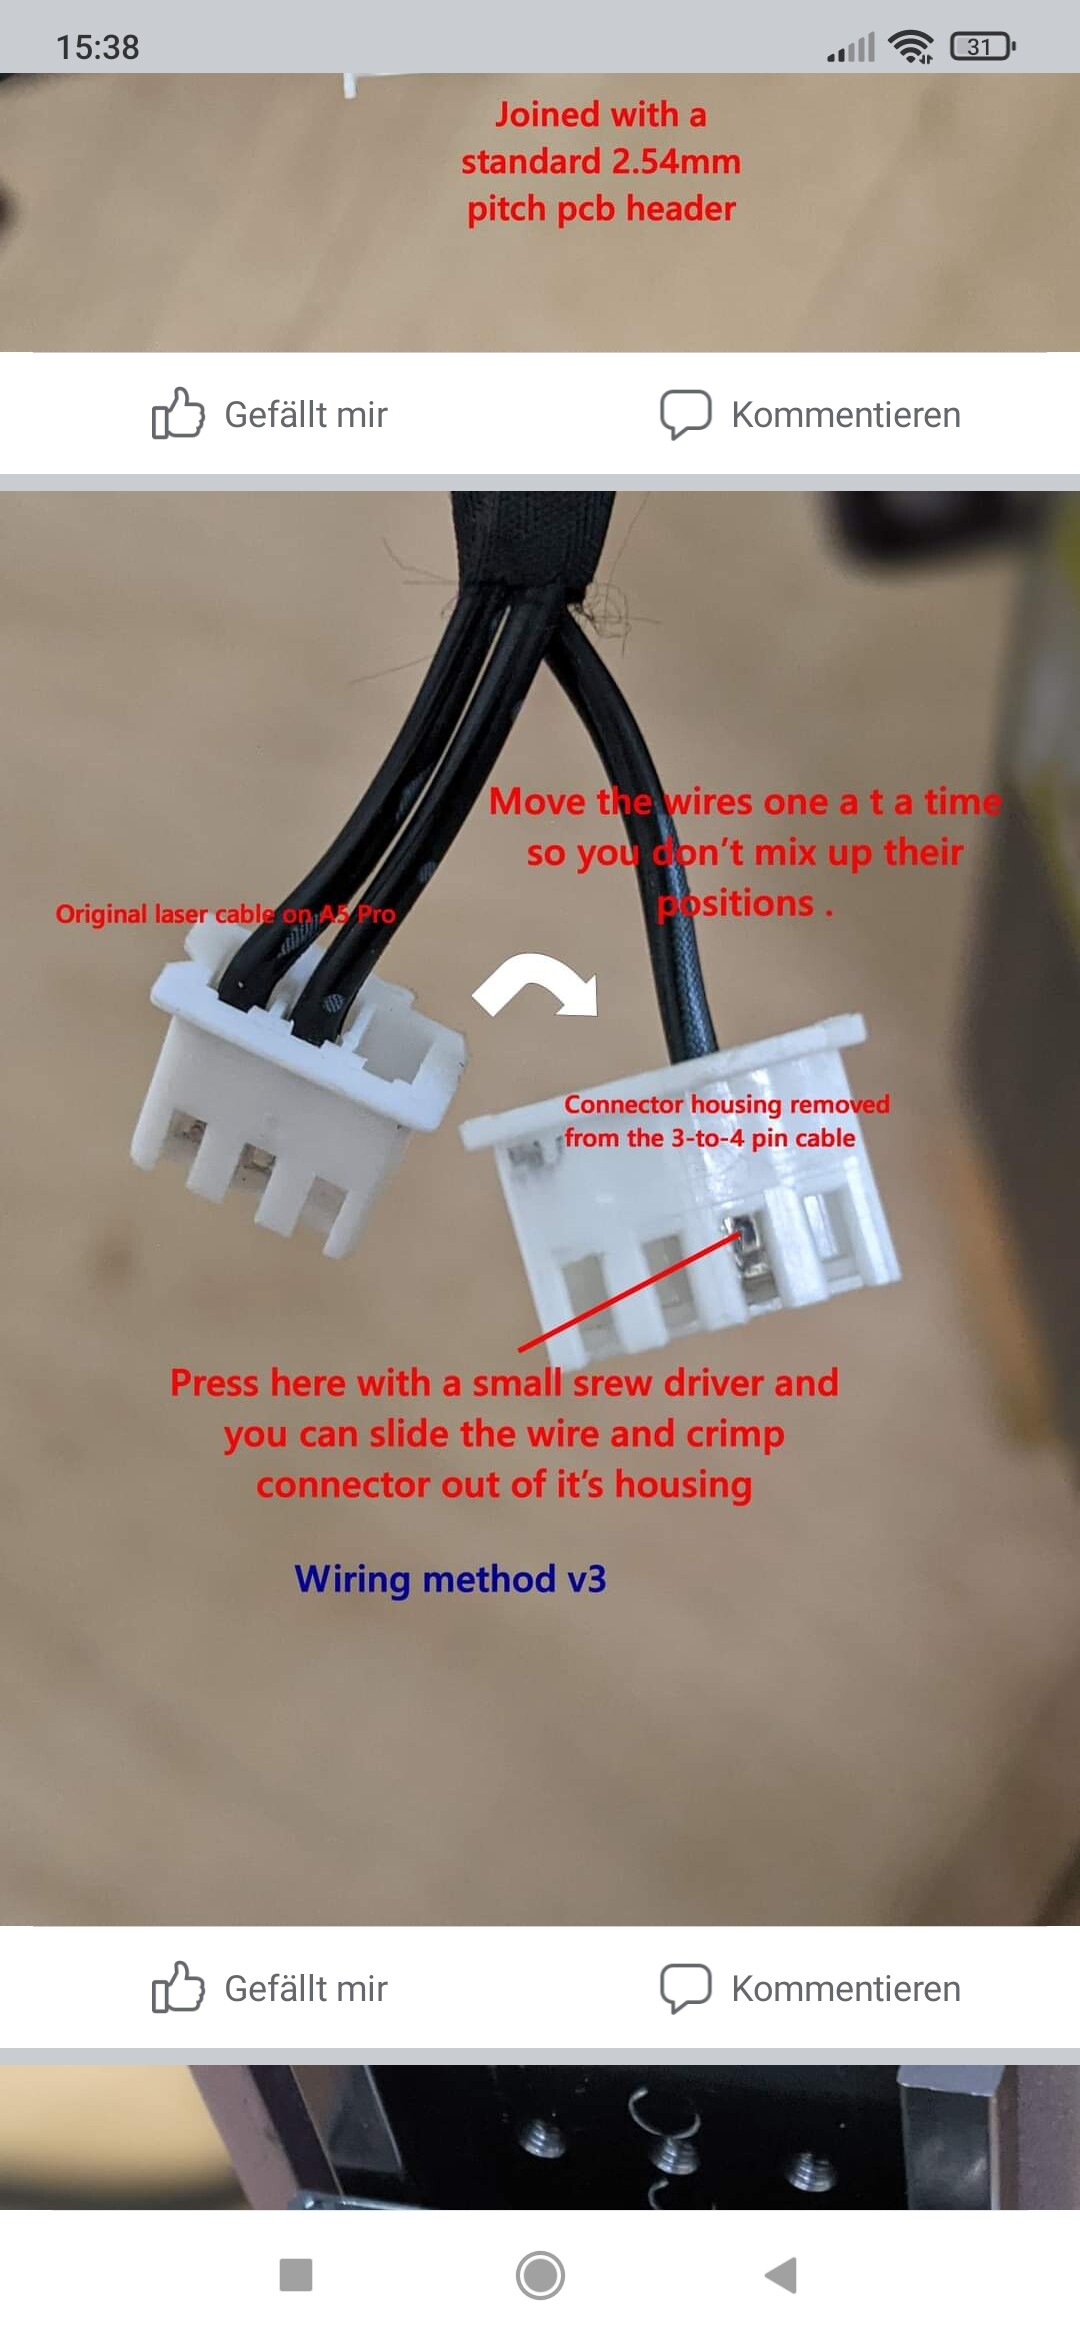
Yes, First I used it. Yesterday i thought it doesn’t Work because of this, so I did it Like this:Atomstack Official Laser Engraving User Group Public Group | Facebook (wiring 3)
Because of Method 3 i have a 3 Wire Plug now😁
Sorry, I’m not joining this FB group so I do not know what you are showing me.
So are you fixed and working now??
It’s mit fixer only the Fan works
It’s not fixed…
German autocorrection…
This is still going to be necessary to help you!
I will take another look at it today.
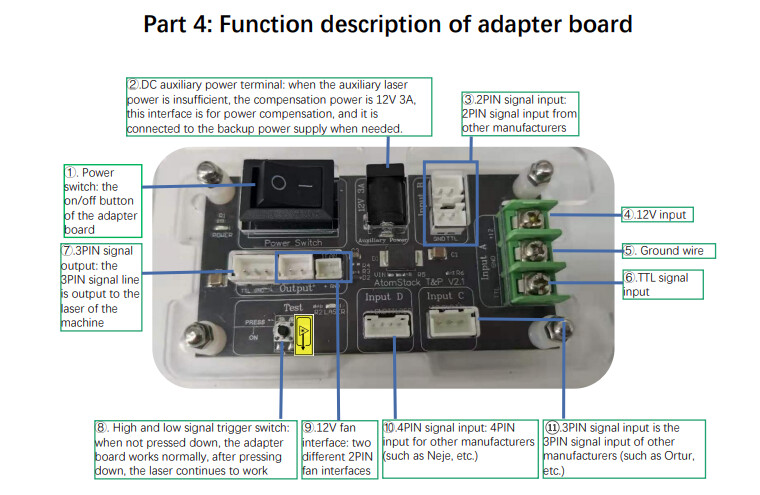
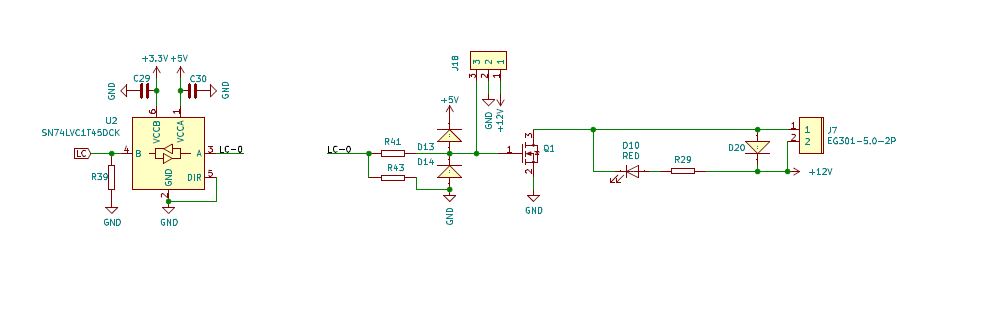
From what I can tell this wiring should work. J18 should contain TTL PWM, Ground, 12V {or whatever DCpower you are supplying to the controller}
I do not know what the pinouts for the M50’s inputs are so I did not label them.
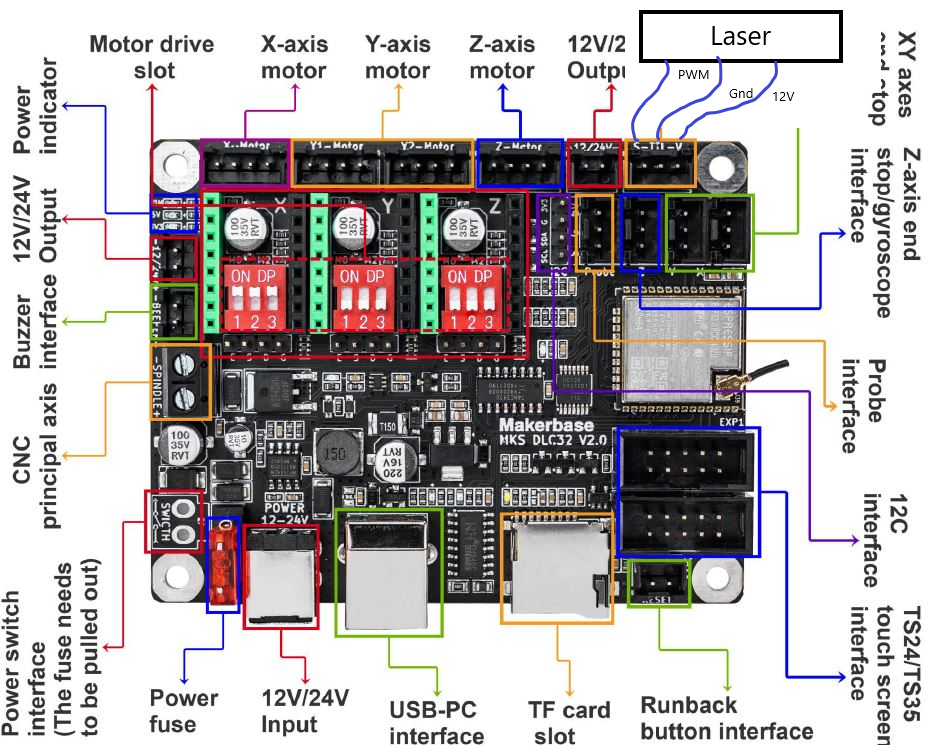
I assume you are powering the controller with 12VDC?
I would check the voltages on the DLC’s connector first:
Check for 12V referenced to the Ground pin on that connector) middle pin.
While running a job you can measure the PWM signal just to see if there is changing voltage on it.
Is the above what you have ???
The voltage changes during charging. I wired the laser as you describe. But it doesn’t work
What voltage changes?
What do you mean by “charging” , running a job?
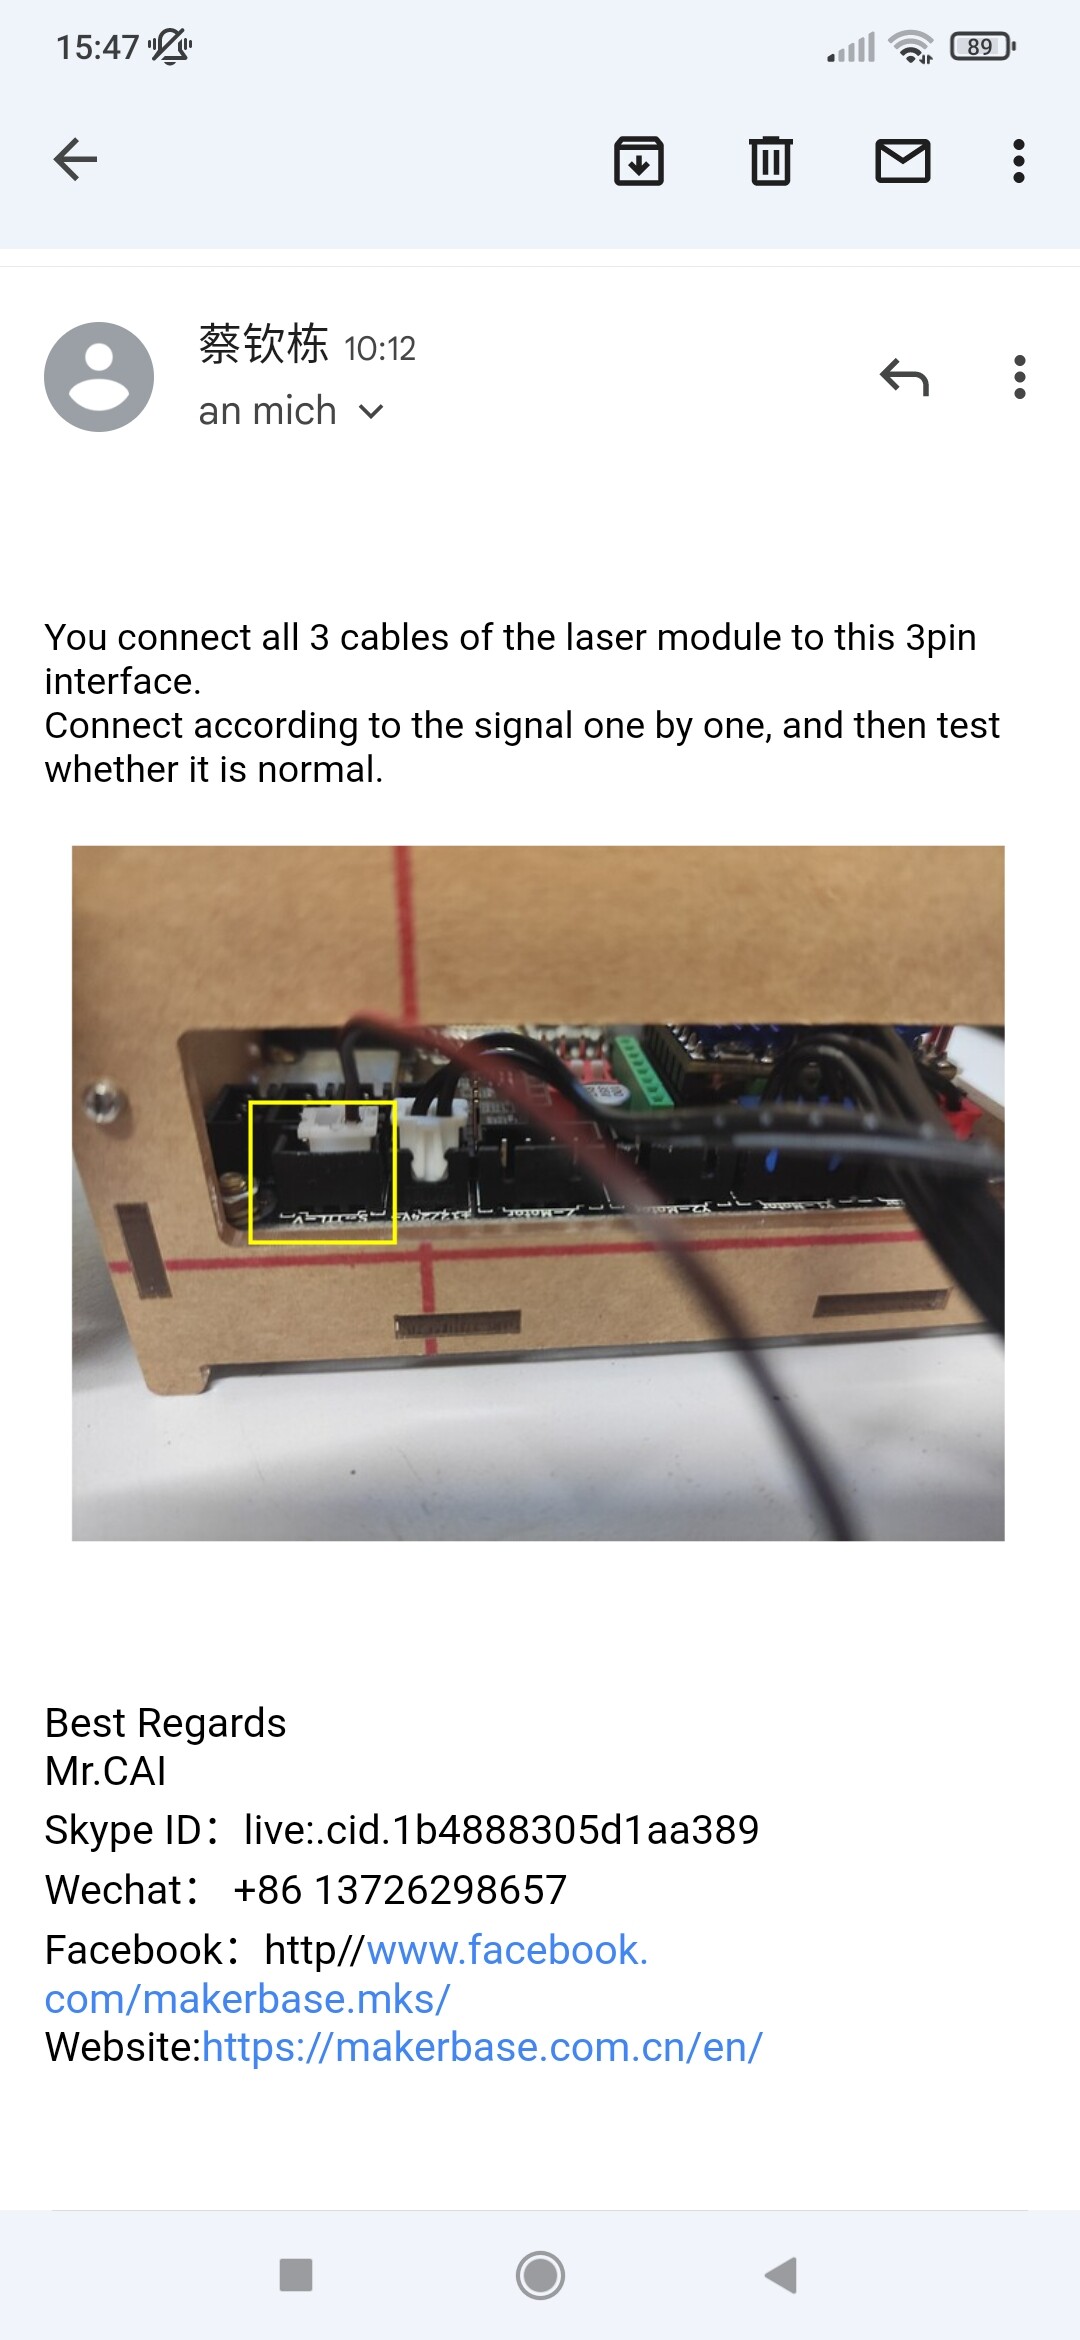
Can you provide a picture of your lasers connections?
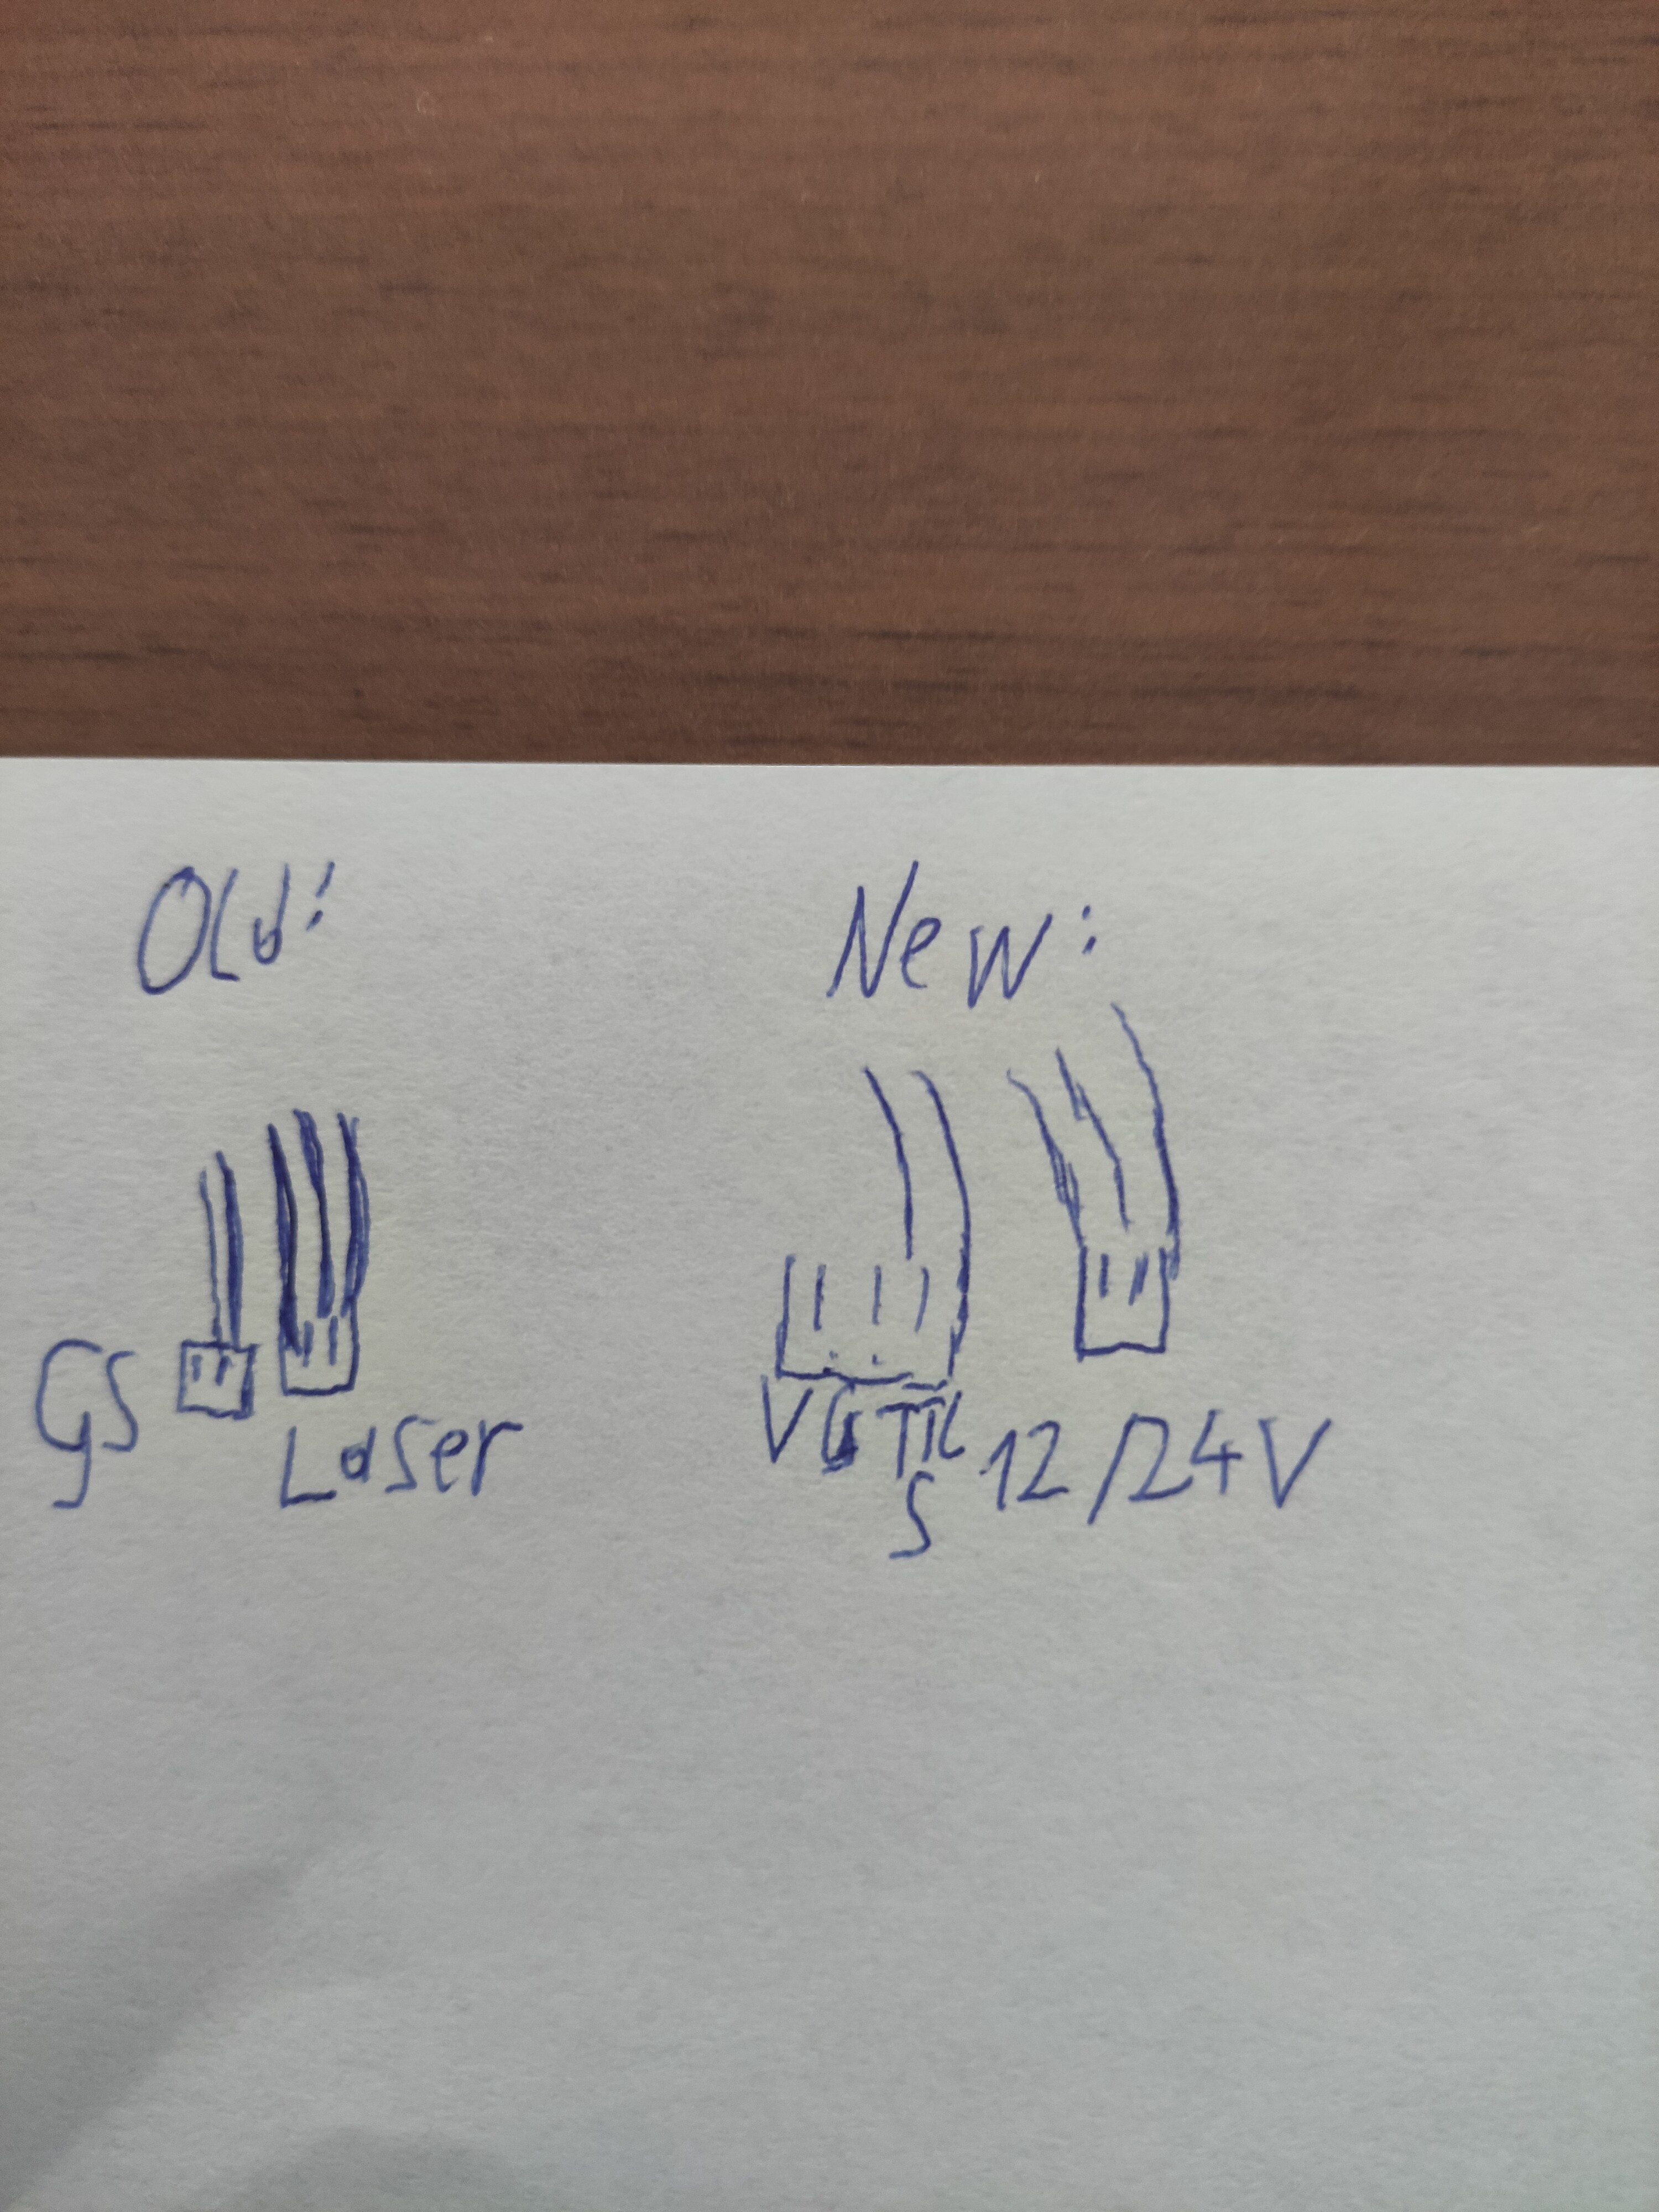
How do you know what pins are assigned to what signal on that laser?