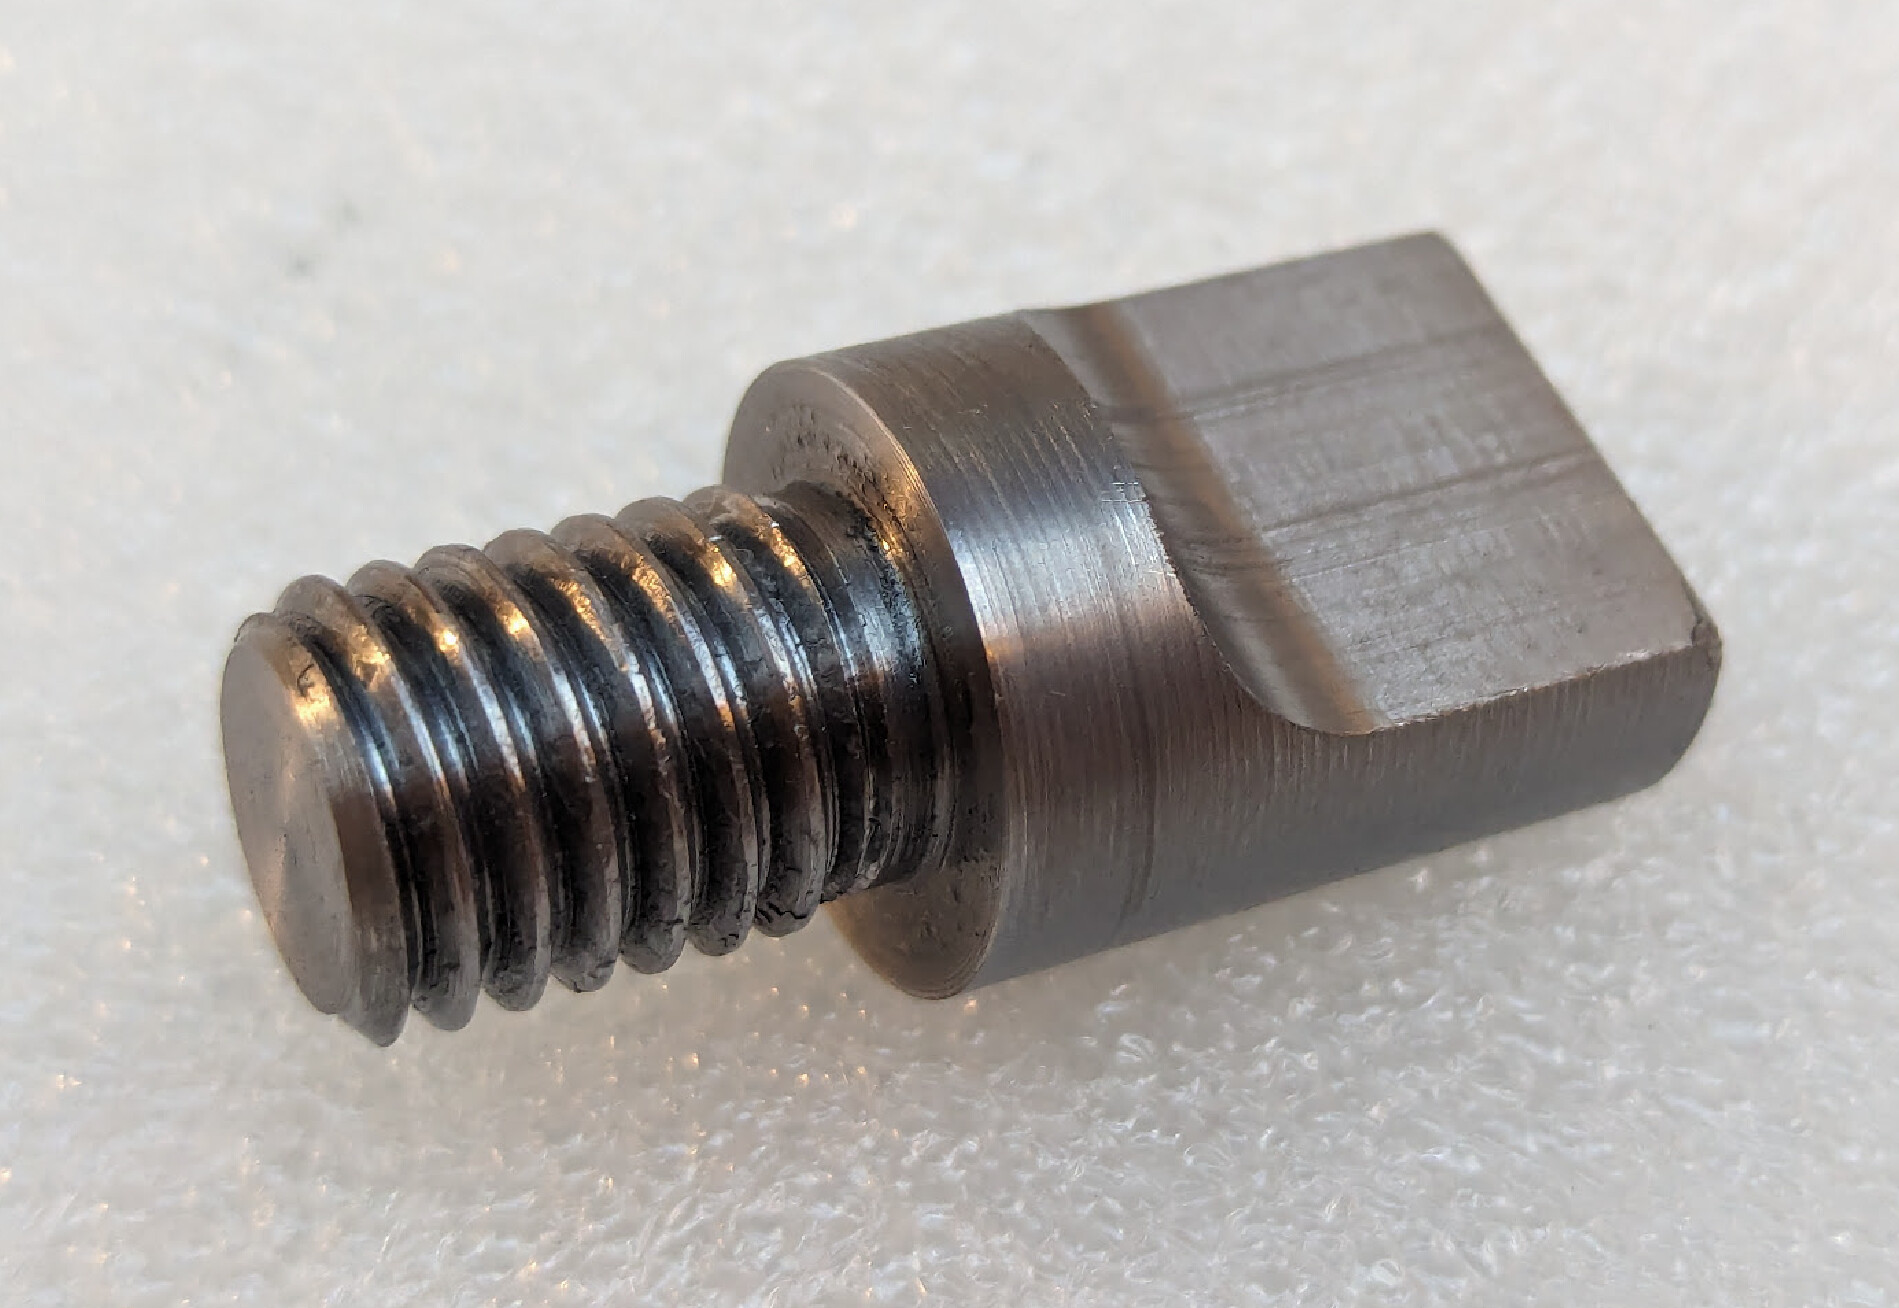
While doing a repair on an odd-shaped part that was hard to hold in the lathe chuck, I wished for a tailstock toolholder. ER40 by preference, since I already have ER40 on both ends of the spindle.
I have an MT3 tailstock, so I bought an MT3 ER40 adapter. However, it was meant to be for a mill, so it was intended to work with a drawbar. What I really wanted was a tang, so that when I retract the tailstock it pops out. Seemed easy to make a tang screw, and in the end, it was:
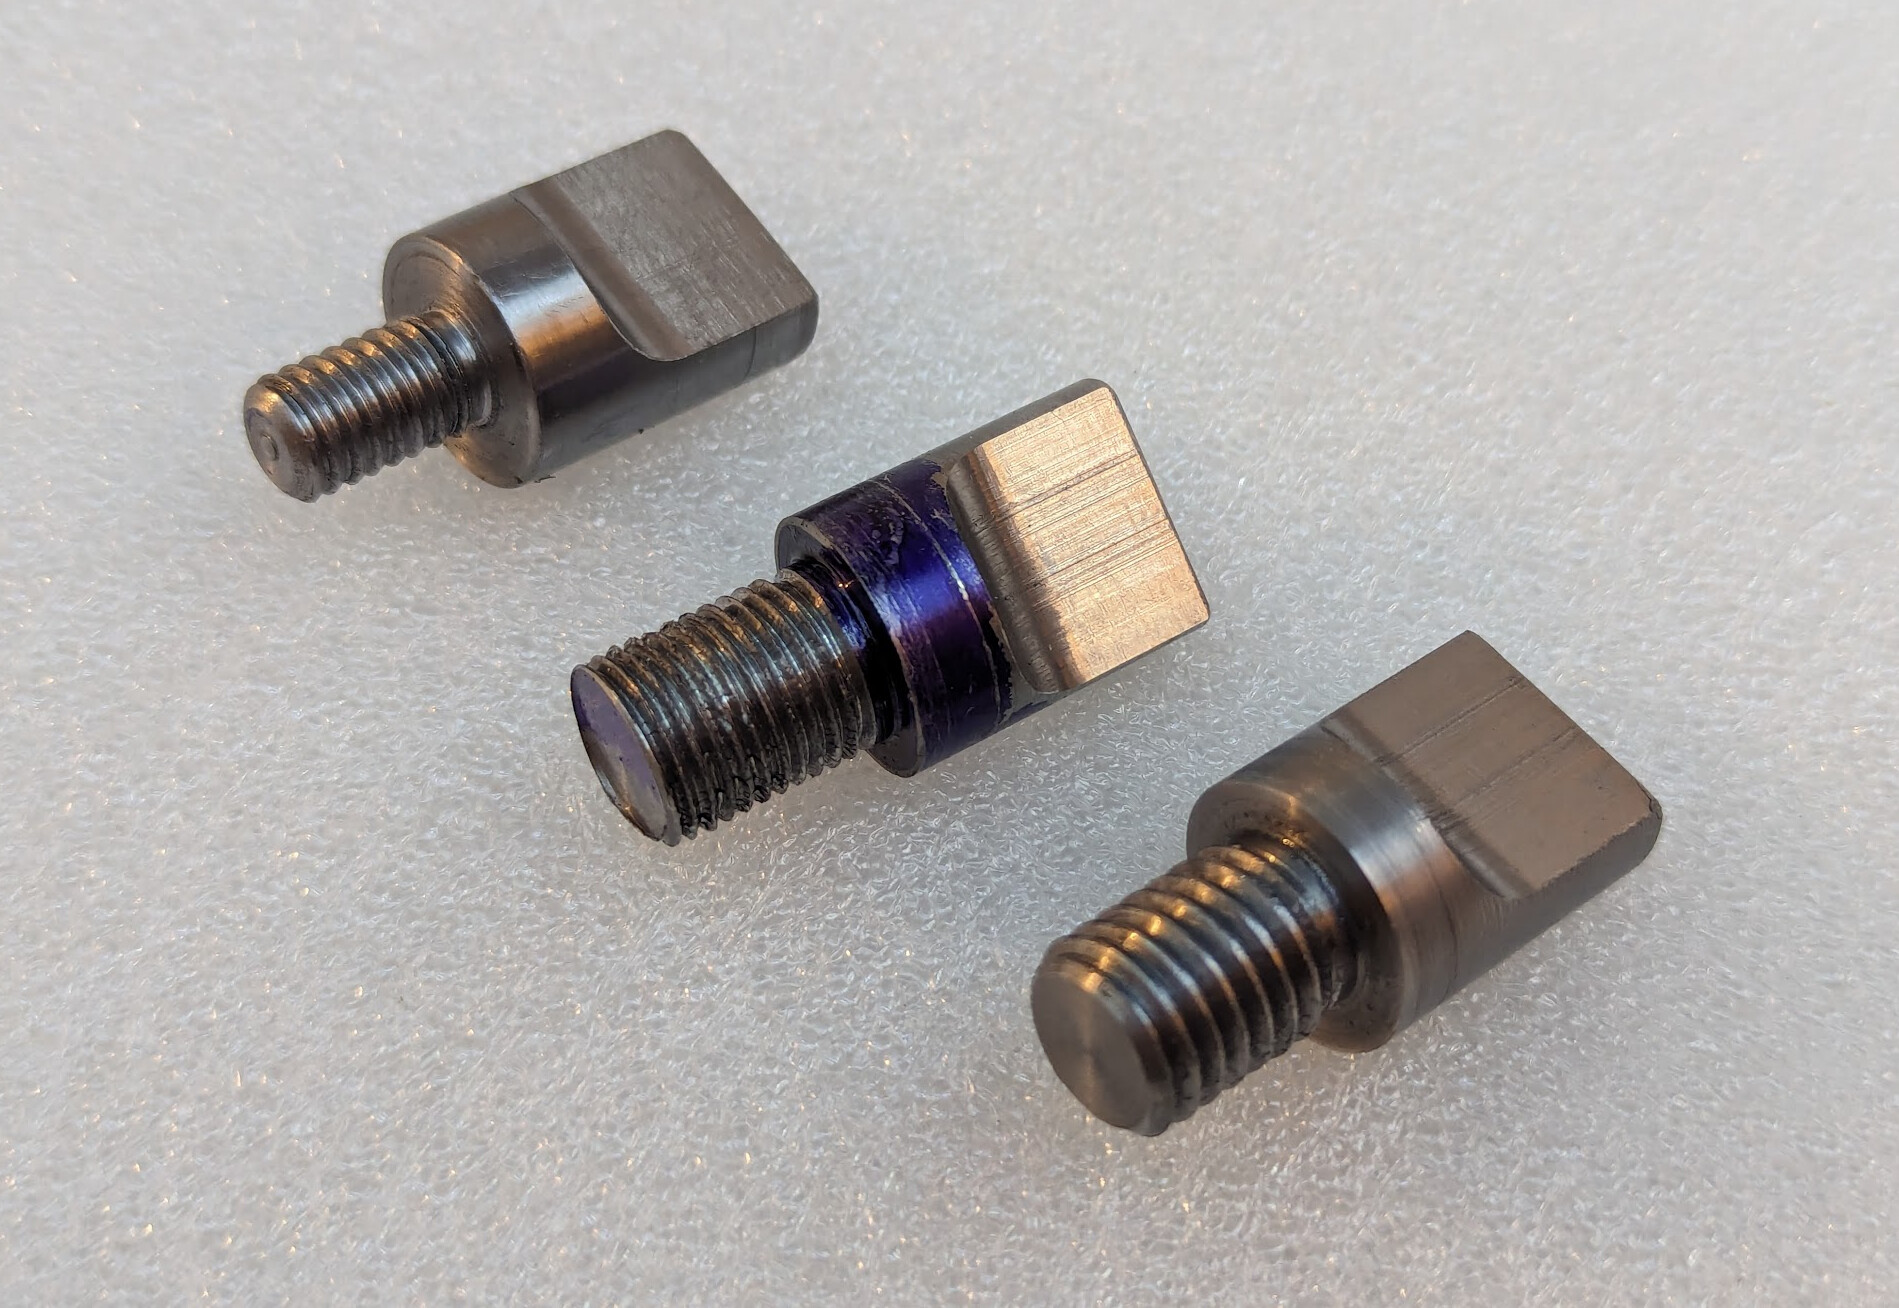
However, the path to a working part was longer than it needed to be. My first mistake was trying to make it before the adapter arrived. It was listed as taking a 3/8"-16 drawbar, so I made that.
Then when it arrived, I found that it didn’t fit at all. The ID of the hole was right for a 1/2" thread, not 3/8". I found that a 20TPI gauge fitted comfortably, so I made a new one with a 1/2"-20 thread. But that only screwed in about a turn and a half, and then stuck. Weird, what’s wrong?
I used a q-tip to put prussian blue on the threads, then used a slip of paper inside the bore to try to impression the threads, and I still found lines that matched the 20TPI gauge. What‽
Eventually, I got a hint to try using hot glue to impression the threads. Now I could see the mucked-up threads well enough to see that the 13TPI gauge would also fit. As far as I can tell, it was partially tapped 1/2"-20, then re-tapped fully in 1/2"-13. (That plus the 0.6mm runout makes me think this was a factory second… No way that is acceptable for a mill!)
I found that I could run the 1/2"-13 tap into the body, so I finally made the third tang screw with that thread, which finally worked.
Here’s the family, in order of making, upper left to lower right:
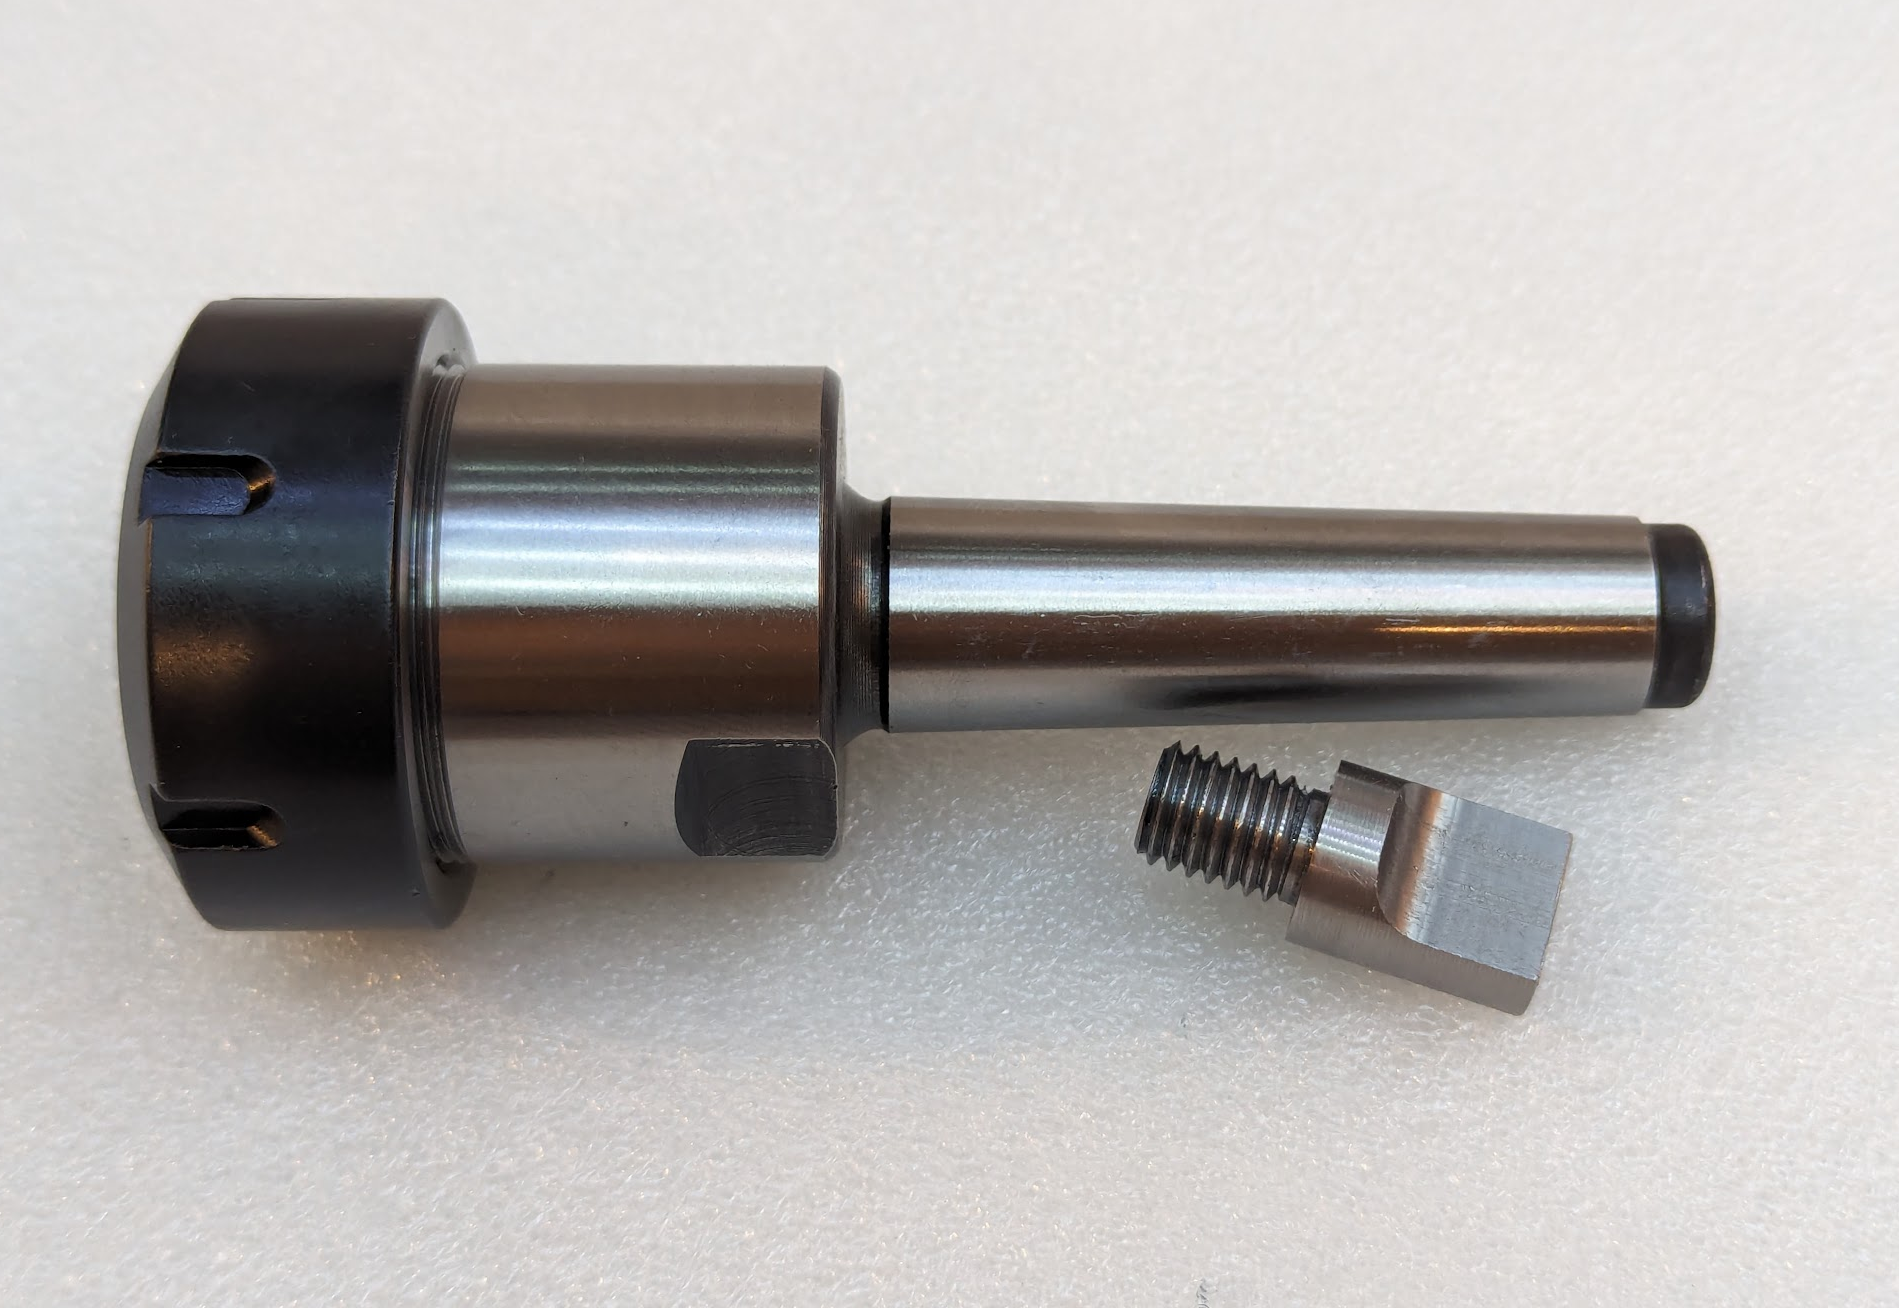
With the adapter:
Assembled:
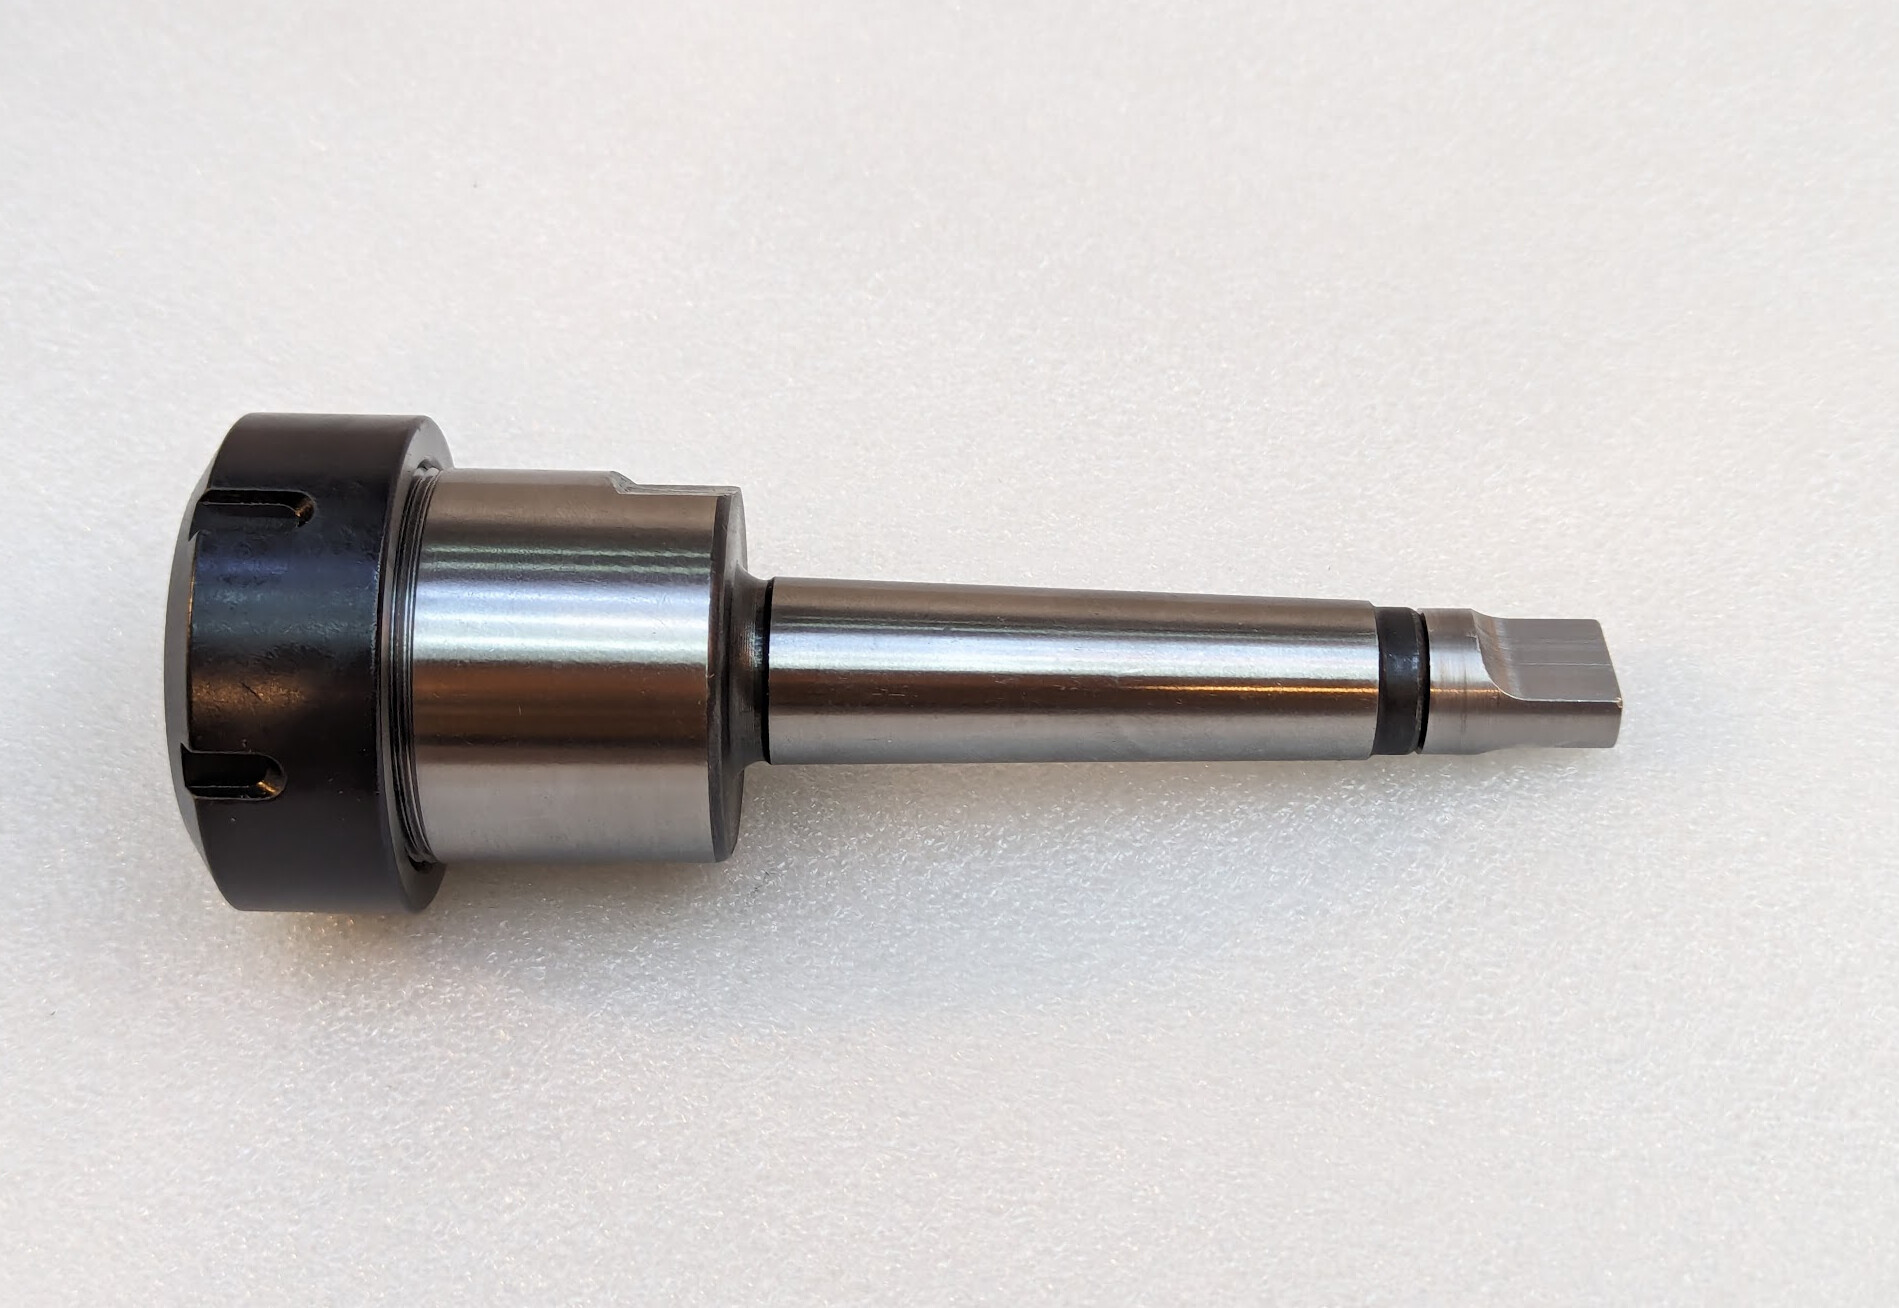
Now when I insert the adapter into the tailstock, retracting the tailstock causes it to pop out. This wasn’t true before I added the tang.
And I have several other MT3 chucks and centers that have screws but don’t have tangs and sometimes are hard to remove. I think I might make more of these (but with the ability to easily copy the male thread of the existing screws) and outfit the rest of my tools. ![]()