Let me know if any other pictures will be helpful.
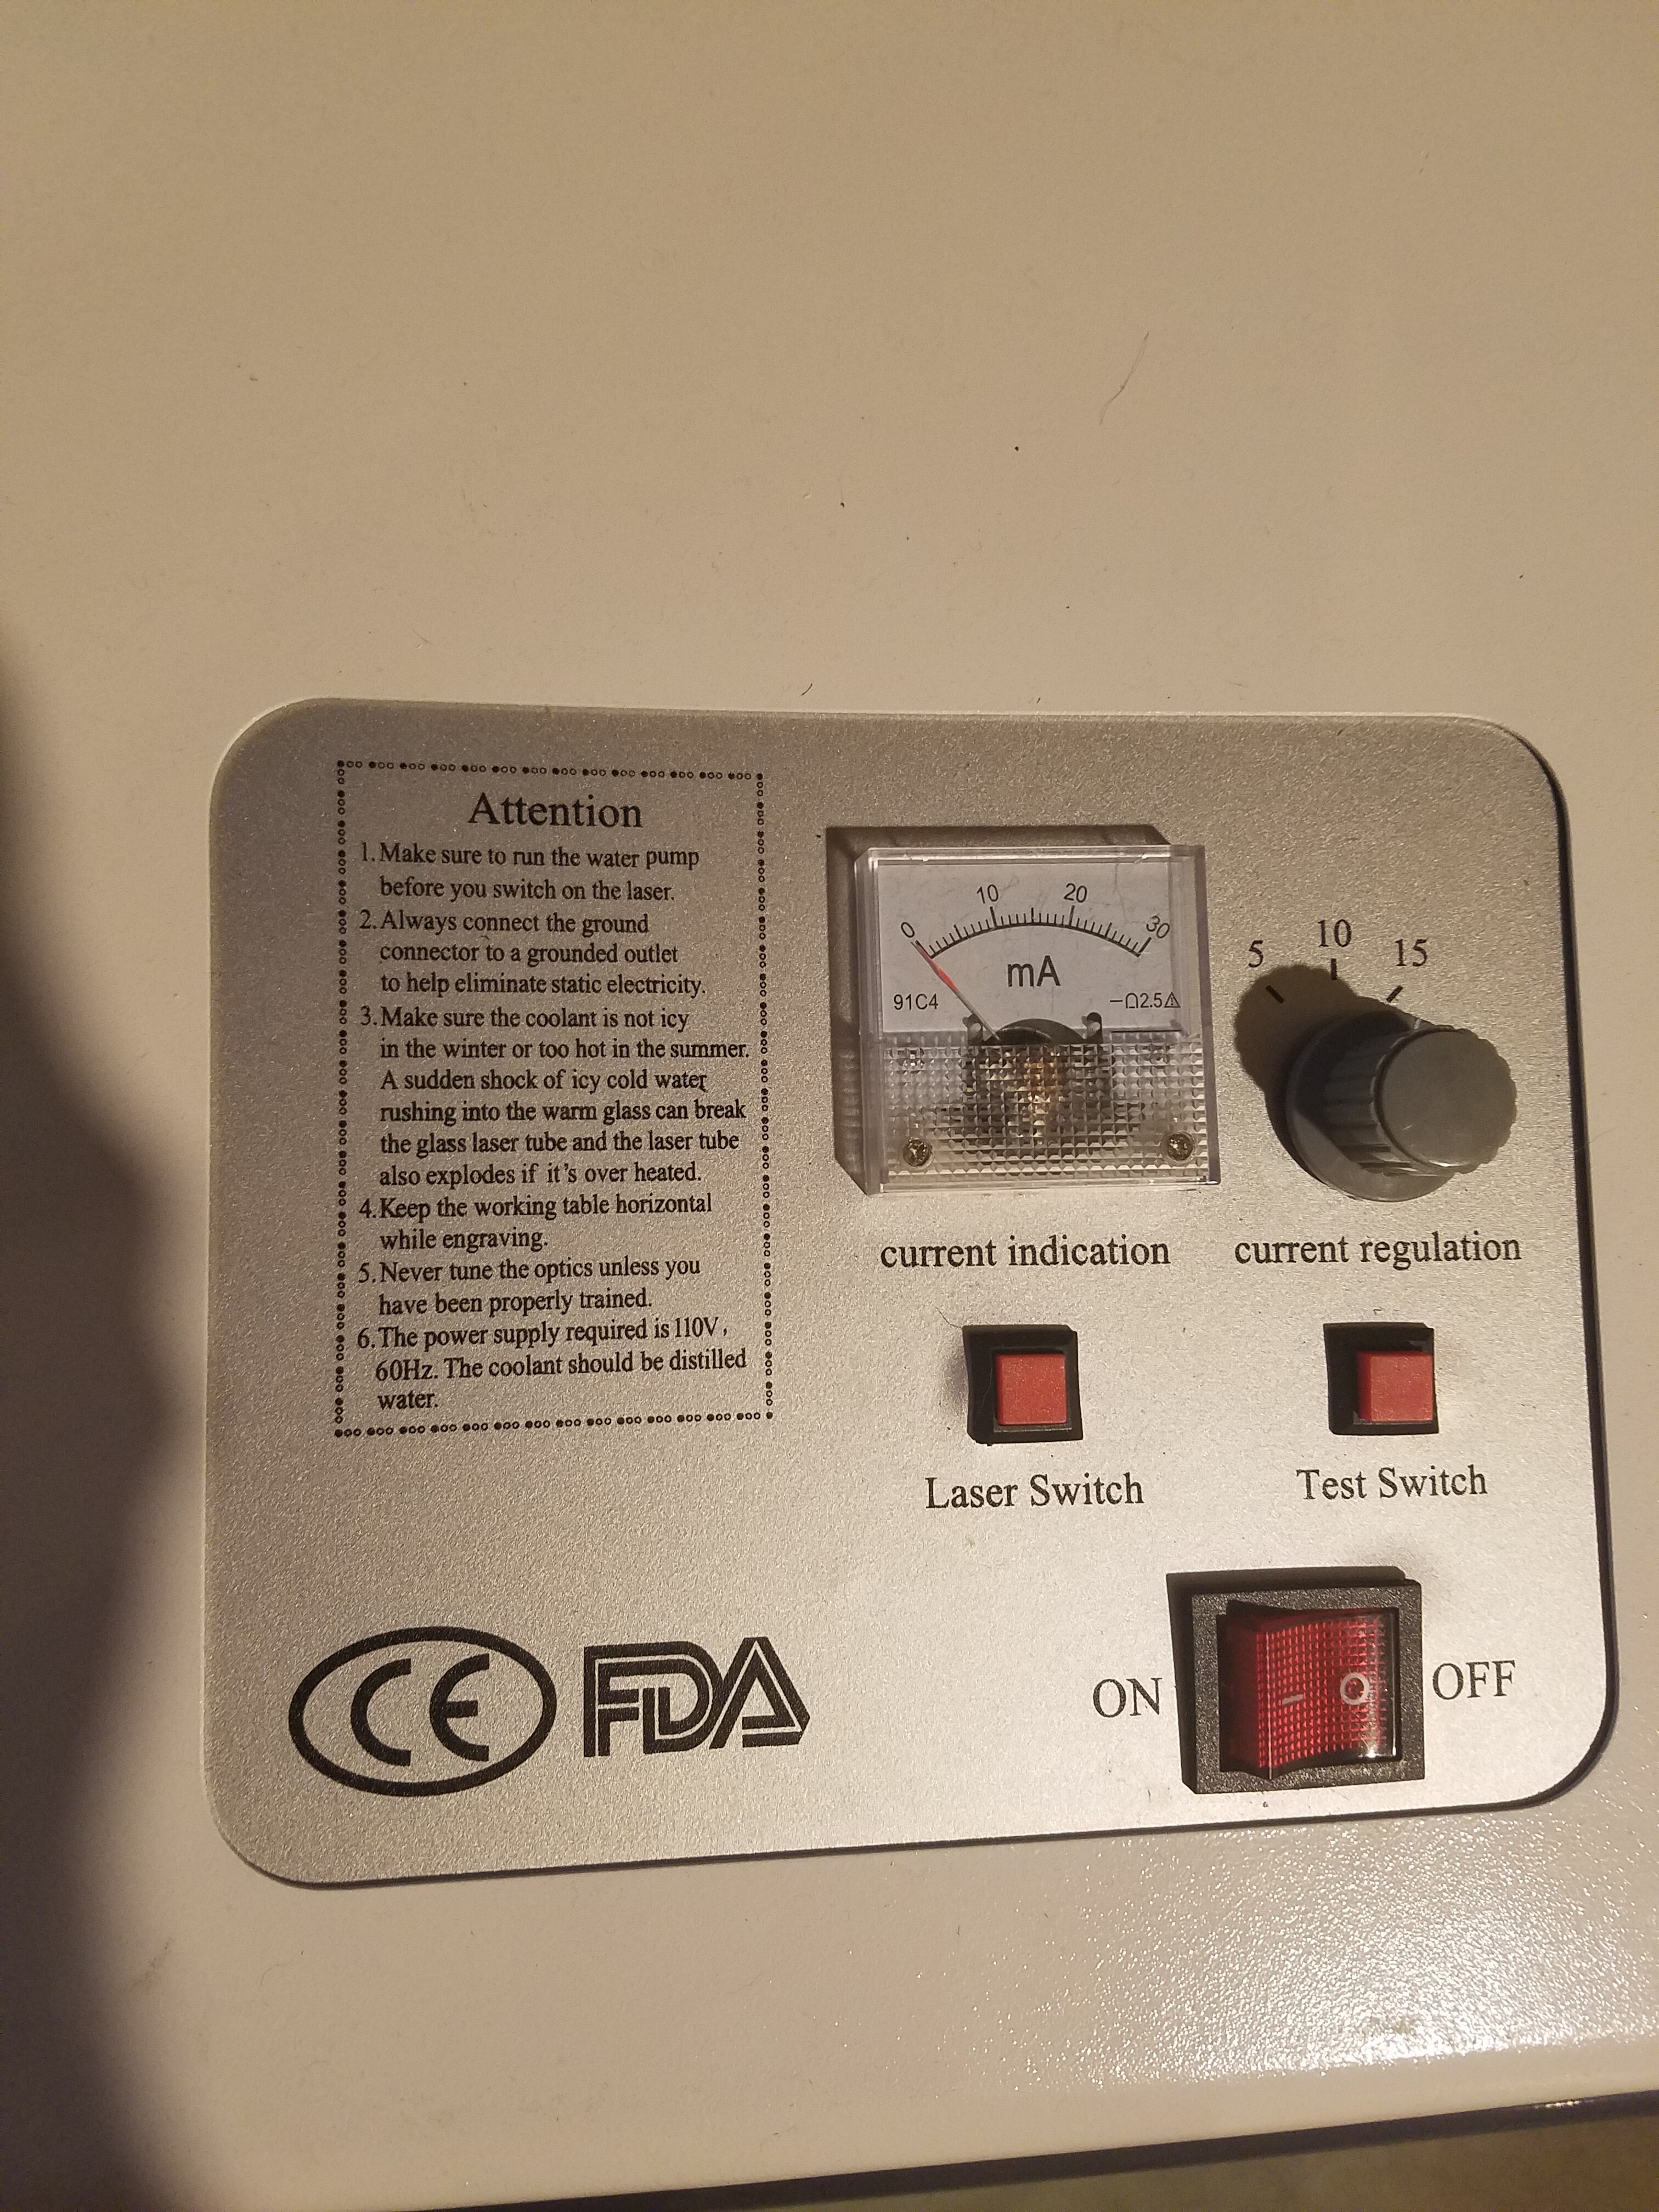
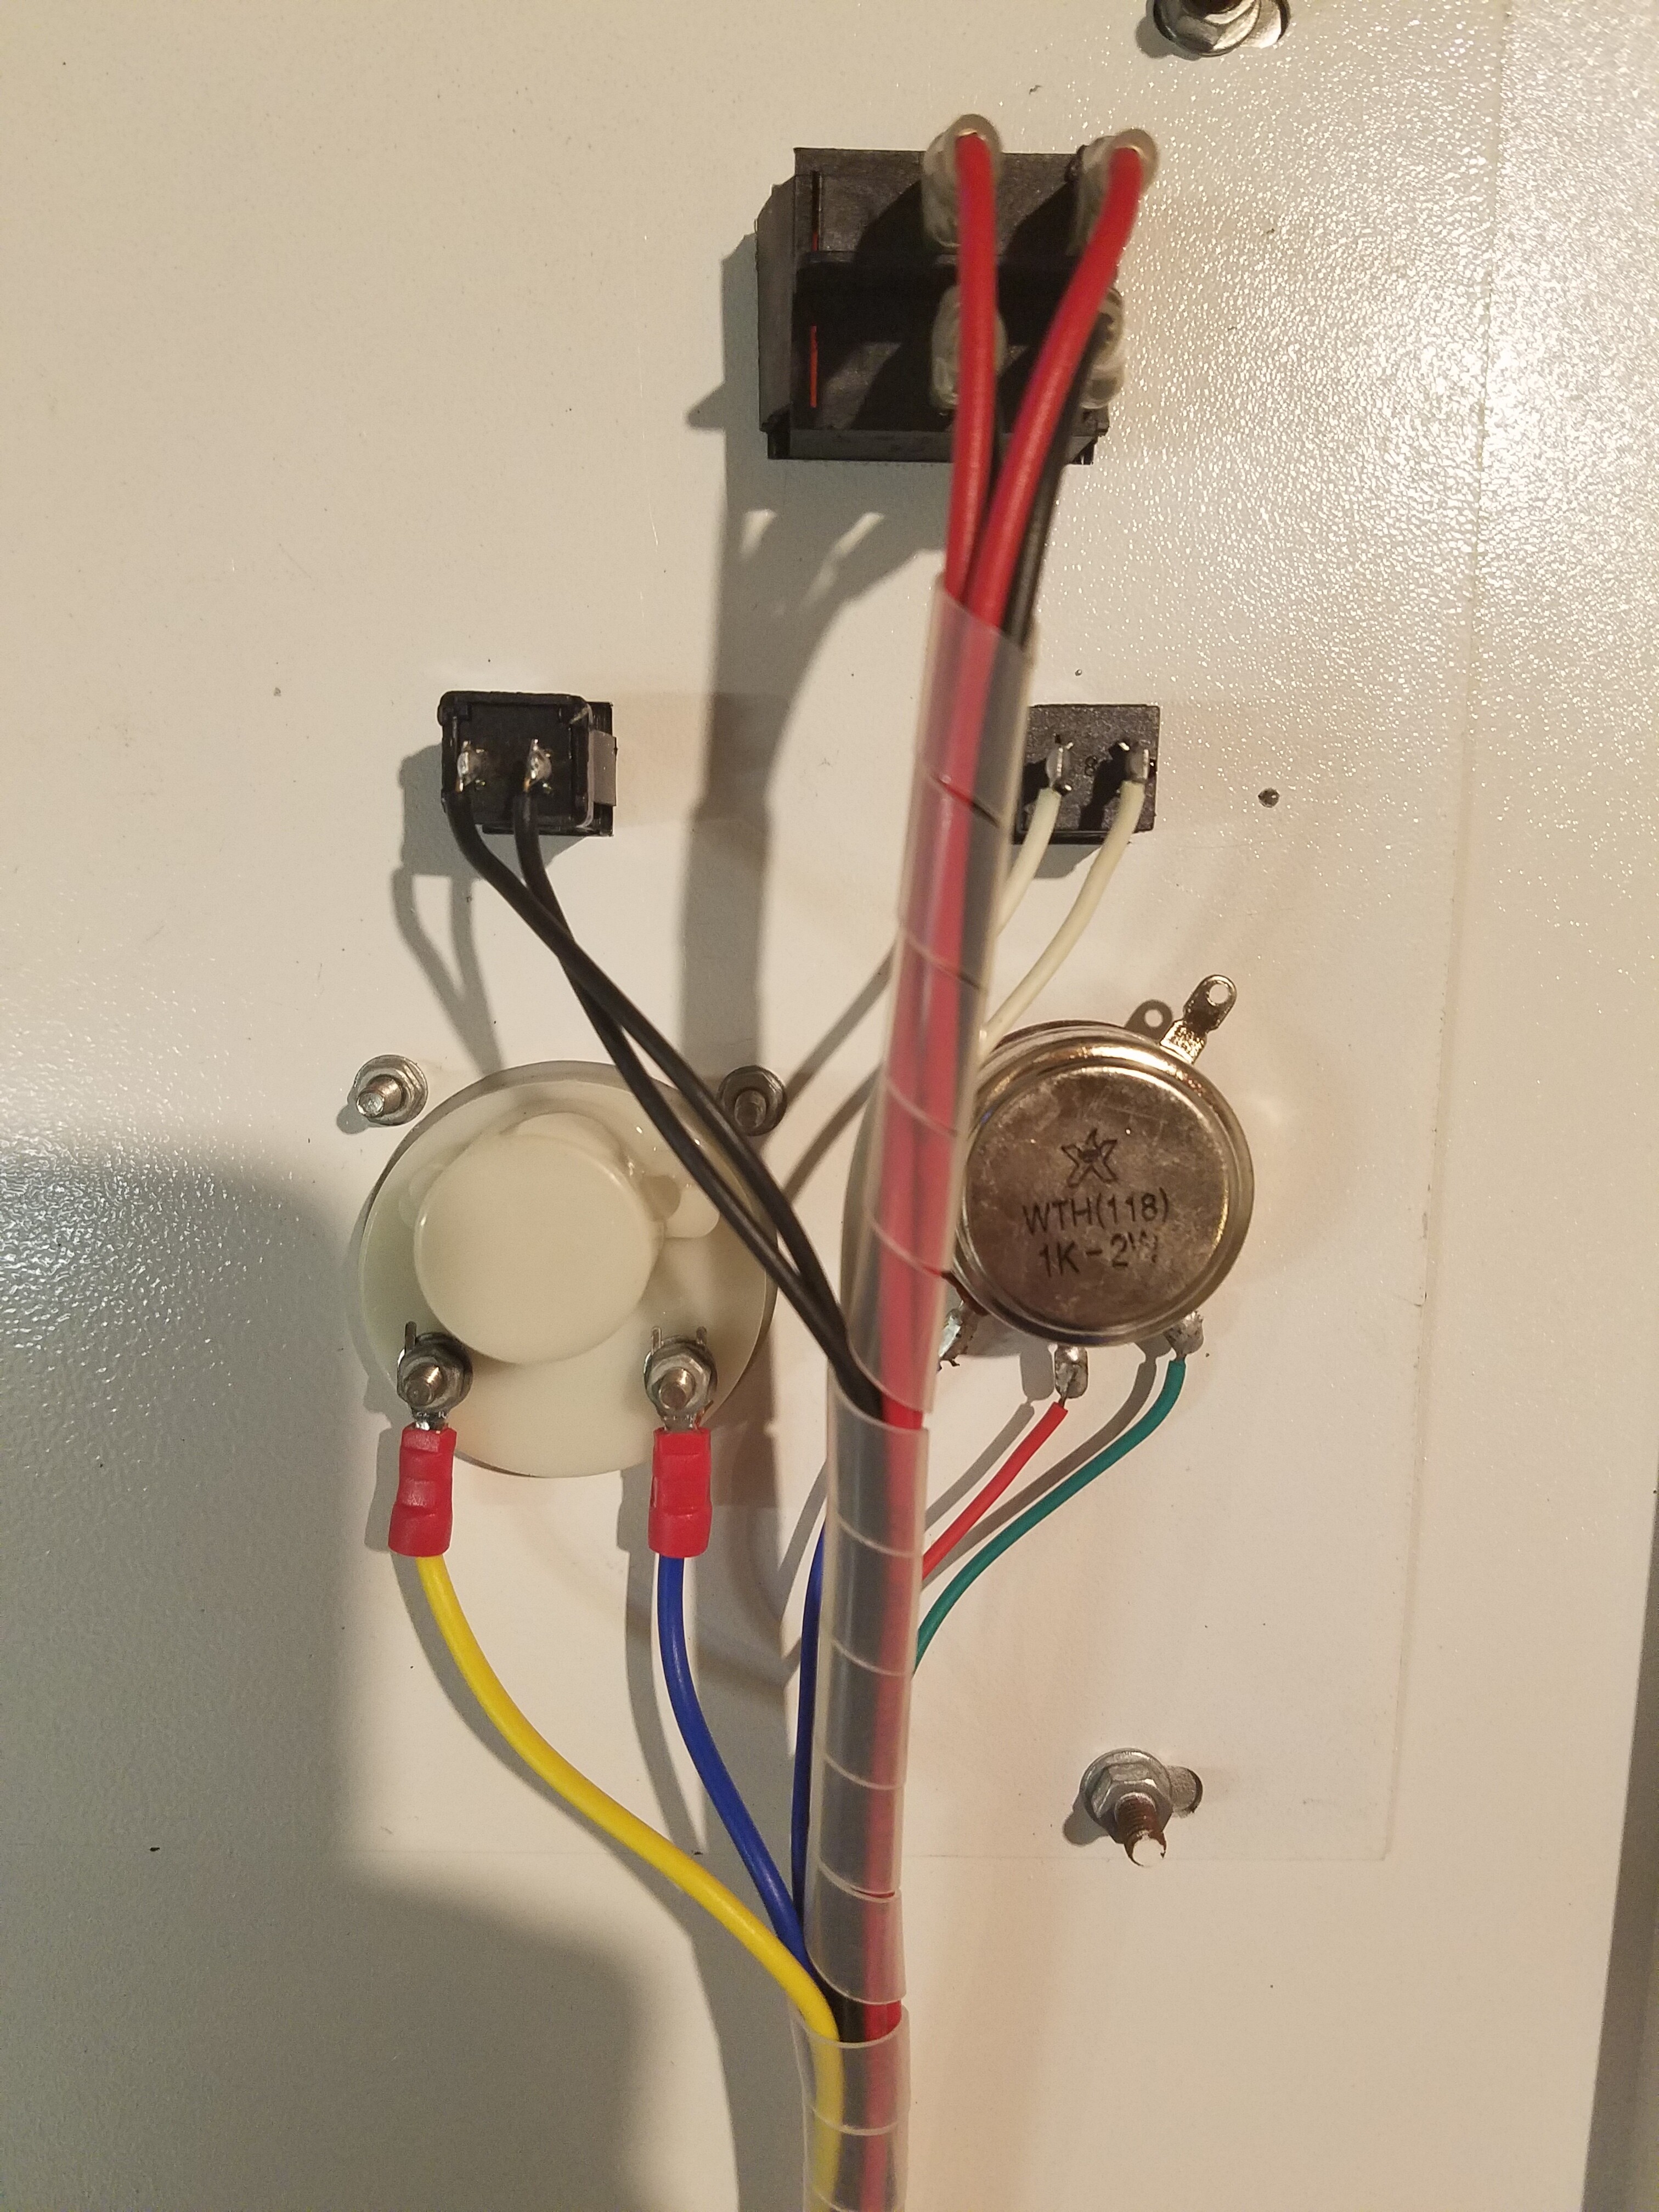
A picture of the front and back of the control panel would complete the set.
In the video I see the arc from the anode but no plasma at all in the tube.
It is tough to tell for sure if the tube it bad but in my experience when a tube goes bad the LPS is unloaded and it will arc like this one does.
Why is it bad:
- Its old? Tubes will eventually leak down.
- There are bubbles in the water jacket which could overheat the tube?
- The tube was run to hot?
So my guess is your tube is bad. No sense going much further until we correct that.
Thanks. I ordered a new bulb today. I will update once it arrives.
Thanks will be waiting for you to report on the new tube.
I assume you know how to replace?
Technically I don’t know how to replace it, but I have found some youtube videos that I think I can figure it out.
We have some resources linked from here:
Edit: The tube I bought is from lightobject and it already has the wires hooked up to the tube so no need to do any splicing (I feel much better about that). So I will just need to connect the wire to the power source (not sure if that is the right terminology).
I was watching a video for replacing my laser tube and the person had added quick disconnect to the HV wire. Is that recommended/OK to do? Here is the video I watched that had it. My thought would be that next time I need to change the tube this would make things much easier.
Thanks.
1 Like
HV connectors are ok to use. Amazon.com
Consider:
- Even with a previously wired HV connector you may still have to reconnect the anode end on a new tube that has no pigtail.
- On a tube with a pigtail you will have to add at least 1/2 the HV connector.
- When replacing a LPS you will at least have to replace 1/2 the HV connector on the anode wire.
- HV runs with no breaks are better than ones with a connector.
Unless you are planning on taking the tube/LPS in and out a lot you may not be gaining much with a connector vs just reconnecting the existing wire back to the anode.
- Strip the HV wire back one inch
- Wrap the wire around the anode
- Replace the sleeve
- Pot with HV RTV
- Wait 24 hrs.
BTW one thing the video did no mention is to ground the anode with a wire taped on a wooden or PVC rod (chicken stick) before working on it. These HV systems can store a charge.
3 Likes
Three questions before I change out the laser tube.
- If there are bubbles in the water cooling tube running through the laser tube, could that be causing the arching issue?
- Just to clarify about the pigtail on the new tube I received. Are you saying to remove that wire and just run the old wire to the new tube’s anode? My thought was to run the pigtail to the LPS and connect it there. It sounds like that is the wrong thing to do.
- Is there a particular HV RTV that you would use to fill the silicone tube surrounding the Anode?
It may make sense to upgrade my LPS at the same time as I am replacing the laser tube since I plan to get an upgrade LPS anyway. Any recommendations on an LPS?
Not sure if it would help to know what upgrades I would like to make to the machine or not. I would like to use the Lightobject Z-table and a rotary machine eventually. I have also considered upgrading the controller to be able to use LightBurn instead of K40 whisperer. I would also like to add a laser pointer to the laser head so I can test cuts/identify the starting point without having the laser on. I may also want to add some additional LED lights inside the cutting area.
Here’s one thread I started: Alternative to red dot beam combiner for positioning?
It’s also possible to locate the cut point with a physical pointer matched to the head, and might be easier than a “red dot” or crossed line lasers.
@Ariel_Yahni_UniKpty posted this link long ago, and it’s still a really simple idea:
1 Like
What functionality are you expecting in an upgrade?
I recommend finding the cheapest you can and use that. These things for the most part are consumable, most will fail eventually.
I would use the one you have till it dies :).
Thanks. I like the maker buddy and will probably do something like that at some point.
How much distance is needed between the laser tube and the mirror? I just put the new tube next to my old tube and it is longer. I think I have enough room in the tube bay, but not sure if it is too close to the mirror.
Mmmmm, I don’t think it matters other than having room to adjust the mirror.
Laser tube installed and it is up and running. Need to check alignment still. Cohehesiin board should be arriving this week. It is starting to come together.
Edit: Checked the mailbox after posting the message and discovered my Cohesion 3d board has arrived along with the LCD control panel. I will likely install it tonight. Planning on replacing the front panel to incorporate the LCD control. Hoping to find something that is already configured. Otherwise I will be doing lots of measuring lol.
FYI and if I understand your plan correctly; the normal K40 panel and the C3D panels are independent of each other.
In other words the C3D panel cannot replace the K40 panel functions.
What I meant was to replace the metal plate that holds all of the K40 controls (on/off switch, test button, laser button, etc) and add in the C3D LCD panel.
1 Like