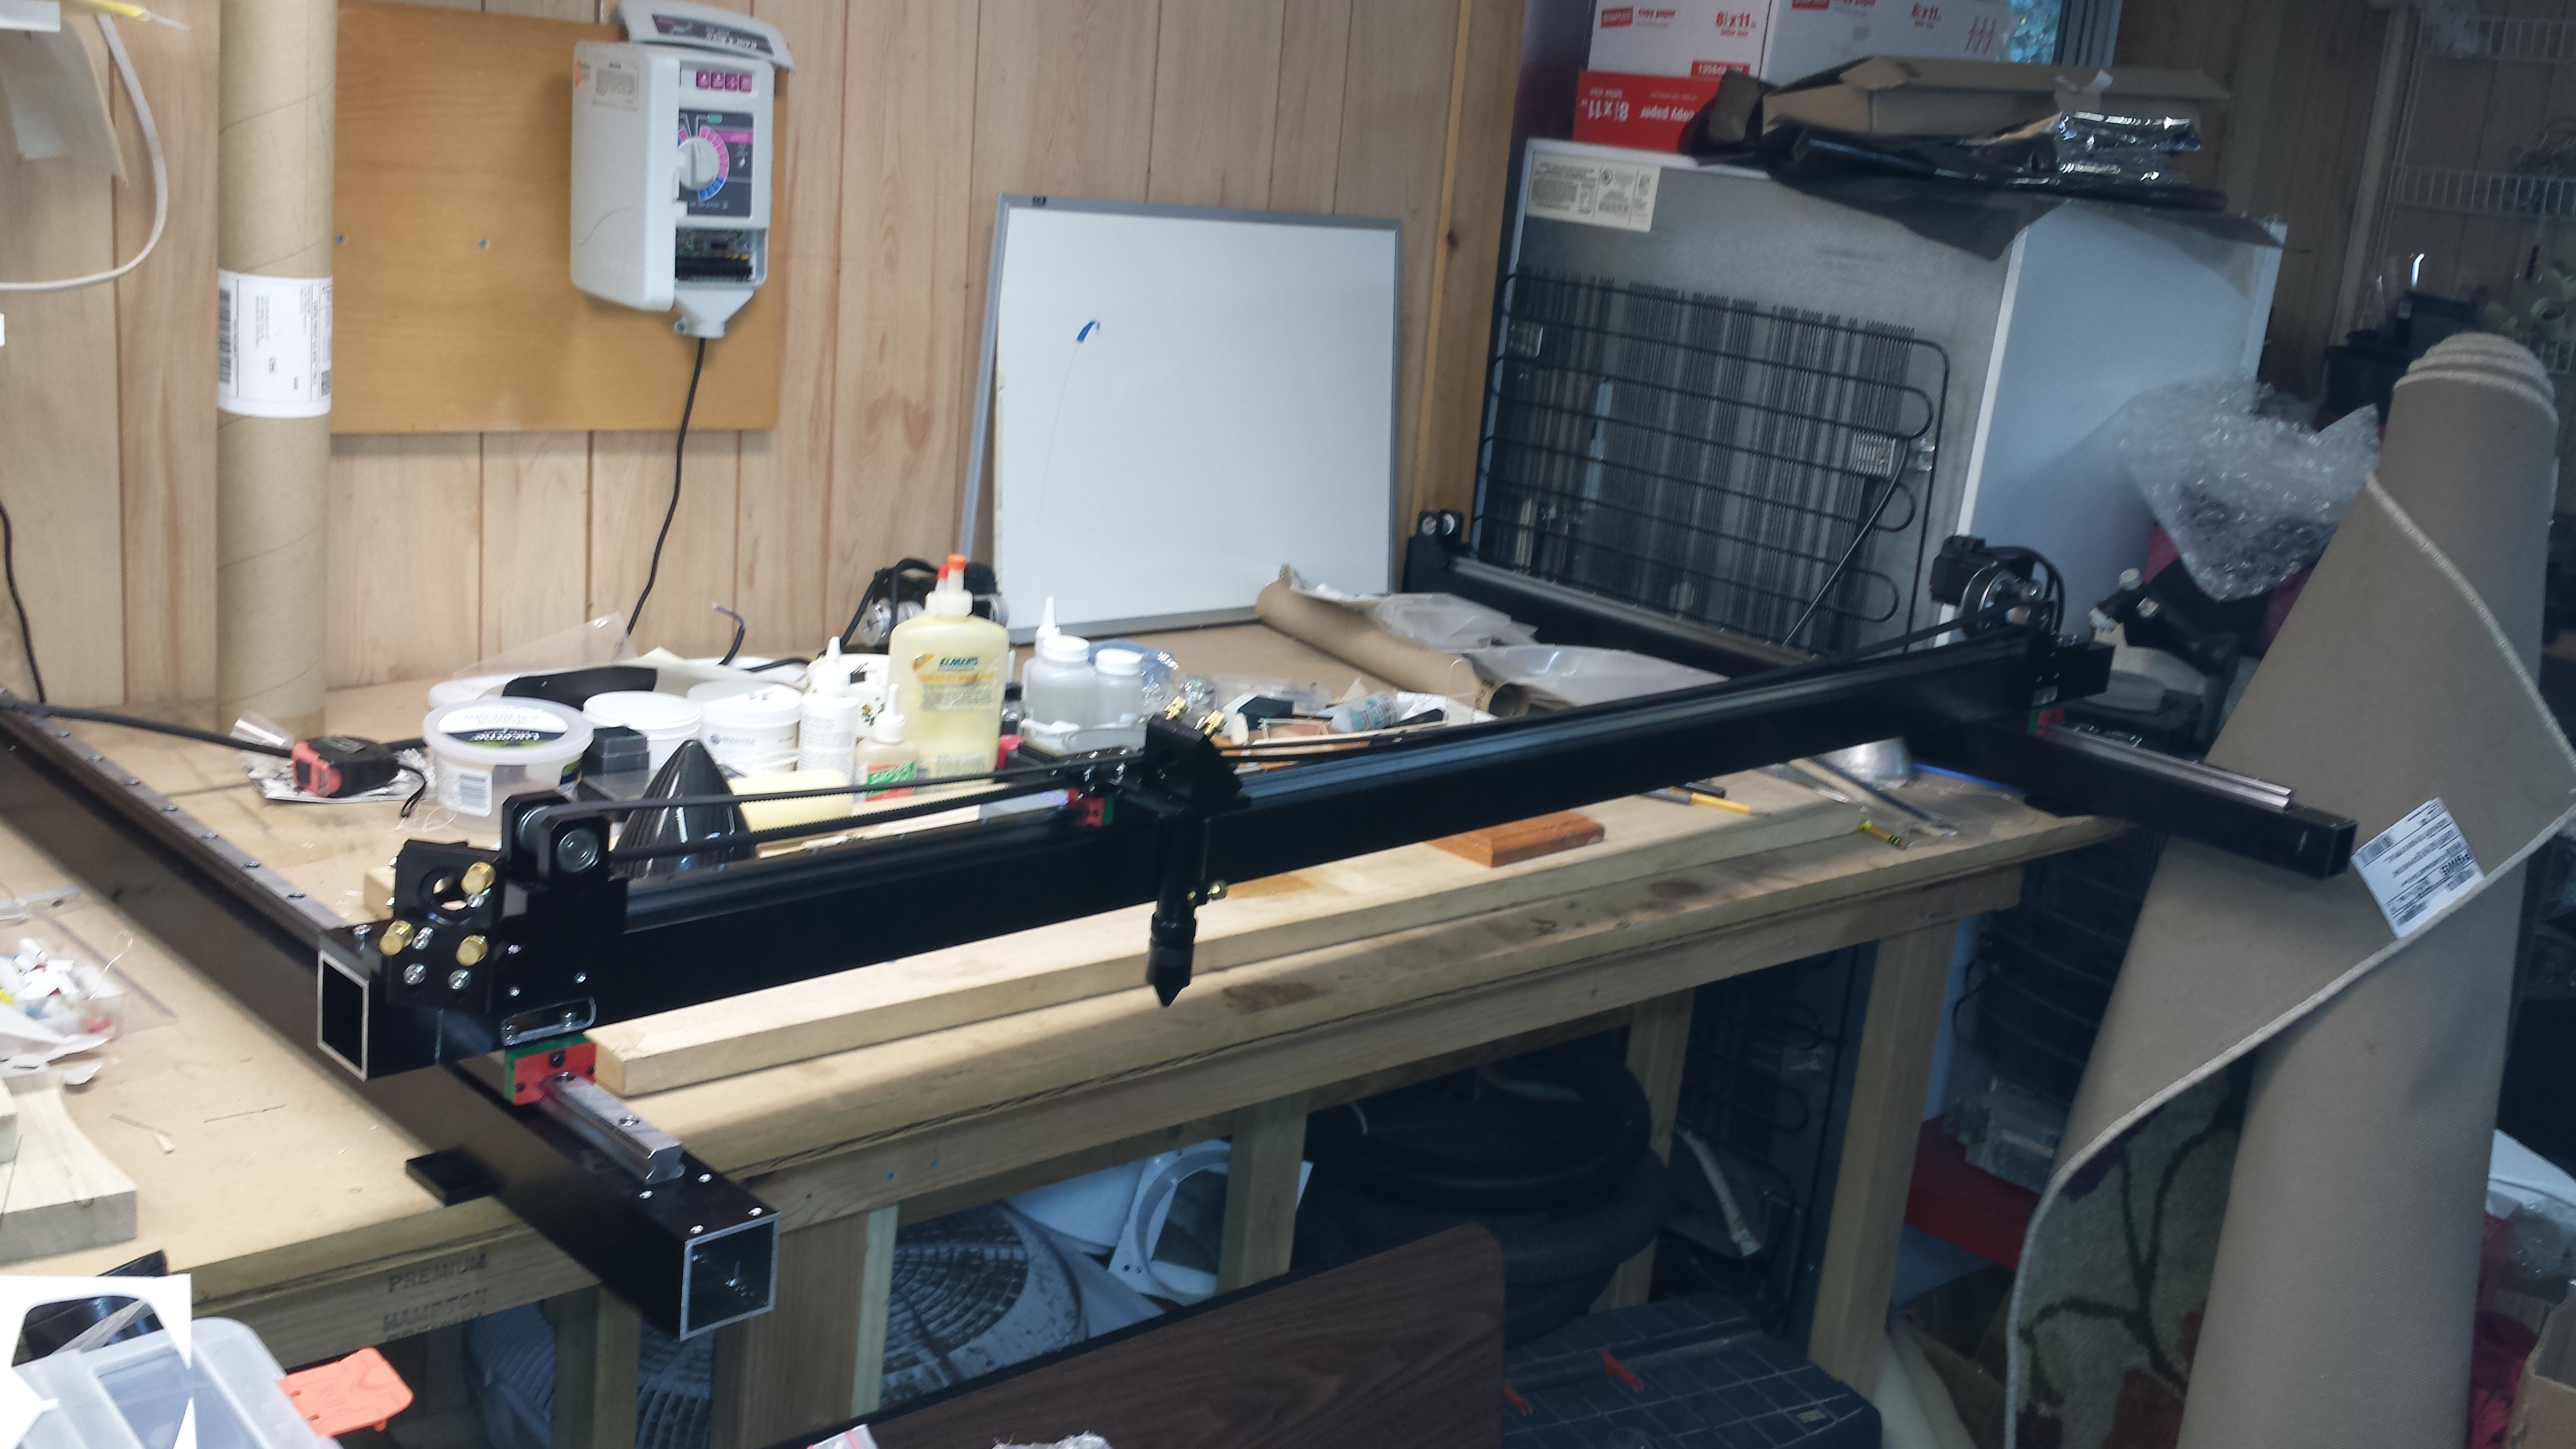
Finally getting back to my large format K40. Purchased the mechanicals several months ago and now that outdoor hobby season is over its time to continue with this. I paid for a 1280x800 setup but the seller was paranoid at meeting my needs so he sent a 1400x900 for the same price. I also got a good enough price on components I went with closed loop steppers and controllers. At this point I need to decide on a base, source some kind of enclosure(thinking from a scrap yard) and assemble it. Trying hard to keep it under $2k including the K40 I bought early this year, now Cohesion controlled. I have the drivers and RepRap display so its mostly mechanical stuff needing done.
Have you considered getting a larger capacity CO2 tube since you should have the space in the new case you will be fabricating?
I don’t get it, you can buy a 100W 1K by 700mm all set up for $2500, including rotary and electrically driven bed
But if it’s the experience your after - that’s priceless
The machines that frustrate me most are the ones I purchased assembled. No tinkering = no fun. Of course, I’m not running a service so I can fiddle with stuff all day.
Anthony, my application is cutting foam, balsa and liteply all of which use very low power settings with a K40…why would I spend money for more power?
Greg- I’ve not seen anything like that kind of price. Given that I can’t get my money back for the K40 that would make me have nearly $3k invested vs the $1500 I’m in for not counting the K40. Also my absolute minimum size requirement is 1280x800. The setup pictured above has genuine Hiwin cars and tracks so I bet I have better quality motion control. Also none of the budget units I’ve seen offer closed loop stepper/controllers and I went one size over the normal size incase I want to add a router head. I would agree if I count my time then a built machine might make more sense but I’m retired and have far more time then money.
Looks like a C3D Mini sized bag
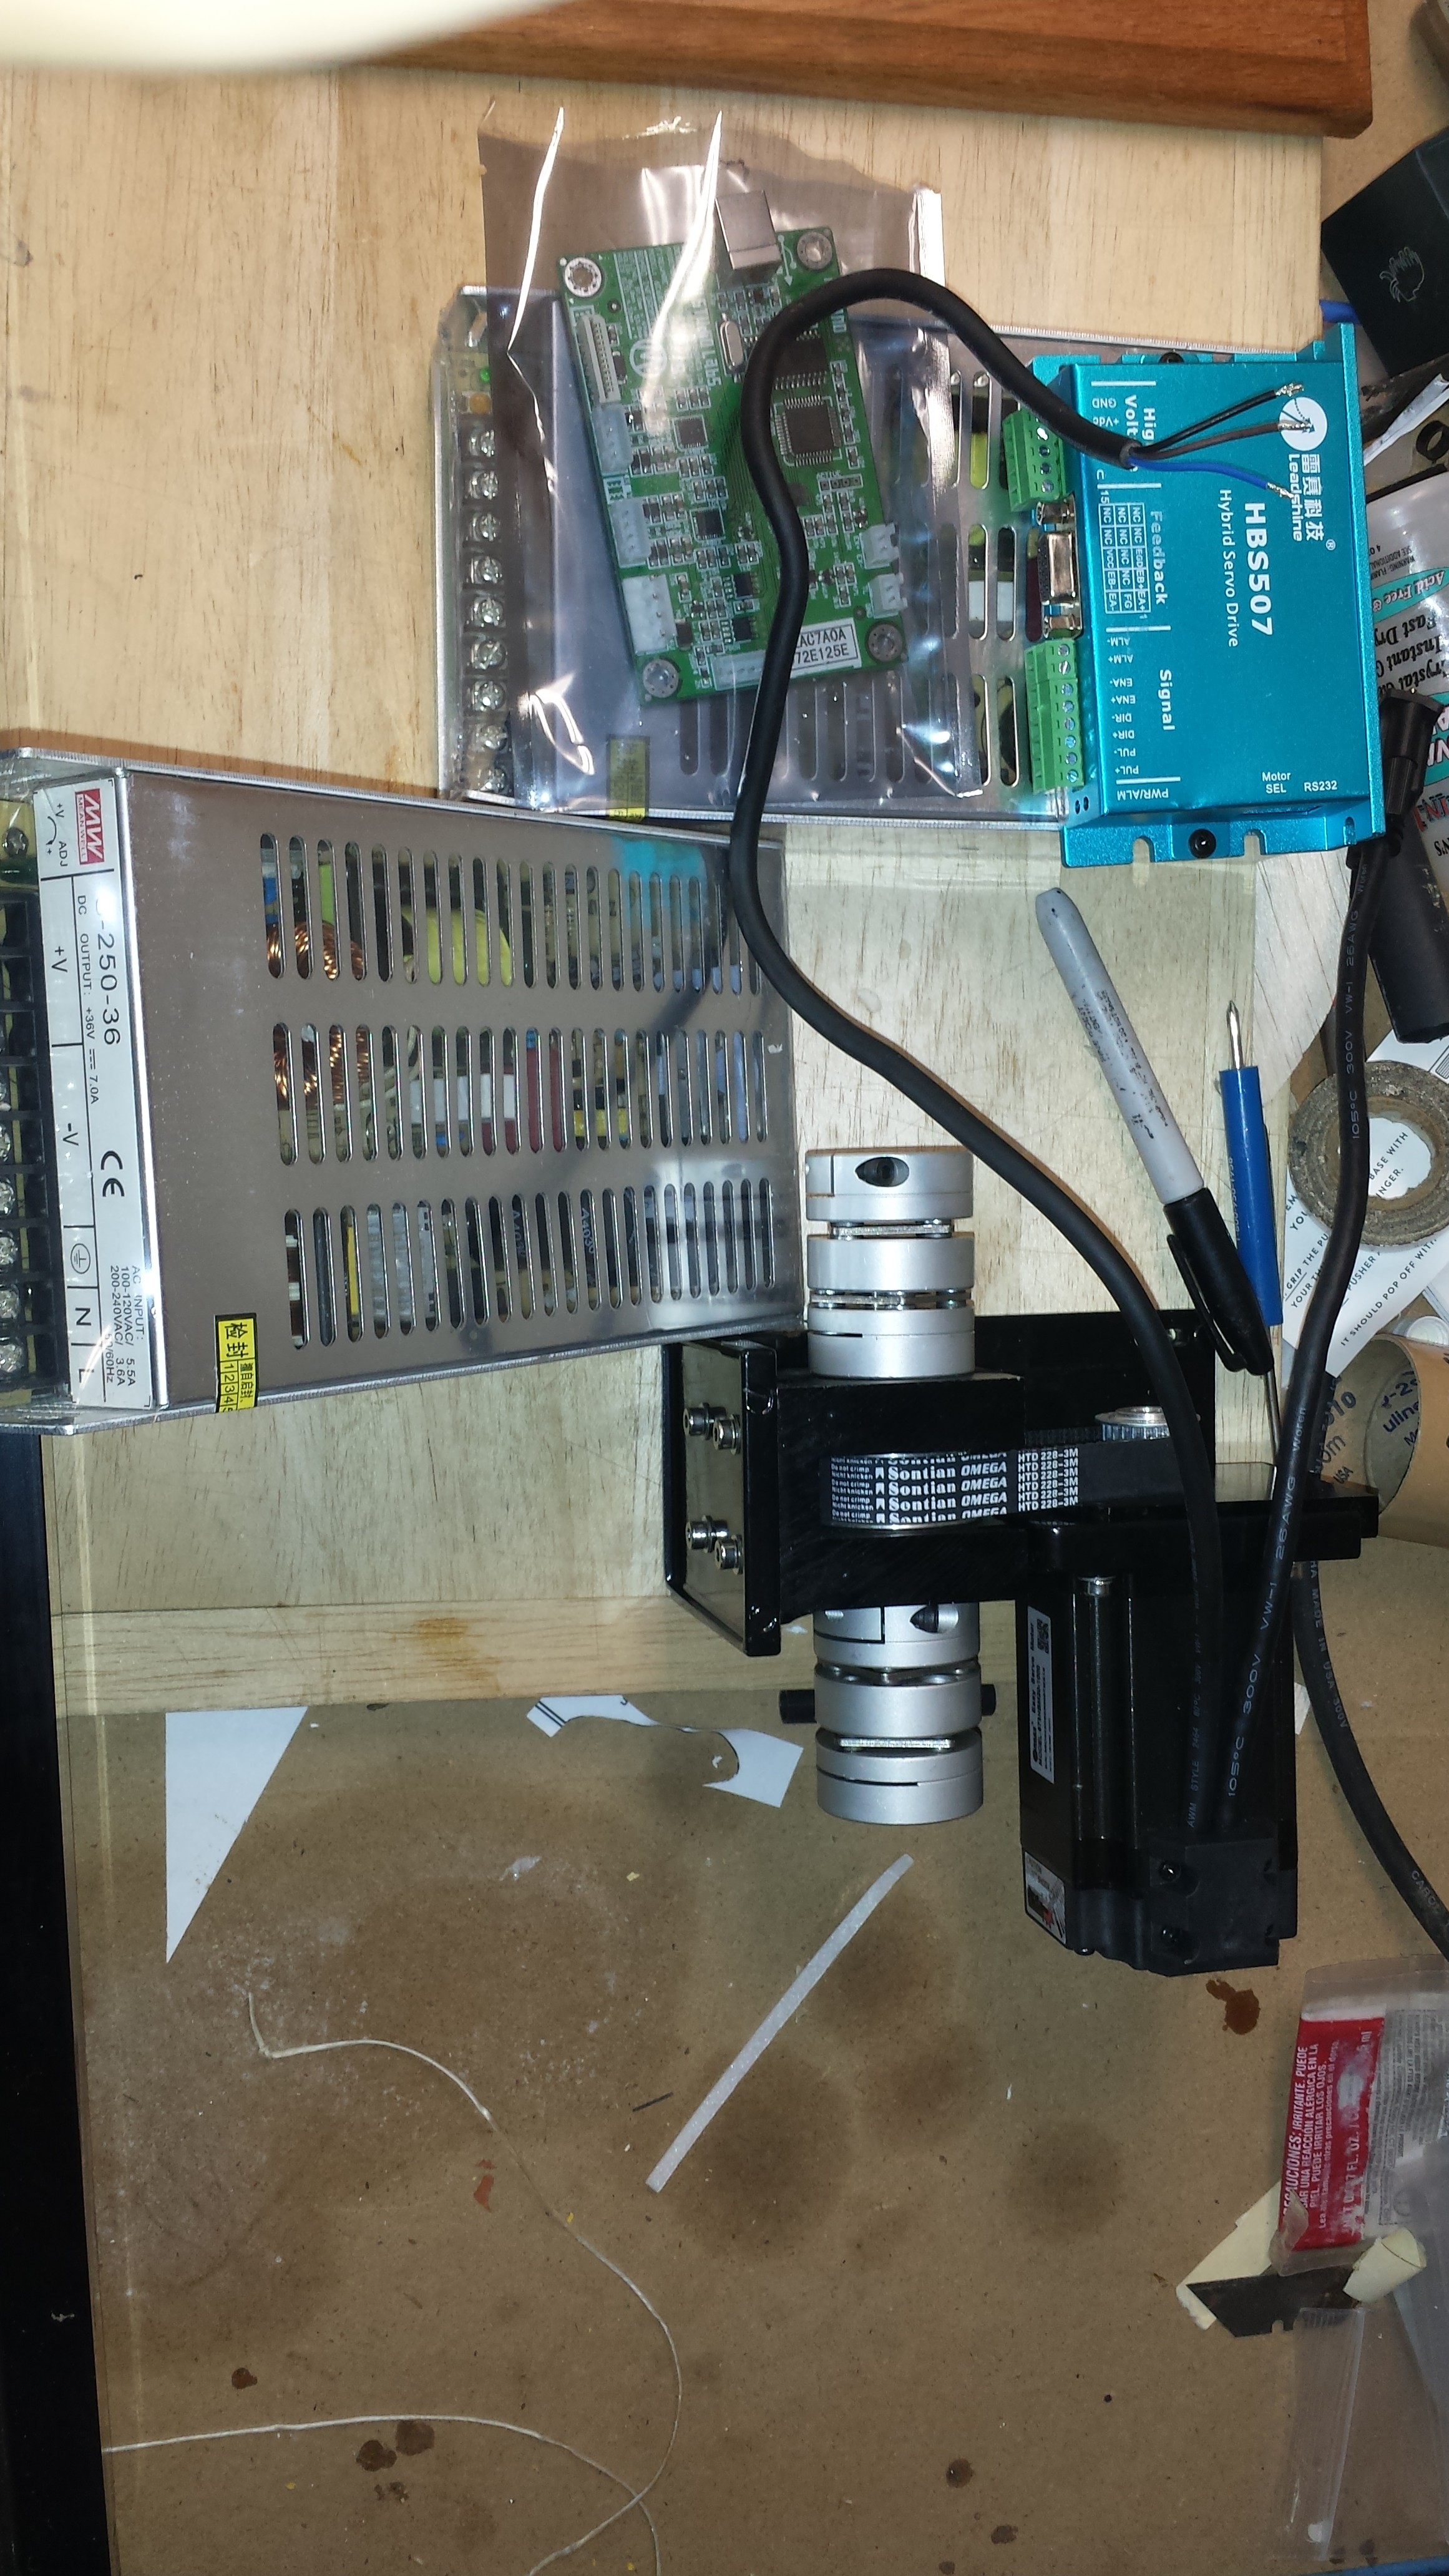
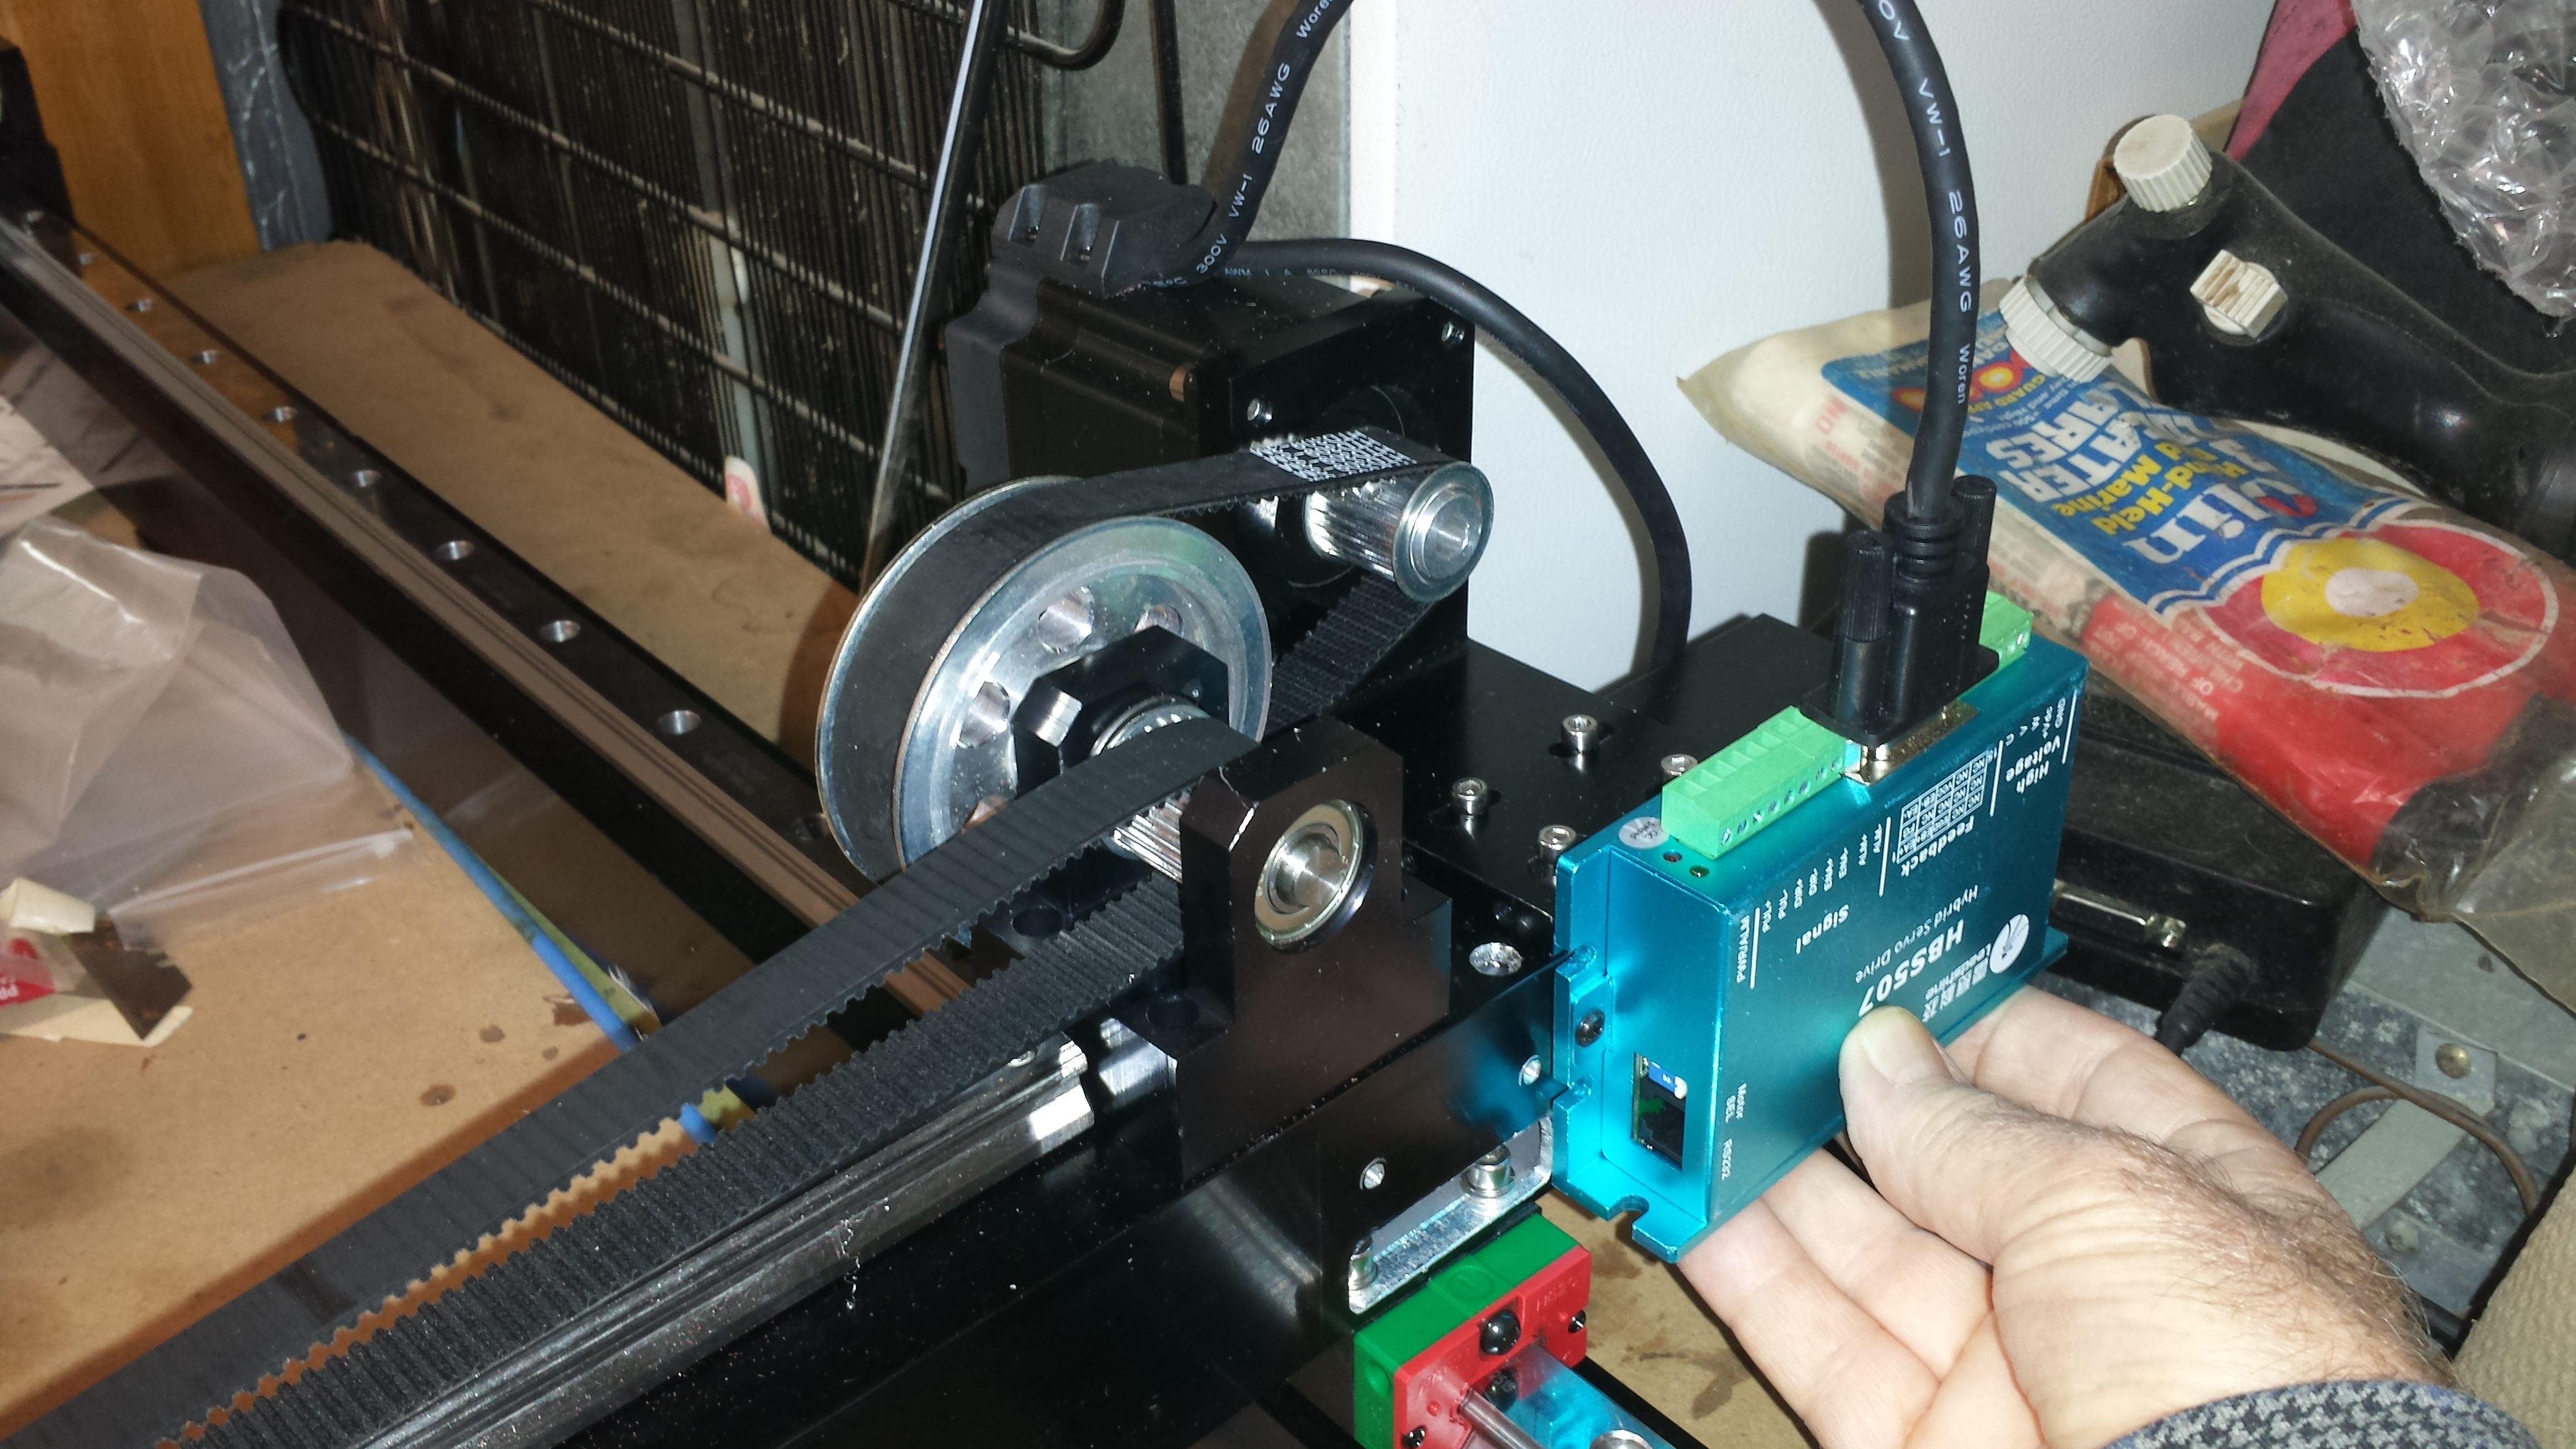
Thats correct…big thanks for a having drive wiring example on your site, eliminated a lot of searching to figure which mode(NPN, PNP or differential)to connect the Mini to the HBS507 which it turns out is the Chinese market model and very under documented vs the Leadshine D series. But a little poking around at CNCzone lead to an english setup utility so I’m starting to feeling like this could actually work 
The biggest issue remains finding an inexpensive 78"x48"x12"(or more)enclosure, hoping to find a equipment cabinet or locker used. NOT liking how this is on track to be a 300lb behemoth thats going to require a rethink of my shop layout, but thats the price of being able to cut 48"+ materials.
Geez - the way your going - your going to need a 20 foot sea can ! 
Sea can? Anyway, I’m stalled trying to figure the best way to mount and enclose this. It does not seem so big on the bench but when I realize I need for example a storage cabinet big enough to easily get my whole body into, twice, it hits home. Worse I need to move this thing in 2 years clear across the country. Its the same old story, pick light, strong or cheap- any two is no problem but all three sure IS.
@Steven_Whitecoff
I’s a nice problem to have I guess!
couple of sheets of 4 x 8 tin, some rivets, a bit of angle iron for a sturdy frame, a metal table with motorized wheels (From a scooter - 36V) - and then - how to get it through a doorway.
@Steven_Whitecoff
I’s a nice problem to have I guess!
couple of sheets of 4 x 8 tin, some rivets, a bit of angle iron for a sturdy frame, a metal table with motorized wheels (From a scooter - 36V) - and then - how to get it through a doorway.
So the plan is locally source 4’x6’ 0.032" aluminum on a 1.25" square tubing frame, brazed together, somewhere around 18" high. All in should total a bit under $300 and hopefully under 150lbs for the system.
Finally made some progress with my Chinese supplier convincing him that gearing the Y axis 20(or 24):38 was not a good practice as the travel/per step did not resolve to a even number which in a low precision (I doubt even a Cohesion mini process more than 4-5 decimal places) application would result in a significant error over the 100000 step full travel takes. So he made me a replacement reducer to yield a 1:3 ratio like my X axis. It should be here in a few weeks and I can get going on making a base/enclosure to get this puppy cutting.
Well only 6 years later, still a bunch of parts. BUT finally with this post, after 3 moves and many ups downs, I have pushed forward to where all the issues are resolved(and I’m NOT moving again.). Part of that included keeping the K40 alive in some mode, perhaps CNC, but now I’ve decide to keep it lasing by replacing the Cohesion Mini with an Awesome Tech MG3. Then the C3D mini, GLCD display, and a new 20w(optical)LED head will be parts to finish the big machine. That simplifies the build by eliminating the laser tube enclosure and beam guides. It also means I have to machine up a new head mount assembly which unfortunately includes belt tensioning provisions so a bit more work than a simple bracket. Since I’m adamant about not moving again I’m dropping the metal enclosure idea and will be just using MDF etc. as the aluminum frame/enclosure was to keep it movable.
2 Likes
With a diode laser head you can just shield the area below the lens to the work piece so no full enclosure needed. I would work on designing your laser head movement carriage so the mounting of the laser head does not effect any motion adjustments elements. You might start off fine with a 20W diode but find you need a 30W or 40W version later and that should be an easy swap. Maybe even plan for an acrylic mount/adapter.
Agree there is less need with a diode laser but in my case with a basement location I need to contain smoke and fumes,
Not sure what you mean by motion adjustment elements, my setup is a Hiwin car on a track, the laser head mount bolts directly to the car. The head mount is also the attachment point for the drive belt. Of course this is a Chinese setup so the original head is for CO2, I may use it some day since I dont see 100w affordable Diode lasers in the near future, so I’ll make a new head mount rather than hack up the original. Just a bit of work as I have a lathe, a mill and a nice piece of aluminum angle extrusion with just the right section.
but you could possibly get away with a more open configuration where there was an air assist blowing back and an extraction slot across the back and just a flat cover across the top to contain the air/smoke so it flows to the back. and if all your work is cutting then even better since with a good air assist and power for a single pass, all the smoke is just below the cutting surface.
What I was getting at was making a mount to do your belt tensioning and have it allow attaching the laser diode to that so you’re not messing with belts and tensioning any time you want to swap a laser head.
It is no big deal about the belt tensioning as I’ll keep the mount the same in that respect which means its just 4 screws total for the belt and 4 for the mount. So I’ll just KISS for the present. But you got me thinking and I wonder if I cant use the shroud of the LaserTree head for extraction, one side is open and I could 3D print up a hose connection there. I like the idea of top extraction for a large format machine… I actually have a blower/fan up to the bottom extraction job but no where to do a 4 sq/ft. exhaust exit.