Encasing the Monocle without breaking the bank

I’ve looked at the prices for acrylic sheet as case material for the Monocle and my heart shrank. If I’m paying that much for acrylic, I want to be shooting it with a laser to make something useful or beautiful. Heavy-duty aluminum sheet isn’t cheap either. But it needs to be encased to be safe, of course.

What can I do?

A CO2 laser won’t cut through aluminum even when it’s focused, at least at the power range that could possibly be installed in this machine. It won’t even cut through aluminum foil.

It turns out that aluminum flashing isn’t terribly expensive, and is widely available in a variety of widths. But (as @Eclsnowman pointed out ot me) alone it would oil-can and sound a terrible racket, as he discovered with 3d printers and 1/8" acrylic long ago.

That led me to think about Aluminum Composite Material (ACM), an aluminum/plastic/aluminum sandwich often used for making signs. It’s easy to cut, the aluminum would not burn from the laser, and it looks nice enough to use as a sign. But it turns out it’s not particularly cheap either.

So for a large-format laser, it starts to look like the box could cost more than the laser.

But you know what else is cheap? Masonite and contact cement are really not very expensive.

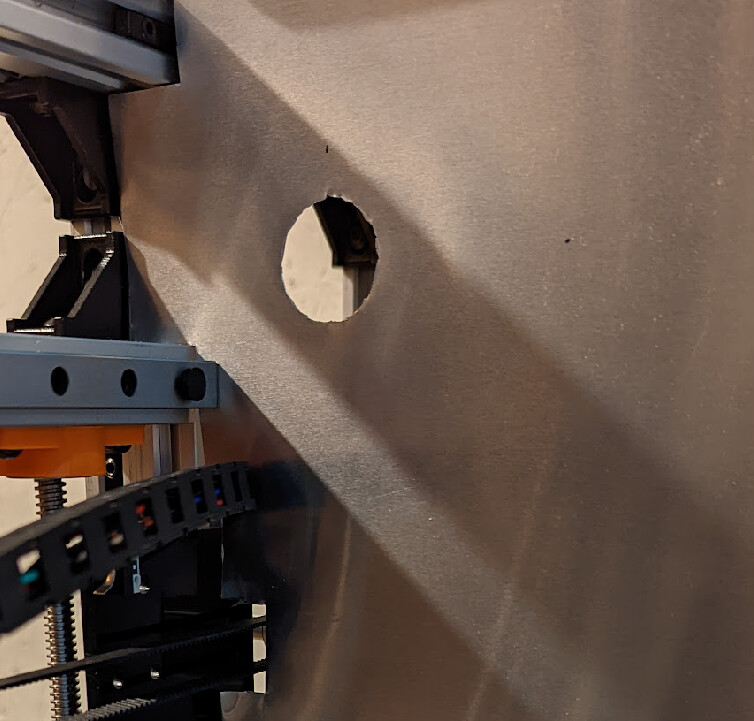
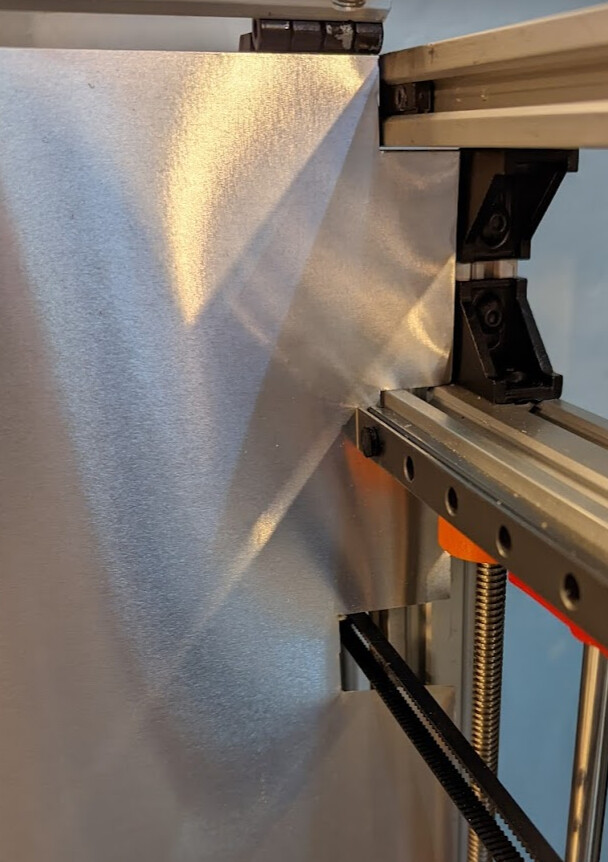
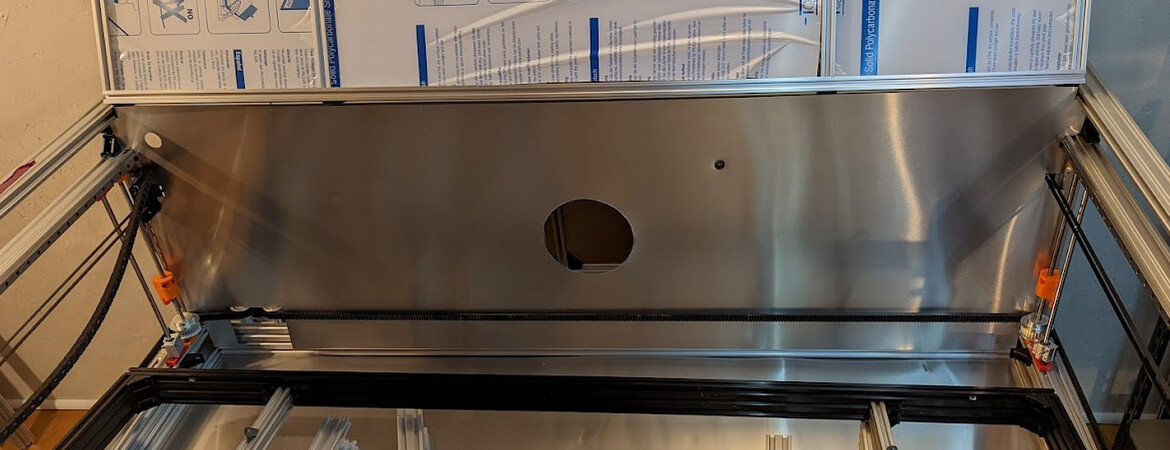
I could make my own “ACM” that’s an aluminum/masonite/aluminum composite sandwich, held together with contact cement. Masonite doesn’t burn that easily, and since it’s made of just wood I would expect that if were to catch fire somehow and be extinguished, it would probably (a) be easier to extinguish than the plastic in normal ACM and (b) be less likely to give off noxious fumes.

A 4’ x 8’ masonite panel is less than $10 in 1/8" nominal thickness; it’s available in 1/4" as well. A 20" x 50’ of aluminum flashing costs $43. 20" is 508mm, plenty for the largest likely useful depth for a Monocle, though you can get it 24" wide for $60 if you need over 600mm. $15 will get a quart of contact cement which is more than you’d need here anyway.

I would imagine cutting the masonite to size, gluing a very slightly undersized piece of aluminum to the inside face, and then gluing a ~4cm oversized piece centered on the outside face. Trim out the corners with shears, then fold it over and file the corners smooth. Glue those folded edges to the inside surface with more contact cement and clamp them in place.

It might even look nice. Brushed aluminum is classic, right?

Am I nuts?

1 Like

You can also use Faced Polystyrene Foam Board Insulation. It is used as outdoor siding underlayment. This would dampen the noise too.

If there were a fire inside the cutter, it could easily melt the polystyrene before I could put it out. Burning styrene gets very hot, and burning styrene fumes aren’t great to breathe. Of foam products, faced polyisocyanurate would probably be better. I used it to build my filament drying oven because of its flame resistance.

2 Likes

The masonite alu dibond sounds like a reasonable idea to me.

3 Likes

As tempting as it is to tape aluminum to the sides and use the laser cutter to cut out its own masonite side panels, I think I’ll use the router to cut the side panels. :slight_smile:

2 Likes

I ordered the aluminum flashing today. Projected to get here within the week. Hopefully by the time it gets here I have the CNC router functional again and can use it to cut masonite for the underside panel to stiffen the Monocle while I’m working on it.

1 Like

Actually, the underside panel will be too big for the CNC router. The other panels should fit, but the underside panel I’ll have to cut by hand…

It turns out that water-based contact cement does not bond well to aluminum, and I’m not super interested in using lots of the high-VOC organic solvent contact cement here. Also, it might be a challenge to bond aluminum sheet to the rough side of the masonite. I’ve been reading up on what people have done to bond metal to wood, and they point out that flexible adhesives are a good idea. I’m now thinking about a thin-spread coat of elastomeric caulk, like 3M 5200 or DAP Dynaflex 920. I don’t need much mechanical strength, just enough to keep the aluminum from making oil-canning noises…

1 Like

I ended up with a construction adhesive instead. I chose gorilla because it was lower VOC (2% vs I think 6-8%) than other construction adhesives that bond to metal; it was also the least expensive of the ones that bonds to metal. Lots of construction adhesives specifically say that they don’t bond well to metal. I’m thinking of making the panels, and then putting aluminum only on the inside against the rough side of the masonite, and just lean into the DIY vibe with unfinished masonite on the outside. I can always add aluminum on top of that if I want later.

2 Likes

Cut the first exterior panel tonight.

Forgot to close the vinyl drop door from the woodshop area to the rest of the shop for the first cut, so the whole shop smells like powdered masonite. I’m using 3/16" rather than 1/8" masonite for the side panels, which is easier to cut due to being less floppy. I’m using the diablo plywood blade that I bought for cutting baltic birch.

The first panel I cut is for the bottom of the unit. I still have to cut out corner features and so forth before I can install it, and I’m not sure whether I’m even going to glue aluminum down into it or just let the aluminum sheet sit on the bottom. In any case, I need aluminum only for the cutting area. And in fact I need to think about where I put the raspberry pi that’s going to be the brains for it — too much aluminum around it and wifi not be working great. :relaxed:

The trickiest part will be, I think, to get holes cut that will line up with the extrusion so that I can use screws and T-nuts to hold it in place. I think that if any holes are a bit out of place, I’ll just pretend I meant it and use a dremel to turn those holes into slots that run perpendicular to the extrusion I’m attaching to, giving me some flexibility.

If I had an even bigger CNC router or even bigger laser, I suppose I could CNC-cut them. I might still do that for the side panels, which would fit on my OX. But all the panels that will be full width (bottom, outside back, above the laser, and inside back between the laser and the work) are too long for the CNC router, since it’s general outer size is roughly the same size as the laser’s… That leaves me with only the two side panels that are even candidates to cut with the CNC router. I’m inclined to just cut them all by hand and see how it goes.

1 Like

I have learned that one way to cut the aluminum flashing is to score it deeply with a utility knife, and then start a tear (with pliers, or scissors, or a chisel, or something), and if I hold one edge down and pull gently up on the other side, it will tear nicely along the score. It also cuts easily with kitchen shears, and is thick enough to cut holes with a forstner bit in which to install grommets. Sadly, I thought of my forstner bits after I had used a chisel to cut the hole for the laser beam! :roll_eyes:

Getting the measurements right for fitting the back in place around all the bits it had to fit around was rewarding where it worked well:

I had to slide the bed frame out the pass-through door to get the back installed:

I will probably use some aluminum tape and aluminum scraps to reduce airflow around where the Z belt goes back to the Z motor; that’s a big hole:

For the bottom, I used double-stick tape to hold the sheet down to the masonite for the bottom of the chamber. Then I held it together against the bottom of the unit and drilled 5mm holes 10mm in from the edge. I’m using m5x10 screws with drop-in t-nuts to fasten it.

The biggest challenge with the aluminum flashing is keeping it from completely unrolling. I have to hold it carefully while unrolling it, and then I use trigger clamps to hold the roll together while cutting off the next section.

1 Like

I have found using a tool like the one below is invaluable for cutting sheet metal/aluminum. I have a cheap one that has lasted a long time.

1 Like

A power nibbler would have been smart. I have only a hand nibbler.

1 Like

That same nibbler is my go-to tool for sheet metal.
For holes, I use a punch [Greenlee] they make a nice clean hole. I was introduced to them when I made tube amplifier chassis.

Wow, I did not realize how $$$ they are. I have treasure in my toolbox!

Here is an off-brand set: https://amzn.to/34TYE5r

2 Likes

You can find them on sale at Harbor Freight at a decent price sometimes.

2 Likes

There you go! Probably not great quality but for thin sheet metal probably ok.

2 Likes

I need to keep a running list for the next HF general discount coupons :smiley:

I ended up buying a rexbeti variant that includes a replacement cutting blade and head, as well as a jig for circle cutting and line following. Still not super expensive. I’ll get to use it soon…

1 Like

Let us know your experiences with it.

1 Like

…wish they sold those attachments separately, may have to DIY them.

1 Like