Embroidery, 3D printing, and a bit of machining

A mixed-media father-daughter project!

My daughter has been learning needlework, and wanted custom sizes of embroidery hoops to display her handiwork. So we sat down with FreeCAD and made a parametric design to 3D print that snaps together around the fabric and has a hoop to hang it from the wall. It has an outer ring with a hole for a hook, a middle plain ring that holds the fabric in place, and a plate that tuck the fabric around the back and holds it neatly out of the way.

The pieces print in place but slightly separated; the fabric occupies that space when they are snapped together.

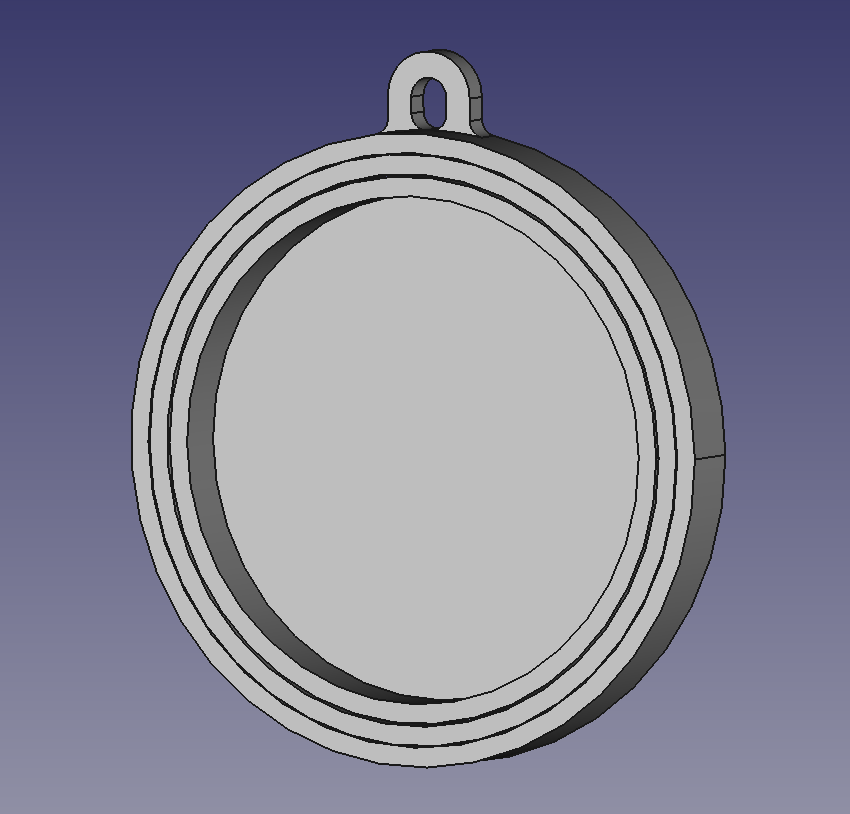
The innermost part can be installed either as printed or inverted so that it bears against the fabric.

Now each time she finishes a design, we measure it, print a custom display hoop, and she hangs it up or gives it away. :heart:

Next, she wanted some custom small hoops that would be easier to carry with her. It was easy enough to make a parametric FreeCAD design to be able to print out any size she wants. Here’s a 3" model:

The only problem is that 3d printing the screw and nut isn’t really feasible. While we could have designed something to use standard screws and tighten with a screwdriver, it was a lot more fun to make a custom design and have some quality lathe time together.

The inside hoop on this set has a rim; this helps hold the fabric evenly stretched tight. This means that the parts can’t print concentrically; they have to be printed apart from each other or separately (The eagle-eyed among you will have noticed that this hoop isn’t the 3 inch version in the model, nor does it have the size label that we added to the model later.)

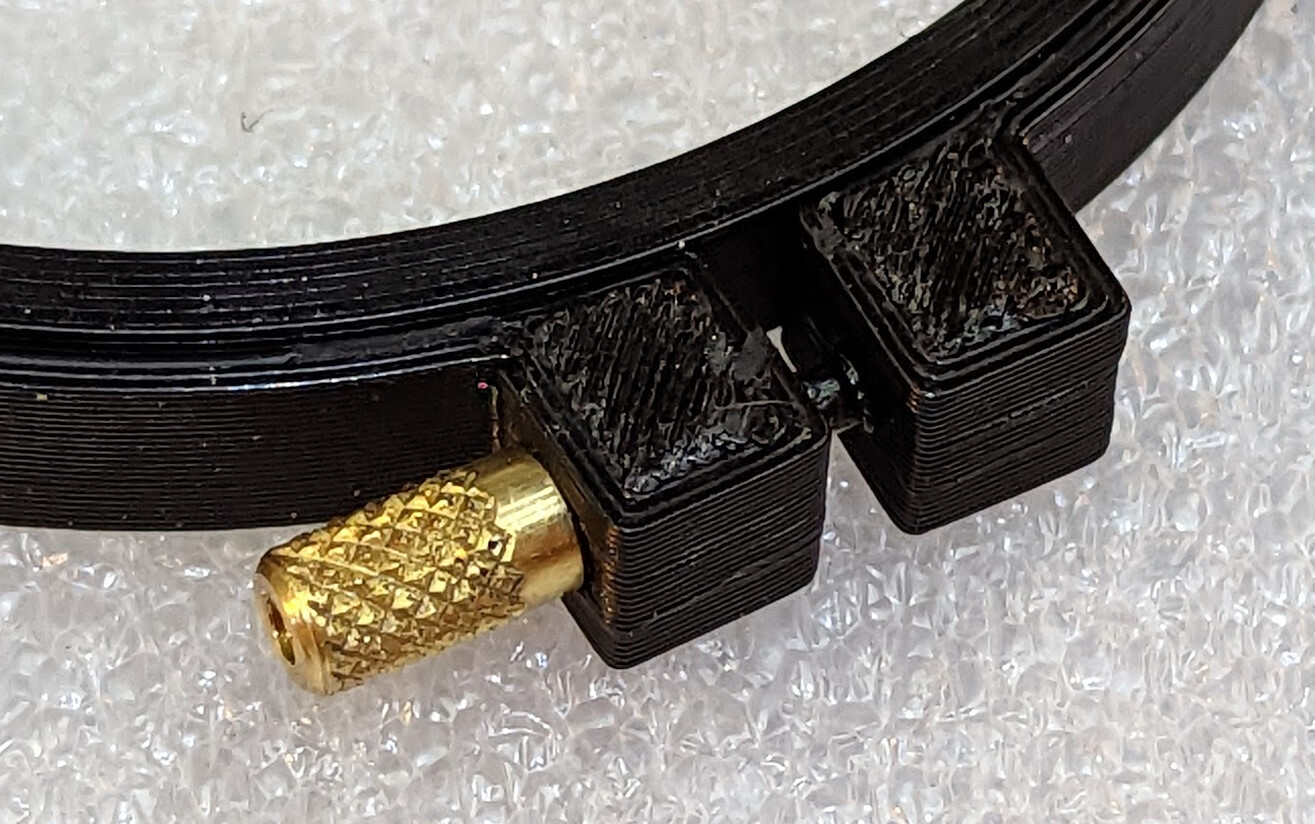
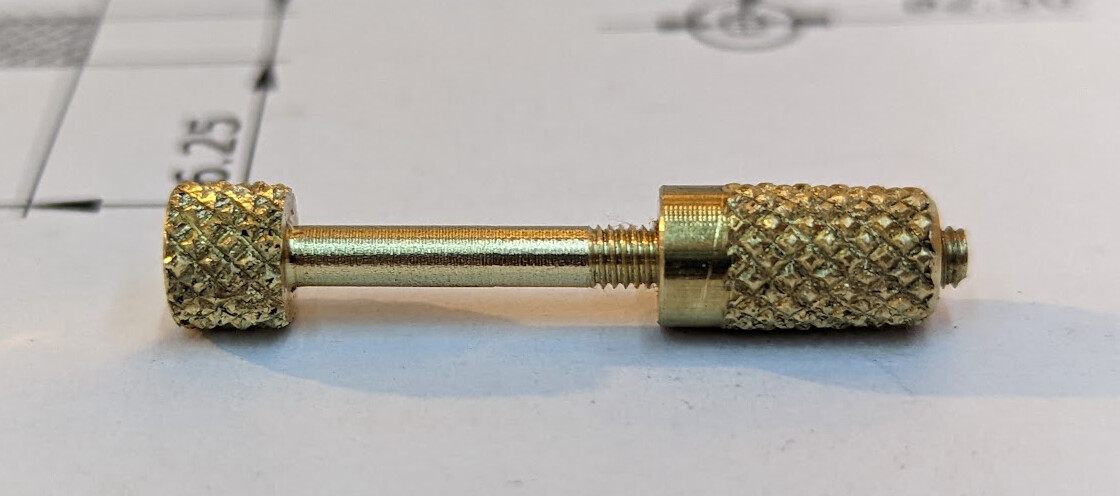
She put some 1/4" brass stock in the lathe; knurled, faced, drilled 2.5mm, tapped M3, chamfered, and parted a finger nut. Then she turned a 3mm shaft 30mm long (turning by segments, about 10mm at a time; see Miniature Lead Screws and Shop Gremlins - YouTube by Joe Pie for an example), die-threaded it M3 15mm long, knurled the head portion, then chamfered and parted it off. Since I have less sensitive fingers, I hit the knurled head of the screw with a torch and used a tool to push the knurled head into the printed hoop, but she did the rest of the work. :tada:

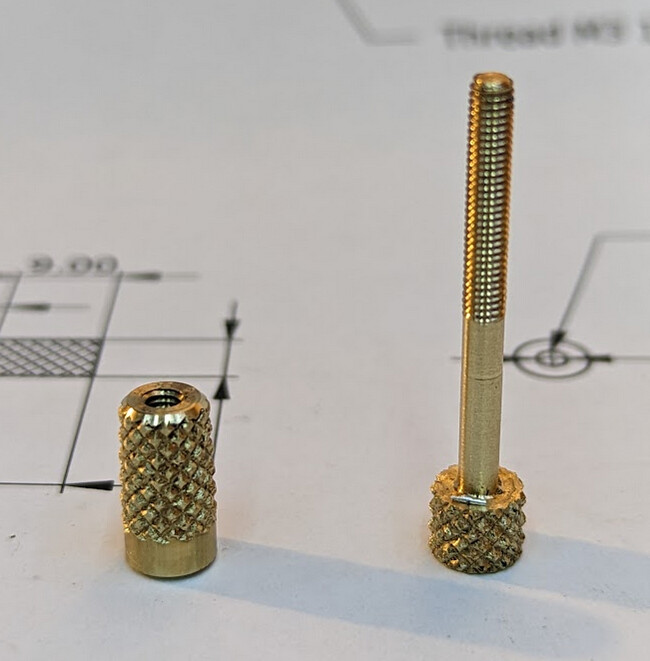
I didn’t notice the tiny piece of swarf on the head of the screw until it was too late to re-take the picture!

You can see that a bit of the plastic got on the shaft, but it’s OK; it closes all the way.

Both of these designs are parametric and driven by a spreadsheet embedded in the FreeCAD file.

DisplayHoop.FCStd (42.8 KB)

EmbroideryHoop.FCStd (106.5 KB)

Hardware.pdf (12.4 KB)

6 Likes

Very nice both in doing it in FreeCAD and on your lathe but mostly being able to do it all with your daughter.

Question, since you too are very ‘parametric’ oriented, do you adjust your ring widths based on your 3D printer extrusion width or let the slicer ‘fill’ the odd extrusion since it’s basically a solid ring?

2 Likes

I let the slicer do its thing. I look at what the slicer is going to do, and change slicer configuration to be good for the model (e.g. number of perimeters, top/bottom layers), but the only thing I characteristically optimize or modify the model for is avoiding supports. And looking at the non-linear slicing work that XYZdims and friends have been doing, that might make even those concessions less important.

I switched to a 0.6mm nozzle in my primary printer, and have been using PrusaSlicer with arachne; when I want tree supports I use Cura but I find the PrusaSlicer approach to configuration easier. With the 0.6mm nozzle, I can print 0.45mm layers and finish faster than trying to go fast with 0.4mm nozzle and 0.3mm layers. A lot of my prints are functional rather than decorative, and when I want high precision I’m probably machining anyway. :grin:

3 Likes

It’s nice to see that you jump through hoops for your daughter!

3 Likes

Excellent.
Was this her first lathe work, or building on earlier experience ?

1 Like

She has used a lathe a few times. I think the first time was using the mini lathe to drill a hole in an eraser to make it fit a favorite pencil for which we couldn’t find a replacement eraser to buy.

No reason to needle @mcdanlj about it… :tada:

2 Likes

Yep…I don’t want to make him cross! :thread:

1 Like

That pun had me in ‘stitches’ …

1 Like

What program/programs is she using to do the embroidery designs in? Pure hand-embroidery or any plans towards moving into machine embroidery?

She’s been mostly using sketchbook on her phone and a lightbox to trace, and doing all hand embroidery. Most of the designs are meme-inspired. Not exactly traditional. :grinning:

She’s enjoying learning stitches and techniques and hasn’t thought about CNC embroidery at this point.

She has been taking the eIMACS University Computer Science courses, which I can’t recommend highly enough, at least for kids who like abstract thought.

The 1990s called and they want their web design back, but the course pedagogy is superb. These courses gave her a love for computer science. She loves the abstractions, so we haven’t gone into assembly language yet, but she loves math and math puzzles. Maybe https://armasm.com/ would be an interesting starting point? Arm machine code is kind of comprehensible enough to fit in your head. Hmm.

1 Like

I’ve since figured out how this could be done without machining: Design the melty side to take an M3x30 socket head screw, and print a knurled nut to take an M3 melt-in threaded insert.

I like machining, so I’ve now made a bunch more of the screws and nuts, but it would be possible without a lathe. If I get bored, maybe I’ll model that.

Anyway, a bunch more working and display hoops in different sizes and colors are on their way to college — for a whole friend group. :smiley:

1 Like

Is your daughter BlondieHacks of YouTube fame?

Oh, I always wanted to build one of these cnc embroidery machines
e.g.