I’m quite new to 3d printing world and i recently bought Creality CR 6 SE
On Sunday i did some prints and they were all good, but today when i tired to print what exactly i did yesterday, i got issues, please refer to attached image.
What i already tried:
perform auto leveling at least 4 times but no luck
aligned Z axis, again i tried it many times
Change the place where to printing
i did everything again to generate g-code
Printer is heating up properly like 200C for nozzle and 60C for bed
Filament is quite new and I’m continuing the same filament from yesterday’s printing
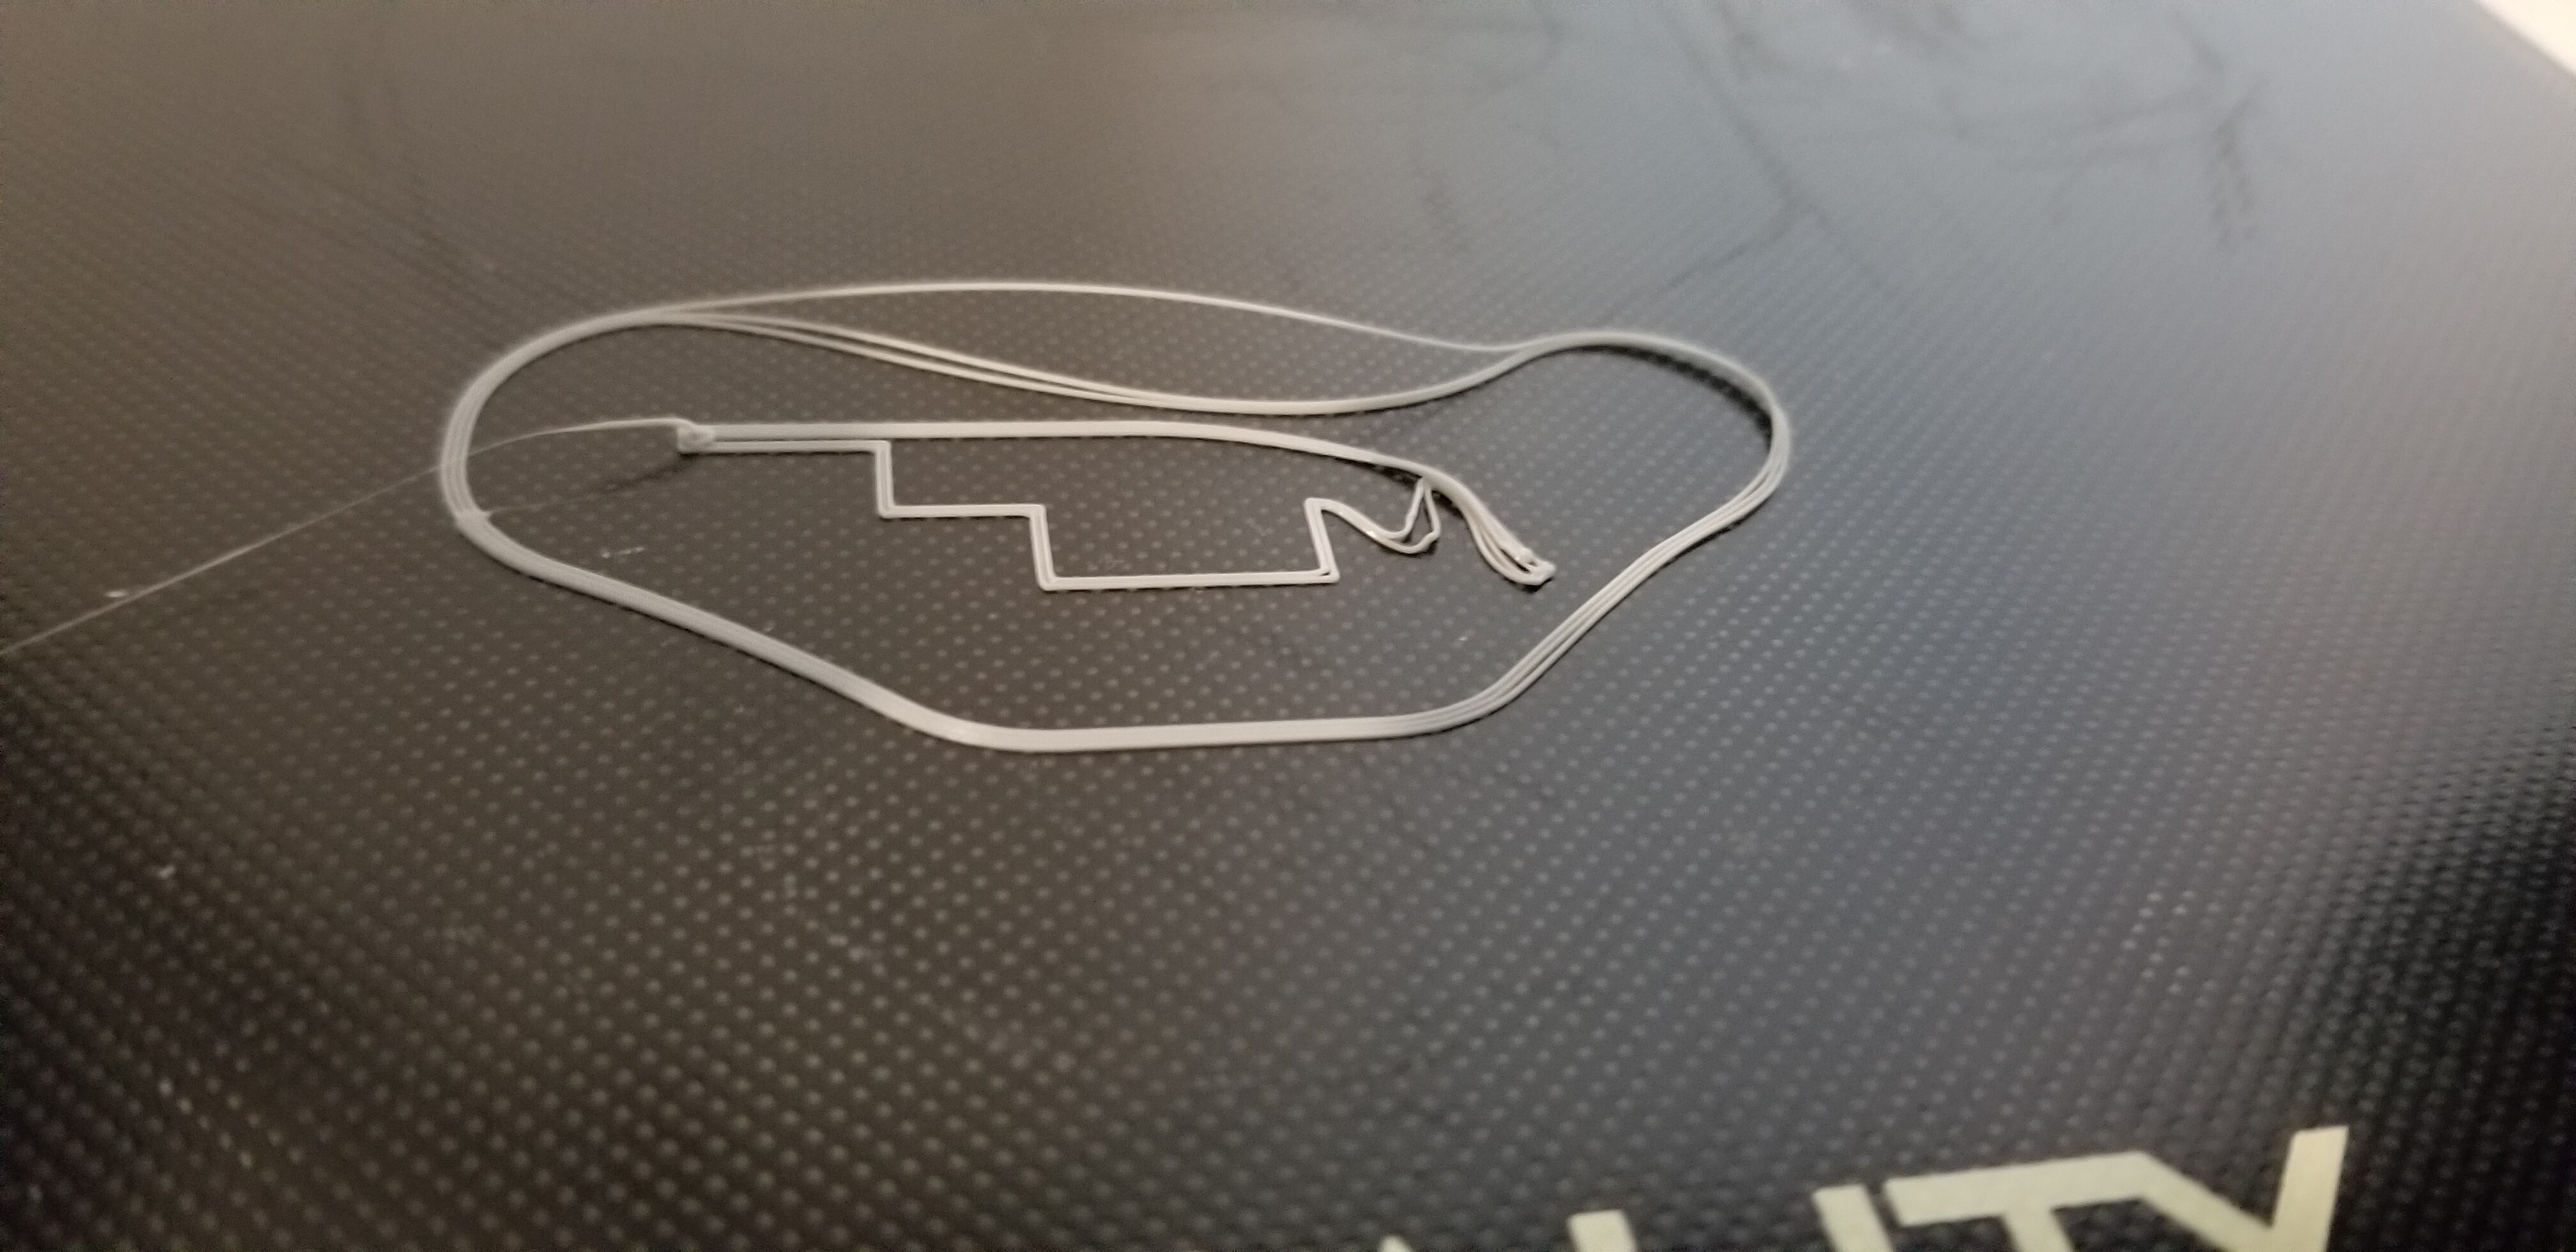
If you see filament closely, its not getting together. for example while building skirt area all three layers are separate from each other, they are normally stick together that does not look like a cleaning issue, its look more likely its not hot ten enough to glue each others, but still i will give it a try.
Ahh, I didn’t zoom in on that picture at first. Now that I do, it looks like the first layer height is to high. You can see the filament is pretty round. It should be flattened out a little. This is why the loops are not sticking together, or to the bed.
While doing past printing my room temperature was 76F but now its 71F can it effect? rough temperatures set on the printer are correct.
Why do i need to set Z Axis every time before print? is it something normal or there could be some issue?
There is a Z end stop switch, I believe by bed probe you mean sensor that is installed right beside the extruder triggers when it touches the bed. Yes that one is also installed.
In Simplify3D, there is a setting Process Settings>Advanced>Layer Modifications>Start printing at height. (I have this disabled so it uses the height in Process Settings>Layer>First Layer Settings>First Layer Height)
In Repetier Host, using the CuraEngine slicer, this would be Print>Speed and Quality>Quality>Selected Quality Setting>First Layer Height.
In Slic3r, it is Print Settings>First Layer Height.
I zero my nozzle on the bed, so then the first layer is whatever height is specified in my layer settings. Since you zero with paper, it will start printing at whatever your first layer height is, plus the thickness of the paper, which is usually too high in my experience.
You could add a Dwell and a buzzer to your pre processor code. Cause it to dwell (stall) at the purge line, It should be at the first layer height so you can slip your paper under it to XX check that it is paper thick (first layer). If your buzzer goes off at the end of the probe cycle as it crosses the plate and the dwell starts after, You should have enough time.
If you are using CURA as your slicer you can go into { Settings, Printer, Manage printers, Machine Settings, and add the extra code. here is my setup for my Ender 3 custom
; Ender 3 Custom Start G-code
G92 E0 ; Reset Extruder
G28 ; Home all axes
G29 P1 ; Auto Leveling Universal Bed Leveling
M300 S300 P50000 ; buzzer for 3 seconds at 5000Hz
G1 Z2.0 F3000 ; Move Z Axis up little to prevent scratching of Heat Bed
G1 X0.1 Y20 Z0.3 F5000.0 ; Move to start position
G4 S5 ; Dwell/Pause 5 seconds
G1 X0.1 Y200.0 Z0.3 F1500.0 E15 ; Draw the first line
G1 X0.4 Y200.0 Z0.3 F5000.0 ; Move to side a little
G1 X0.4 Y20 Z0.3 F1500.0 E30 ; Draw the second line
G92 E0 ; Reset Extruder
G1 Z2.0 F3000 ; Move Z Axis up little to prevent scratching of Heat Bed
G1 X5 Y20 Z0.3 F5000.0 ; Move over to prevent blob squish