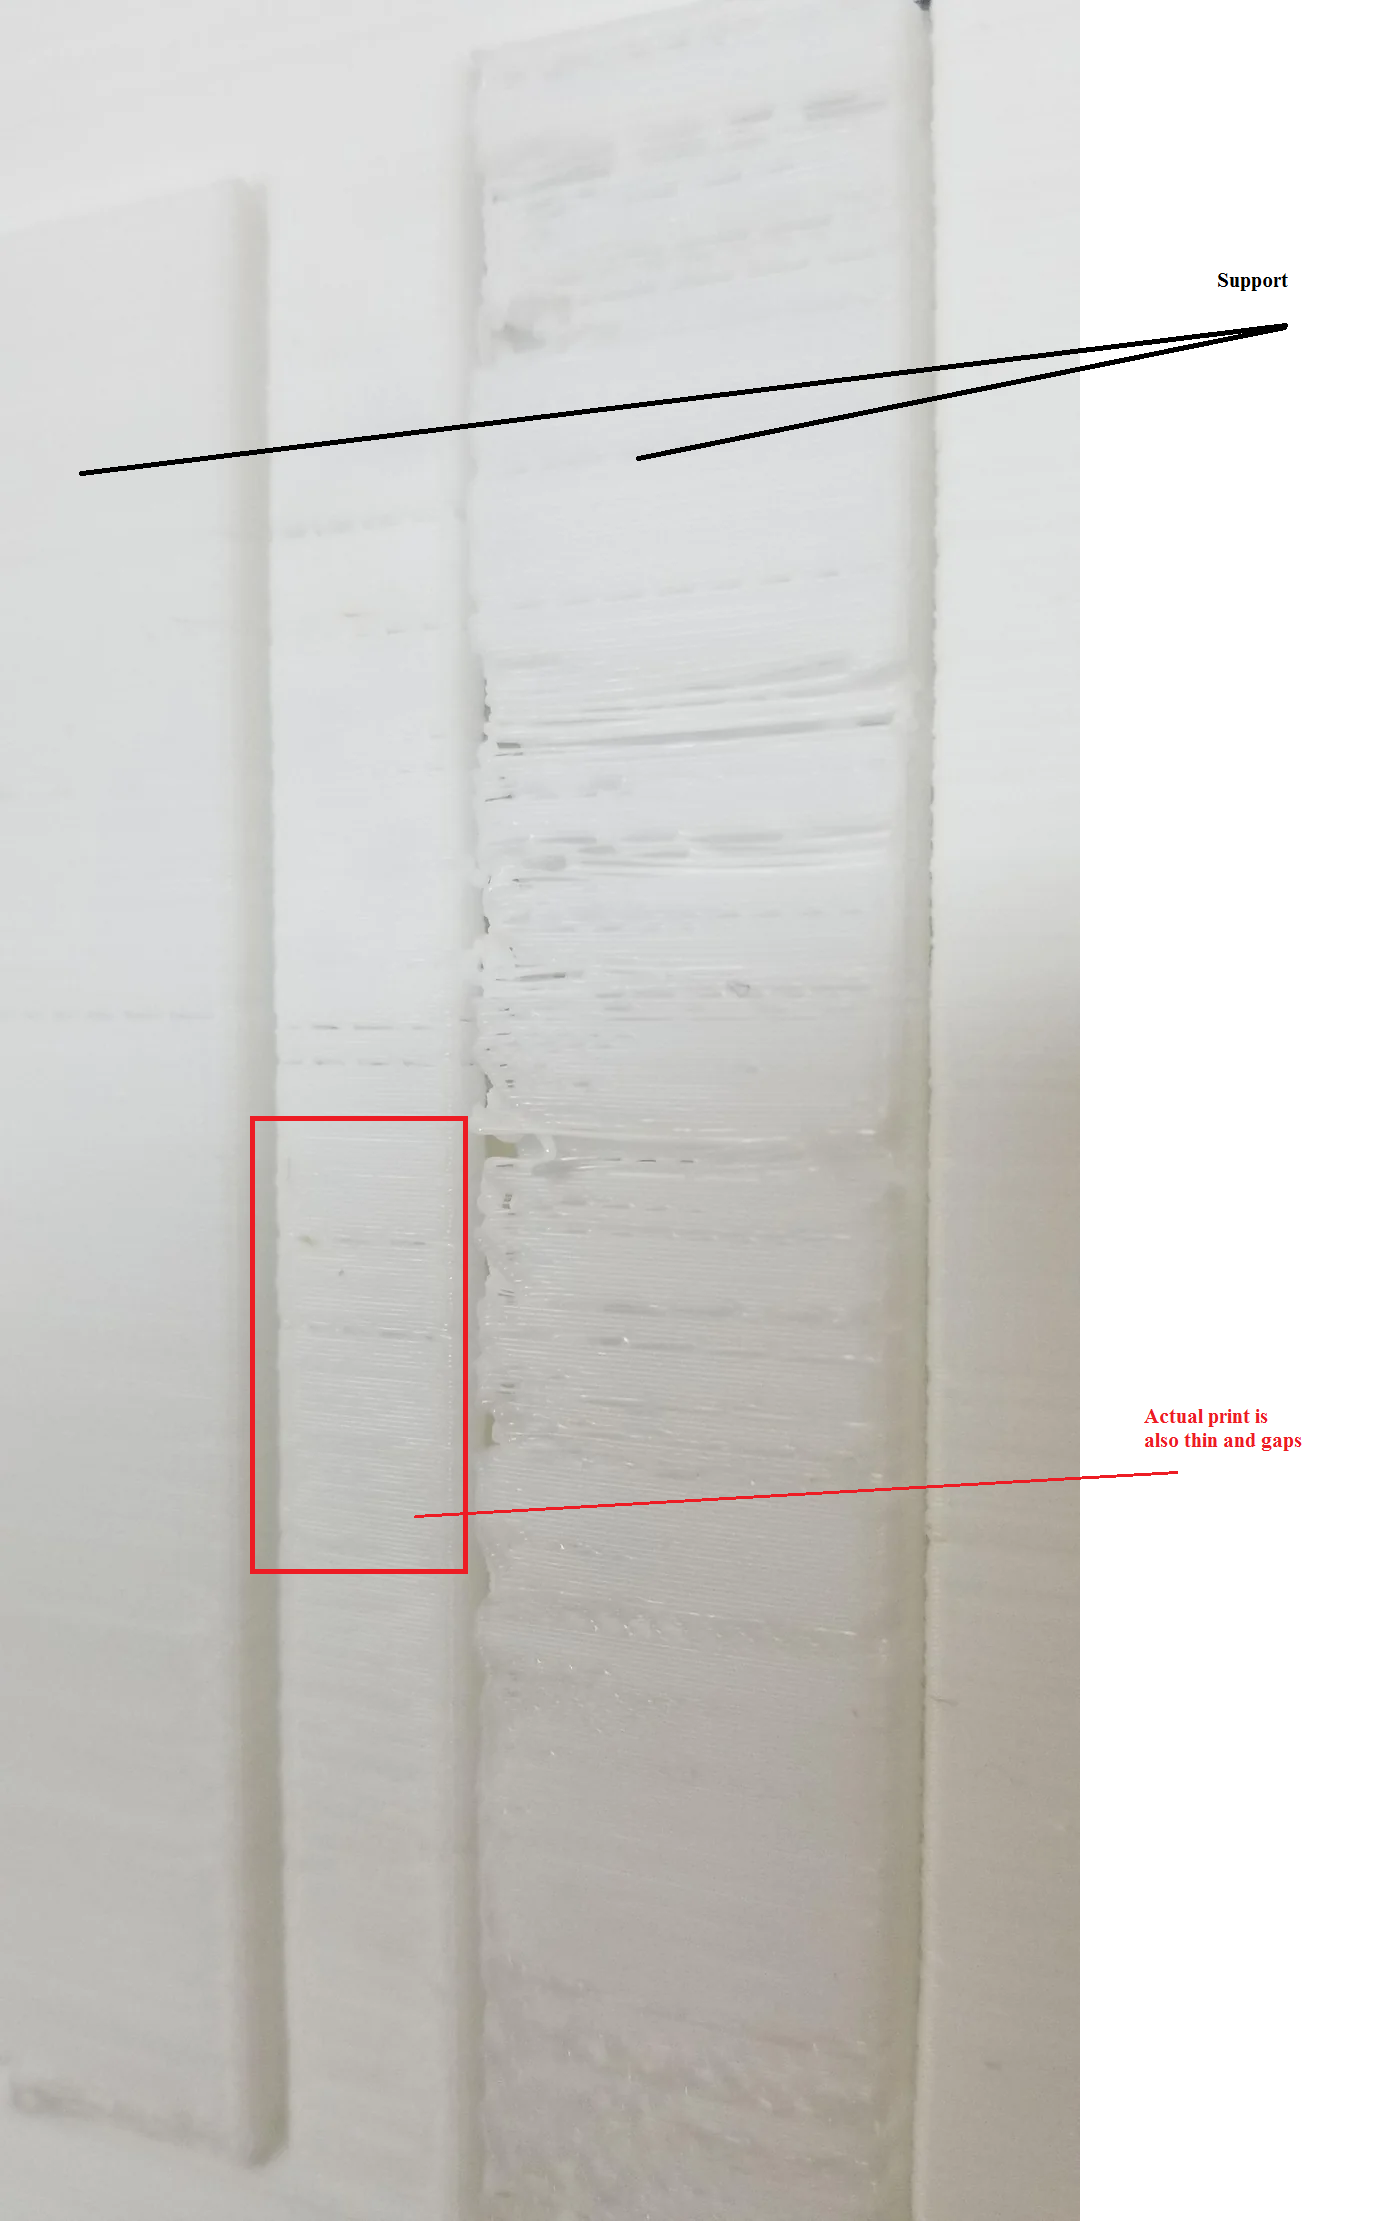
Please refer to attached image, its was a box shaped print but only one side has gaps, and very thin printing, please note that some area is printed as support is very poor, other real printing area (marked with red) is also very weak with little space and thin material
Looking for what could be the reason and how to fix it
stuff like this usually comes down to calibration issues. calibration of your extruder motor(ask for 100mm but not getting 100mm), calibration of extrusion width(set to .4mm but a single line is not .4mm wide), speed set too high for what the hotend can output or hotend PID is uncalibrated and hotend temp varies too much, or even loose belts so things like the extrusion overlap on infill isn’t accurate and infill does not attached to perimeters.
Sherley it would be helpful to explain what 3D printer you’re using, what filament brand and what slicer software you use.
2 Likes
I’m using Creality CR6-SE
I understand configuring extruder motor for 100mm
but i do not have idea how to calibrate PIC for hotend.
Based on printer model do you have any other thoughts? thank you,
the PID process is what helps your devices get to a setting and stay there without much overshooting of the setpoint nor sagging below the setpoint.
You can tell by watching your reported temperature and see how far off it drifts from the setpoint.
Also, you might need to dry your filament. Moisture in the filament will bubble off inside the hotend and cause consistency issues.
Calibration of the heater of your printhead is a big thing to get right!!
Also printing temperature,printspeed.
I started using external PID temperature controllers with SSR and ac heater cartridges for nozzle and hotbed a while ago on my big high speed printer.
Its a HUGE difference with the standard onboard controllers when high speed high wattage heater is used.
If standard heater is used just find the PID tuning for your printer, its different for marlin, klipper etc.
Clean your nozzle/ check for wear!!
Brass nozzles last from 1kg to 10 kg
If you extrude at 50mm hight and it goes steep to one side and it is clean replace it…
Expensive nozzles vs replace them frequent. If you print no carbon filled etc just replace if you suspect, printing a 8 hour print 2 times beqause you didnt change a €5 nozzle is not smart in my opinion
For saving some money
Re drill nozzles that are 0.4 and worn to 0.6 or even 0.8with a hand drill not a machine! Or you need a drill stand…
Use the 0.6 /0.8 for ANY print if possible 0.4 only when thin walls are needed!!
The bigger the nozzle the less problems with extrusion
Stronger prints faster prints and if estethics are allowing it higher layer hights!
Don’t forget to mark the drilled nozzles (i mark them with a little 1mm spot drilled in the hexagon side)
Get a calibration print of some kind (2 towers going into a point, square boxes 20x20x20mm high, with different wall thickness etc)
Set for example your feed 10% higher,
If remote extruder adjust your retract settings from example 10mm to 2 . If it starts to ooze adjust it to 3 or 4.
Get a digital caliper to measure what you are printing.
They cost €4 (for a plastic version) if you look around
If you let an expensive one fall out of your hands its just as prone to being dead…
Get your printing temperature just right! Most people print much to hot.
I print at the lower end of the recommended settings most of the time, the less heat you put in the less heat has to go when cooling= shrinkage/warping of cooling print
Let the printer warm up for 10/30minutes (longer for precision thin walls, critical objects)
Prevent airflow of opening doors,windows at your printer/get 3or4 sheets of cardboard/lexan around your printer
Set the heatbreak cooling fan on from the start
And the print fan permanent on at +50% after the first 2 layers if print deforms set it higher if the noise is annoying get earplugs ![]()
Get 1 type of filament (brand, type, even color matters sometimes) for dailing it in, every roll can be different name brand is a lot better at this than budget filaments.
I buy 5 to 10 kg rolls and spend up to 30 min tweaking before i start a new roll, costing about 2to 5m of filament
Write down your setting before adjusting so you can go back…
1 Like