So in my house we have some plantation shutters in the living room. My wife has been after me for awhile to paint them.
( If you have ever painted plantation shutters then you understand why I have been procrastinating on painting them. ![]()
![]() )
)
Cleaning and sanding them was actually the worst part. Definitely wasn’t going to paint them by hand, so I’m using my low pressure paint sprayer.

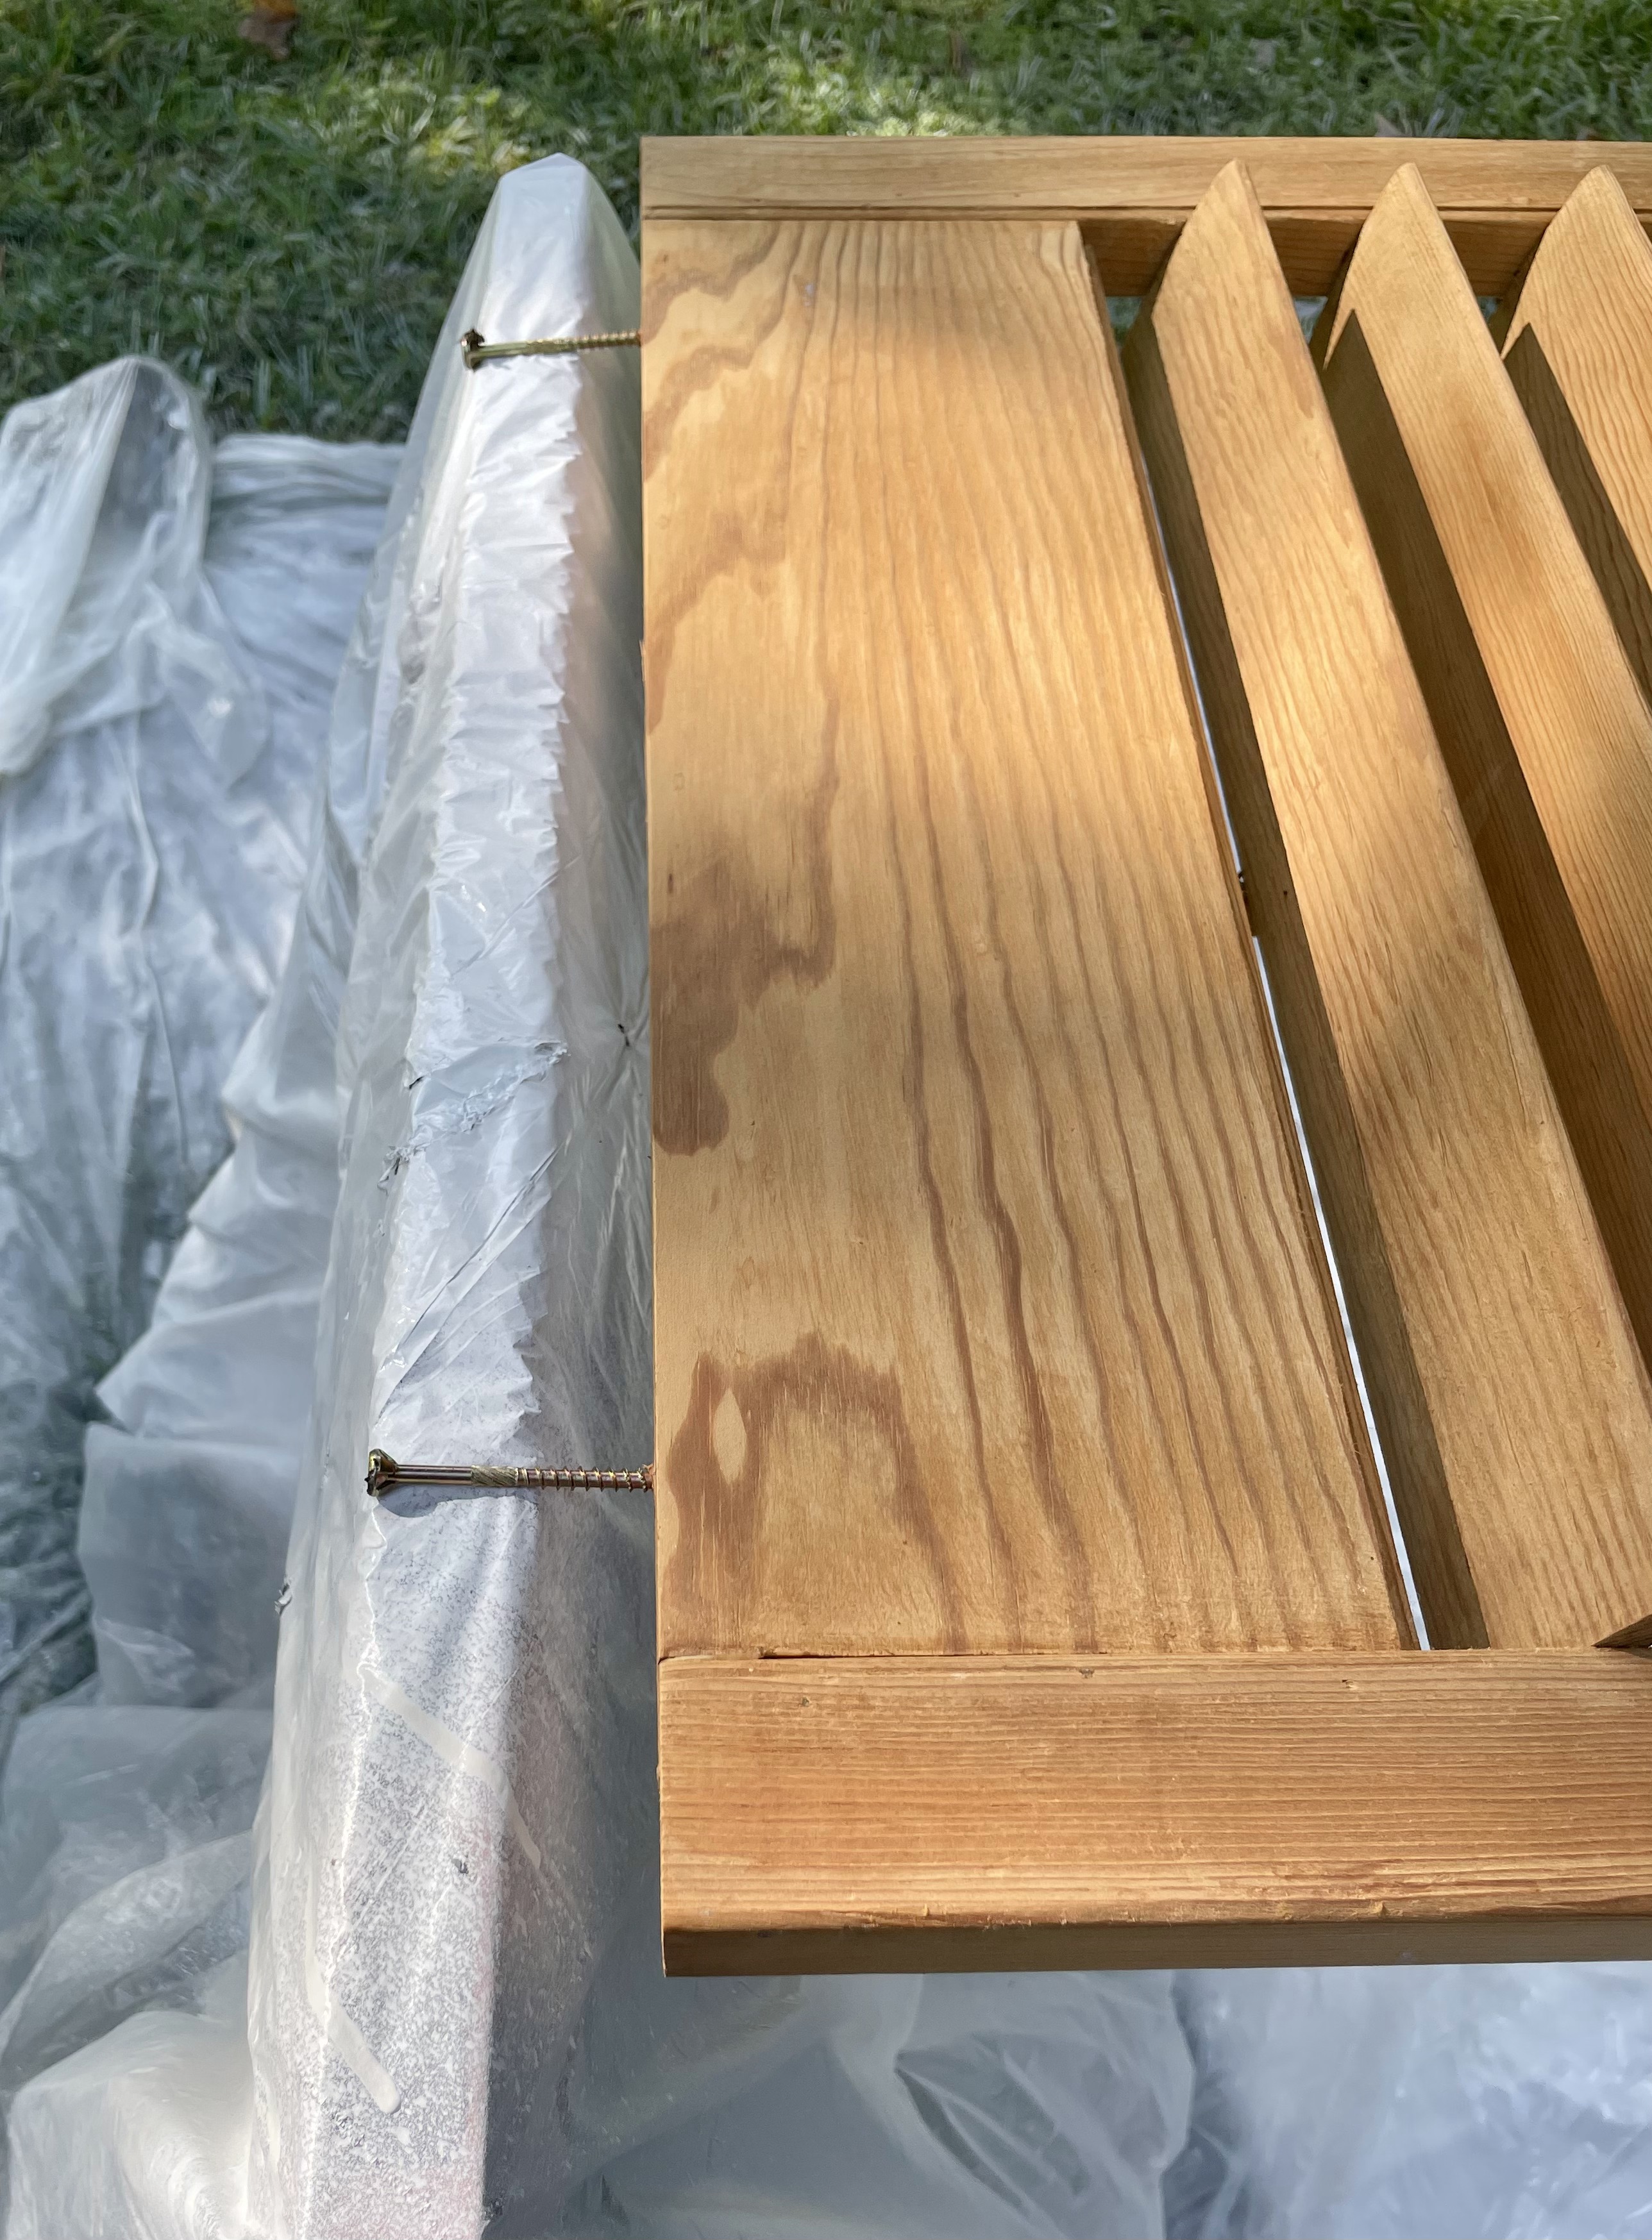
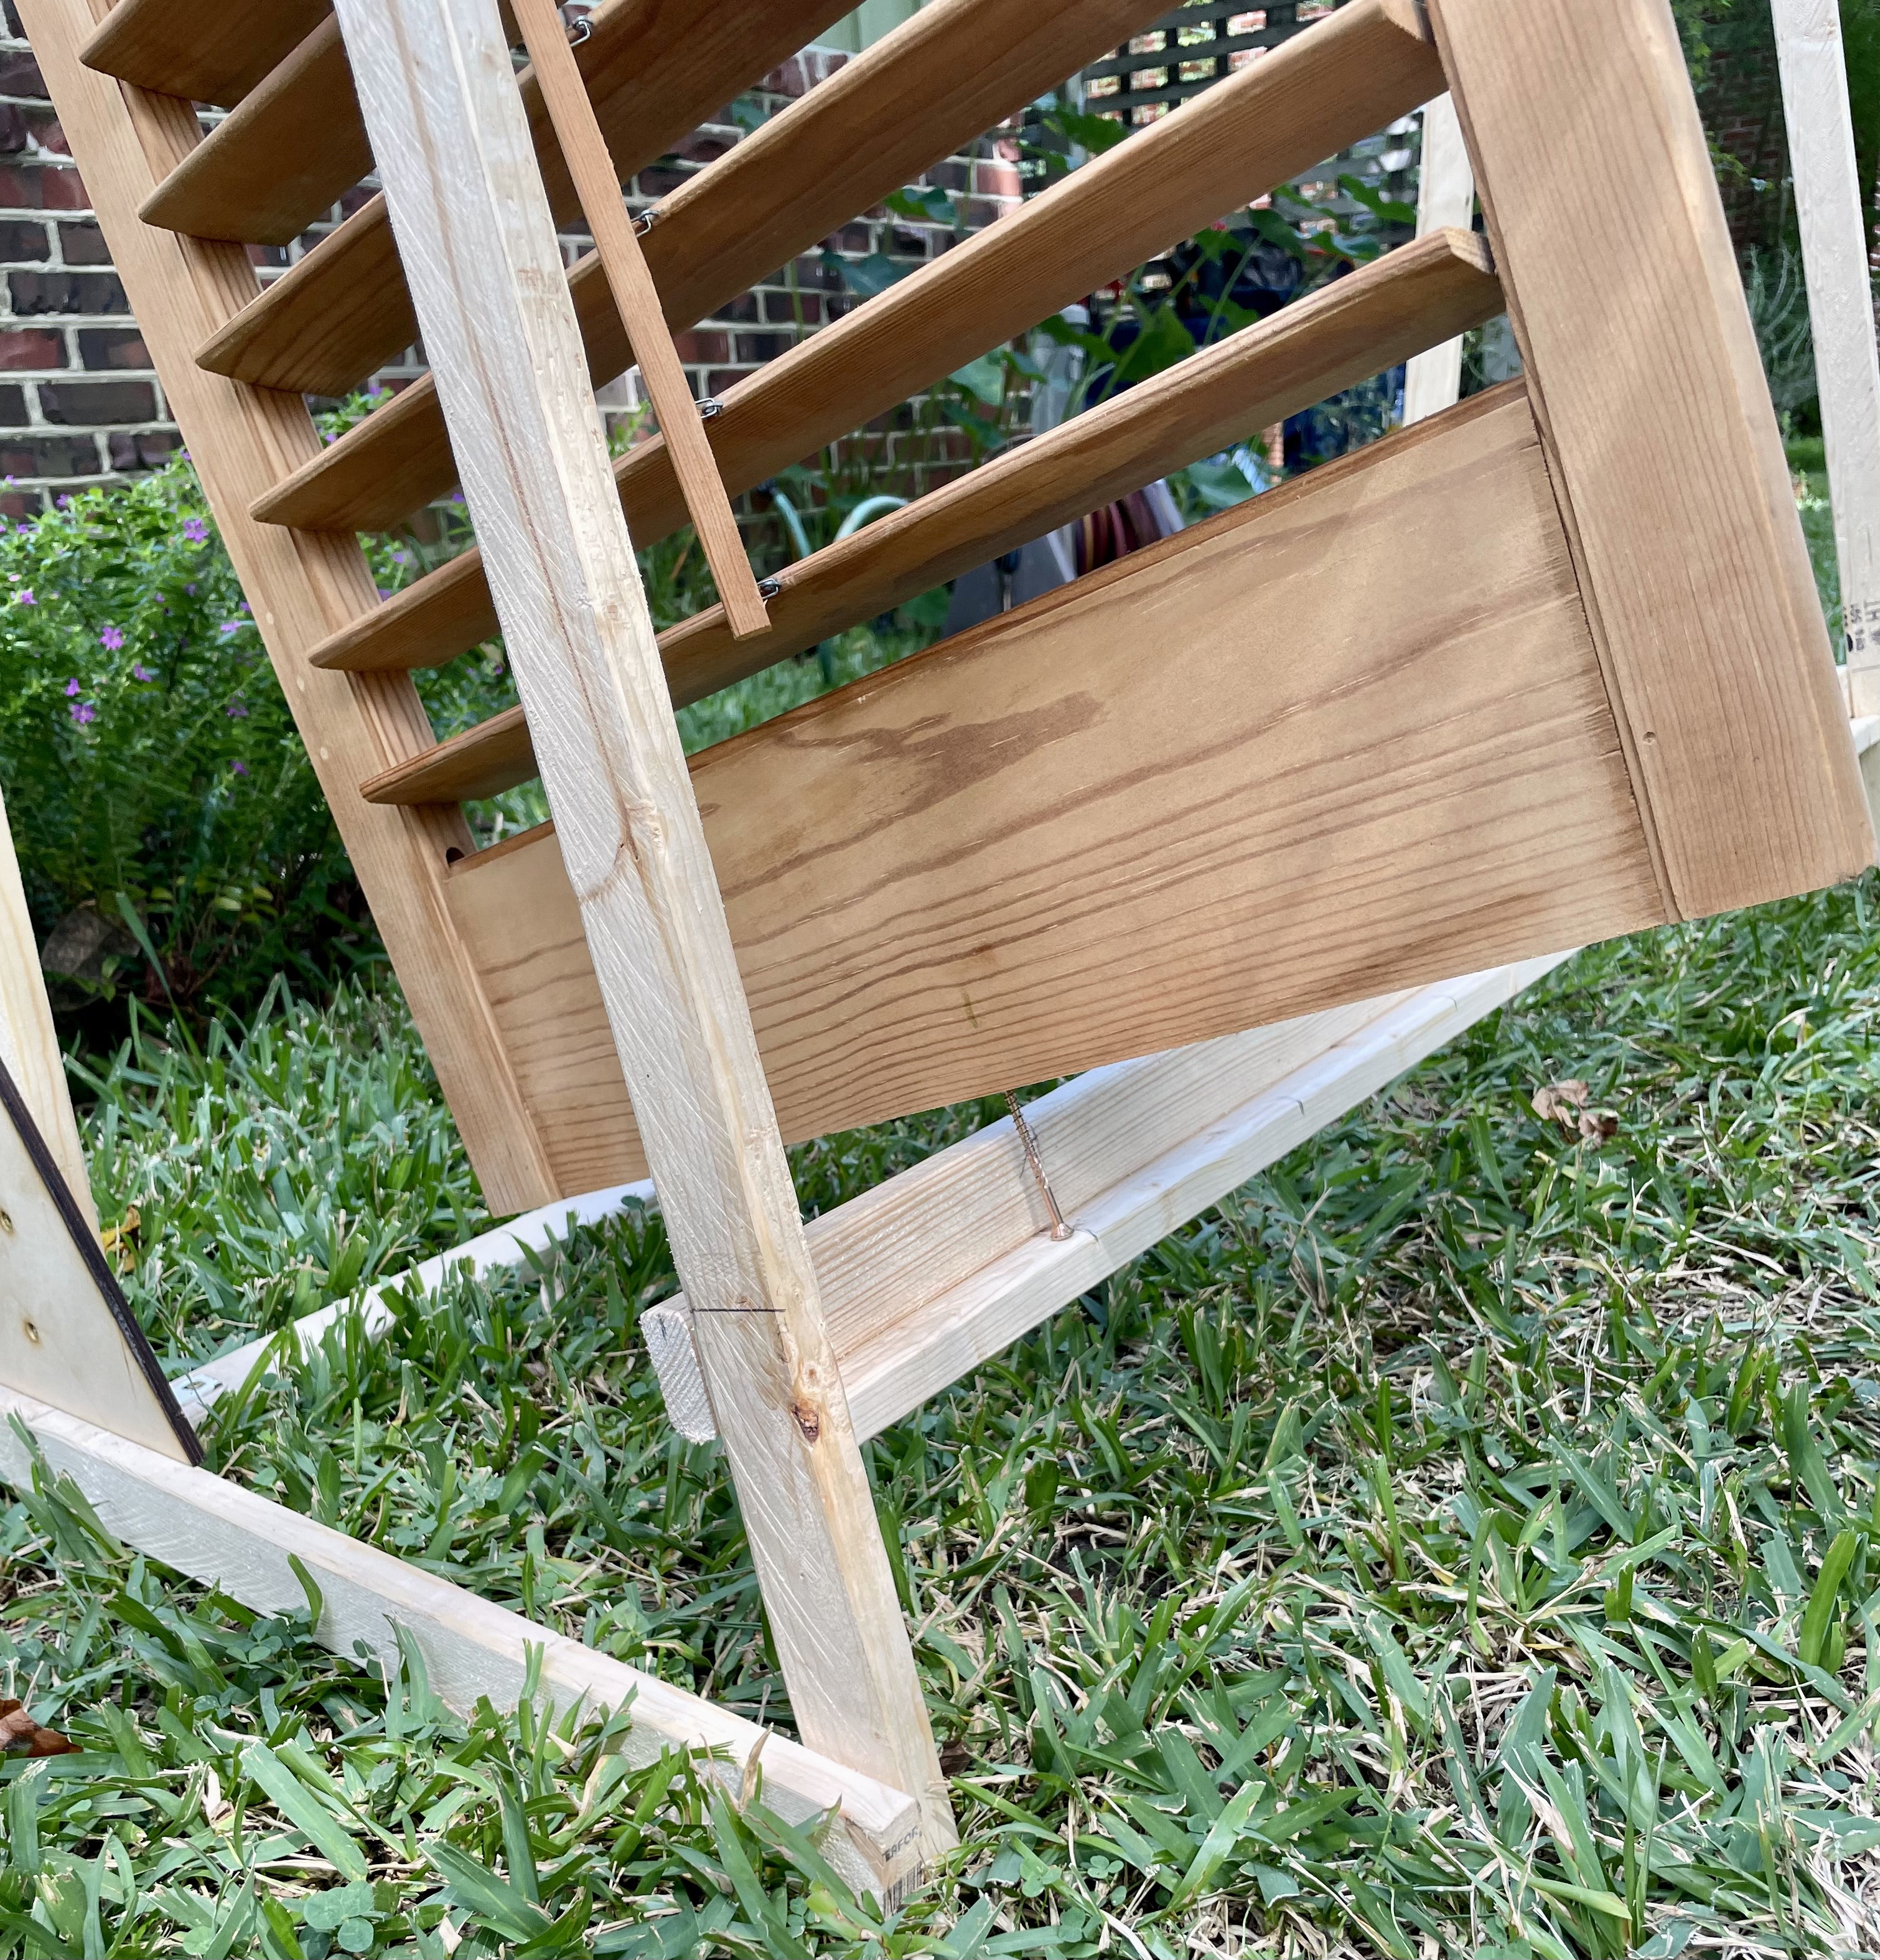
I’m using 2.5" deck screws that are screwed 0.5" into each end to suspend the shutters between 2 saw horses. One end has has 2 screws that are placed 3" in from each side and the other end has 1 screw in the middle. That way I can flip the shutter after painting one side to immediately paint the other side.
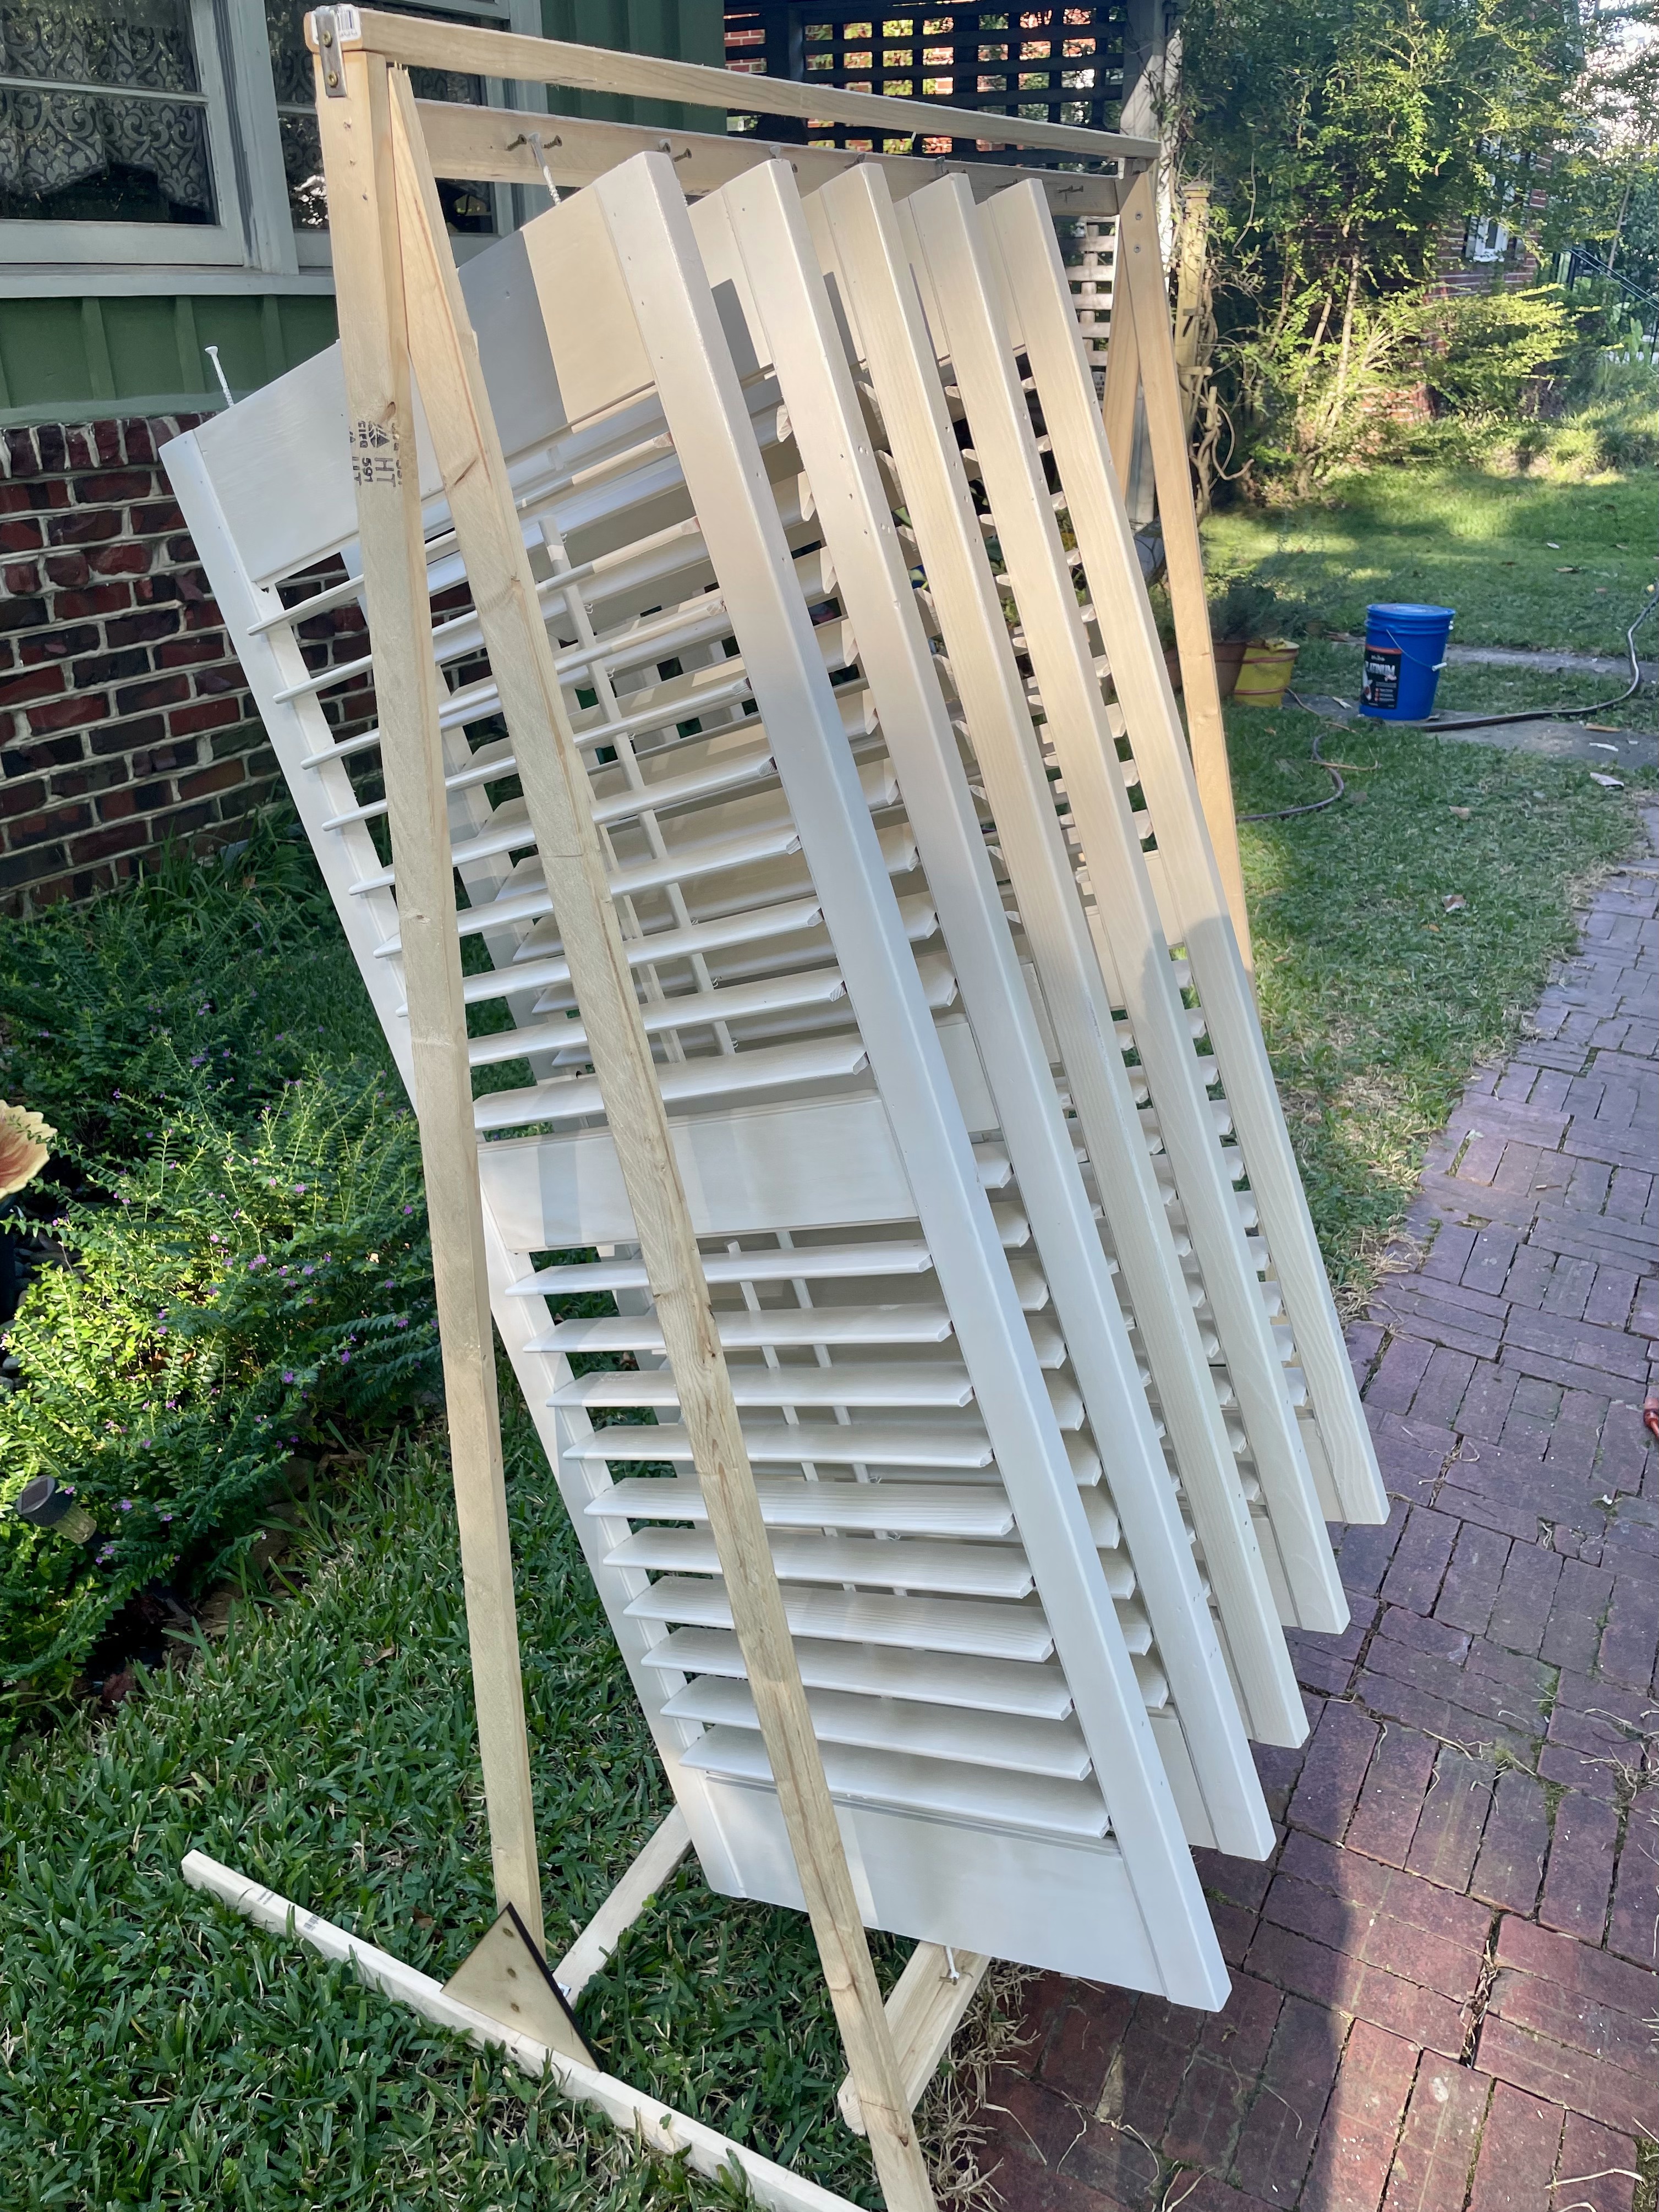
I had 8 shutters to paint and that left me with the problem of not having multiple sets of saw horses to leave the shutters on to dry. The solution was to build a drying rack out of some cheap 1" x 2" x 8’ pine furring strips (7 total). This is one of the those builds where it doesn’t have to be pretty or particularly robust, it just needs to work for a day or 2.
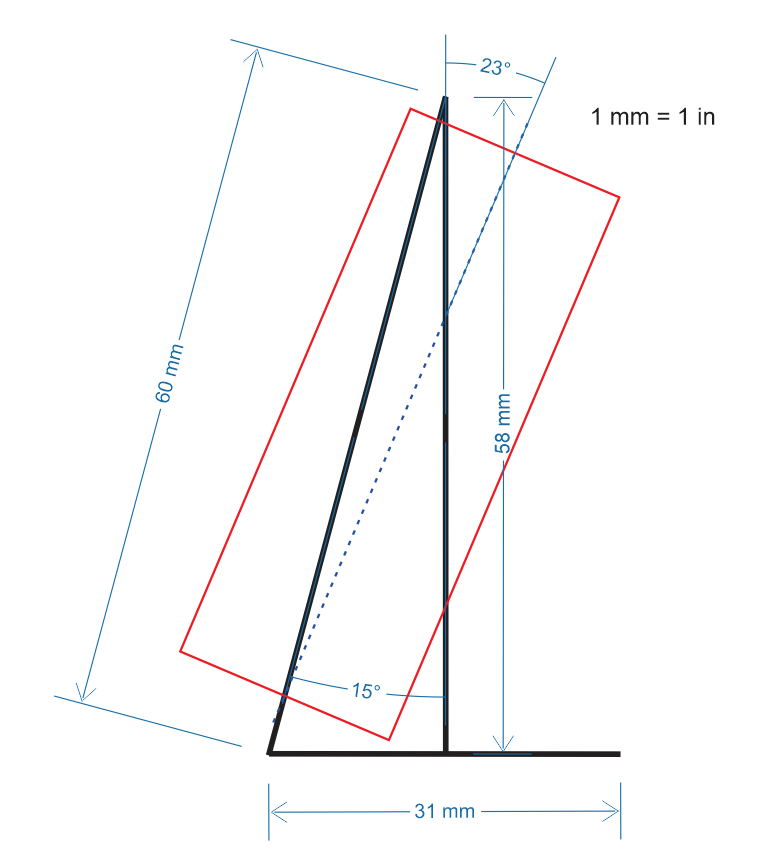
The shutters are 20" x 58" and I modeled up a quick profile to get the main dimensions. The width would be 4’ since the furring strips are 8’. The build angle is 15 deg, but by placing the middle screw end at the bottom I could then rest the top by one of the other screws on the other end. This then gave me a final hanging angle of about 23 deg, which was good enough.
Assembled using 1.5" deck screws. Used some corner brackets I had on hand to join the back frame.
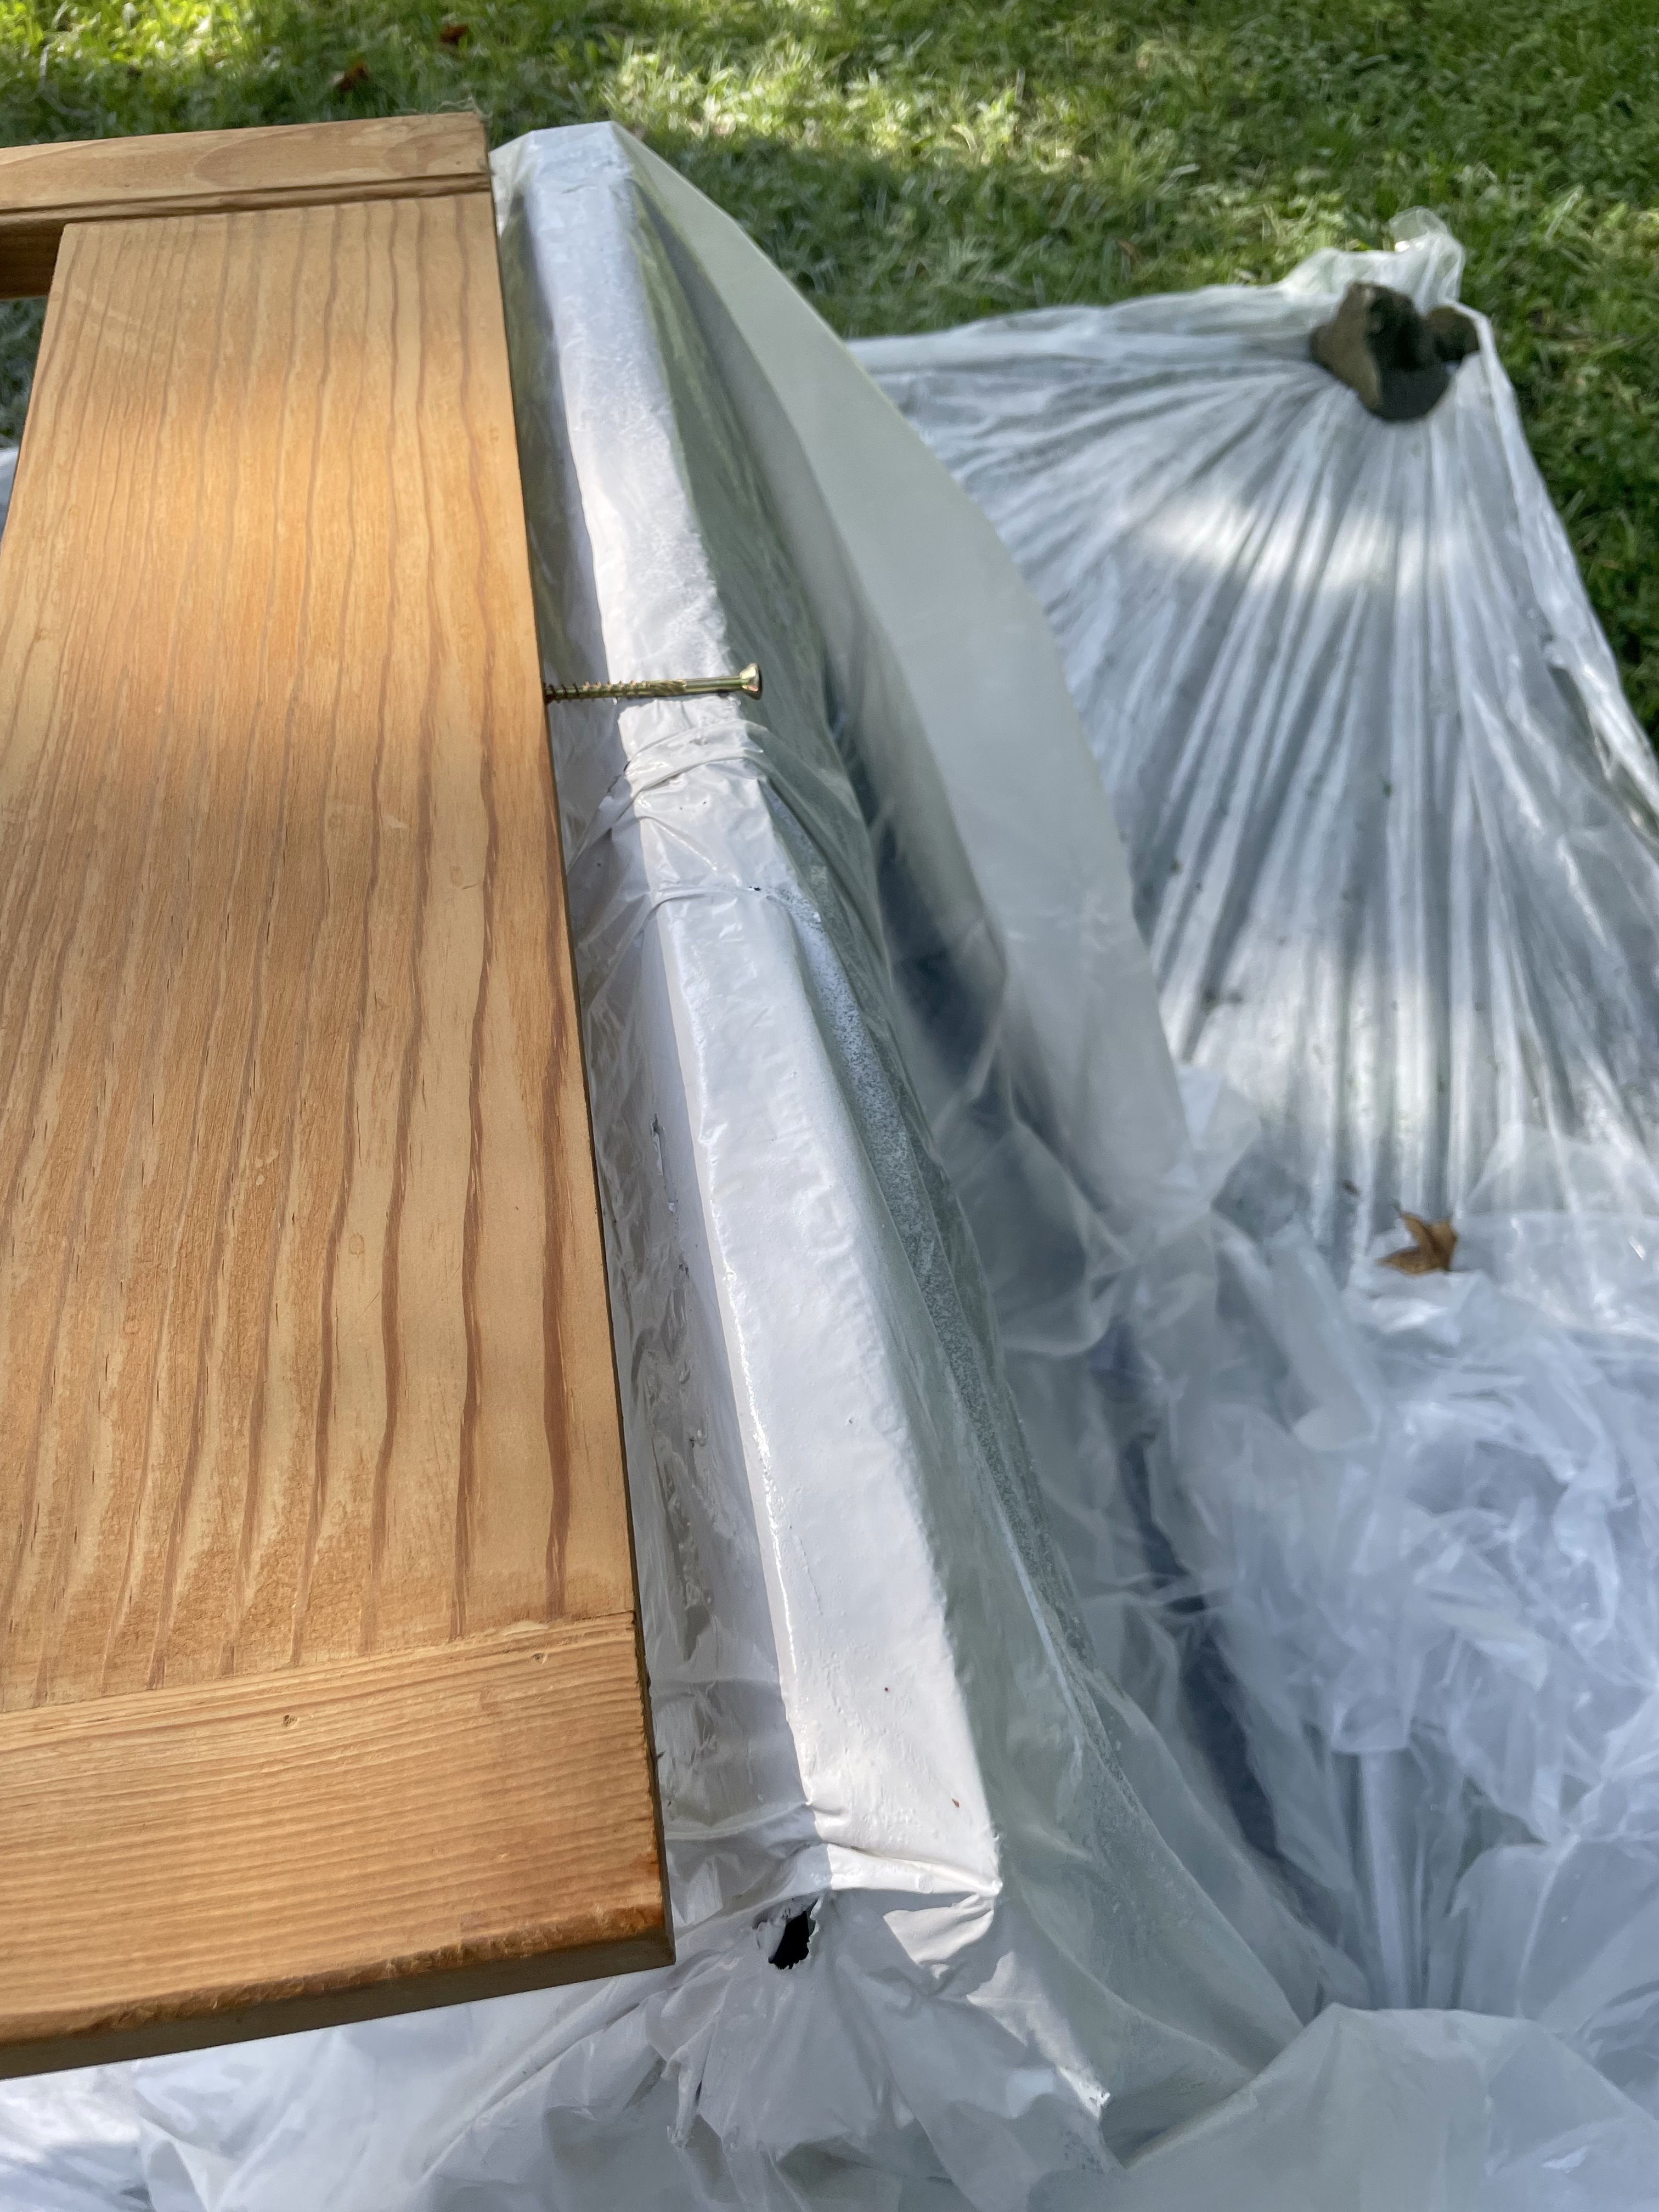
The bottom rest has a lip to rest the screw on.
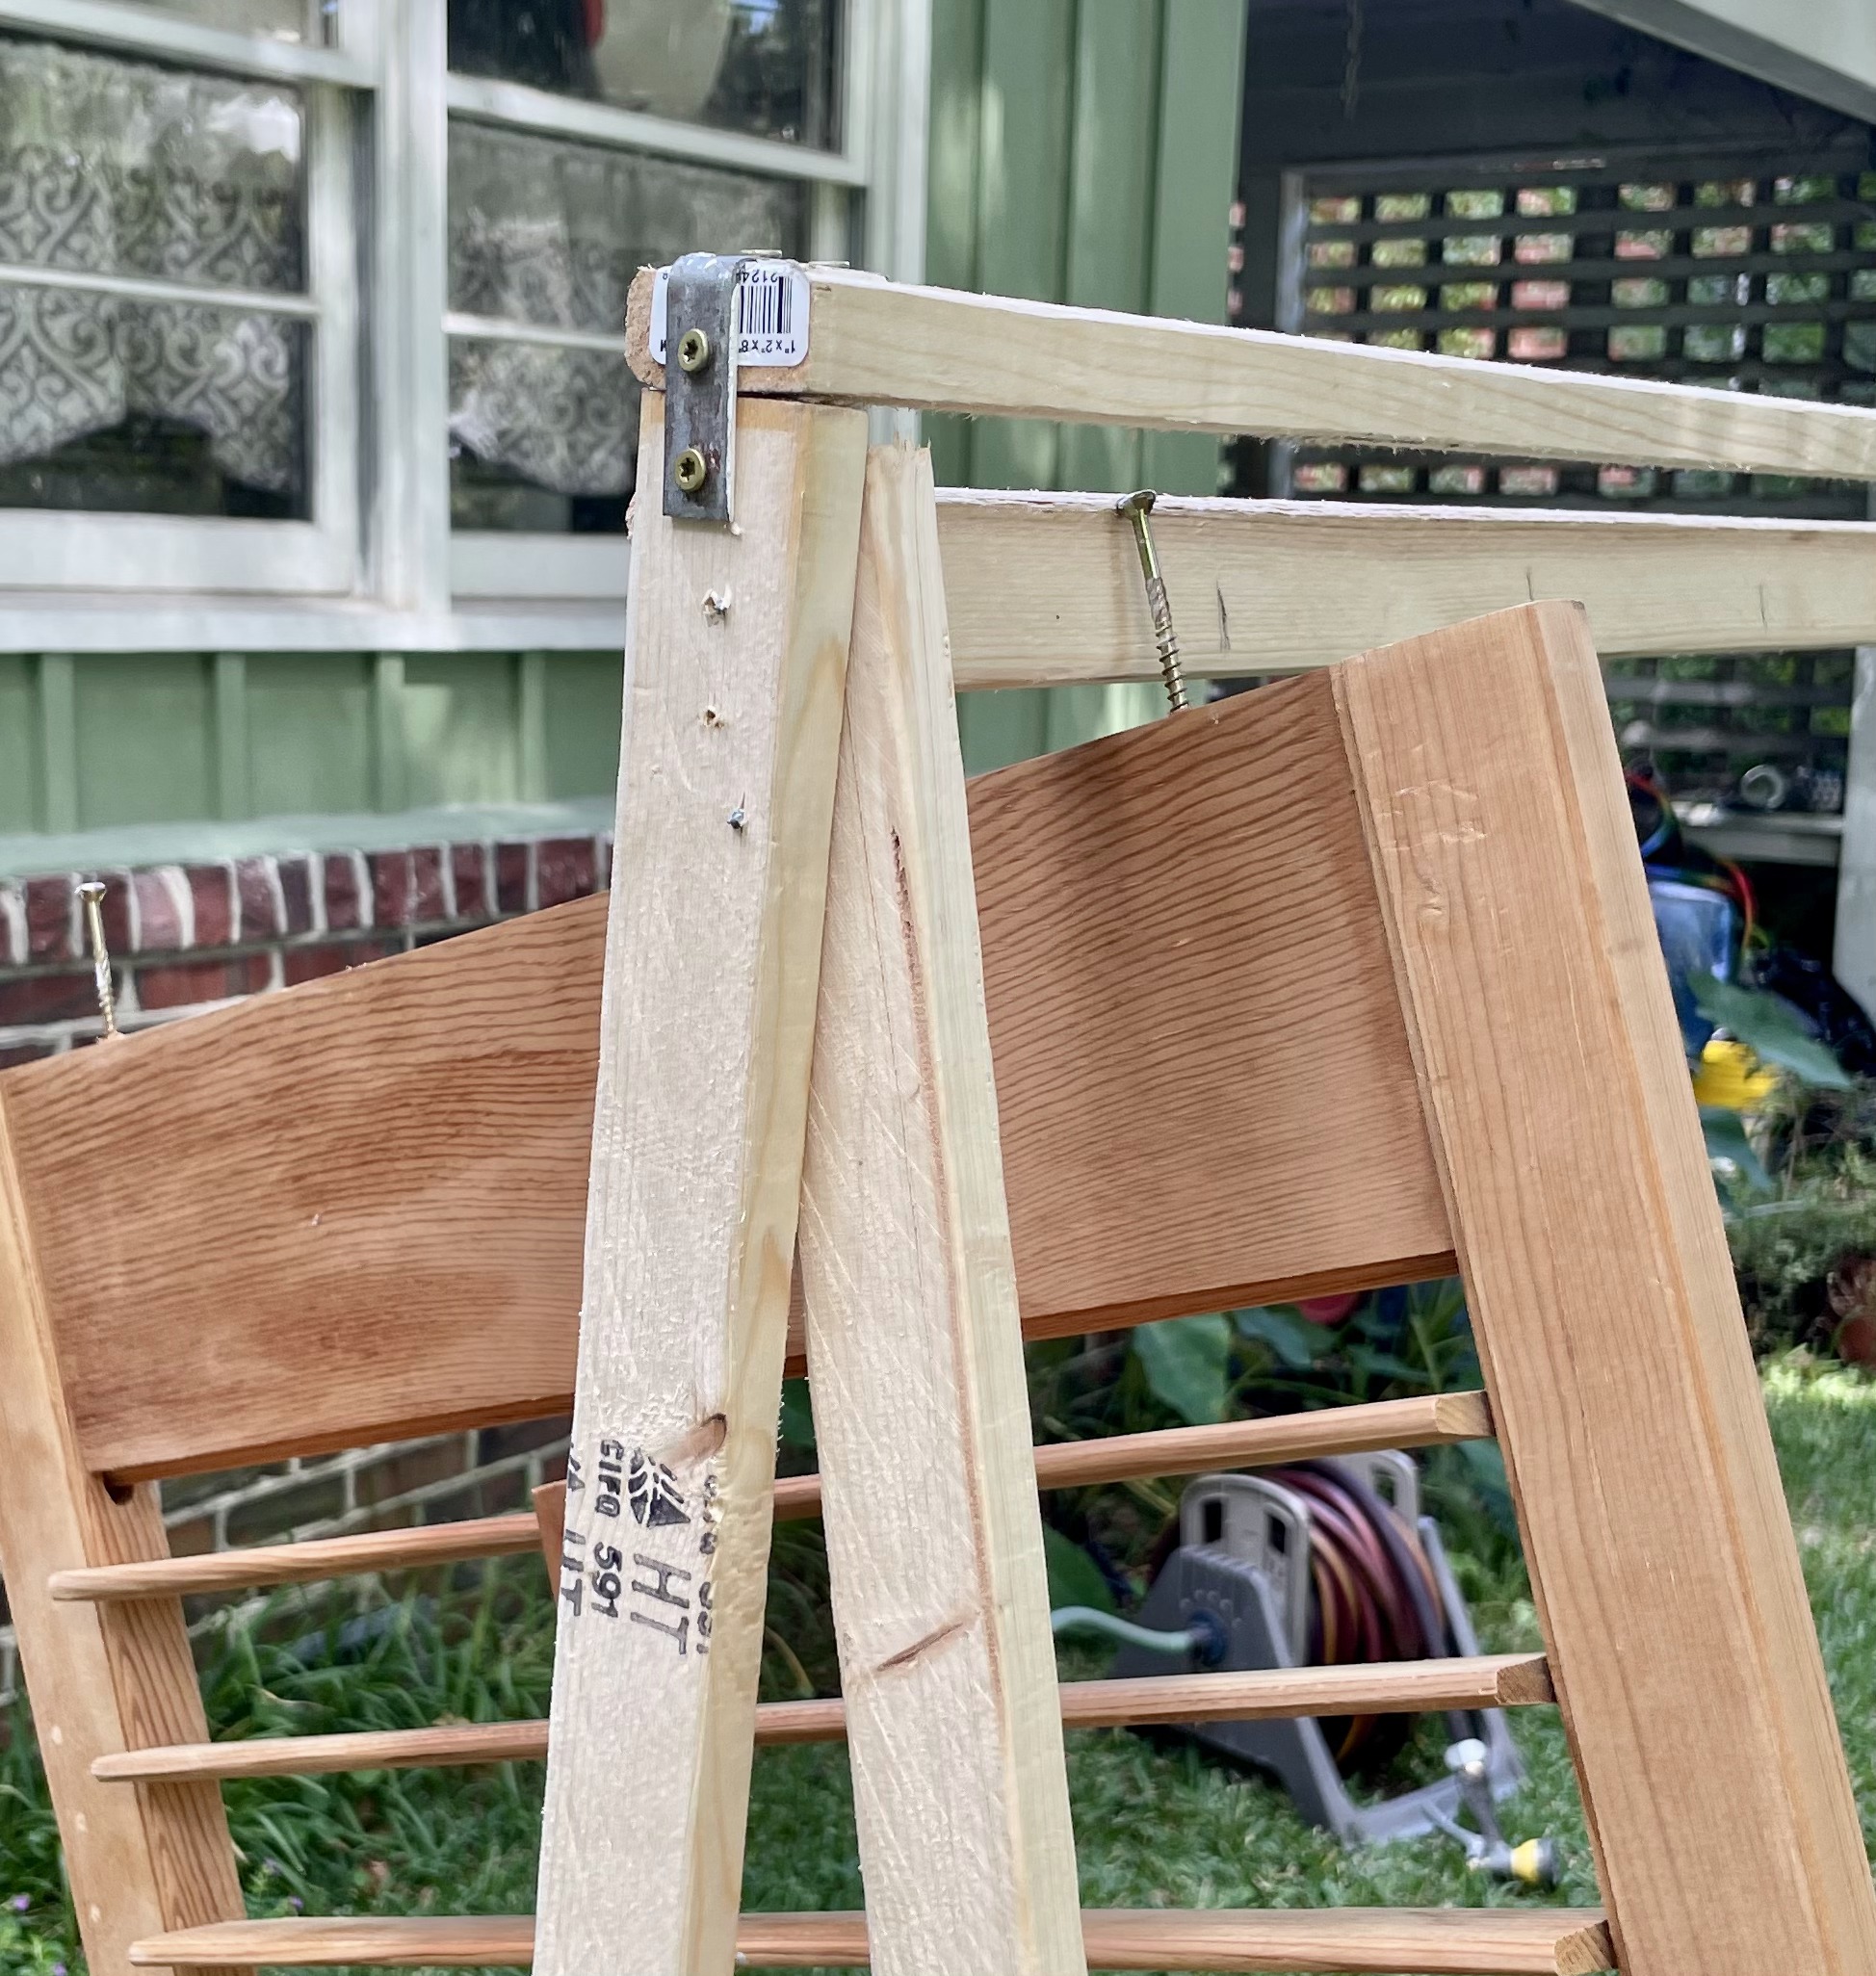
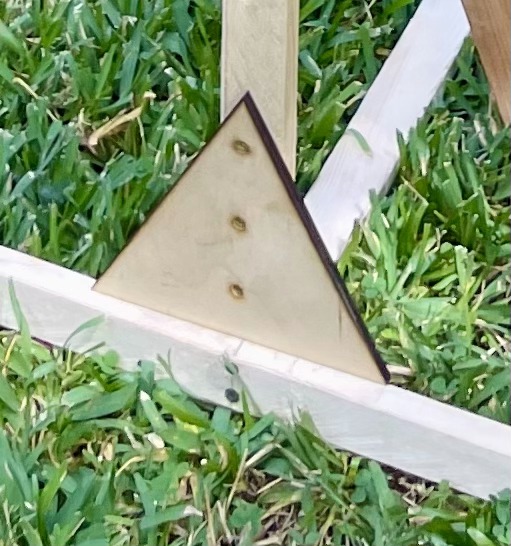
I did laser cut some braces from 1/4" ply for where the back frame joins the bottom feet. This was to stiffen up the frame a bit as I joined everything together.
It could have just been a rectangular piece of wood as it’s just to make sure the back frame stays perpendicular to the feet. It only is attached to the frame and rests tight against the feet.

Worked like a charm. ![]()