One last little mod before I move the new K40 to the shop. I poked a couple of bolts through the laser tube cover and glued them in place. Next, I attached a foam strip to the inner edge of the fan housing, slid the fan in place, and secured it to the bolts with a couple of wing nuts. From what I can tell, it’s pretty much sealed in place now.
Time willing, tomorrow it goes to the shop, water gets connected, and a test fire will be performed.
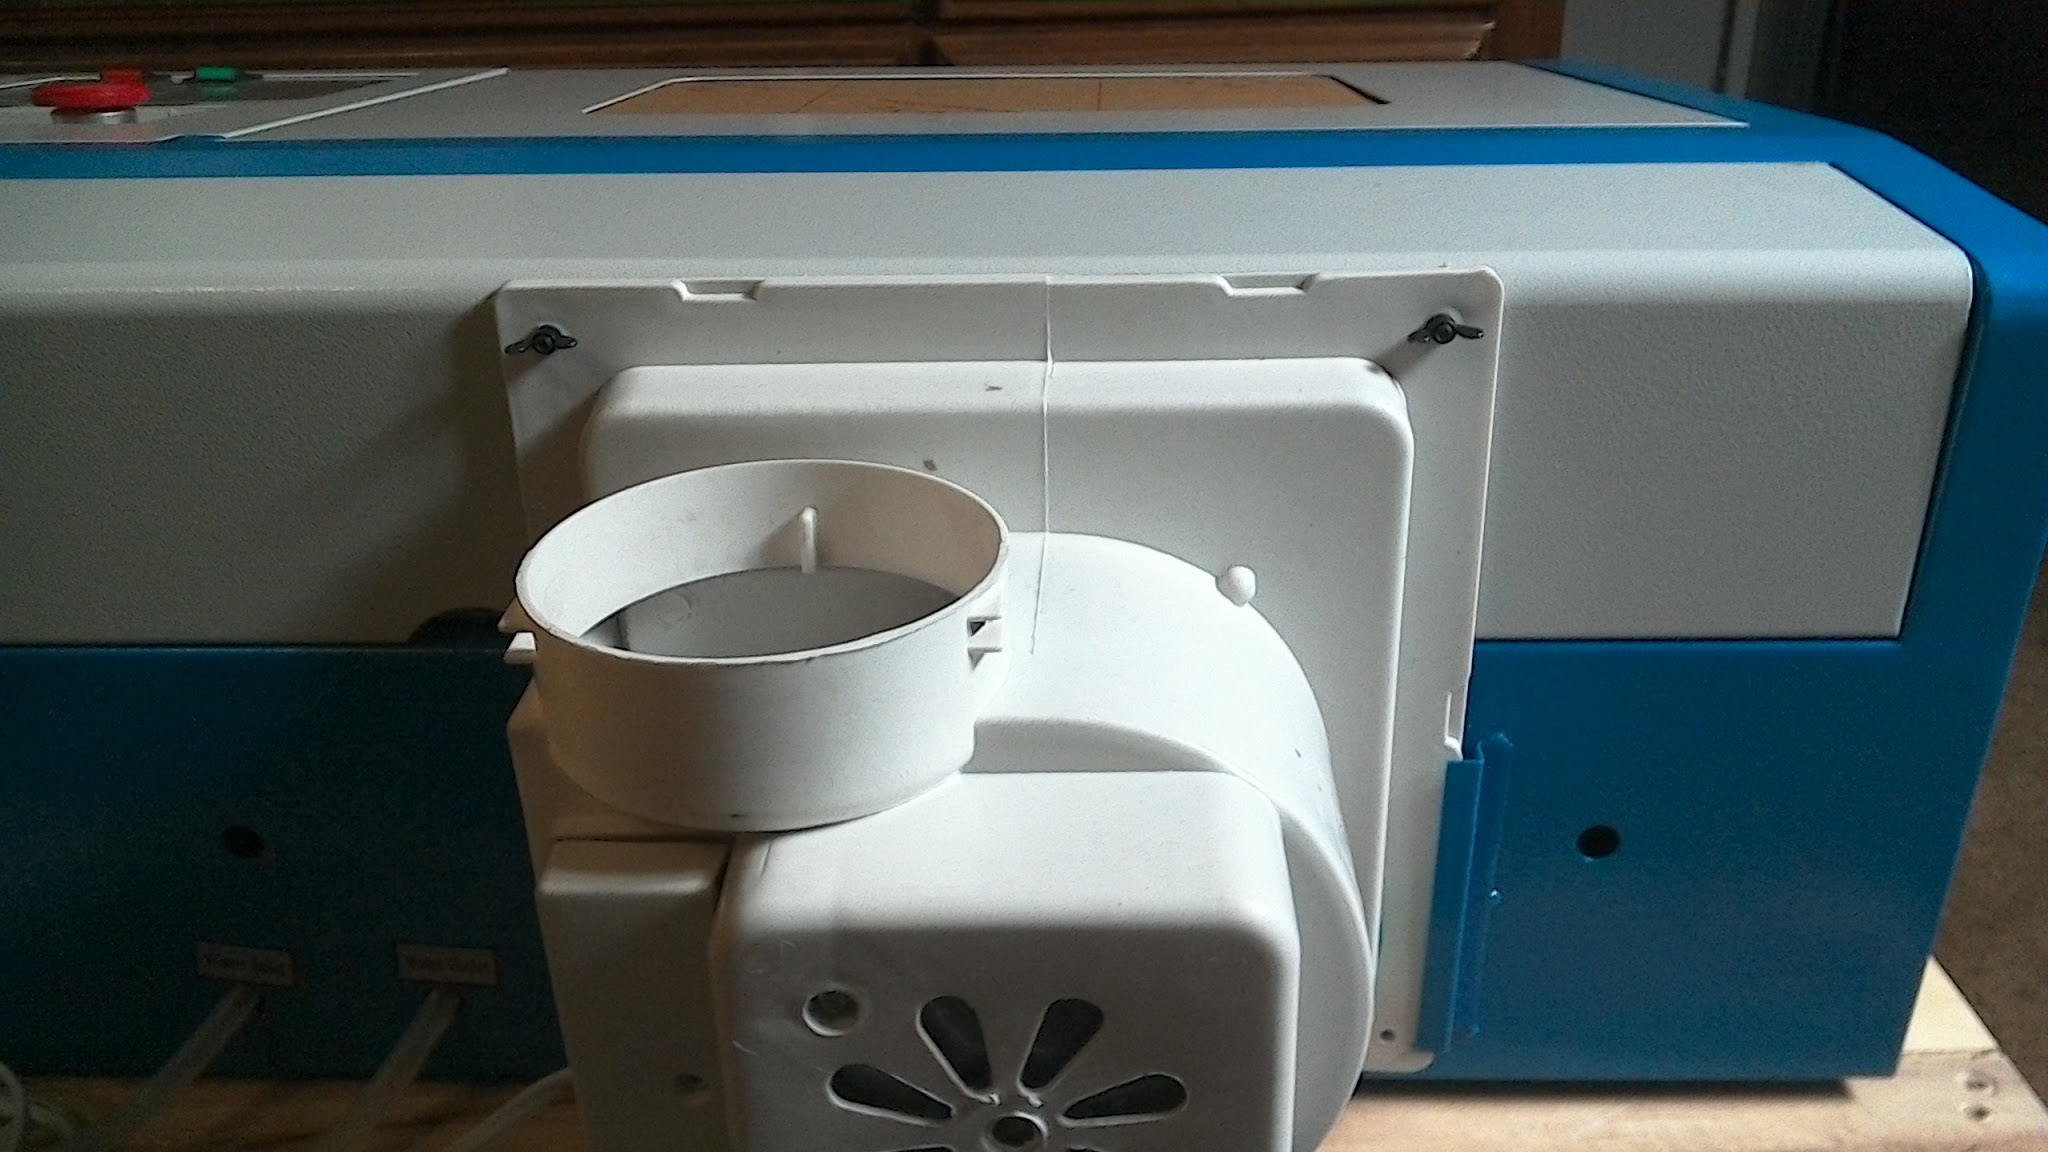
I’m in the process of designing an adapter for using a standard dryer exhaust booster with mine. all 3d printed. 
Honestly just ditch that duct it doesn’t produce enough pressure to do any good there plenty of cheap alternatives
I just use this
Attwood Quiet Blower (White, 4-Inch) https://www.amazon.com/dp/B003BMATFK/ref=cm_sw_r_cp_api_LT6xxb2S95D72
With a 3d printed exhaust piece and it sucks pretty good
I like the idea. But how do you slide it out again? Can it go over the bolts?
If you use the original fan: make sure the nut holding the fan is tight. Mine got lose and I had to glued it on the axle.
I’ve actually had good success with the stock fan (hacked). See my post here: https://plus.google.com/communities/118113483589382049502/s/exhaust
Rather than pushing air, I placed my stock fan halfway down my exhaust. This creates a negative pressure in the k40 and the pipe leading to the blower and keeps the fumes from entering your work space. I’m even considering moving my fan right to the window.
I replaced the flex pipe with hard pipe and minimized both the exhaust length and the number of bends. This was to reduce friction losses in the air flow. (I seem to remember something like that a 90 bend is equivalent to about 7 times it’s length in straight pipe).
All flash on the stock motor blades was trimmed. And lastly, I taped up all joints, including the joints between the two plastic housing pieces of the stock motor.
I have a 4" in-line bilge exhaust blower, but I haven’t installed it yet, because my stock motor hack works really well. So if you’re on a limited budget, I’d recommend hacking the stock blower and spending money on a more worthwhile cause like a new bed.
I find that the oem fan works great, I am using a custom duct. My duct was too long and I wanted to shorten it, but mine was trapped in the machine and wouldn’t come out. I cut it apart in-place with tin snips and removed the chunks. Then I installed M4 nutserts in the K40’s cabinet and 3d printed a new duct that installs from the rear rather than from the inside. I’m using the original fan with a piece of tape across the top so that it doesn’t sag and it works perfectly.
@Corey_Renner I find the stock fan only draws out the smoke when cutting along the top half of the bed. Any cutting being done along the bottom half of the bed, the smoke will just rise into onto the laser head and around the case.
I too tape along the top of the stock fan to the case so there is no vacuum leak there and only have a short length of vent.
I need more powerful exhaust fan… anyone know CFM of current fan?
I see 270CFM fans on ebay but whos to say they aren’t even worse than the stock fan if I don’t know stock fan specs?
cheers,
I could print one to sell I’d have to see if my printer can do another good one
I’d like the designs to these. I have over 5 printers, ready to go.
I just bought a 4in in-line, conjuring up a fitting to see how well it does
ben, that’s what i’m designing an adaptor for, as well. are you 3d printing yours?
@Julia_Longtin No I’ve got a vacuum adapter from another tool that I’m using. Cut some 6mm ply to fit it. I’ve got a post on the process.