The project is now called MoBeam. I got tired of typing Vigotec.
I completed the design/fab of a simple vertical adjustment laser module slide.
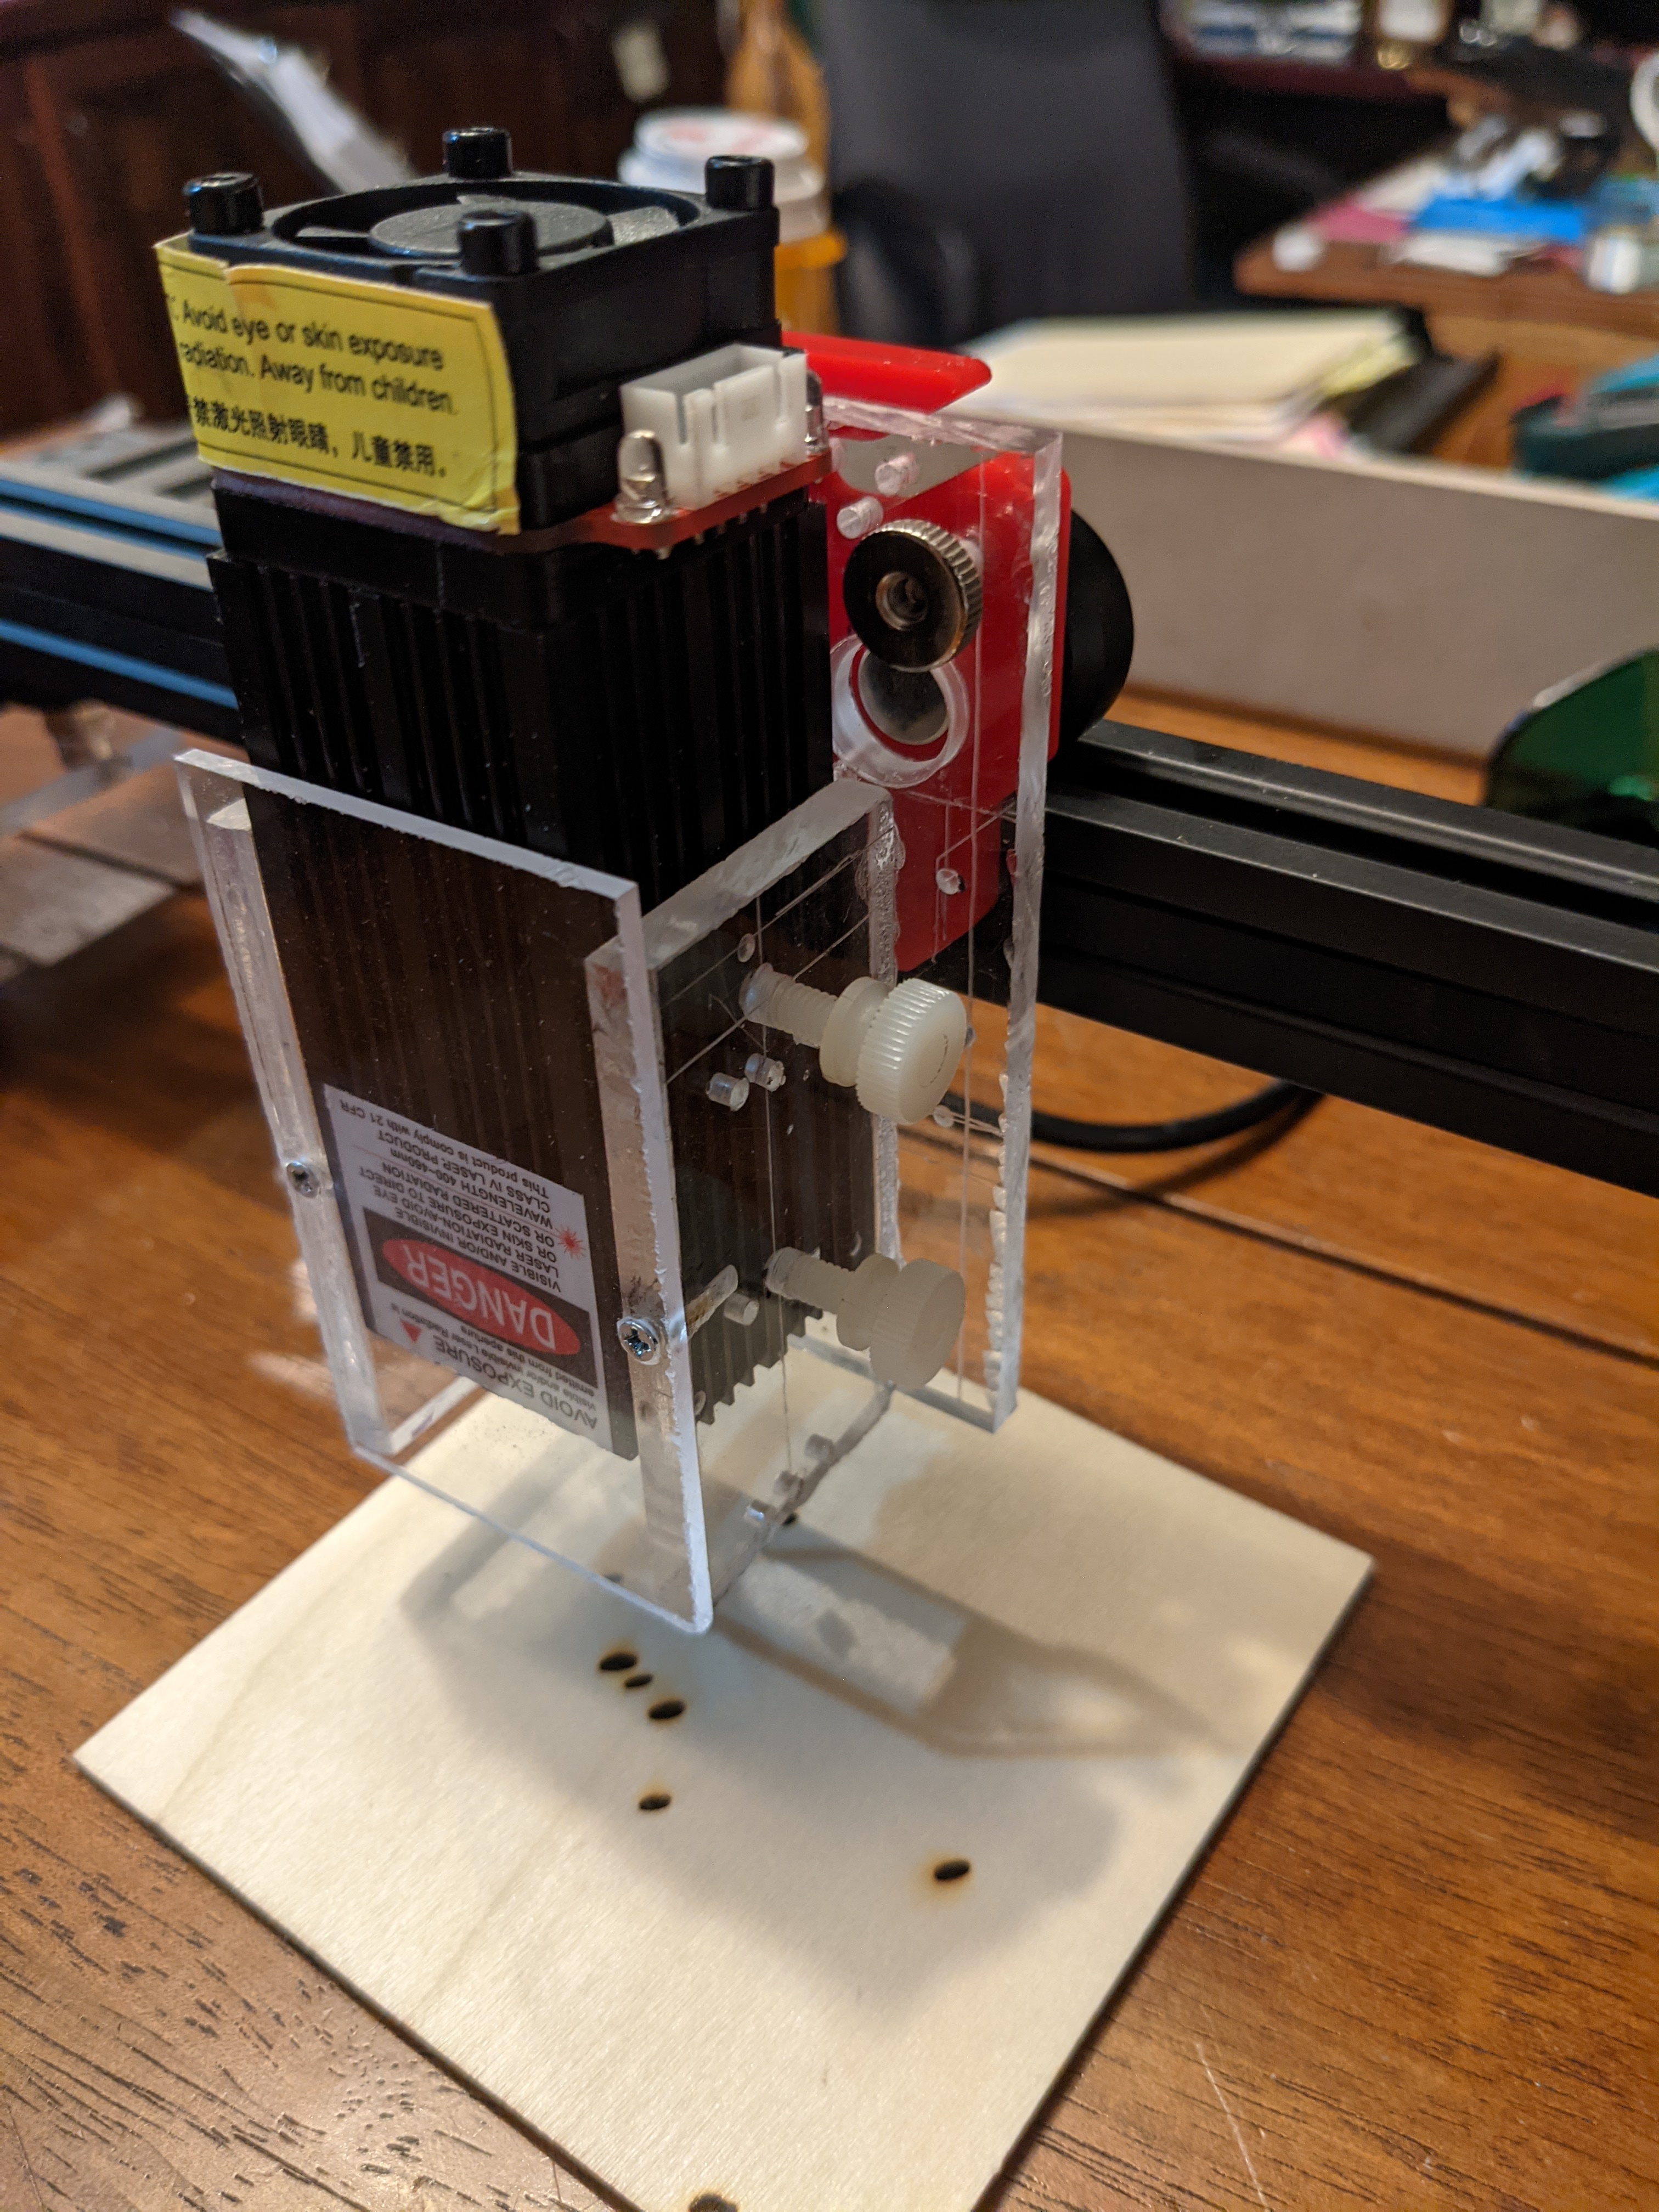
Adjustment Slide
Not yet knowing what’s the best way to adjust focus for my L7X I decided to build a slide that would enable simple adjustment of the diode modules vertical position.
Prototype SlideDesign
This is a simple design and concept. Replace the stock carriage interface plate with one that has a sliding channel for the diode module. The up/down motion is achieved by loosening a binding screw, sliding the laser module, and then retightening the screw.
This may be too simple for long-term use but I needed to make a fast prototype that would allow a simple yet large range of adjustment. Using this proto I will identify how much range & precision the vertical adjustment needs to have.
Once the adjustment needs are identified I may change the approach to a screw slide.
Didn’t realize you had a LD machine
My plan is to always engrave below the bottom of the machine.
So once the focus is set there is no more adjustment.
Is this going to be a practical strategy?
One of the first few hacks I made to the Ortur LM1 was to move some mounting screws so the cantilevered arm was about 20mm lower just so I could focus to the surface the machine was on.
I then engraved a large cardboard box in sections by just repositioning the laser machine on the box.
If you really will only use it for a single purpose then it’s not a bad strategy.
But these things will engrave lots of things which are smaller than the the machine and will have thickness within the working area so focusing is needed. I started doing slate and cork coasters recently and soon will try the Norton Method on some glass coasters. White tiles and the Norton Method of engraving is pretty amazing.
My machine has a 15W(<4W actual) and I changed the lens to a 3 element to get an even finer more rounded focal point.
Thanks for the advice,
I plan to make the frame adjustable up/down so if you have a material that is smaller than the frames perimeter you lay it on a surface and then raise the frame the thickness of the material.
I am interested in the 3 element lens can you point me to a purchase location.
adjusting the frame is a good alternative and I’ve considered that option myself.
I got my lens from an ebay reseller. Looks like he’s still selling them. This is what fit my Ortur but the threads might not fit what you have so check that. This also only takes a few threads to get the focus I want so I designed a 3D printed holder which uses an o-ring to help create the friction to keep the lens from backing out.
Some people use a single lens G8 for a bit better dot shape. Not as good as the 3 element and has less optical losses but my take was that the better focus point gets you a bit more condensed power even if that power is a bit less. Make sense?
I don’t know much about optics but I wasn’t happy with the stock lens and the oval shape which made burning in the Y direction a thinner line than burning in the X direction on my machine(I might have that reversed). People were talking about switching to the G8, IIRC mine came with a G2 so I tried one and wasn’t thrilled. Somewhere along the way I read about the 3 element design giving a smaller and better shaped focal point at an optical loss of a few percentage points. Seemed to me that might be a wash if the point was smaller and better shaped. I talked with that eBay seller and he said I might like his 3 element lens so I tried it and it seemed better and I’ve been using it ever since. Because of the limited focusing number of interfaced threads I looked at some Z axis options and hacked the most commonly liked one for the Ortur Laser Master 2 machine.
I also did some airflow tests and found that the air from the fan on the heatsink doesn’t stay in the heatsink channels for very long. Turbulence knocks it out before it gets down to where the diode is mounted. Simply putting some tape over the outside of the heatsink keeps the air in the channels much like how it does the same on the front side like the metalized information/warning label does.
I don’t have directed air assist since my K40 does most of the cutting and the laser diode is for engraving so I keep a good amount of air blowing across the cutting area to keep the smoke off the lens. Trapping the air into the heatsink helps there too since it’s blowing air down all around the lens so helps keep smoke away too.