You will not need a crimping tool. There is a clamping screw for the wire, just don’t over tighten it because it’s easy to strip the threads.
2 Likes
++ on the flow indicator. Better still, use an electrical one and interlock it so you can’t turn on the tube unless there’s flow and cool water.
Maybe someone makes an improved interlock upgrade kit to help with both personal and tube safety ?
2 Likes
You can get cheaper tubes than that from chinese suppliers. However they’re very fragile and easily damaged in the post. A local supplierm, even at a higher cost, is probably worthwhile.
A tube is a consumable. It’s sad that yours got consumed too quickly, but learning how to do it is very worthwhile. You will have to do it in the future if you use it much.
It might be thought that a electrical instead of visual fluid sensor is better but I’ve seen a tube ruined because the electrical interlock failed in the wrong position. The system thought everything was fine but infact the sensor failed and later the pump failed followed by the tube.
Getting used to hearing the exhaust fan, seeing the water flow and possibly earing the water cooler becomes normal operation and when one is missing it’s quickly noticed.
A firmware which controls water flow and senses the changing states would be the best option but until the firmware can do that, including a visual indicator with the flow sensor would be a good thing.
1 Like
Yes, quite true. I have also seen a flow sensor stuck in the ‘flowing’ position.
That is the type of sensor where a bar is pushed by the water flow and held against gravity or a spring with no movement. When the flow stops, it falls.
The answer is to use one like that illustrated as a visual sensor - a little turbine. The wheel has a magnet on it and an external electrical sensor generates a pulse. The sensor circuit looks not for a fixed level, but for a train of pulses.
4 Likes
Just to clarify on the electrical work to be done to replace the tube, is it correct that one side has a HV connector and one side has a clamping screw? Will I need to order 2 of the HV connectors that you listed from amazon? I am assuming there are 2 HV wires? I need to get the order correct right from the start since my school is ordering the components hopefully. Thanks for all the info!
Only the end that connects to the laser power supply is high voltage. The end where the laser exits the tube is not.
According to the comments, it looks like @LightObject includes a HV splice in the kit now, so you shouldn’t need to buy another one. I’d suggest contacting them to be sure before placing the order. They have a chatbot on their page where you can ask, and they’ve always responded promptly to email questions for me.
1 Like
LightObject did confirm that it comes with a quick connect for the HV connection. Thanks all!
1 Like
Hello again,
So I bought the tube and the visual flow indicator. Is there an instructional video that you would suggest following to do the replacement? I get the parts next week.
Thanks!
Lightobject has a tube wiring video.

@donkjr writes about it:
Both of these are linked from Where can I find K40 replacement parts? in our Getting Started with CO2 Lasers category.
1 Like
So I finally tried to replace the laser tube in my K40 laser today and realized that the tube in my laser is around 620mm long while all the replacement tubes I can find online are 720mm. Unfortunately I found this out by trying to insert a new 720mm long tube into my enclosure. It was in no way going to fit in there. Now I cannot seem to find a supplier of shorter 40W tubes. Any ideas? I bought it originally on ebay:
link to K40 laser purchased Jun 2022
Cut a hole in the anode end of the enclosure and then fit a plastic box that allows the tube to stick out. There are many box designs on the web for this.
Here is one on Etsy: K40 Laser Tube Extension Box K40 Laser Laser Engraver Laser - Etsy
1 Like
Funny, I had a similar thought but then thought that would be irresponsible to do that!
you’ll find lots of examples and info linked from this search: k40 laser tube replacement extension housing - Google Search
It may not be obvious but if there is any metal that is isolated from the frame insure that it is grounded.
In this example the fan shroud should be grounded.
Did you get the machine up and running?
![]()
I just recently finished the work. Changing out the laser was not too difficult, especially if you watch the video linked above. I liked the suggestion in the video to use silicone tubing to insulate the joint in the wire.
I also now have a 10 gallon fish tank for the water reservoir, I added the flow indicator suggested above, and found a temperature sensor with an alarm to help prolong the life of the laser in the future. Link to temp sensor with alarm.
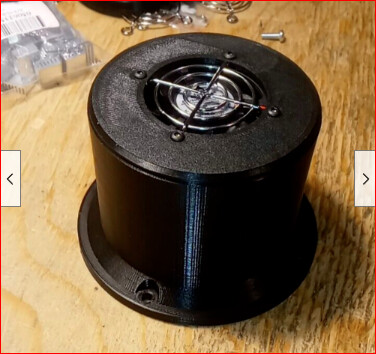
I also created my own tube extension and posted it to Thingiverse.
3D printed K40 tube extension
I have only used the laser once after aligning the mirrors and it looked good but it was a quick first test. Time will soon tell how well it went.
Thanks to everyone who replied with info to this post. It was tremendously helpful to have this forum. Thanks all!
3 Likes
Since your new tube is theoretically greater than 40 watts, be careful not to drive it at full power (never a good idea in any case) to avoid damaging your power supply.
LPS shouldn’t produce more that it’s limit, so it shouldn’t be an issue with the lps, it’s with the tube …
![]()
1 Like
Some ideal modifications to improve life:
-
Wire a temp controller and flow switch into the interlock (WP) circuit on the LPS so it shuts down immediately upon an error condition.
-
An analog laser current meter is the best way to tell what your tube is doing.
1 Like