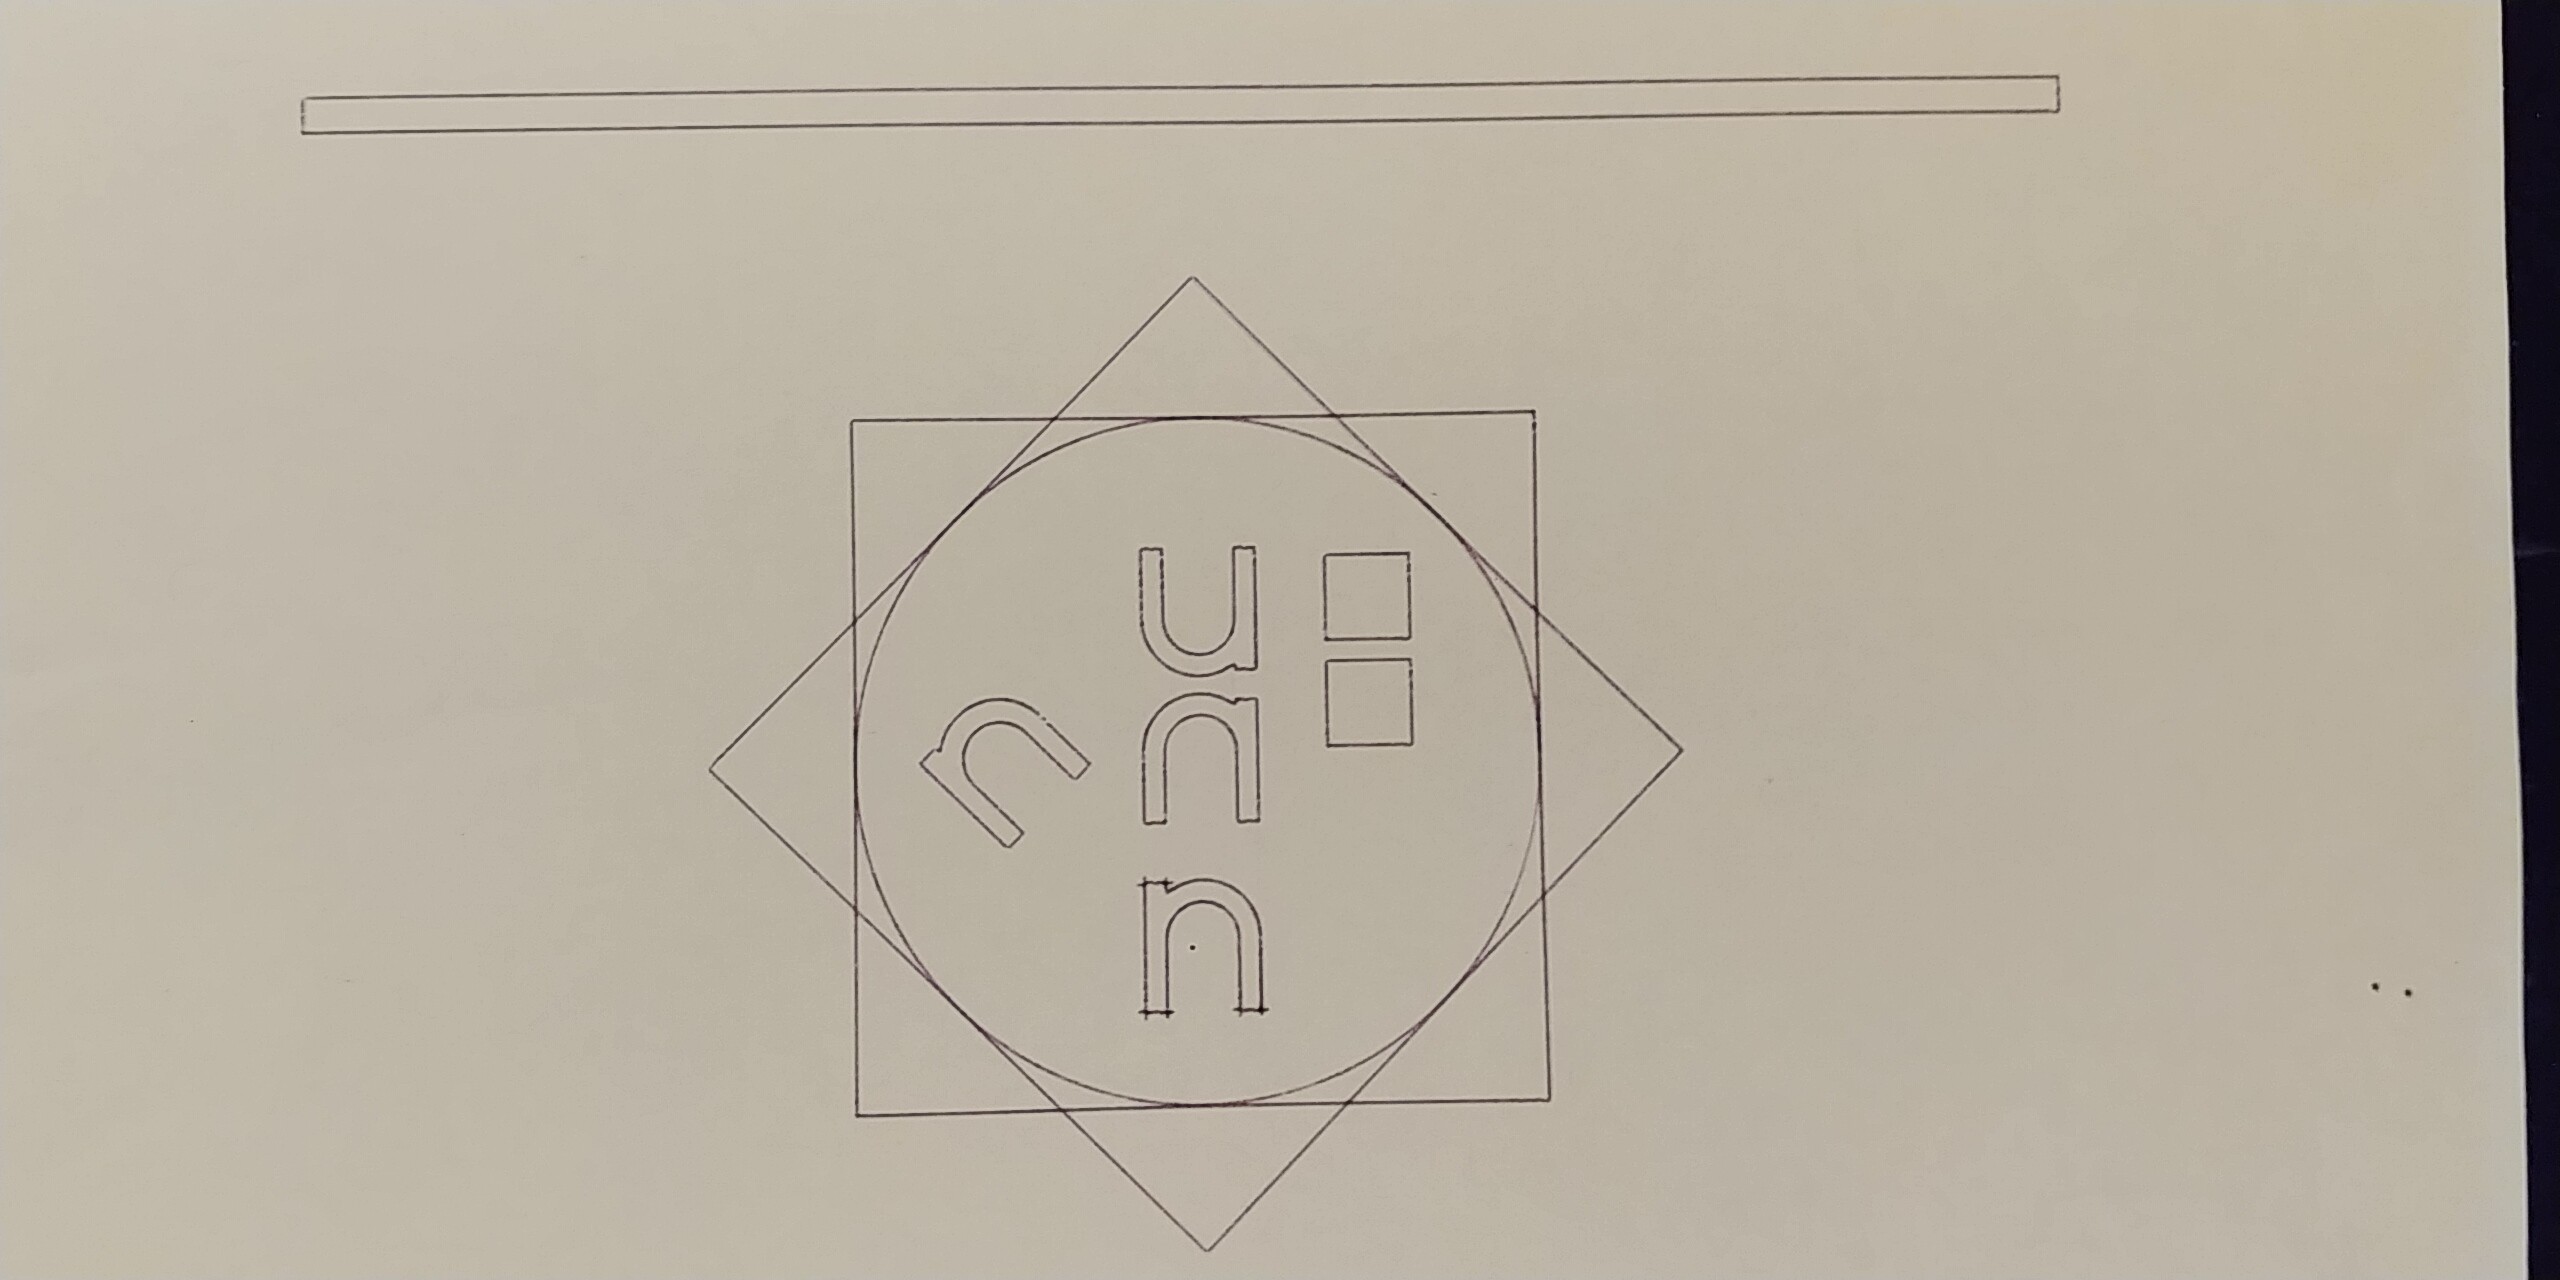
Hello everyone. I need expert help please. I have problems with horizontal cuts. As you can see in the image, the horizontal cuts are not straight. You have much better quality in your K40 right?
I have sanded the horizontal bar cleaning small bubbles of paint
I have done tests with different scrolling speeds
I have leveled the horizontal bar
I think the problem has to be with the wheels. I have placed the wheels in different positions to accommodate the scroll bar. I may not have found the best position, I’m not sure. I’m also not sure what level of pressure the wheels have to exert against the bar they’re attached to. There may be some imperfect wheel (at first glance they all seem imperfect to me)
Guess I should buy new wheels and give it a try. Could you tell me exactly what product I have to look for please? Do you have any other idea what might be going wrong?
In case you can give them some extra hint, when the displacement changes from vertical downwards to horizontal left there is always a small ripple in the cut (you can see it perfectly in the square of the image)
Thank you for your attention and for this wonderful forum.
Yes, I also think it’s a problem with the carriage. I have reviewed the other possibilities that you mention and they are discarded. The carriage rides firmly, it is not loose at all which leads me to believe that it is a problem with the placement of the wheels or that the wheels are damaged for some reason. The truth is that due to the use they have had, it cannot be.
I have found the wheels for sale but on the other hand I have been looking for x-axis upgrades on the internet to avoid the wheel system but I cannot find a kit that can be bought from Spain and installed easily. I have found this kit which looks quite interesting but apparently it is not sold outside the UK.
Do you know something similar that I can buy? I’ve searched the forum but so far I still can’t find anything similar. If I could install a better system on the x-axis, I think I would finally be able to build what I’ve been trying to achieve for a long time.
That linear rail upgrade is interesting. Haven’t run across anything else like that before. Usually for the wheel tightening, I loosen all the wheels and then rotate the back ones all the way in. Then rotate the front ones in so they are firm to the rail. That way you have an even setup.
Yes, the rail update is very interesting and at a very good price compared to the solutions I have found on aliexpress. Too bad it’s only sold in the UK. I’m going to contact the seller to see if I’m lucky and he wants to send it to Spain. I will also try your method to adjust the wheels, thanks a lot NedMan.
If you want to see a more complete kit from the same person, I leave you a video of him on YouTube:
My opinion is that they need to be firm against the rail but still move easily along the rail. It’s a bit of a balancing act. If you get them too tight you can also deform the wheels and cause excess wear.
Since I have a 2 mm acrylic sheet, I will not need to print the pieces, I will only cut them with the same k40. The linear rail costs only 16 euros, although it takes a few weeks to arrive.
I plan to change the 3d printed pieces for acrylic pieces cut with the K40. I have downloaded the files from Xile6 (the creator of the upgrade) and adapted them to laser cutting. In the piece that serves to align the linear rail I am going to cut several equal pieces and join them with screws until I reach the thickness of the 3d piece. I will cut the 5mm spacer out of an acrylic piece of the same thickness and with this I don’t need to 3d print any pieces. I imagine you did something similar elephantandcoffee, right?
It seems that the linear rail will not take much longer to arrive. When I have done the upgrade I will tell you.
The modification has been partially successful. Horizontal lines are now straighter. Maybe in the photo it doesn’t look so much but this is because the test is done on old paper and the surface of the bed is not completely flat. Where it has been improved but not so much is in the horizontal changes of direction. Especially when it changes from vertical down to horizontal to the left. There is still a small wave. Now it is less but it is still evident. Diagonal direction changes are less of a problem, I’ll eventually have to cut the pieces in this position. I tried the MeerK40t program before the modification because I read that the program corrected this problem but it did not help me. Has anyone used this program and noticed any improvement?
Regarding the modification, I must say that it is relatively easy to carry out and very economical. For me it is very worth it. I had to make some modifications to the original pieces because I was using 2mm acrylic and once cut it would bend slightly where the piece is narrow. For the aligning piece at the end I used 10mm acrylic. I have cut two pieces one for each end. I have also modified this piece slightly since the original is for 3d printing. I have added 0.25mm due to laser cutting and the piece has worked perfectly. I absolutely recommend spending some time on this upgrade. Thank you very much Xile6 (the creator of this modification), you have earned me to invite you to a coffee.
Thanks for sharing an update. I realized that I never asked what speeds you are using?
I don’t use MeerK40t, but I understand it does have some acceleration / deacceleration functionality. Did you play with those settings? Some info in the link below.
Thank you for your attention NedMan. Being able to share this work with someone is priceless.
I have done this test at a speed of 40 mm/s. I cannot carry out tests with wood since I do not have any assisted air system installed and therefore I carry out tests with paper at high speeds. The thing that confuses me is that I’m not getting good results cutting 10mm thick acrylic and I’m also getting corners failing on my test pieces. Although if you confirm that it is normal that at a speed of 40 mm/s I obtain these results with the corners, it would be very helpful. I am already evaluating other updates to get the best results for this extreme thickness for our K40.
Thanks to the information that I have been obtaining in our forum, I have decided to change the surface of the bed. I am going to install a stainless steel plate and I will raise the methacrylate with several pieces (I still don’t know exactly what material but I suppose they will also be methacrylate) to create an empty space between the bed and the piece that is cut. In a video shared here I’ve seen a man leave the front cover partially open to create airflow to help prevent the piece from “burning” on the bottom (do you know if aluminum sheet would suffice? I’m worried that the aluminum will warp from the heat). I am also going to install an air assist system for the head to get better results on top of the acrylic and also to be able to do some good tests to fine tune the focal point as well as possible. Does this head choice seem appropriate to you?:
I have also bought this device to try to level both the bed and the headboard as best as possible since I need the cut sides of the acrylic to be as vertical as possible to be able to fit some pieces with others:
Thank you very much for the link you have provided. At the time I didn’t delve into the MeerK40t program, I just used it the same as the K40 Whisperer and it gave me the same results. I thought I understood that by default the program’s settings were better than those of the K40 Whisperer. Once I have installed the updates I will start to delve into the MeerK40t but now I understand that without these two updates it is impossible for me to get good results with the 10mm acrylic.
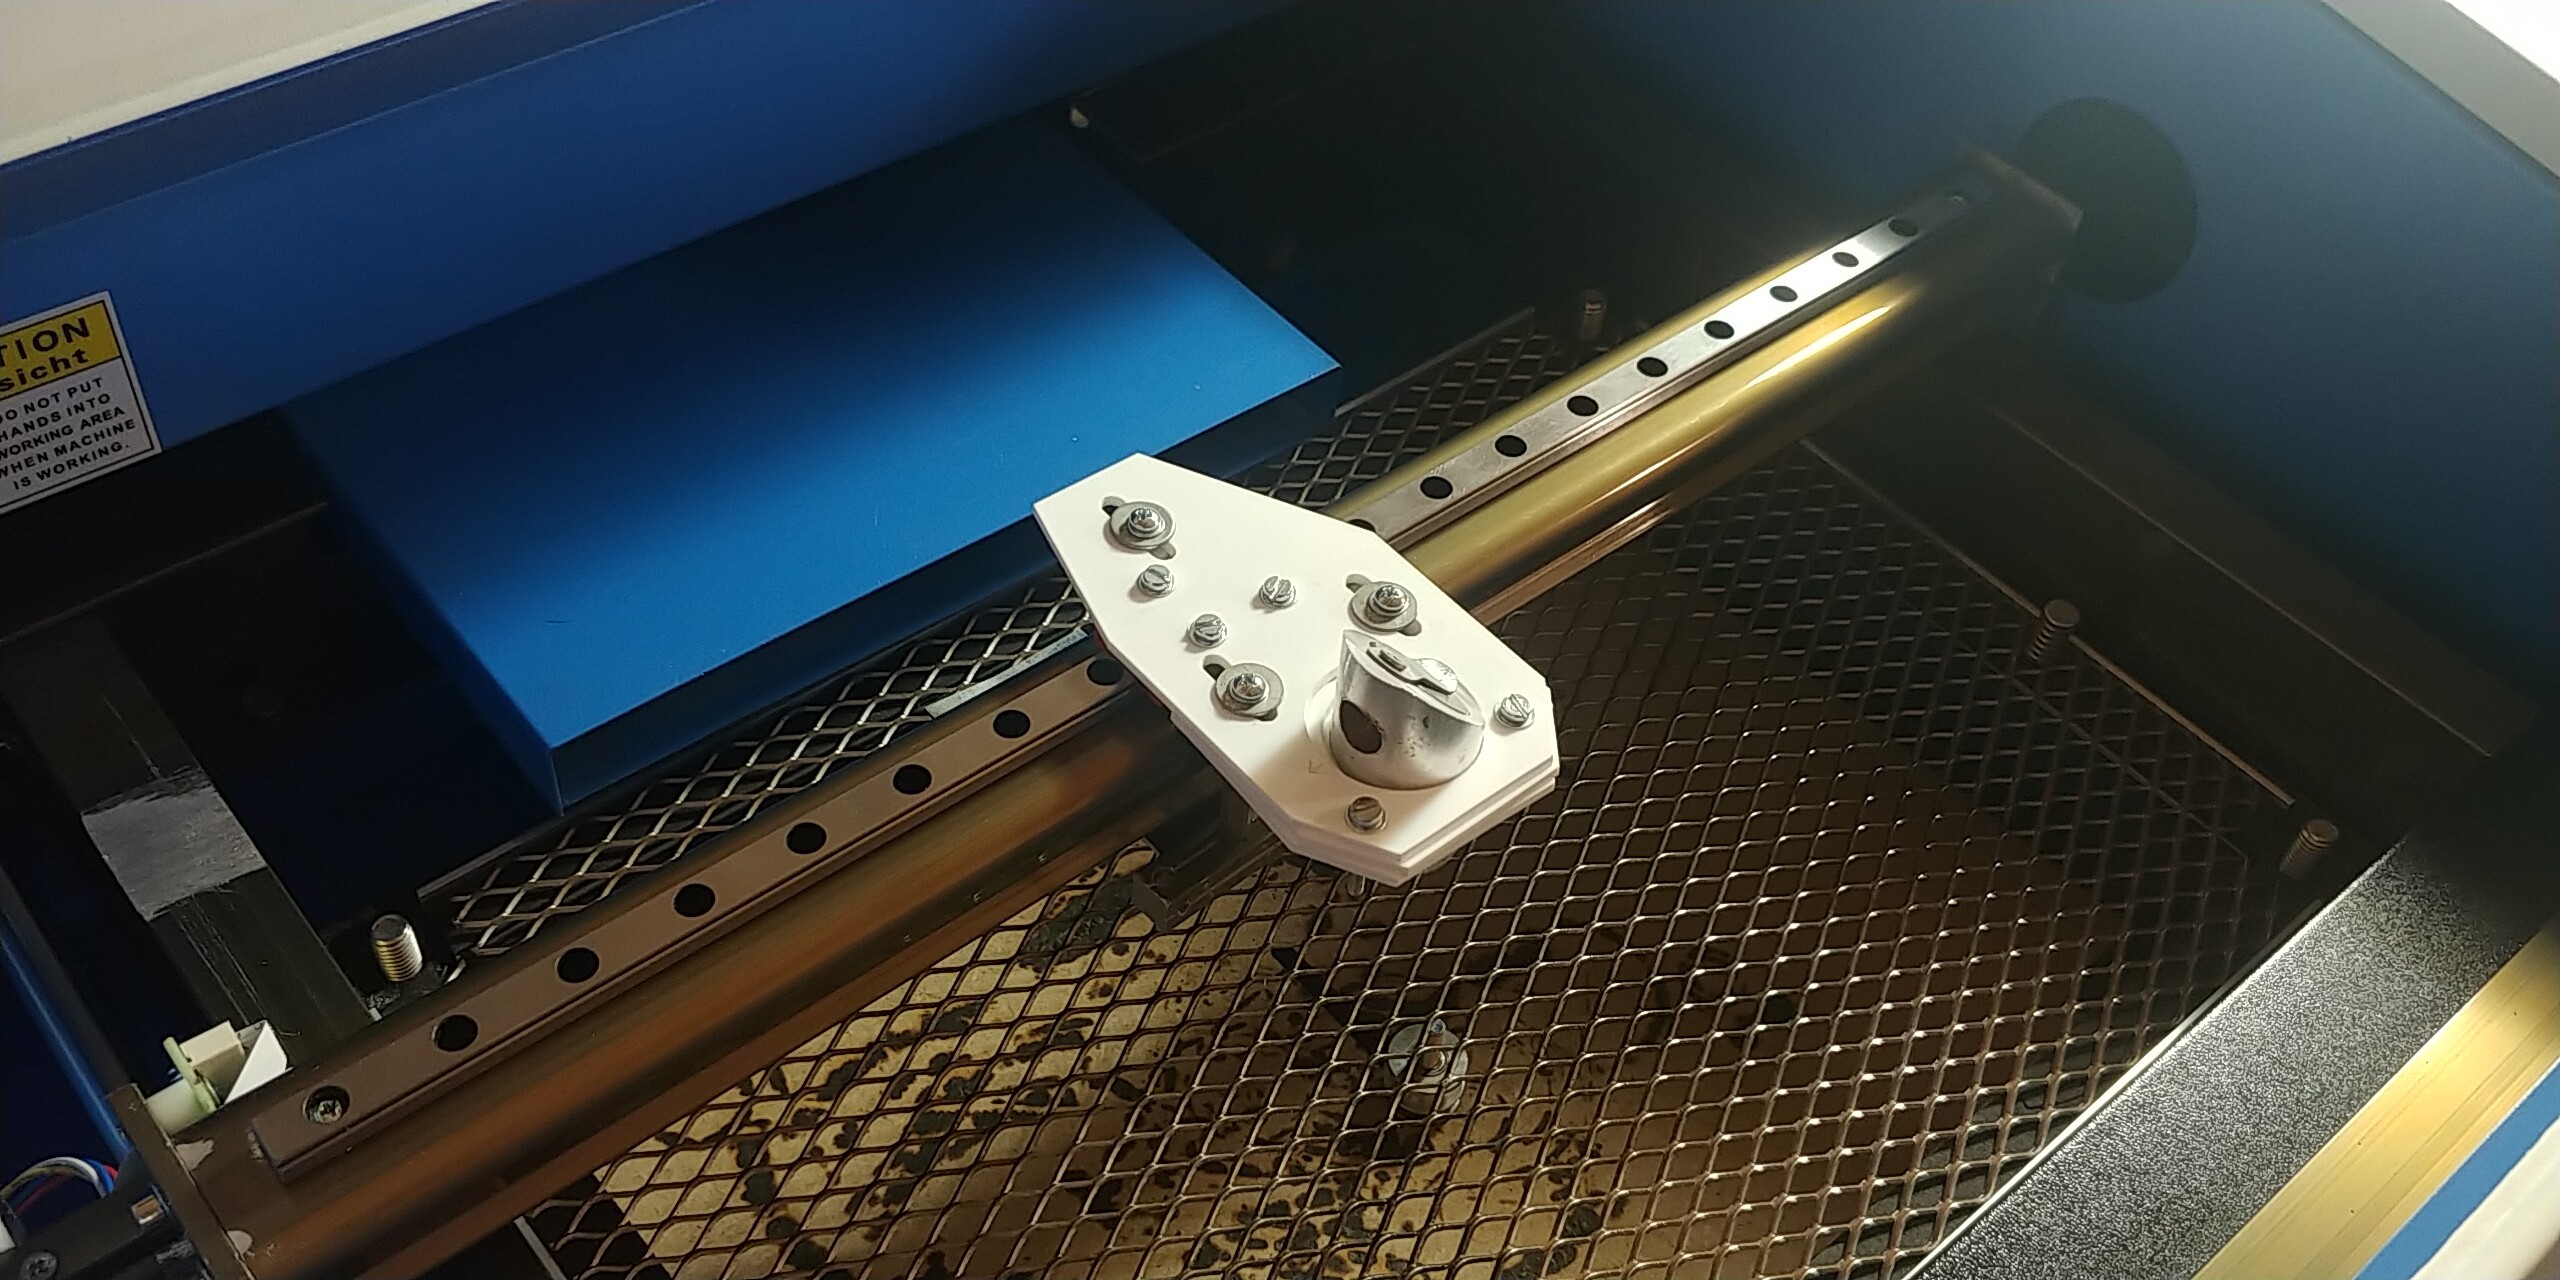
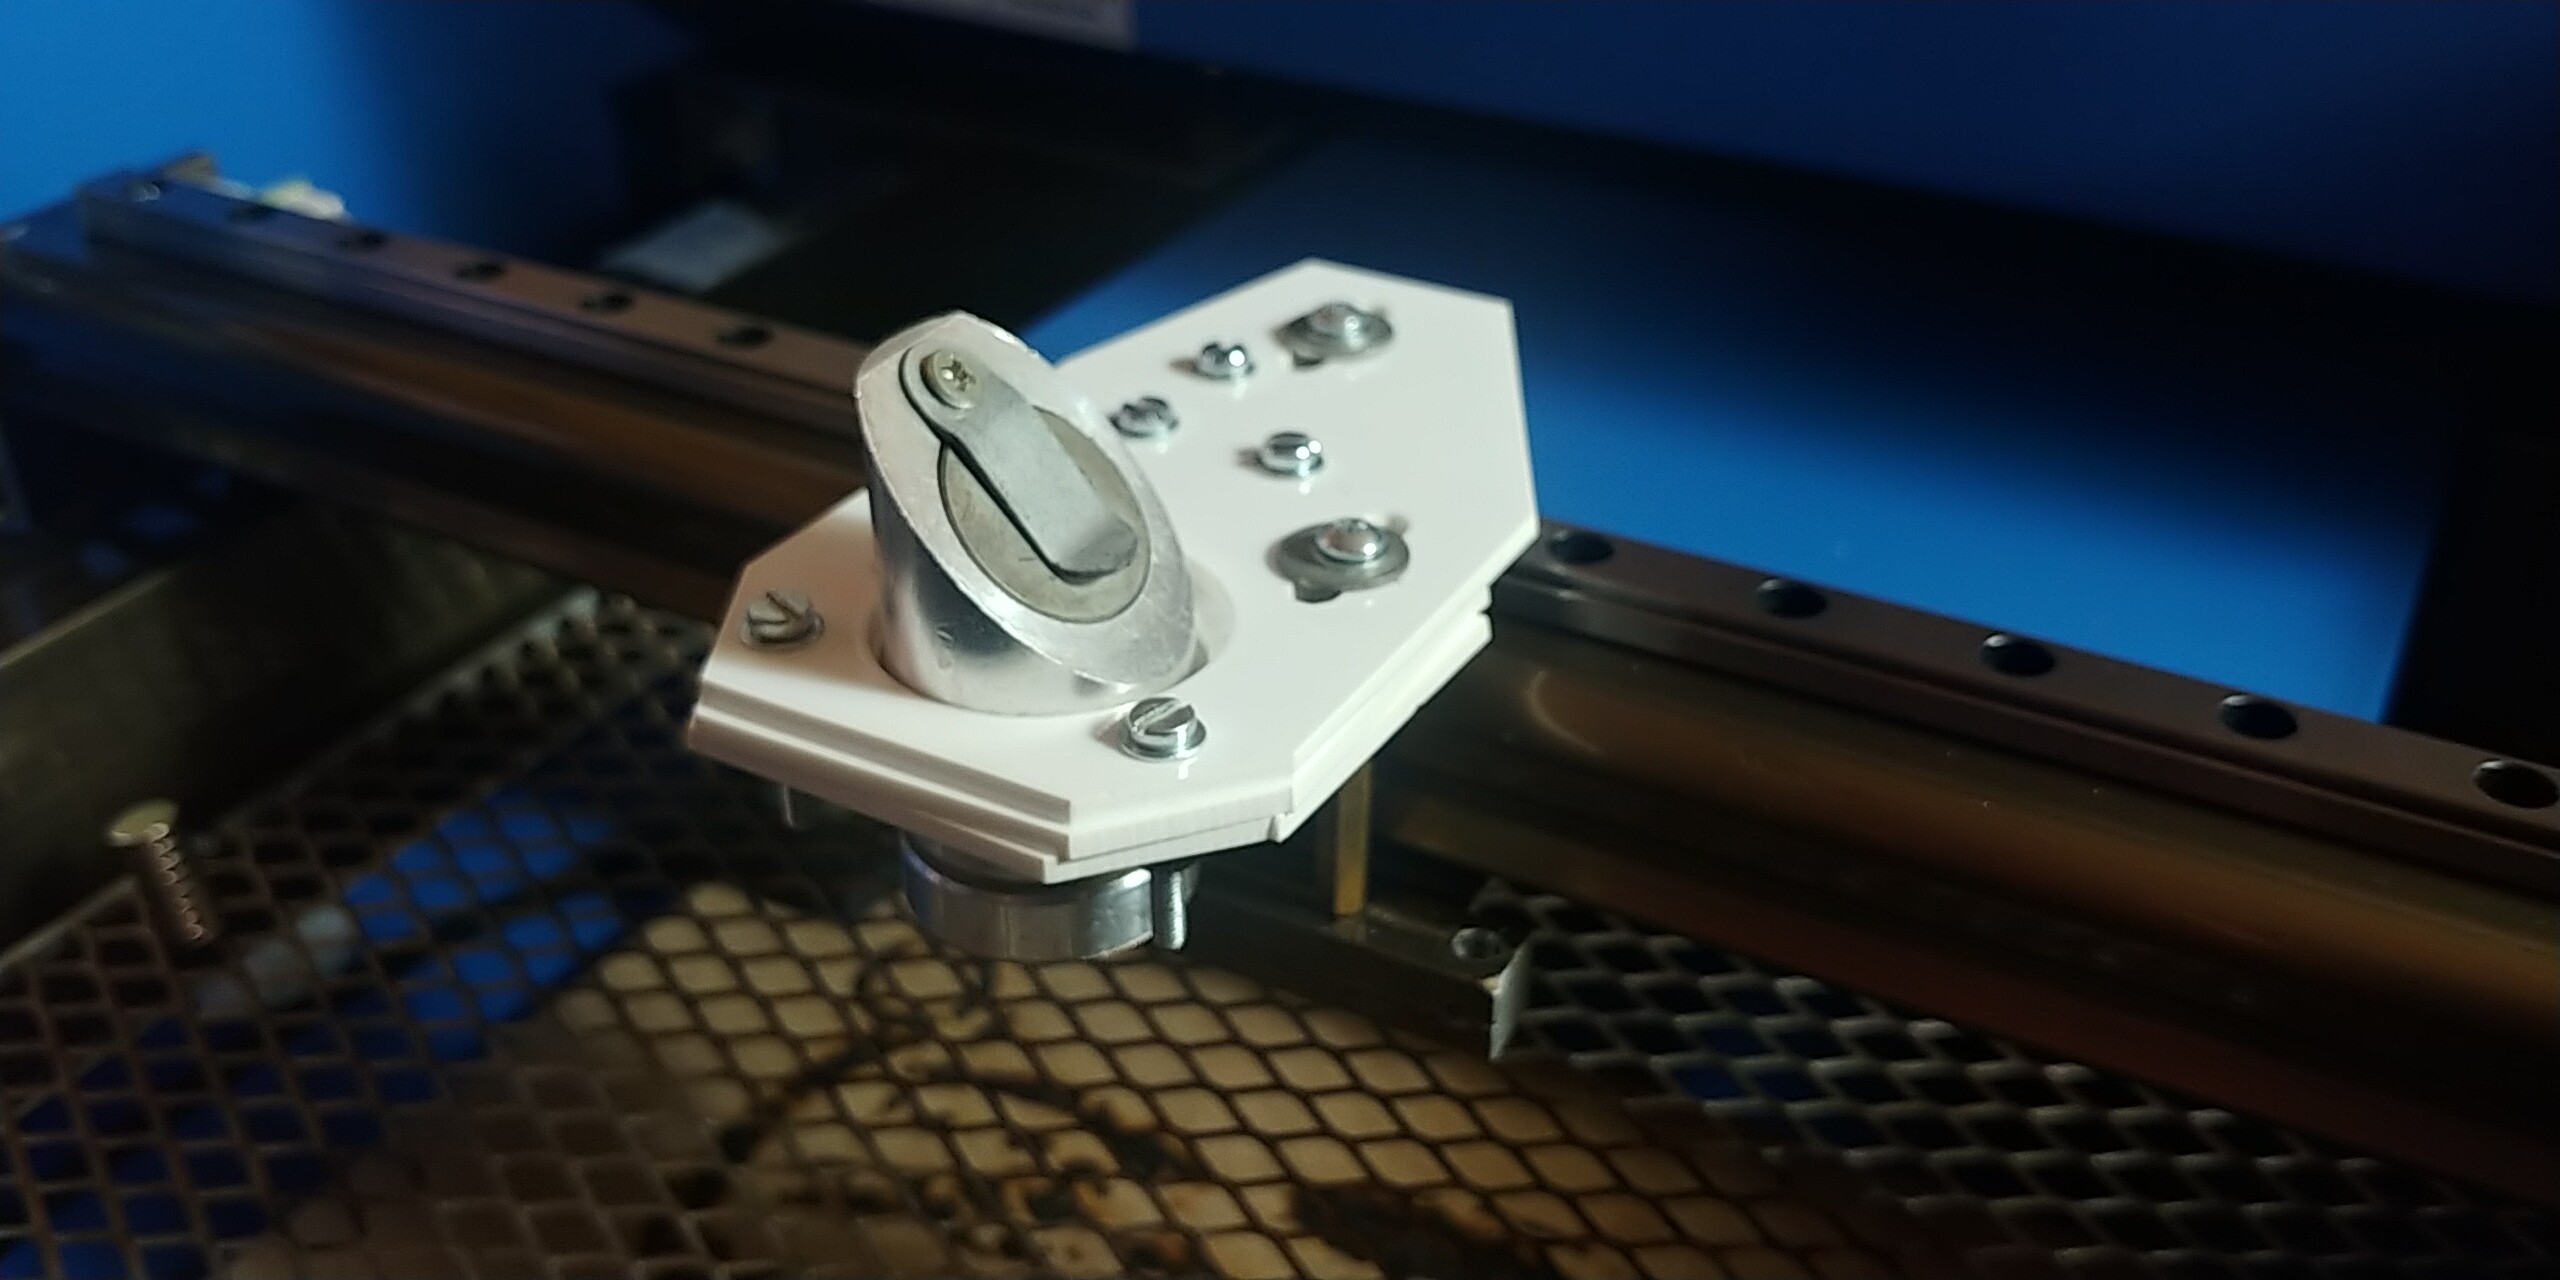
These are the pieces to align the rail that I have cut in 10mm acrylic. I have placed each of them at one end and it has been very easy to be able to make the holes in the bar with precision without the help of another person.
I have now remembered that when I tried the MeerK40t I had serious problems with just the initial tests. The machine stopped in the middle of the job with the laser on. This was repeated twice and I stopped delving into the program. Such a thing has never happened to me with the K40Whisperer.