Hello- I downloaded a file from Etsy and it has the red cut line but when I upload to K40 Whisper the lines do not show up? I have ungrouped and re-saved the file. Thanks
KCBEAD
I would load it up in Inkscape and verify the red lines are indeed pure red(ie “255,0,0” ). And you might check on the stroke width to make sure it’s wide enough to be visible.
1 Like
Open the file in a text editor and check if there is a <style>...</style> section at the beginning of the file. If so, remove that section.
Then open the file in Inkscape and set the stroke color to red (#ff0000).
1 Like
It shows on inscape as red and 255,0,0 and when I load it on k40 it’s Grey?
Yes, you get that discrepancy if the stroke color is set via <style>...</style>.
Someone else had the same problem a few weeks ago.
If you don’t have a text editor installed, download a small and simple one like Notepad++ or SciTE.
Alternatively, delete the <style> element via Inkscape’s XML editor.
2 Likes
Hello the color is set correctly. And there is no in front of it it’s just and SVG file.
Karen
SVGs are text files. E.g. a simple one with a green rectangle with a red stroke can look like this when viewed in a text editor:
<?xml version="1.0" encoding="UTF-8" standalone="no"?>
<svg
   width="210mm"
   height="297mm"
   viewBox="0 0 210 297">
  <defs>
    <style>.red-stroke { stroke-width:2; stroke: #ff0000} </style>
  </defs>
  <g>
    <rect
       class="red-stroke"
       style="fill:#00ff00"
       width="100"
       height="100"
       x="30"
       y="30" />
  </g>
</svg>
I used an inline style for the fill and the stroke color was set via <style>....</style>.
Inkscape will show the red stroke.
K40 Whisperer will not.
If you delete the <style>...</style> bit and set the color in Inkscape, it will work fine in Inkscape and K40 Whisperer.
3 Likes
The file for nothing that starts with ?
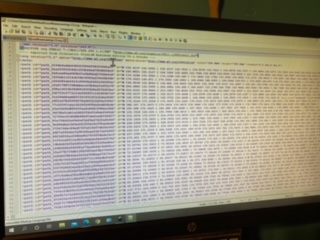
Do a text search (Ctrl + F) for “<style”.
Do you get any hits for that?
Hello- I did a search and nothing. Thank you for trying to help me.
Karen
No nothing
can you post the file to the forum( attach using the up-arrow looking icon )?
Since it’s a commercial file, uploading it as-is isn’t really an option.
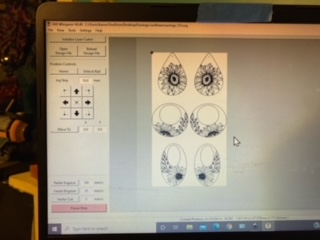
I suggest to make the file unusable. I’d start deleting 5 of the 6 designs. Then select all and then use Extensions → Modify Path → Jitter Nodes to scramble it a bit. That should be okay.
Sometimes it helps to ungroup everything in Inkscape (select everything the CTRL-SHIFT-u, sometimes this needs to be repeated a few times for nested groups) then look at/set the colors.
The other thing that can help general SVG problems is to select the design and paste it into a ne Inkscspe SVG file.
Scorch
3 Likes

Here is the file. I had to ask the person I bought it from if it was ok upload to this forum. Thank you
I just bought another file from the same person and it worked just fine.
It’s the wrong red. It’s #ed252b instead of #ff0000.
The reason why you couldn’t see that is because those paths are clones (they are <use> elements).
If the original object has a stroke color set, you can set the stroke color for the clone to something else (and you’ll see that value in the Fill and Stroke dialog), but it won’t actually have an effect. The stroke color from the original will override the stroke color of the clone.
(The style of a clone will only have an effect if that particular style was not set by the original.)
Here’s one way to fix it:
-
Select all (Ctrl + A), then repeatedly use ungroup all (Ctrl + Shift + G) until the status bar reads:
No groups to ungroup in the selection.
-
Hold Shift and click on the red paths one by one to select them. If you accidentally click on the wrong object, just click it again (without letting go of Shift) to remove it from the selection. Once you’re done with selecting them all the status bar should read:
12 objects selected of type Clone in root. […]
-
Use Edit → Clone → Unlink Clone (Shift + Alt + D). Now you have regular paths in your selection.
-
Set the stroke color to red (#ff0000) in the Fill and Stroke dialog.
2 Likes
odd since it shows up as ff,00,00 when I open it.
I got it to work using Inkscape by first ungrouping then copying the design to a new file, then I had to select a red one outline, convert object to path, then in stroke/fill I had to exercise all settings, toggle fill on/off, toggle stroke gradient/flat, set the stock width to .5mm. Notice if the toggle changes the outline and if it does you know you’re effecting the line and it should set the properties correctly.
ugh, a tough one.
Yes, the stroke color for the clone is #ff0000, but the original path (invisible, stored in <defs>) has the stroke color set to #ed252b. Since the original has some stroke color, the stroke color of the clone won’t be actually used.
4 Likes
Thank you.