Auto Leveling, GRBL crashes

Hi again,

I have been using GRBL VER:1.1h.20190825 and I am using the Protoneer V3.0 GRBL shield. I have followed latest GRBL advice and using Pin12 as my Z-Axis limit and home switches.

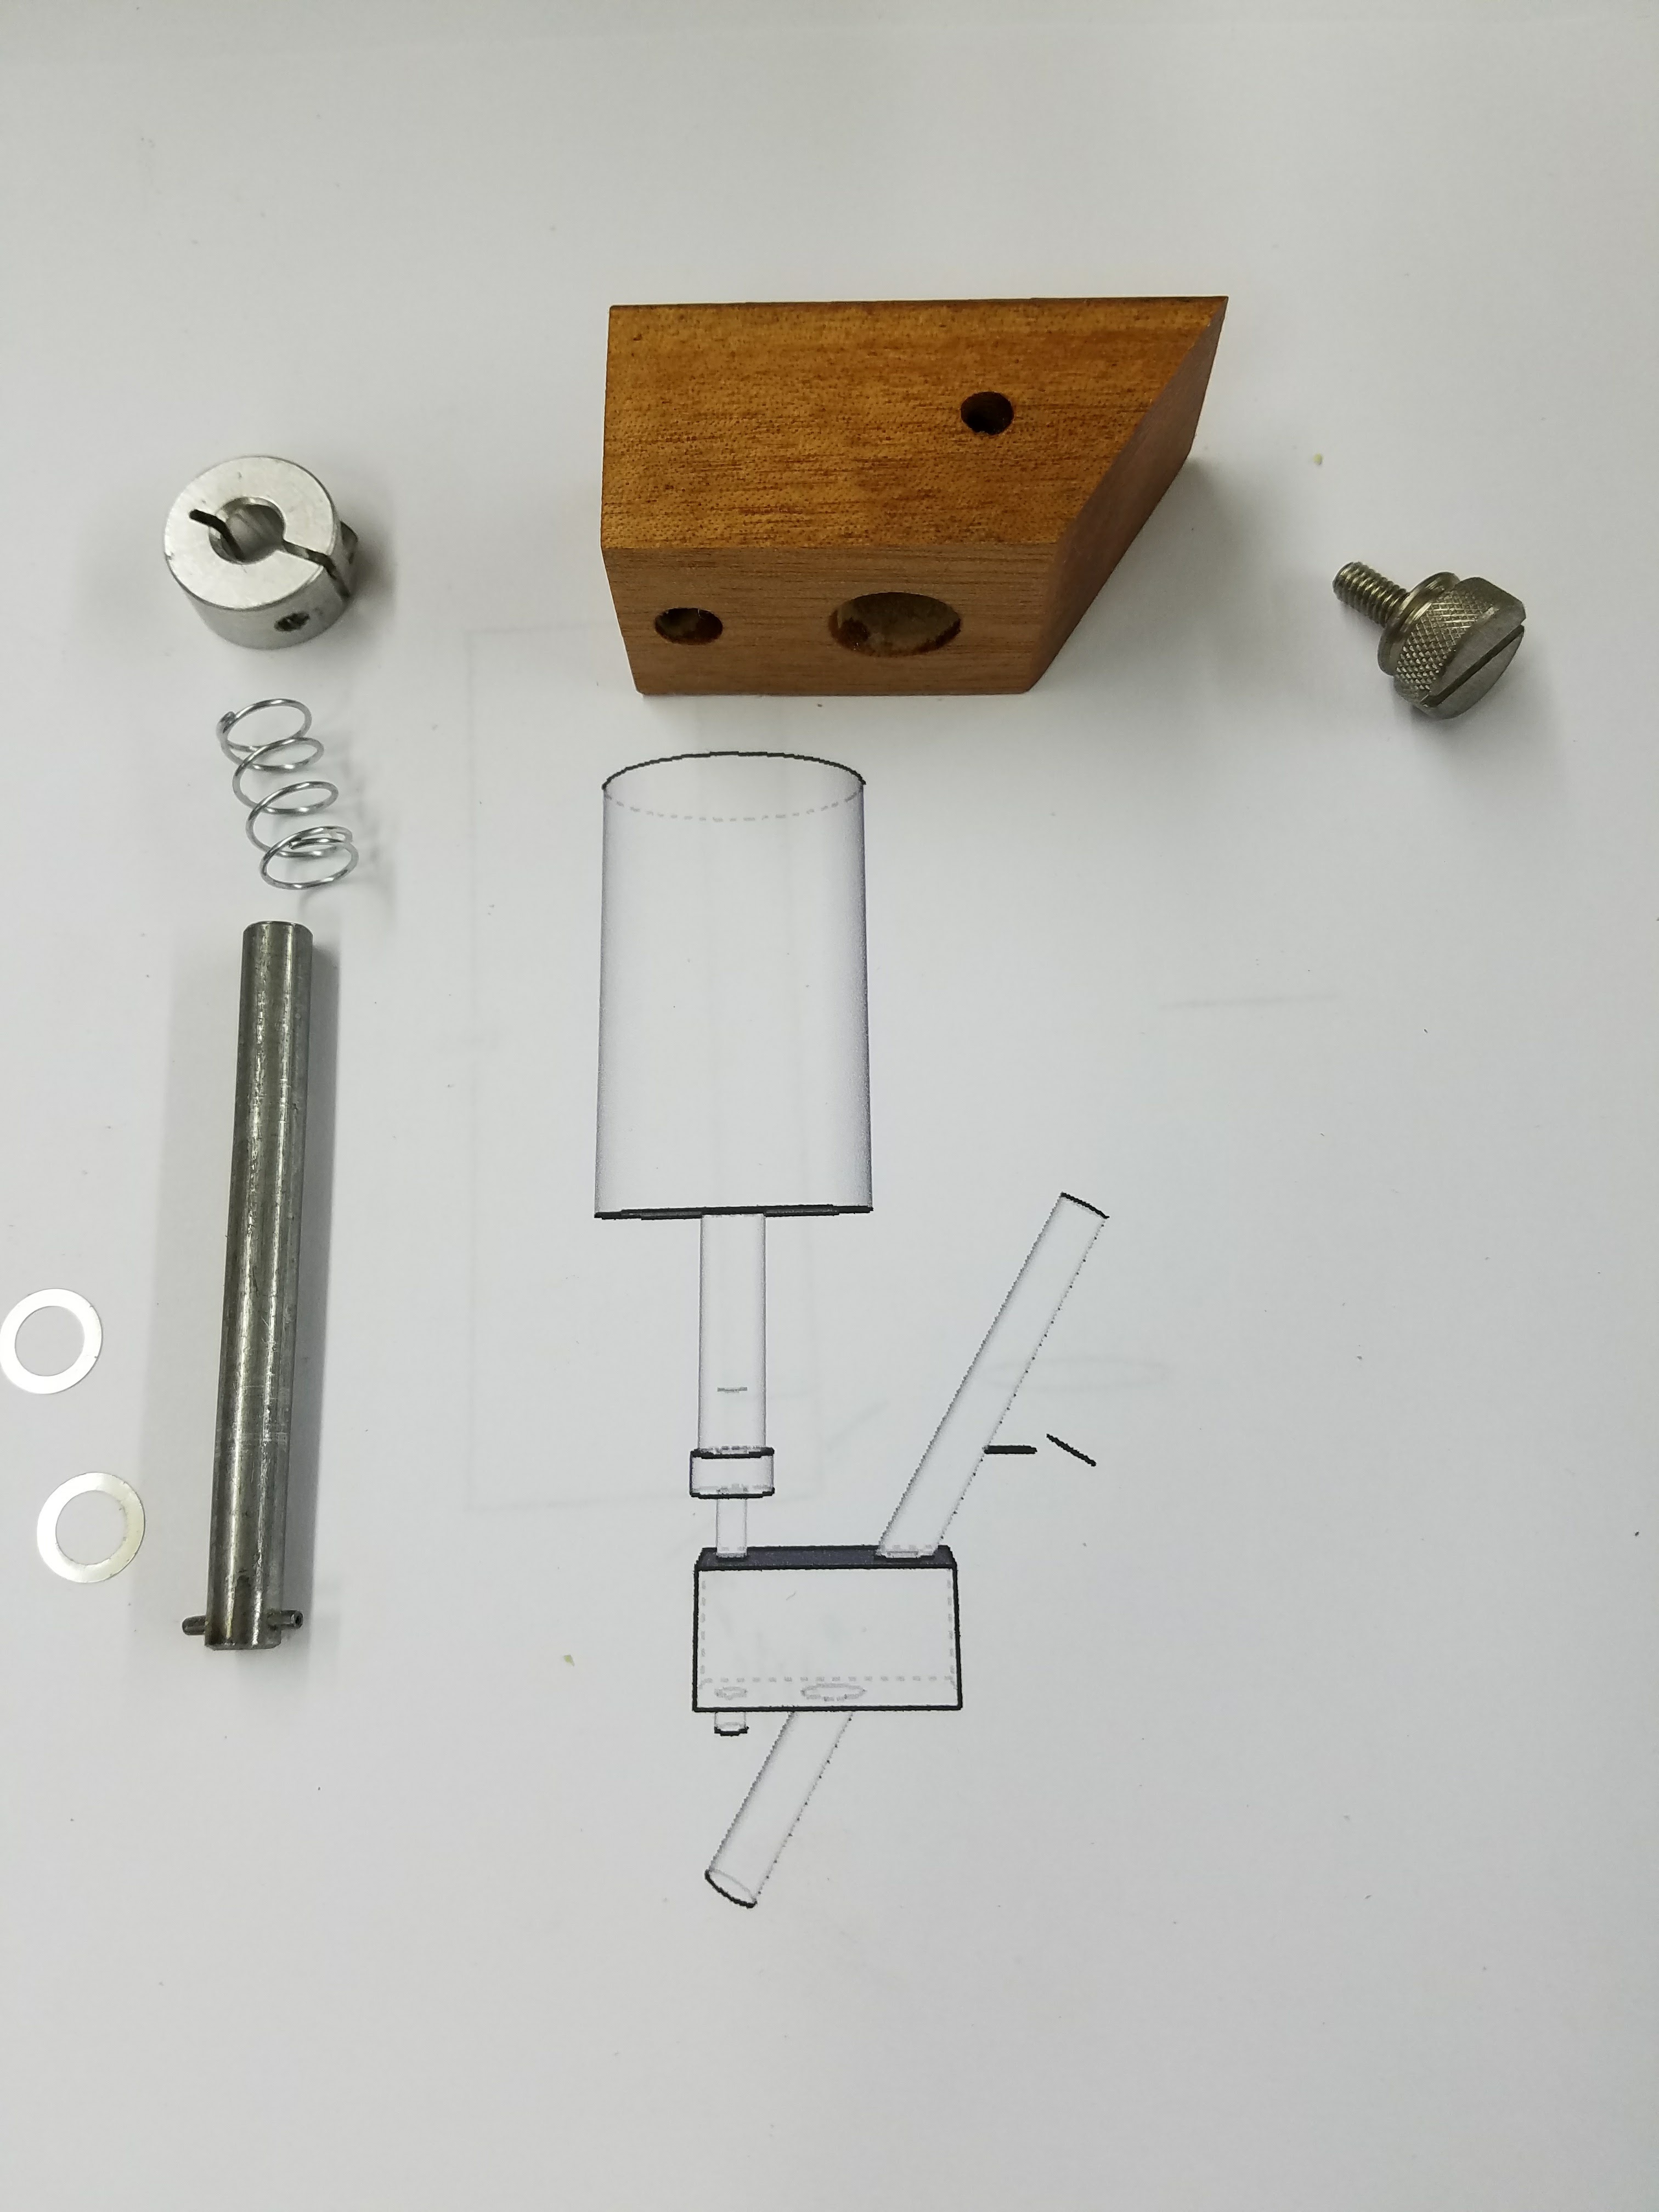
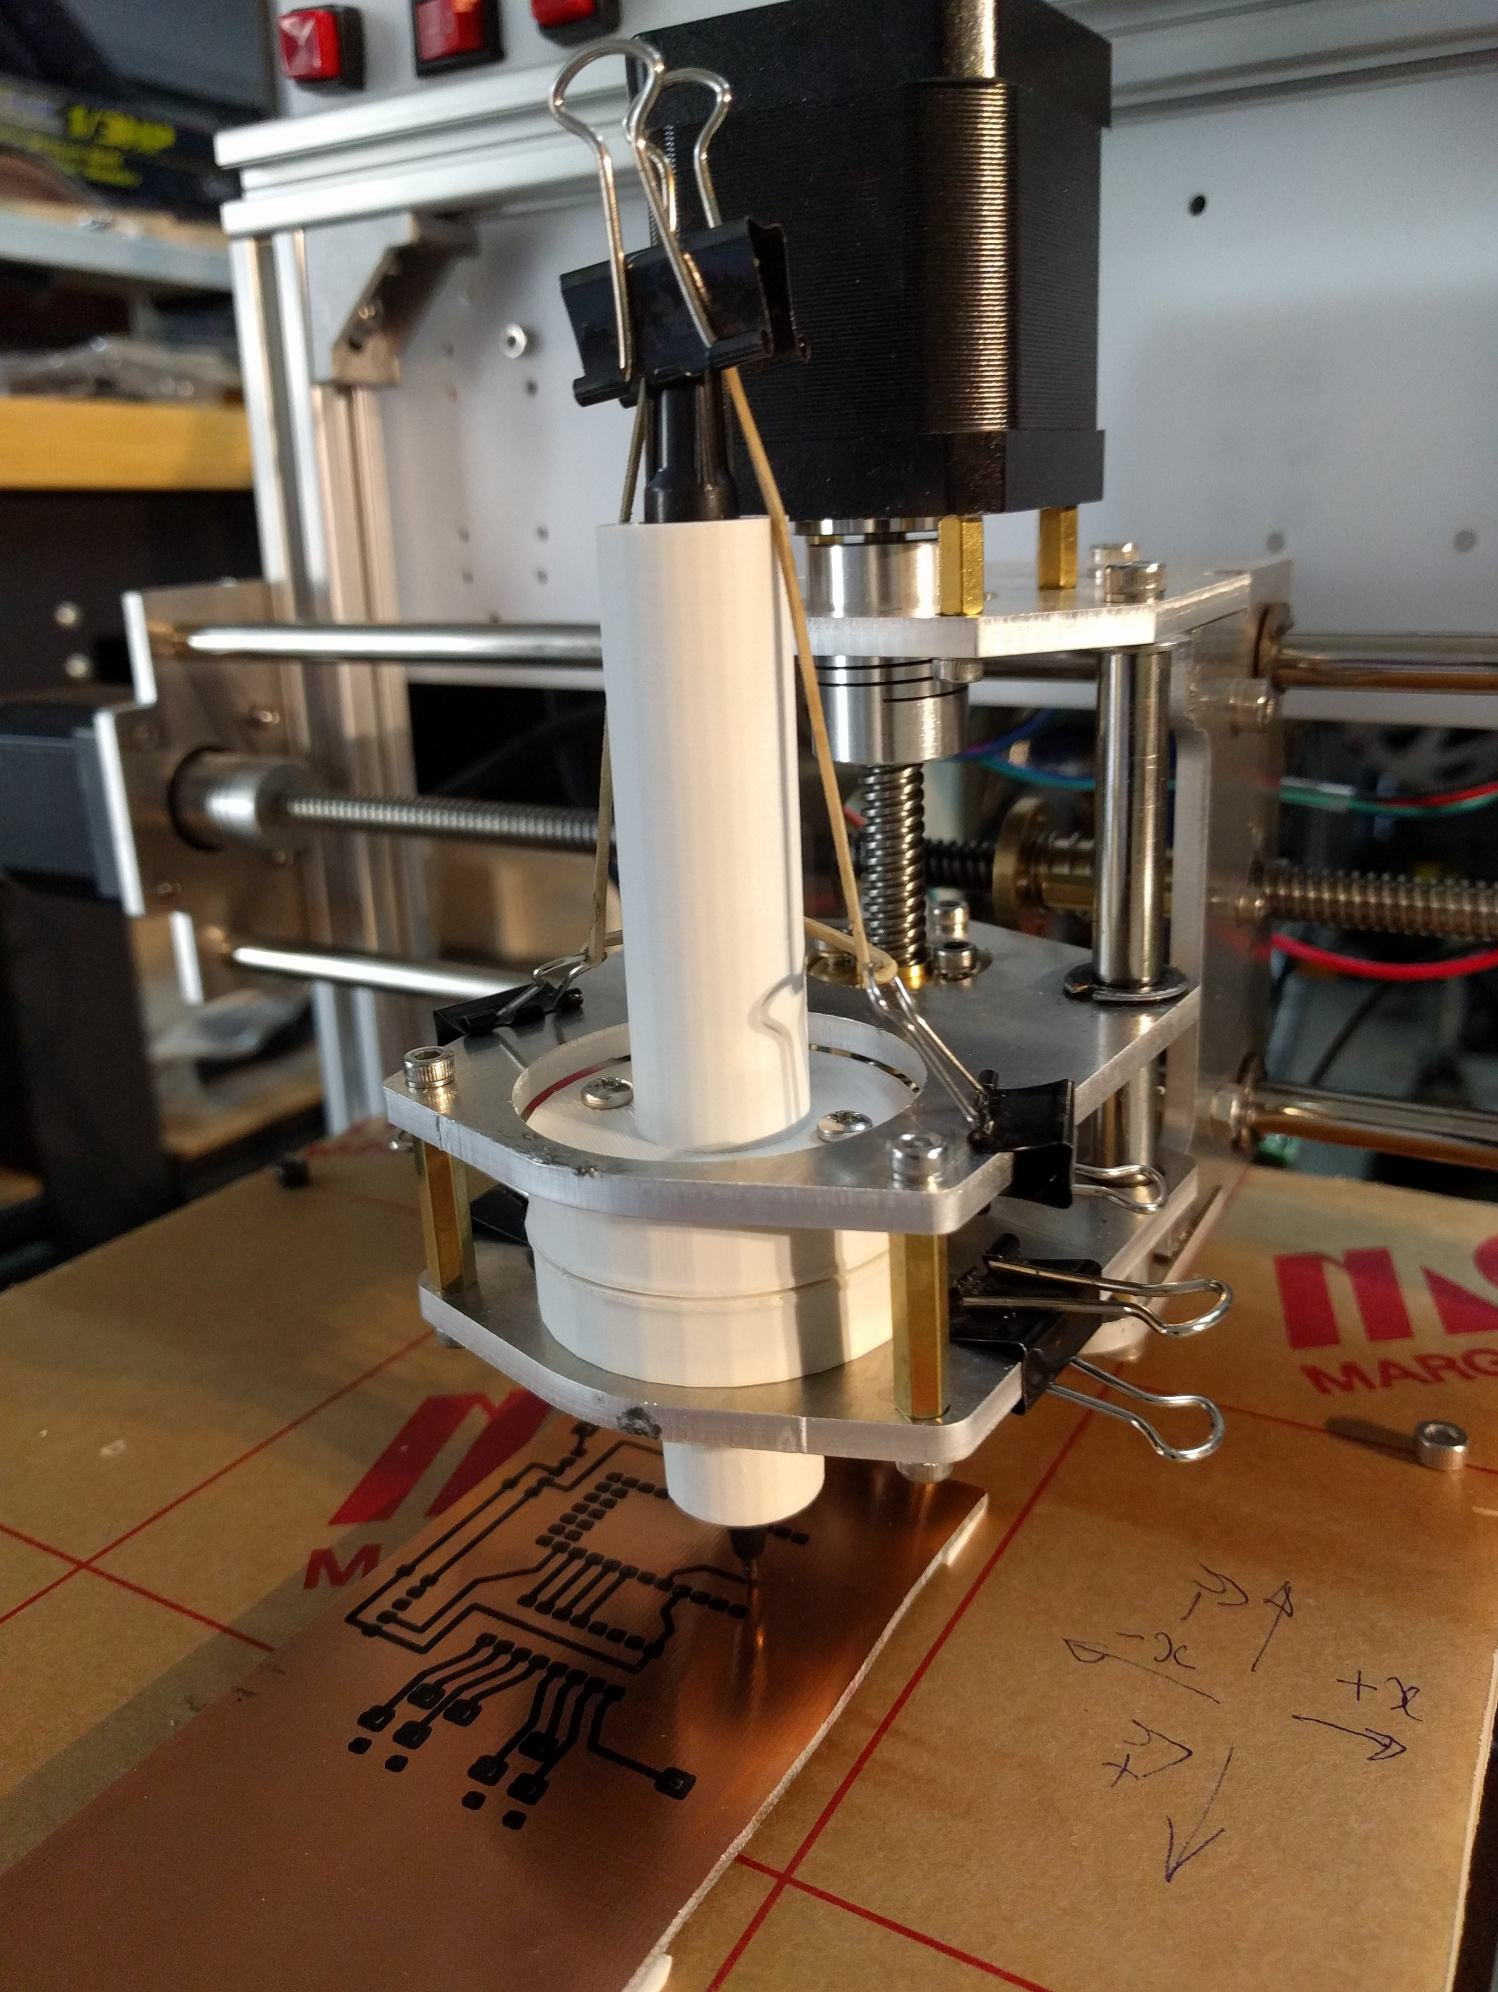
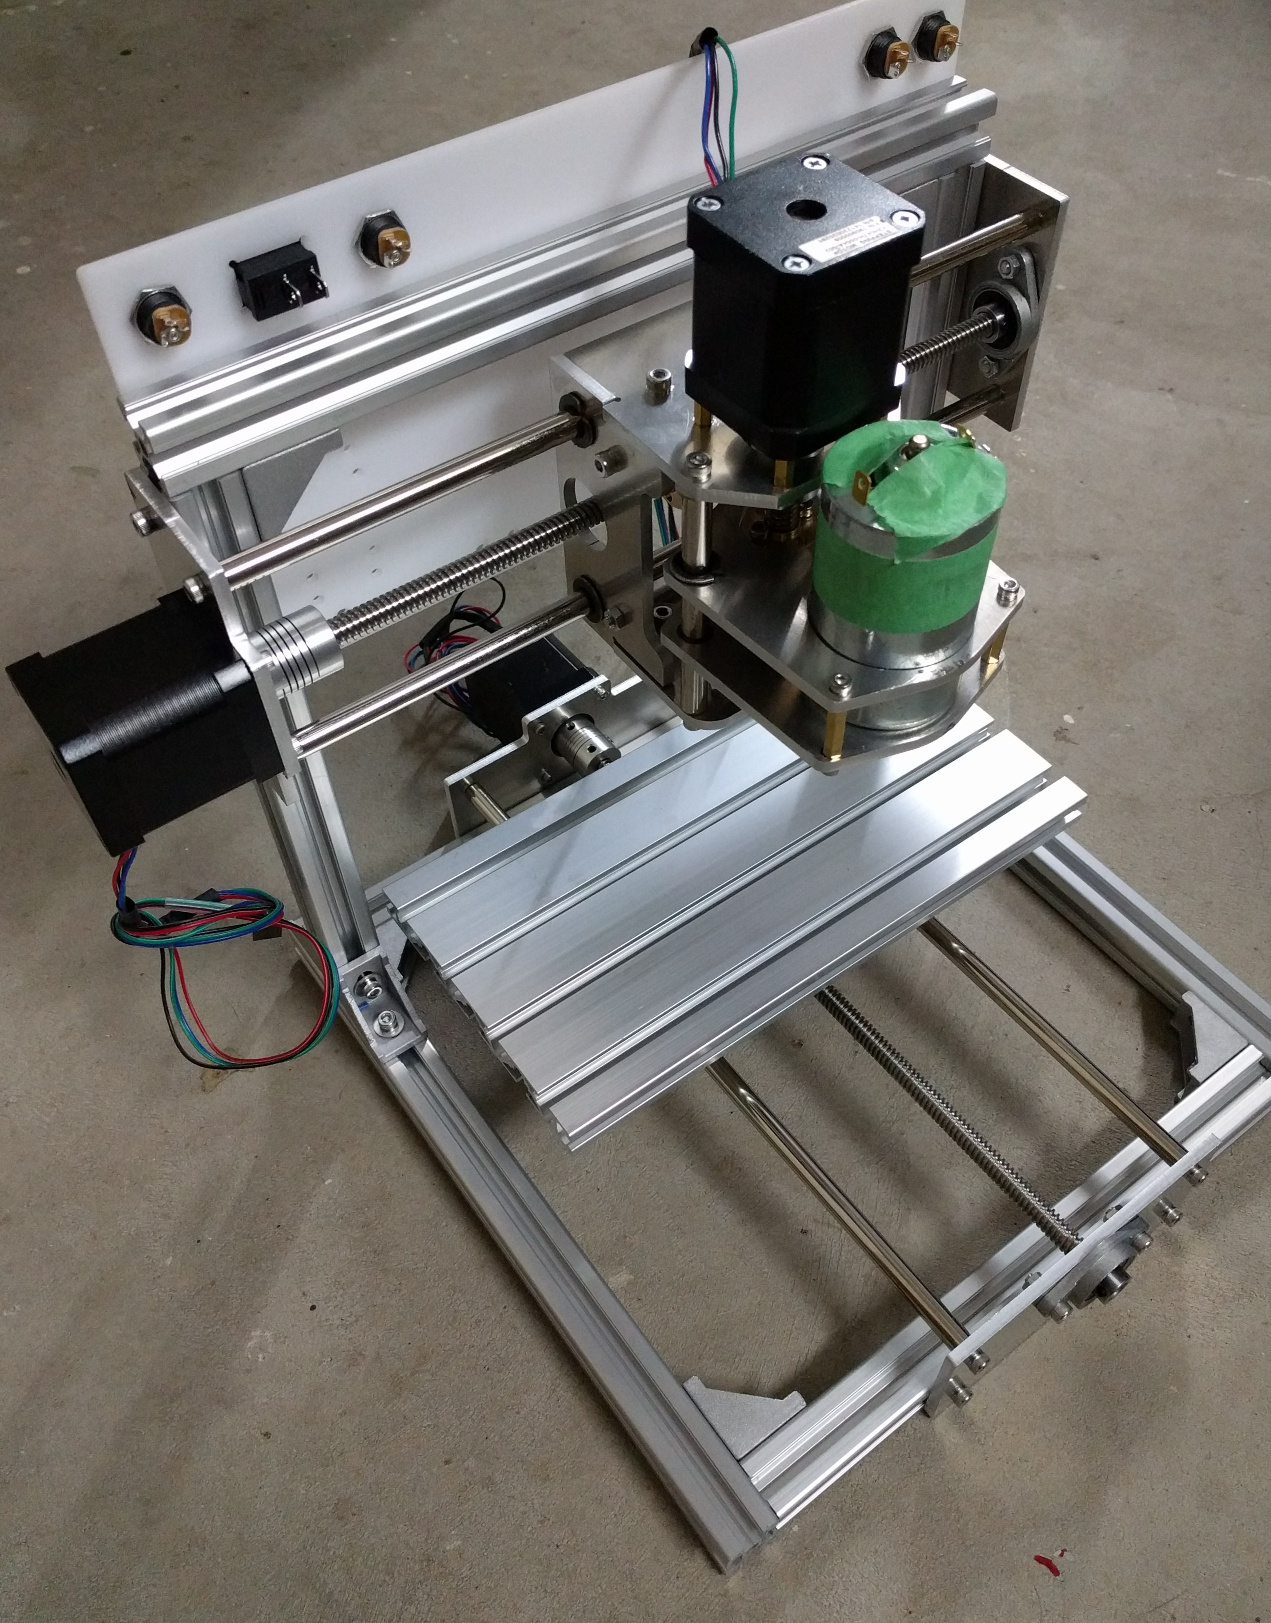
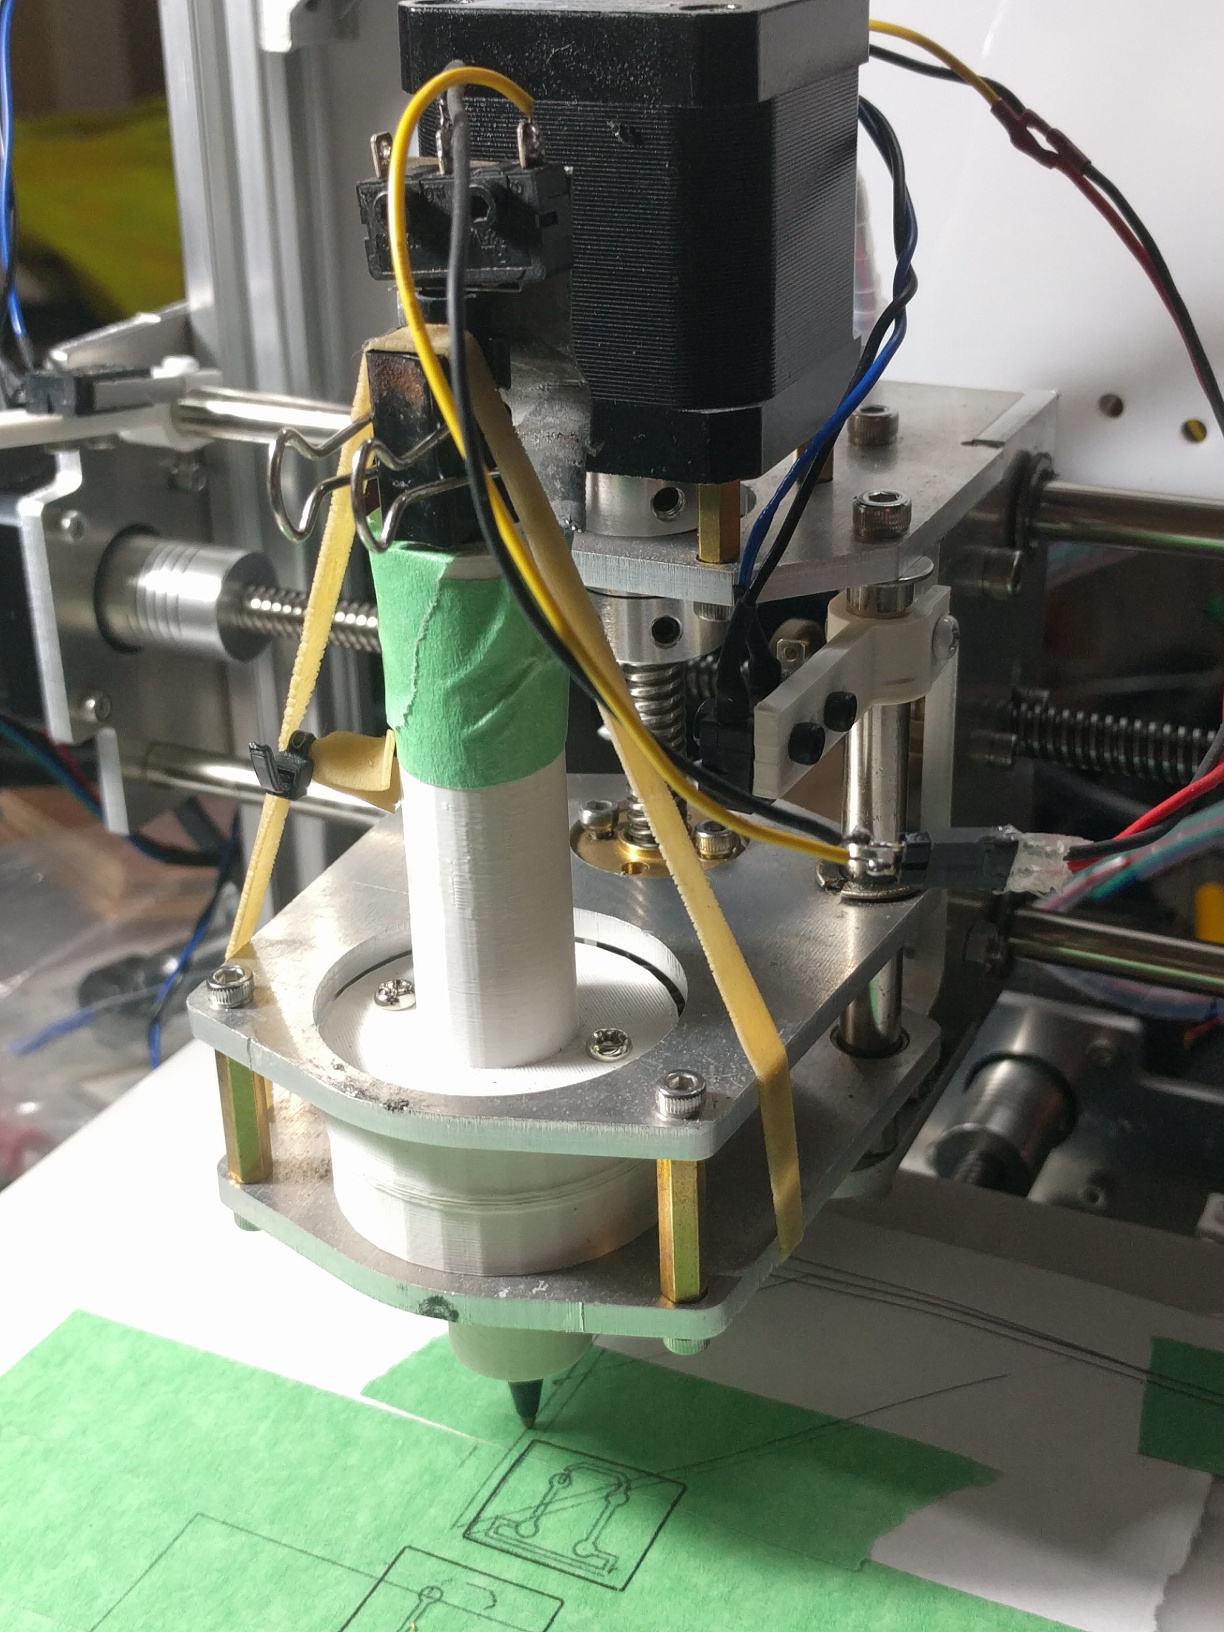
I am reluctant to dive straight into whirring sharp blades while I am still familiarising myself withe CNC world, so I have rigged up a 3-D printed pen holder as a spindle motor replacement. Thanks to your previous assistance I have been able to get ChiliPeppr (CP) to draw the desired path that would cut a PCB “etch” from an Eagle design (also very simple, two resistors and some track). This might look a little whacky but until I have got Auto Levelling working I am postponing and real milling.

mtp://[usb:002,008]/Internal%20shared%20storage/DCIM/OpenCamera/IMG_20200415_141602.jpg

What is does prove is the system is working up to a point. The stumbling point now is when I do a test probe I get an ALARM 1

$H
$J=G91G21X-100.000F200
$J=G91G21Y-10.000F200
G92X0Y0Z0
G21G90
G38.2Z-10F5
ALARM:1
First 6 lines are Jogging to the same position as the previous drawing position, resetting the axis, then selecting “Test Run”, then I get ALARM:1, which is G-Code has an unknown letter in it, and understandably locks up. The Z-Limit on the pen movement has not fired off.

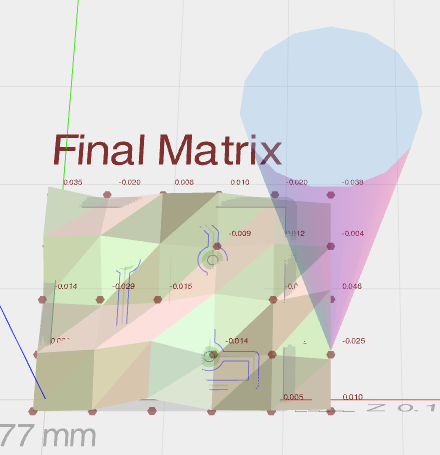
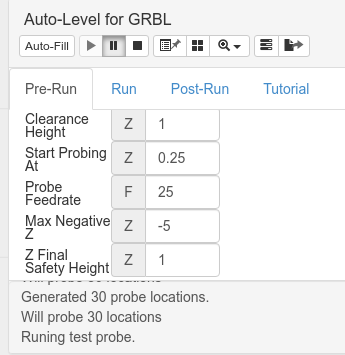
Here are my settings for Auto Leveling Pre-Run, pretty tight but trying to avoid hard limits.

image

My understanding and skills have improved since last asking a question, but this one is really bugging me now, I feel I am so close. So any assistance will be greatly appreciated. I include a photo of my Heath Robinson gizmo to show I have also mastered how to include a photo and a screen grab. :slight_smile:

Cheers, Rob

I know the “getting started” feeling this was my solution for easing into it … …

I think you’re running into a Z limit, like a soft limit that you have configured into your Grbl settings. You are going to a Z of -10 and maybe that is beyond your limit, thus the alarm is for the soft limit.

Hi Don,
I have had my engraver since mid 2017, and initially thought I would not try the whirring-fast-blade experience as auto levelling seemed a long way off, so I built my pen adapter on the 3-D printer, bought some etch-resist pens and was going to draw and etch my boards. However having since built a 3-D printer from scratch and modified it, plus stripped my original one back to bare bones and rebuilt it open source RAMPS style, I thought I should revisit that engraver. It can’t be all that hard. So the upshot is the Corona Virus (and waiting for a spare part for my 3-D printer) has given me the time and mental space to get into it. The pen carrier is now just a very stop gap and learning measure.

So this is what I was doing Xmas 2017.


I am hoping to finally move on and use the much more sophisticated tools of Eagle and ChiliPeppr. I am really looking forward to it.

Cheers and thanks for taking an interest in my project.

RobW

Why don’t you take some video on your phone, let it upload to Google Photos, and then paste the video here for us to see when the alarm hits? I don’t really see any ideas from the stuff you’ve posted so far.

This looks like a Grbl setting issue, not a ChiliPeppr issue. My guess is that you have this wired up or configured as a limit switch, not as a probe switch, and you are getting a limit switch alarm here.

1 Like

Hi John,
I tend to agree with you, however the GRBL set up can draw a correct engraving outline for my simple PCB. The Jog directions make sense and the Machine Coordinates make sense for the Negative Space CNC Volume.

However ignoring the advice in the Auto Levelling instructions I have connected Arduino Pin5 (SCL, on the red Protoneer V3.0 board) to the probe tip and the copper plate to the GND (2 pins down on the connector) and it works.
image

The probe goes around the matrix of points and reports the relative heights of each probe.
image

For the sake of the record here is my $$ config of GRBL 1.1f
$$
$0=10 $1=25 $2=0 $3=3 $4=0 $5=0
$6=0 $10=3 $11=0.020 $12=0.002
$13=0 $20=0 $21=1 $22=1 $23=0
$24=50.000 $25=635.000 $26=100
$27=2.000 $30=1000 $31=0 $32=0
$100=800.000 $101=800.000 $102=800.000
$110=500.000 $111=500.000 $112=500.000
$120=50.000 $121=50.000 $122=50.000
$130=200.000 $131=200.000 $132=100.000

This is the machine/engraver partly built, and I bought from a Chinese manufacturer in 2017. A sturdy little machine and should good for my purposes. I have two limits switches, Max and Min on each of the Xaxis & Yaxis input pins (Arduino Pins: 9&10 respectively) and Z Max limit connected to Pin12 SpnEn (not ZAxis as marked in the Protoneer Board, pin 11 is now used as SpnEn as it is capable of PWM and 12 is not). The position for the start of the scan is achieved by jogging to a paper thickness off the PCB and the CP used to Zero out the position.

This documentation not right for GRBL 1.1f on the Protoneer board…
image

The probe must make a circuit between A5 SCL (Arduino) and GND for the probe to work. Other wise using the lower Z-Axis limit switch will just return ALARM:1 where it indicates it has reached an unexpected Z-Hard limit switch.

I will edit or delete the posts above as they contain a lot of red herrings. When I have successfully engraved a PCB, I will return and hopefully be able to declare the problem solved.

Solving this took a while, and a round about route, but we made it. I think the documentation could be updated. I have no idea whether you get many GRBL/Protoneer users, but it could save them a lot of frustration.

Cheers and thank you again, Rob W

PS The FRM board option still influences the size of the area scanned, whether that option is ticked or not. I will investigate that further, otherwise it is another potential area for confurion.

2 Likes

Awesome. Glad to hear you figured it out.

1 Like