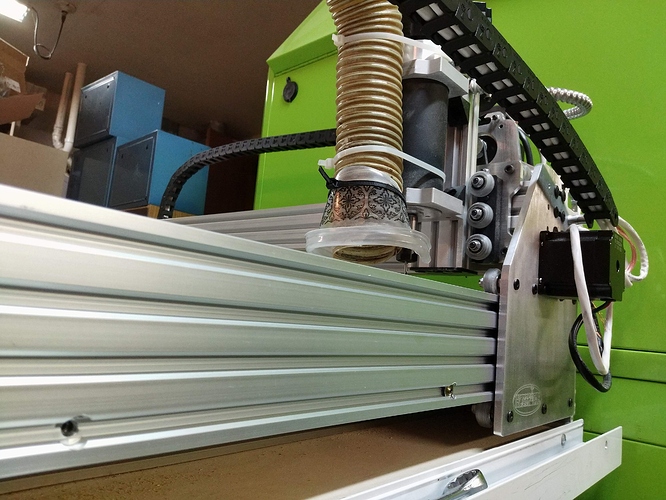
Y AXIS STIFFNESS UPGRADE - I used a 3/8 paddle bit to countersink the Y Axis 20x80 beams (5 holes 9-1/2" apart), to set GRK 2" cabinet screws into a spoilboard fit tightly between the rails.
Have you noticed a difference? This is a great solution!
Like night and day. It was obvious from the first screw, and kinda made me feel dumb for not doing it sooner. I had been thinking of ordering some drop-in nuts and corner angle blocks, but this is elegant. I use 3/4 Ultralight MDF cut from a 5x10 sheet for my spoilboard, so 1 piece no seams. The GRK screws are slim self-drillers, but I pilot drilled too. Now it feels like a CNC machine instead of an aluminum kite.
I just used a corner bracket attached to the spoilboard in several spots. The X-axis is the one that needs more stiffening, IMO.
Nice, are you worried that the screws will loosen quickly given it’s MDF? I have a double-stack of normal MDF but I haven’t attached it to the frame at all.
I feel like the Z is the weakpoint on mine. It’s the first point of flex and there’s only the 6 delrin wheels to prevent flexing in all directions. I am also still using a 3d-printed spindle holder that’s difficult to adjust.
I wish I could get the Z to be shorter by somehow horizontally mounding the stepper. I’m building my CNC into my man cave wall so it can flip up and be invisible but it’s just a few inches too tall so I have to build the wall out.
Just did first cuts on the upgrade, and I’m smiling. The material I’m cutting is high pressure laminate on fir plywood; super easy to set up a chatter and drift off to …
I just crossed my fingers and used some feeds and speeds that had failed before, and she naild it.
I couldn’t get those speeds previously, and it was causing me to burn bits.
@Jace_Richardson Great minds think alike! I have my Ox on hinges attached to my garage wall so it can swing down and out of the way. It is definitely NOT invisible if/when I flip it down, but it does provide an option for reduced space when not in use. Of course, right now that will never happen because I have so much clutter in my garage that the space underneath it is full so there is no room to flip it down!
@Jace_Richardson Six little points of contact, so I mash them down good and hard to make them earn their keep. Somebody could have kept an 8-wheel design, but ‘tradeoffs’…
Have you fused your gantry beams? That was my first-worst problem, and impacted Z the most: the two twenty by sixtys flexing independently allowed the trolly to rotate around the X axis.
@Jonathan_Roeder Have you guys looked at Chris Laidlaw’s plates? He offers a plate set for the Ox to increase the X beam width to 80mm, so you can use 2 x 20 x80’s, or a piece of c-beam. He also offers an 8 wheel Z axis plate that uses C-beam instead of 20x60 and those flimsy motor mount plates. He makes nice router mounts and 4 hole motor mount plates to replace the hanging OB motor mounts. Look on Ebay for Chrisclub1.
