Yep, 4"
Hi All. Ressurecting this thread because I’m curious how far along the group ultimately got to completing an open source version of LO’s motorized Z-Axis table. Is this basically the current winner? https://hackaday.io/post/51315
I haven’t heard any updates on this. The community regulars like @donkjr and @Scorch seem to be focusing on perfecting an easily replicable, spring-loaded clamping table first. It’s lower tech, lower cost and requires less expertise to create. As such, it stands to provide a lower barrier to entry for new K40 owners (like myself, admittedly). From there, people can graduate to either a purchased powered table like LO’s design, or building/refining that http://hackaday.io solution.
Scorch Works’s Design: https://plus.google.com/+ScorchWorks/posts/UkrvPtra7UK?fscid=z12kellrwormyby5504cj5wwawqpslwwdis.1490350839700586
I was seeing that, but I was just curious. Thinking of cutting out the bottom and putting an auto z and focuser, but trying to see how.
@Bob_Buechler @Abe_Fouhy
Latest version of the clamp table is here, still waiting for shop time.
I find myself mostly doing .092 and .22 acrylic some 1/8" and 1/4 wood materials mostly cutting and some engraving.
I find for most of the above my lift table is overkill and annoying to work with. I know of two that have built the simpler Scorch table and like it.
However I do have the notion of engraving some bowls that I make which means a cut out of the bottom and a lift like the bigger machines is in the future …far future1
@donkjr For doing bowls I tested cutting a bowl shaped circle out of plywood & raising the plywood to the correct height. Allowed me to do the rim of the bowl easily. Unfortunately, deep bowls seemed like there was no way I could figure out how to etch the base without it being severely out of focus (due to the wall height coming too close to the laser head/rail). Only option I could think for that was to have a z-axis on the head to lower the head (or at least lens) to the level required to get it into focus after getting past the walls of the bowl.
edit: To clarify, that’s the interior base I’m talking about, not the exterior.
@Yuusuf_Sallahuddin_Y I was thinking of the edge and the bottom mainly. I current sign the bottoms by hand pyrography. I would like the edges engraved as you suggested. I also want to use the laser to mark patterns on the edges for subsequent carving.
Then I imagine that some day a device that goes on my lathe that engraves the body. There is one project that engraves drum bodies with a diode laser I see as moving that way.
OMG this is an awe-full hobby for a ADHD person like me.
@donkjr @Yuusuf_Sallahuddin_Y for a bowl you could cut plywood it into 1/8-1/4" layers with the bottom layer having a hole for a rod to act as a spindle. Then have each layer attach to the spindle with support spokes on each layer going up, laminate them all together, cut the spokes and sand smooth.
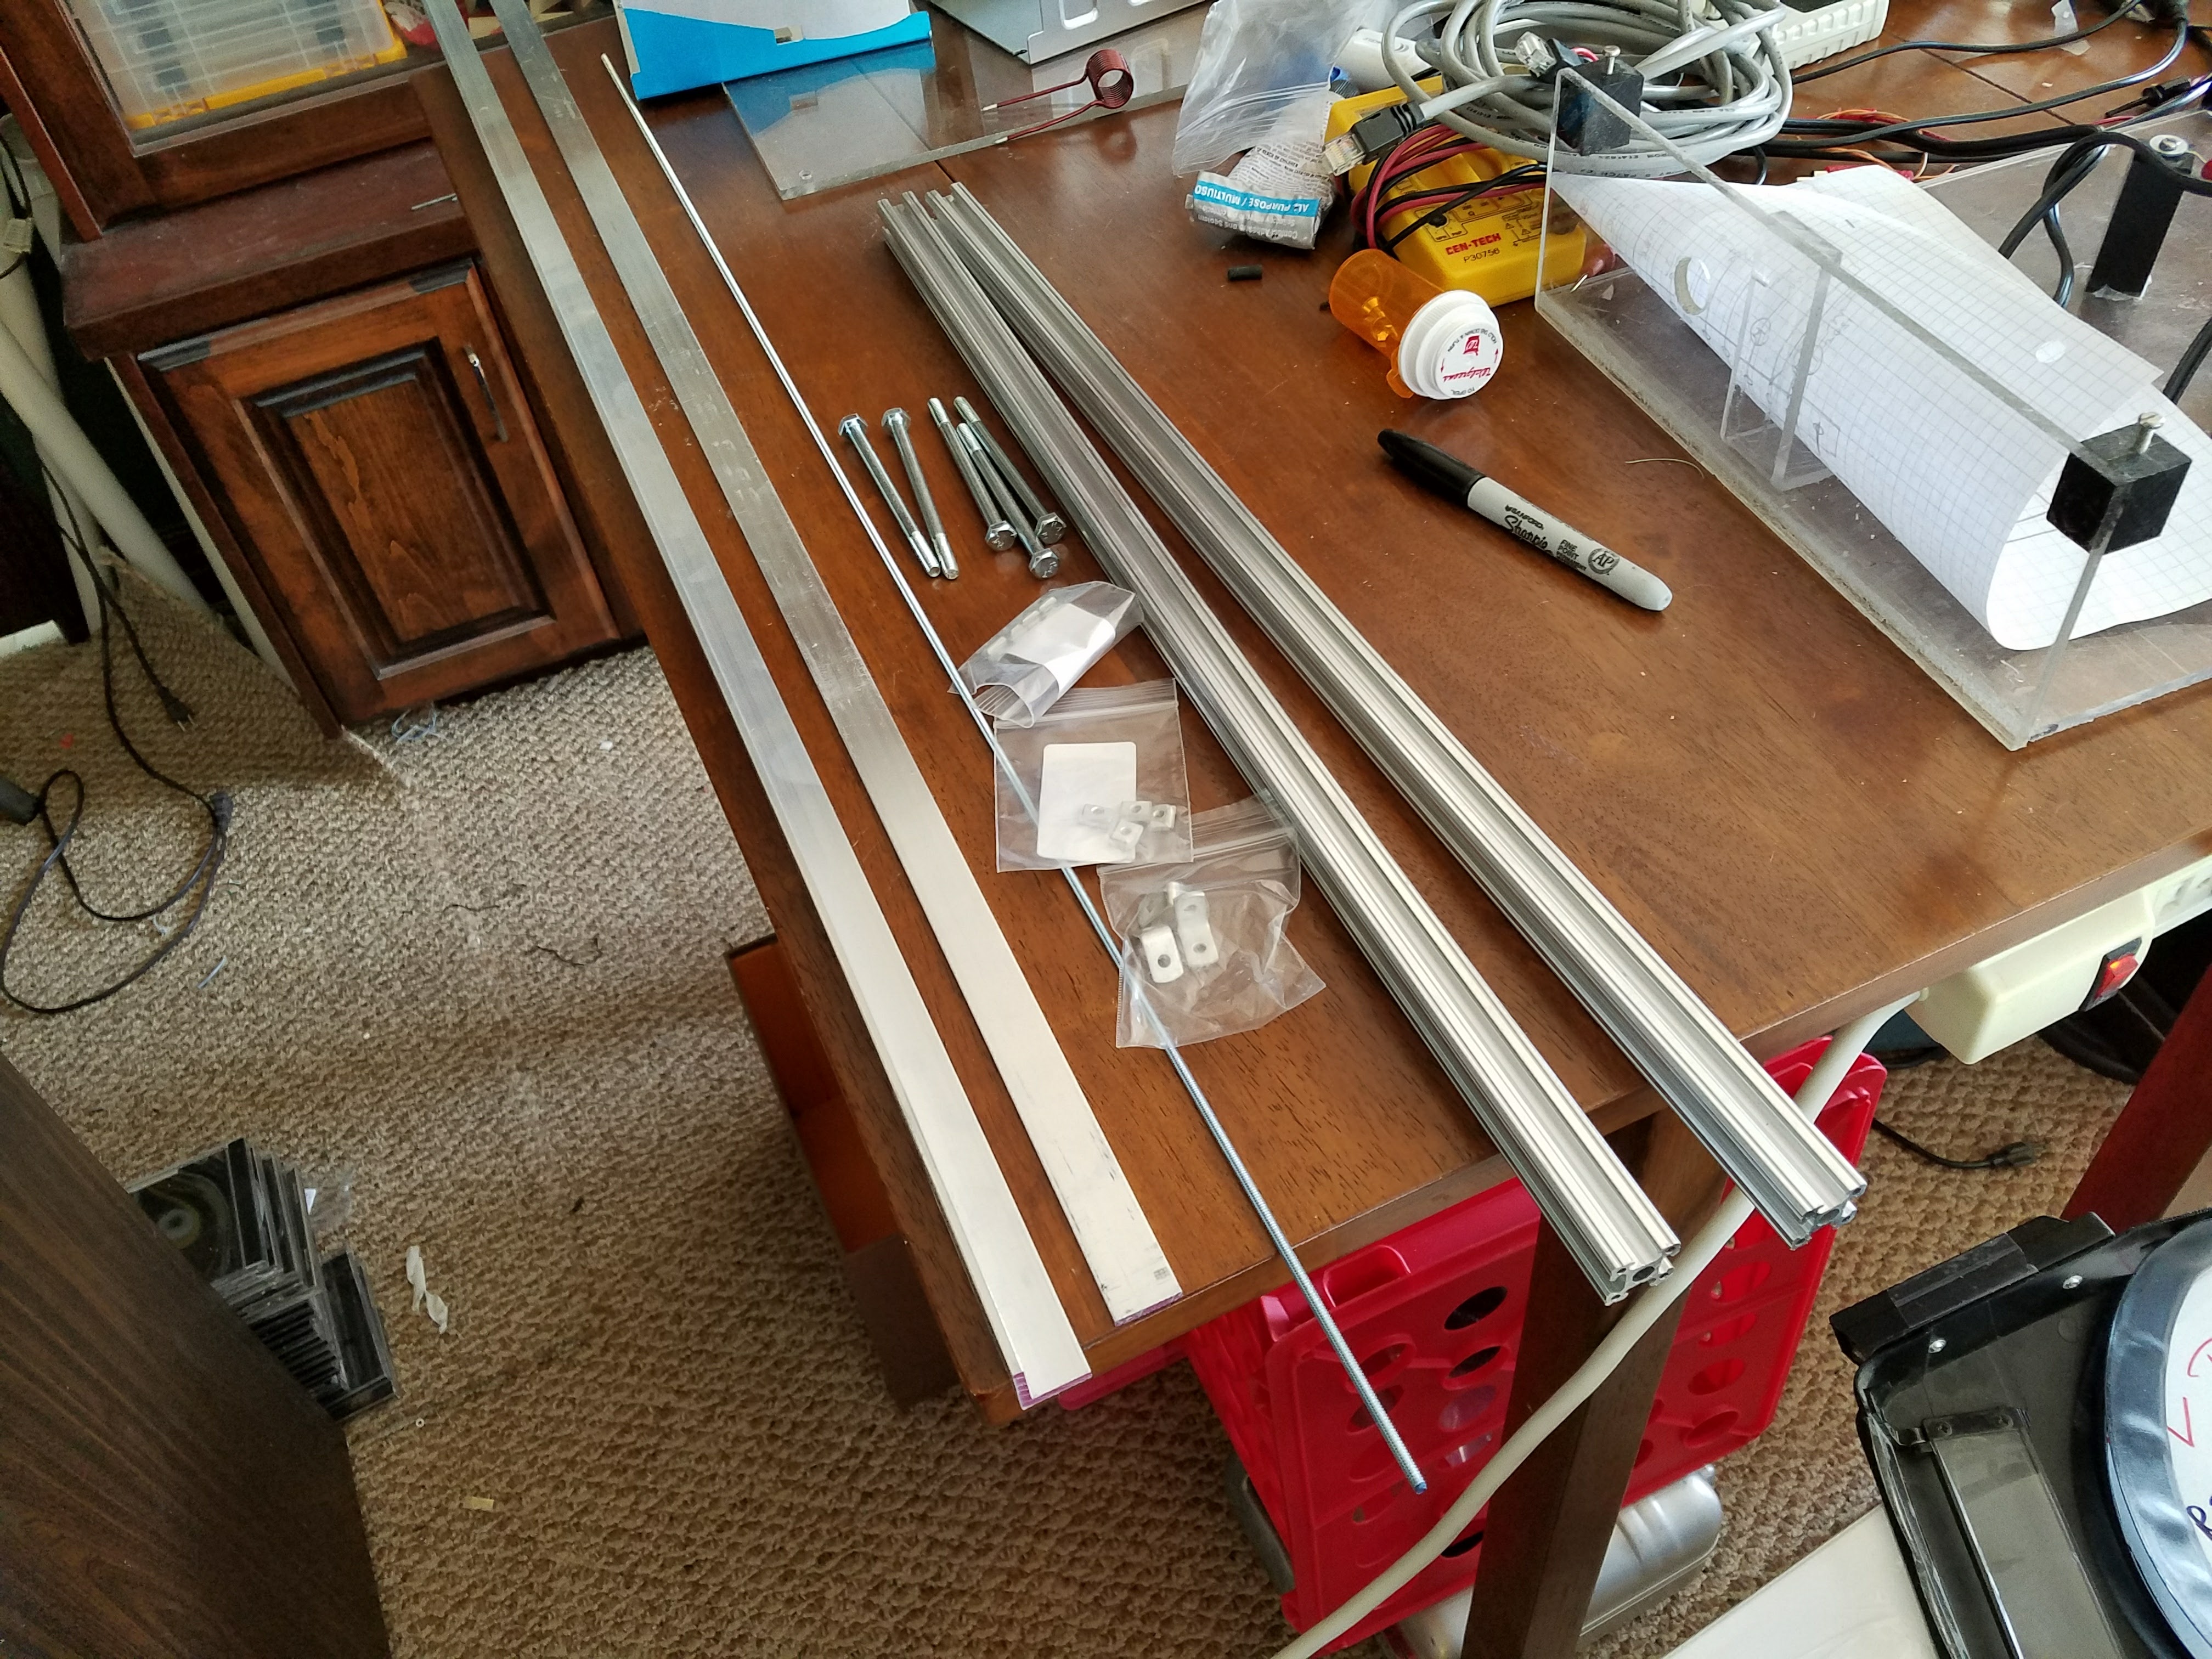
@donkjr re: “still waiting on shop time”: Is there a parts list anywhere? I like the current design enough to try a test build, I just don’t know what materials to buy.
@Bob_Buechler
Not a formal parts list as its still a “prototype wannabe”.
Warning: I haven’t built one and haven’t checked the drawings.
However you could build one from the Sketchup drawings.
Some parts # and sources are marked in their properties.
Roughly…
Spring: MC Master Carr, spring rate 1lb/inch (see drwg). Make your own with music wire. Check YouTube for how.
1/4 Bolts: home depot
Alum angle and flats: home depot
Handle: eventually 3D printed, you could substitute or print from SU.
#6 threaded rod: home depot
Extrusion: servo city (see drwg)
Extrusion hold down: servo city (see drwg)
Hold down bracket: Servo City (see drwg)
e-clip: Choose one to fit on machined groove.
The bolts need some machining for the eclip.
… I have a lathe ![]()
… I have done this by hand in a drill or drill press cut the groove with a small file or hacksaw.
…You could use a pin vs an e-clip
…You can get an e-clip that fits tight on 1/4 shaft
… Take to a machine shop
I updated the drwgs with a machining drawing for the bolt.
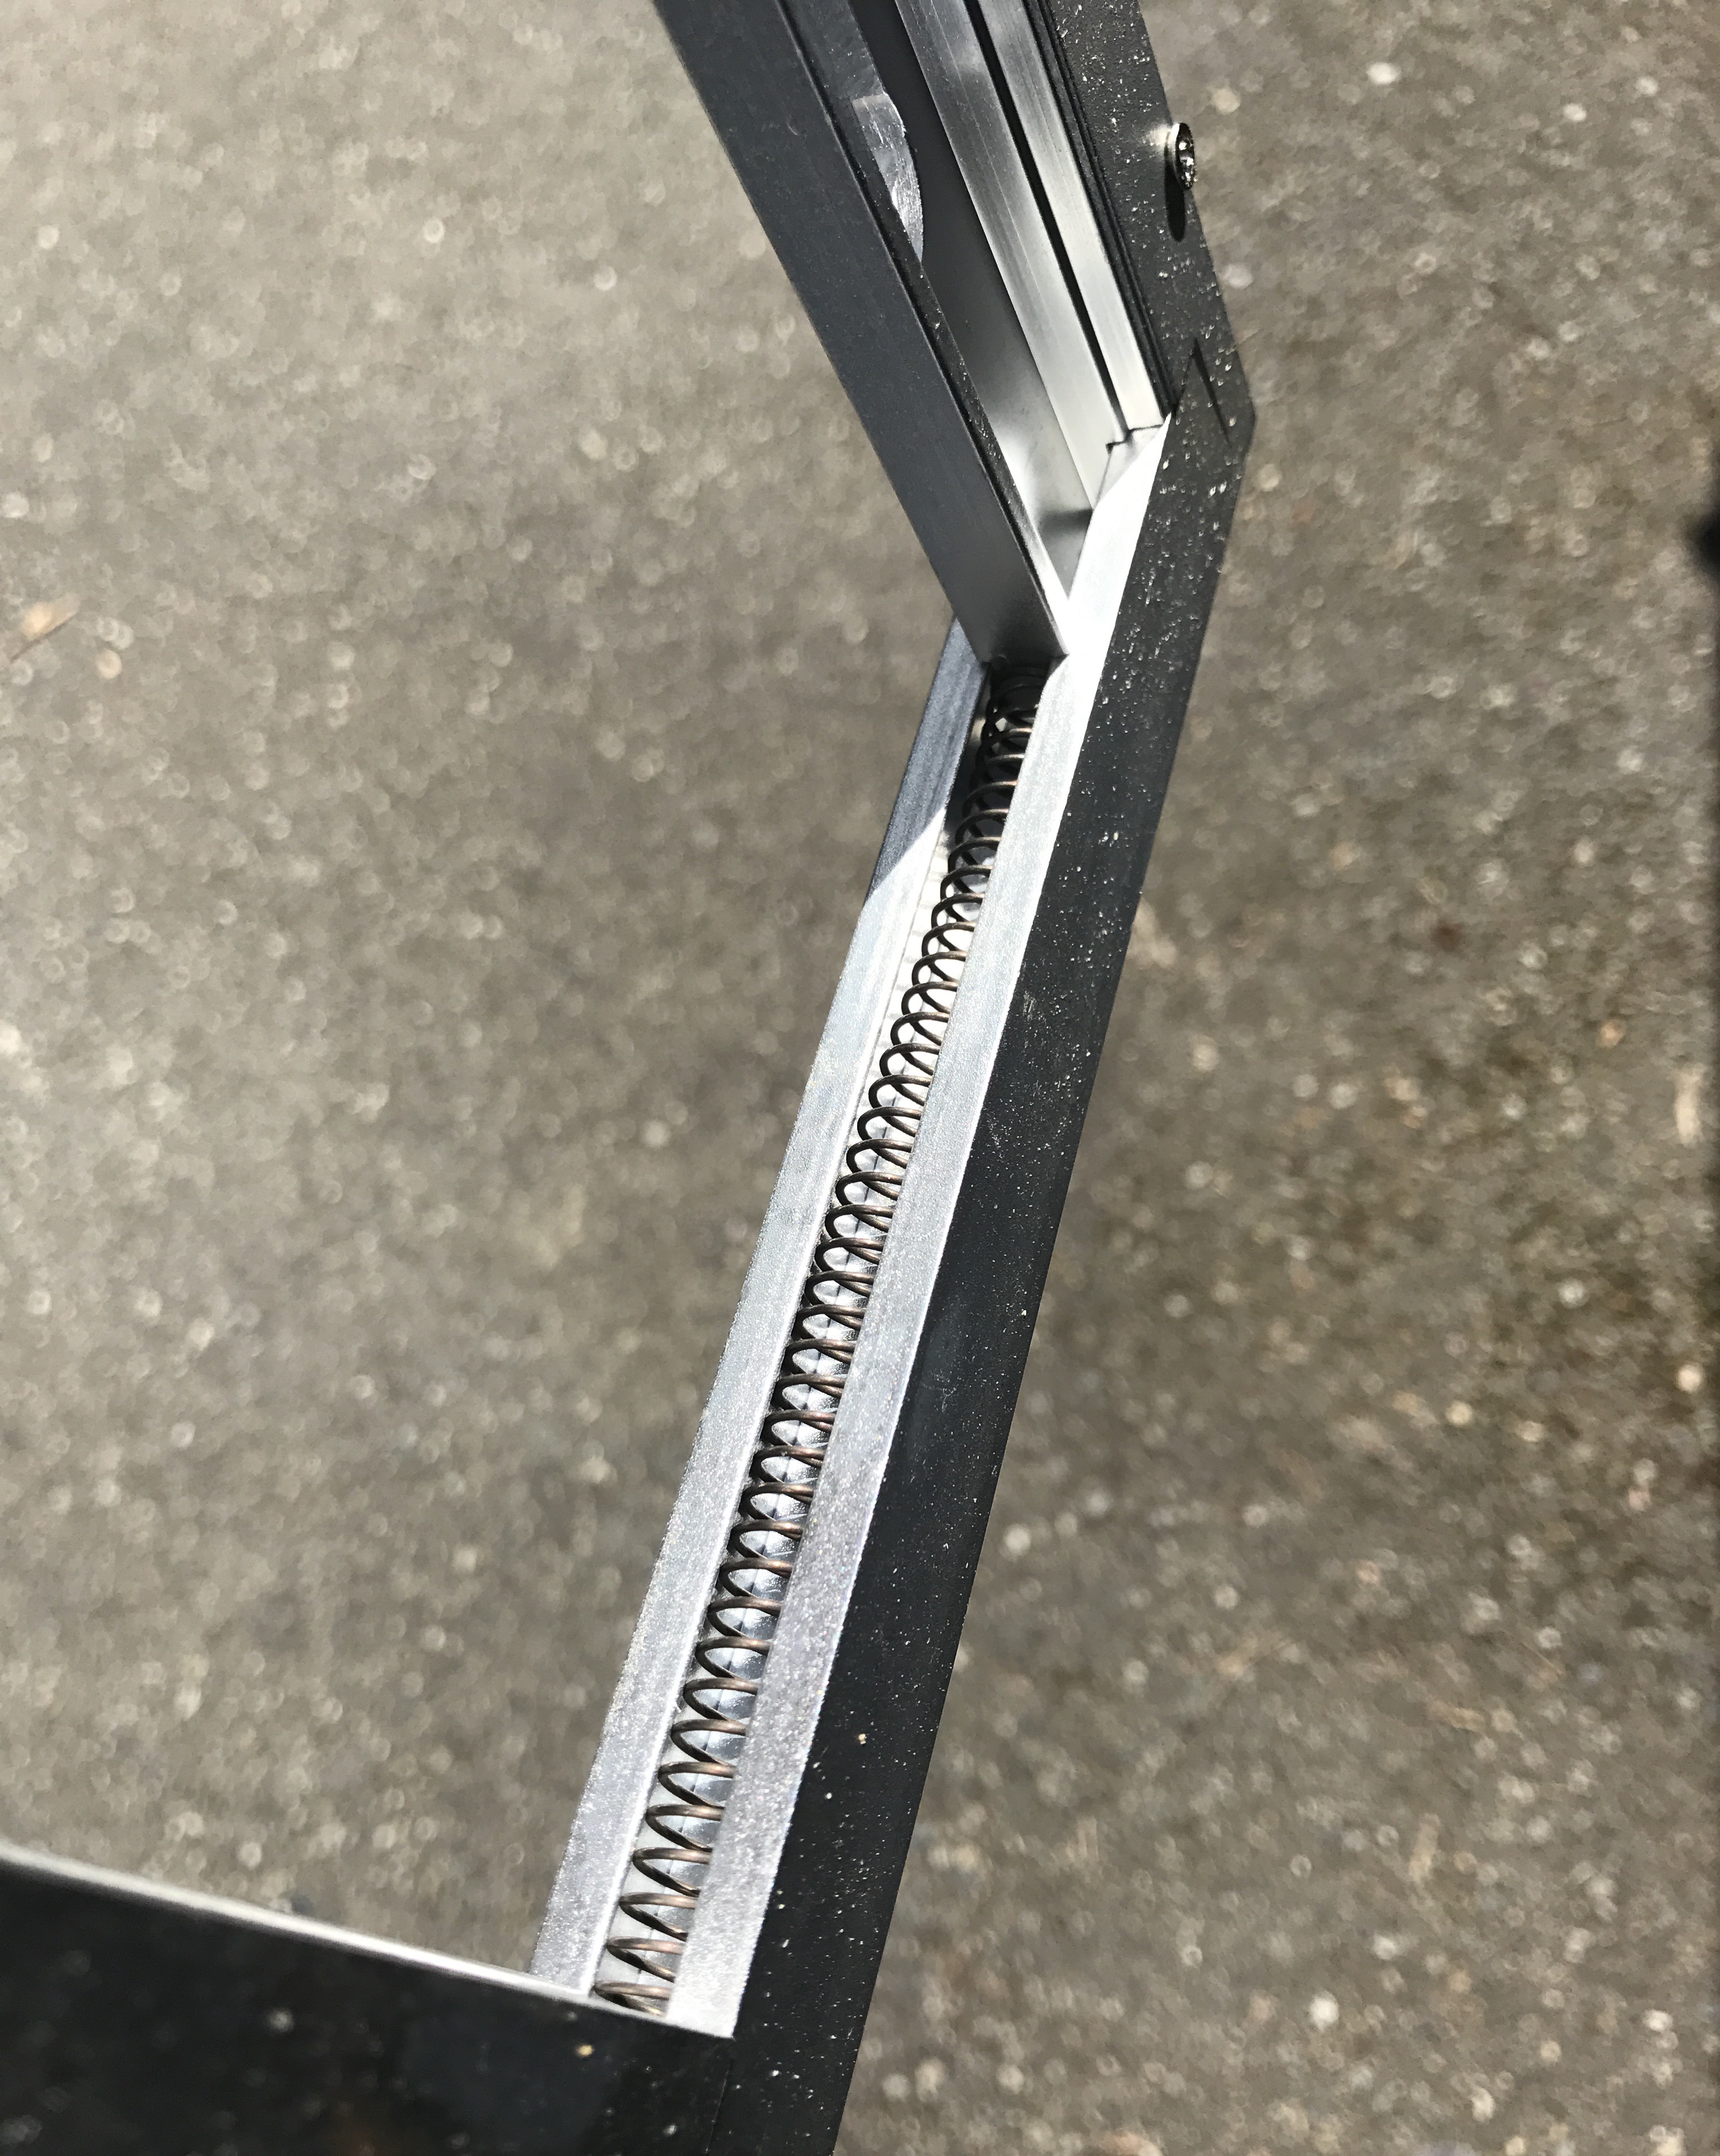
It occurred to me today that the stock K40 stamp engraving bed comes with two long springs that have a wide enough diameter built into the stamp clamp. I’m planning to salvage and reuse them on my forthcoming clamping bed. I will, of course, take lots of build photos and measurements as I go 
@Bob_Buechler LOL…
I have been staring at my original clamping table and asking myself “whats so wrong with this approach”. If it was adjustable up and down it would create similar function to what we are doing.
Well it does not hold as large a piece and I don’t have access to those kind of extrusions :).Thats a good enough excuse for me …
Got my parts this week and now it has to wait until after my travels. Wondered what I was going to do about springs, Never did I think about using the friggin springs from the stock bed… thanks.
Saw this video on Openbuild’s G+ community, and thought it relevant to our interests here: https://www.youtube.com/watch?v=cefOJ7PQHjg
Also, I’m midway through my own design’s build and discovered a small design improvement. Good news is, the build can be achieved with off-the-shelf parts, a manual hacksaw, an electric drill (or press), a common vice and typical metric and phillips head screwdrivers. Additionally, the number of modifications are minimal. A couple holes in the aluminum, and cutting the materials to the appropriate lengths, and that’s about it.
I’m painfully slow still in Sketchup, so it’s taking me a long time to get the design drafted. But I’ll post a build log once it’s done and installed.