Confession time. I never bought a tap follower, even though a Brown & Sharpe reversible tap follower is only $19.
I have previously just put a pointy object (made from a broken drill bit) into the quill and used quill pressure instead, which is hard when hand-tapping. It was clearly time for a proper spring-loaded tap follower. But instead of spending a reasonable $19 on a high quality tool, I spent a few hours in the shop.
Spoiler alert!

Design
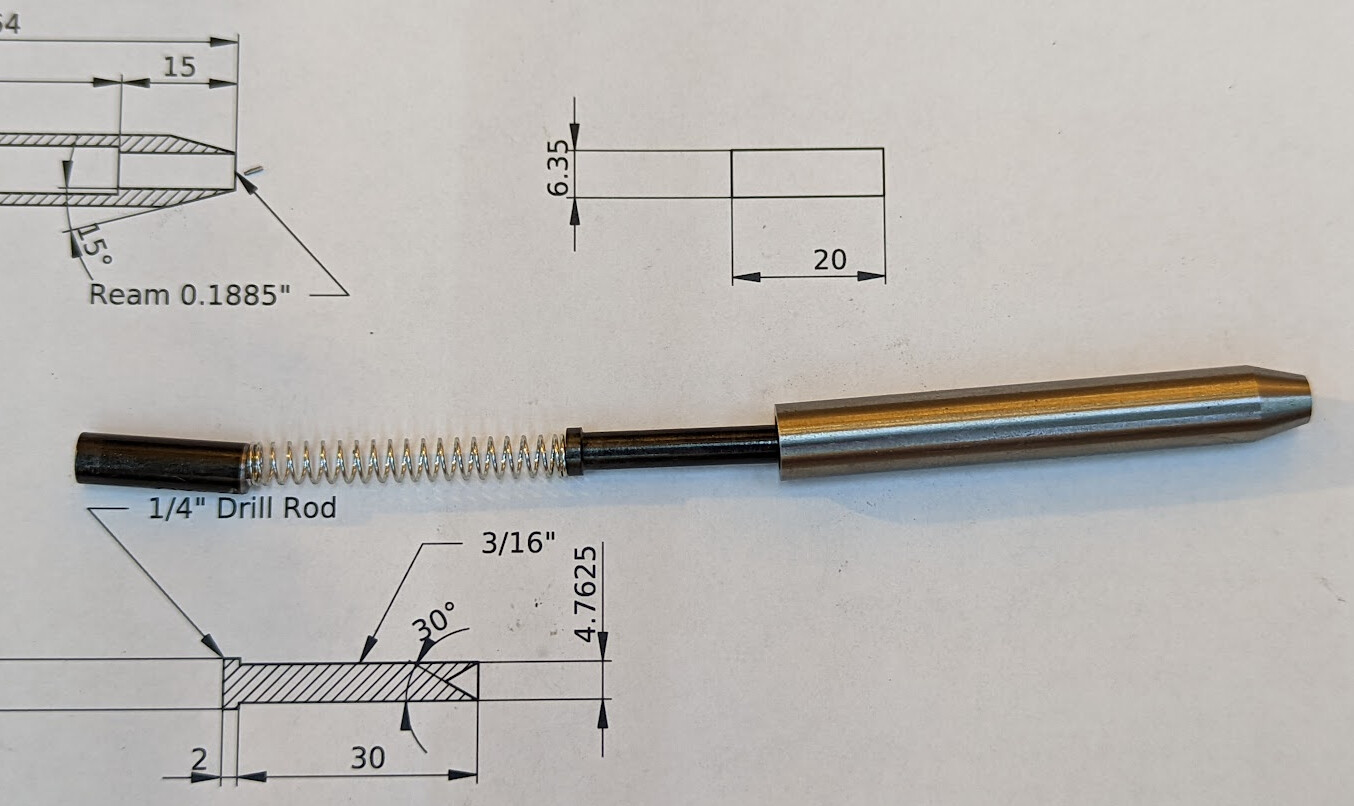
I looked at my stock pile, and was sad that I didn’t have any quality ¼" round stock, just hot rolled junk. But I had cold-rolled ⅜" and ½" stock, so I figured I’d use that. I found a 5.55mm x 38.1mm spring with 25mm of compression in an assortment I bought a few years ago; 200 assorted springs when I needed 3, of course, because 200 was way cheaper than 3.
I went with imperial diameters because my over/under reamer set is imperial. But of course I did lengths in metric because I’m angry about imperial.
Implementation
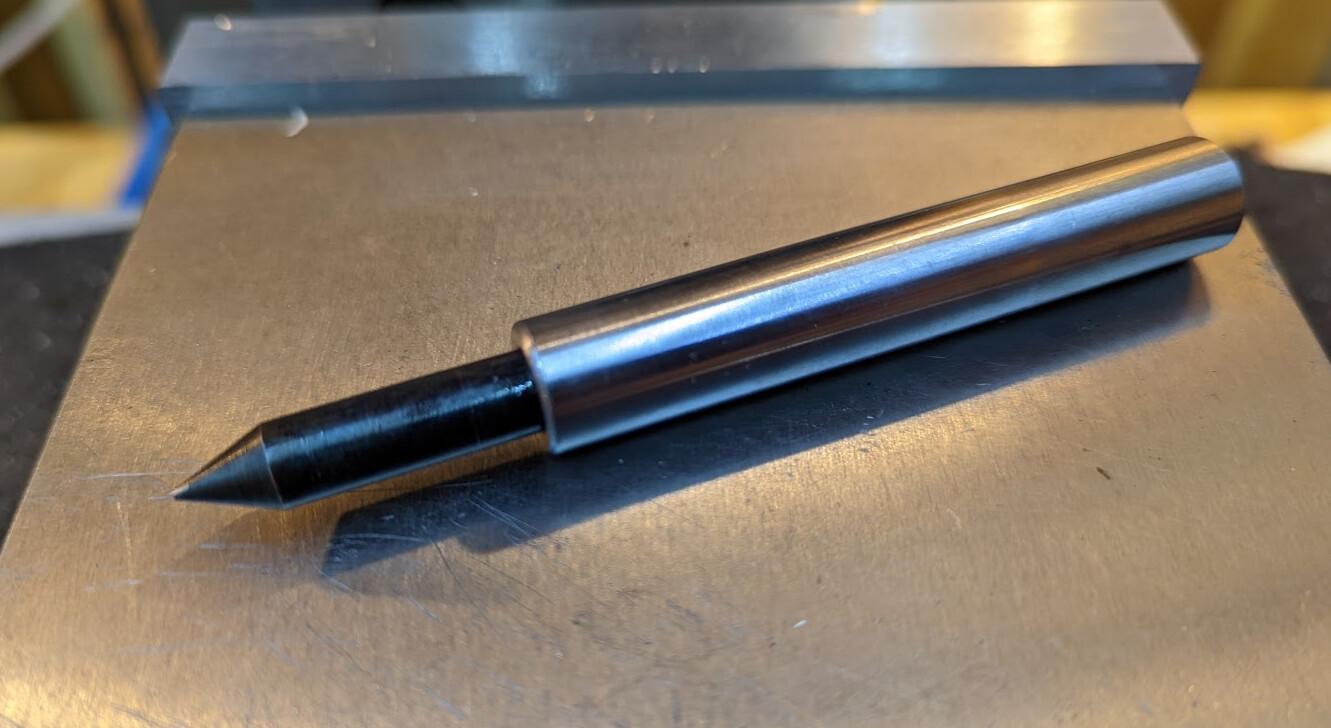
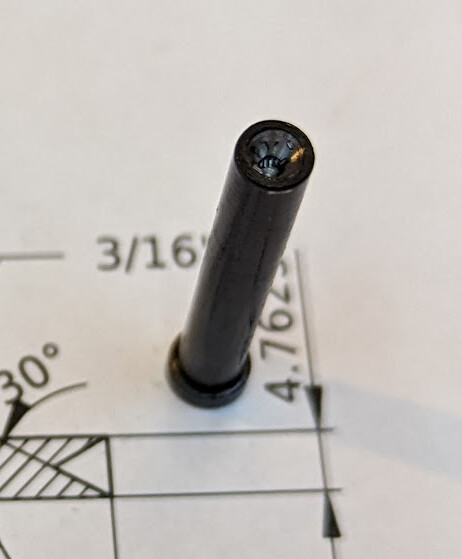
I started freehanding the pin. I decided on a 5/16" pin diameter, put the tip on, and then put 50 mm of 5/16" shaft, 5mm long ⅜" collar, parted off, and then stopped in a panic, unsure whether the design in my head would work.
More Design
I used FreeCAD and the Assembly4 workbench to try out my idea.
At first I had thought I would just put a set screw in the back to hold the screw in place, but I finally realized that there wasn’t a particularly obvious thread that I could cut into a ⅜" hole without single-pointing both sides, and I didn’t feel like it. I also realized that the narrow 5.55mm spring would buckle in a ⅜" tube, so I decided to make a 4mm shaft for it to run on and drill a 4.5mm hole in the back of the follower pin for the shaft to run into. I realized that if I just knurled and pressed ⅜" into the ⅜" reamed hole, I’d have a tight fit and a relatively permanent tool.
More Implementation
Back down to the shop!
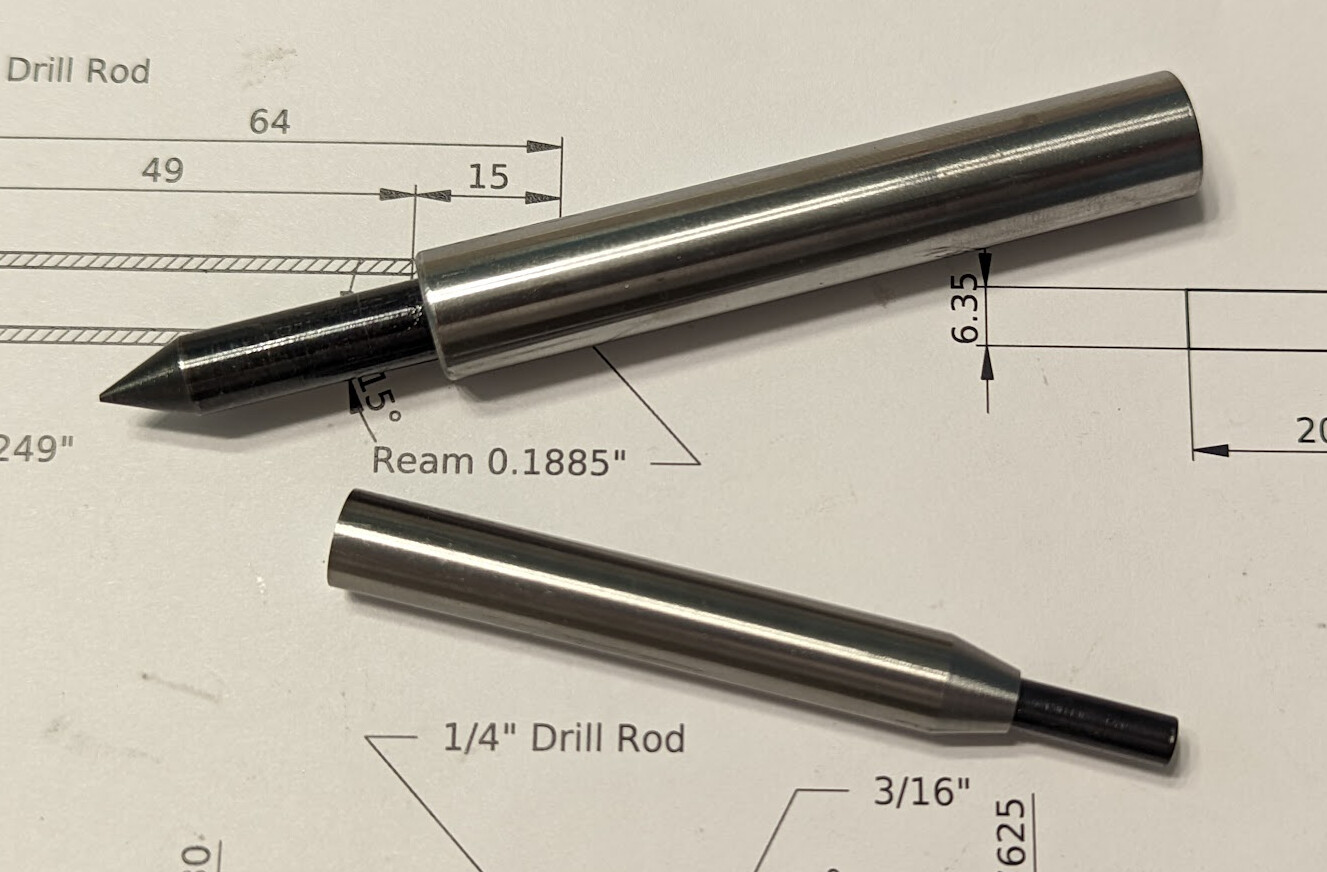
The ⅜" and 5/16" oversize reamed holes in the body had to be concentric for this to work. So I pilot drilled through the ½" CRS bar, drilled through 19/64", chamfered, and reamed through .3135" the entire 77mm long body. Then I drilled 23/64" 52mm deep, chamfered again, and reamed .376" 52mm deep.
The 4mm shaft 40mm long was a pain. I should have taken it all in one pass, and I didn’t, so I had to take many fine passes and finish up with file and emery paper. Serves me right for ignoring what I knew. Got it right in the end. Knurled 10mm, and parted it off.
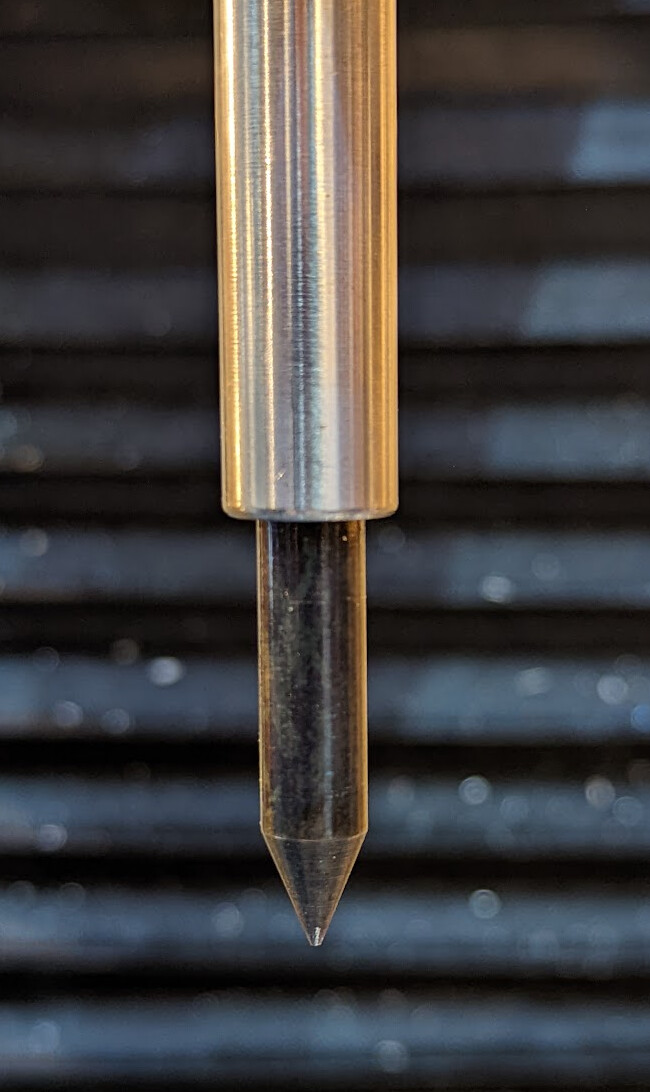
Decided to blue the pin and the shaft to protect against corrosion and hold oil, and also to blue the inside of the body for the same reason. Sadly, I didn’t clean my fingers as well as I thought I had when I picked up the body, so one side of the body is a bit uglier than the other:

I put the pin in, put the spring on the shaft, pressed the plug into the back, then faced it off to try to blend the back end together. I could have knurled it deeper and/or used loctite, because when I faced off the back to try to blend it together, the plug moved slightly, breaking the illusion. Oh well. I should really have reduced the follower head diameter a thou or so and reamed the body undersize for a solid press fit for the plug.
If I were doing this again, I would also consider a thinner follower pin so that the spring fits in the body without support in the middle of it, allowing me to use a standard size of set screw in the back. That would also let me have two pins, one with a male taper for very small taps. I should probably find some ¼" drill rod on ebay one of these days.
Surprise
I thought that the ½" body was rather stout, and that perhaps I should have gone with ⅜" for the body as well as thinner follower, but I then found that the B&S follower also uses a ½" body. So maybe serendipity there?
Artifacts
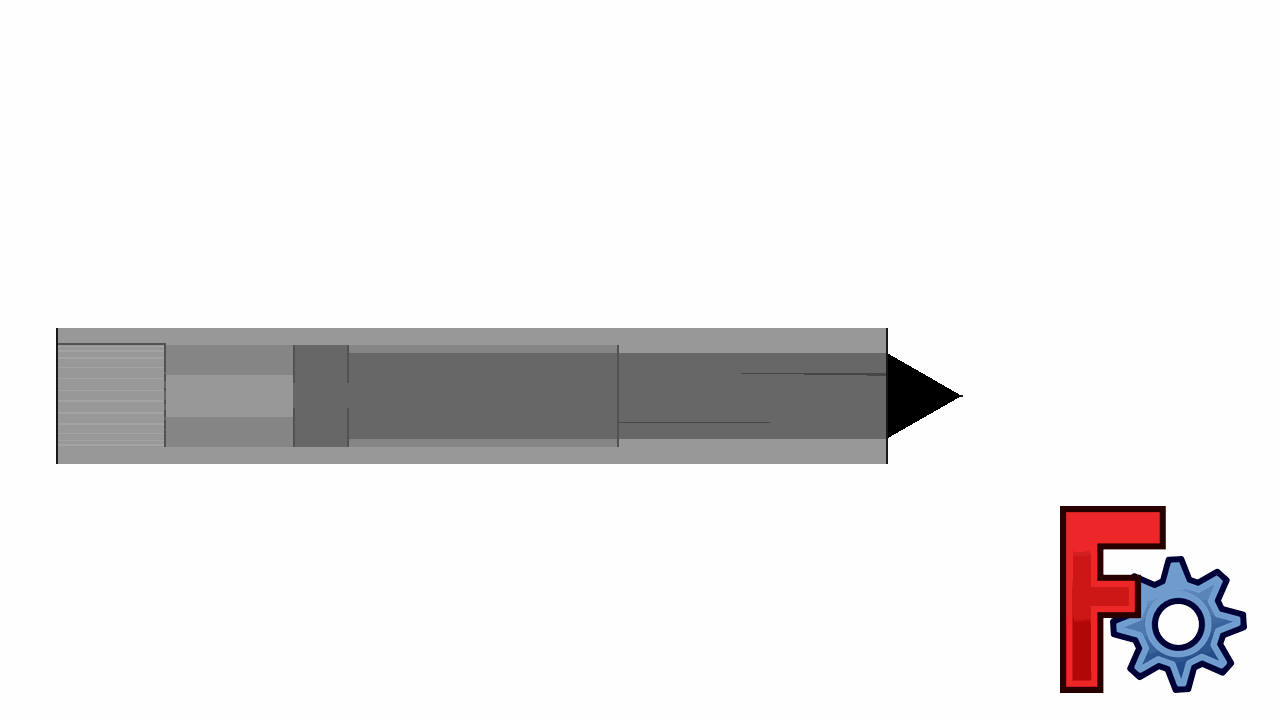
I’ve made a few design changes since based on what I’ve learned. In particular, turning the head of the follower undersize means reaming the shaft undersize and not having to knurl the plug for a press fit. Here’s the current drawing, such as it is…
TapFollower.pdf (16.0 KB)
Here’s the model:
TapFollower.FCStd (63.8 KB)
Animation with these changes: