Routing air and wires

With the lid and door in place, I’m starting to play with drag chain configuration to route wires and air for assist. The air needs a bit larger drag chain, but the wires can use very small drag chain, like 7mm.

This piece for the air assist feed is too long and the extra length gets in the way, so I’ll have to shorten it. I want it as short as I can get it while still being able to move the head the full width.

The preload on the Cloudray bracket is a bit much:

You can see that I’m using an Openbuilds T plate to hold the drag chain to the underside of the X rail. I need to find a more flexible tube than what I have right now in order to fit inside that drag chain, but the T plate works well. It’s thick enough that I used an M5x10 screw to hold it in place.

4 Likes

Good choice on the layout of the drag chain. Many people go with drag chains that are horizontal instead of vertical (not sure of proper way to describe it) and they end up having trouble with it sagging over time. Mine is flipped 180º vs yours but same idea. You’ll be happy with your layout.

2 Likes

That is exactly the design struggle. It’s why the bracket is up at an angle, to set a preload to compensate for sag in the horizontal arrangement. In my case, it biases it away from the gantry, so it won’t tangle. But I have a roughly 700mm x 1300mm moving area, so a diagonal of almost 1500mm, and 1500mm of drag chain seemed likely to sag substantially over time. On my corexy 3d printer with a 330mm x 330mm movement area, I use the horizontal arrangement, and I had to add substantial preload for sag even with that much smaller area.

I haven’t yet routed the second drag chain on the side to feed air to the gantry. That’s trickier because of my unusual single-frame design, where there is no gap between an outer and an inner frame in which to route a drag chain. I’m still playing with that, and I’m mostly confident that I can find a working solution. :relaxed:

2 Likes

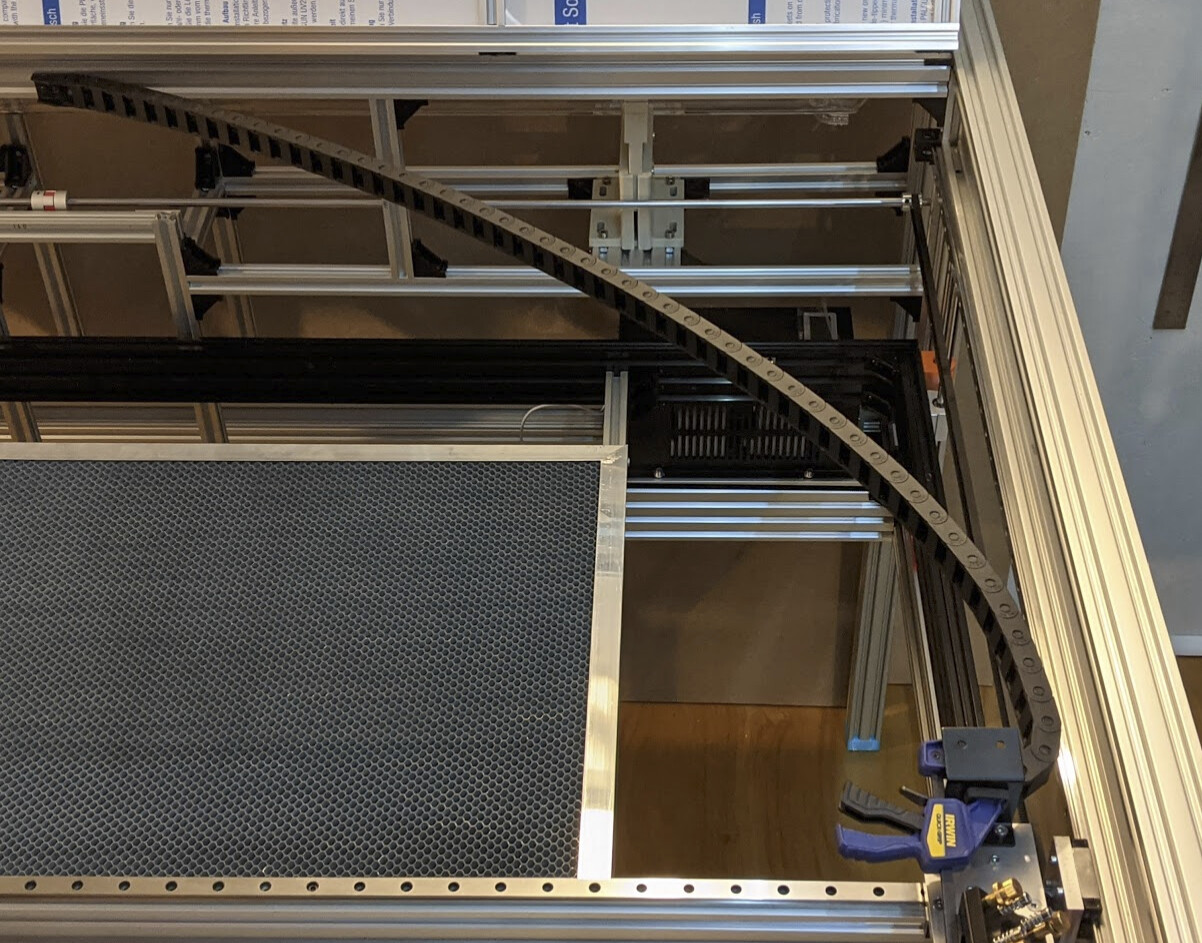
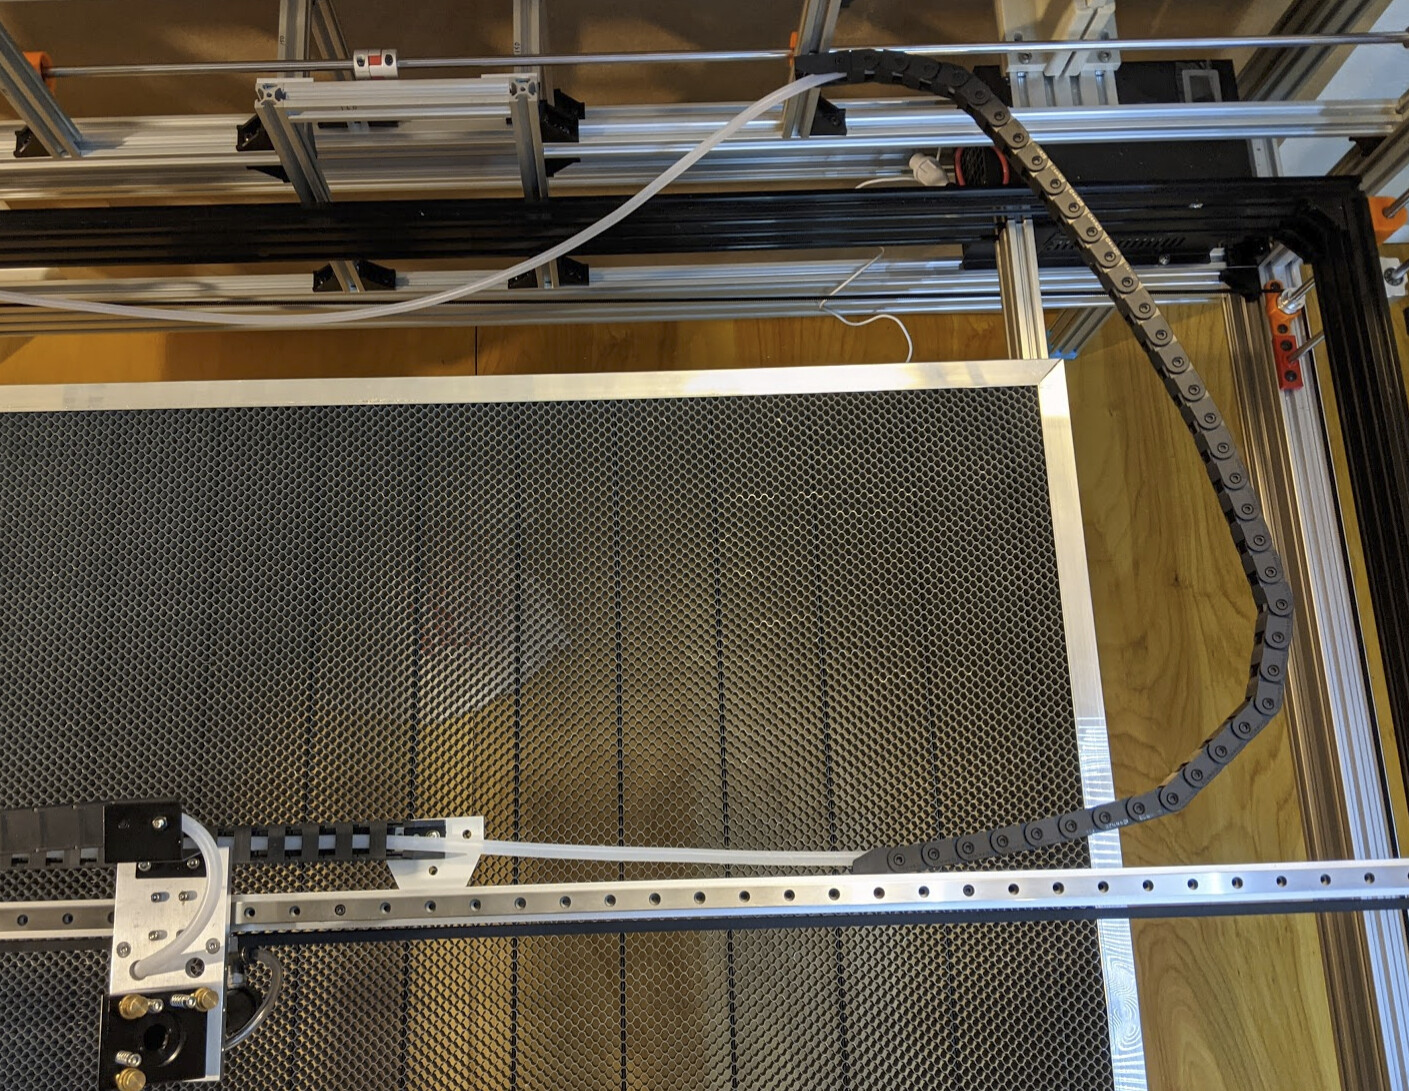
That was silly. I only need about 1 meter for the horizontal arrangement, because it can be connected from the middle of the back. However, there’s another problem. No matter what, if it reach one front corner, it needs extra room on the back. I tried it out. Here it is reaching to the front corner:

And moved back to the corresponding back corner:

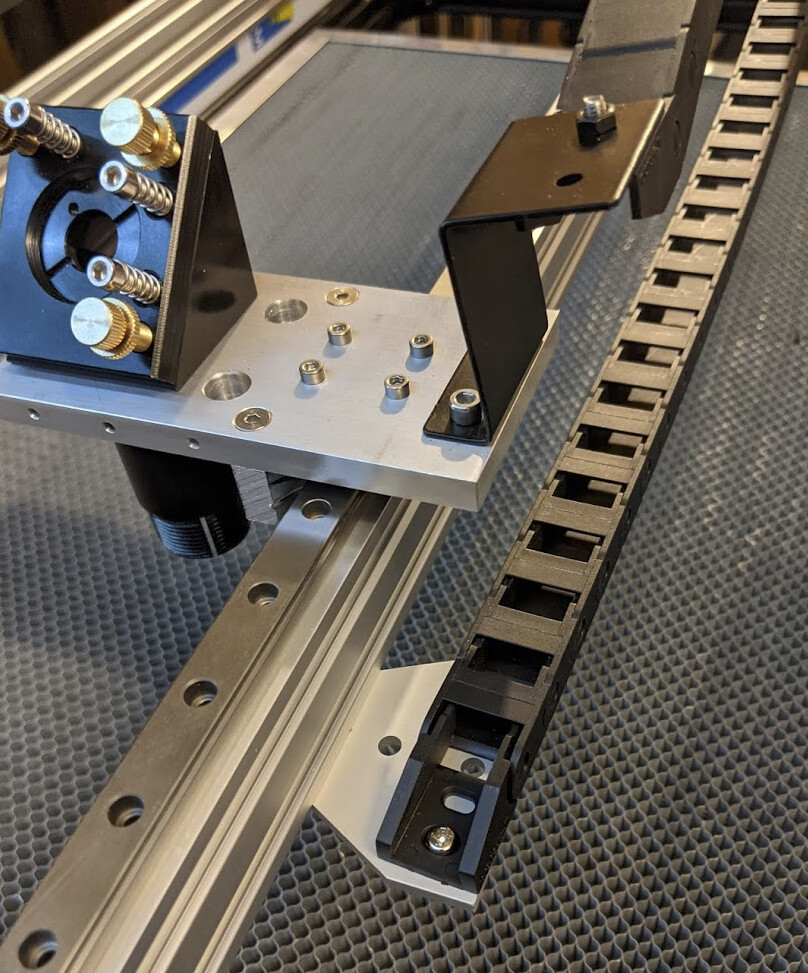
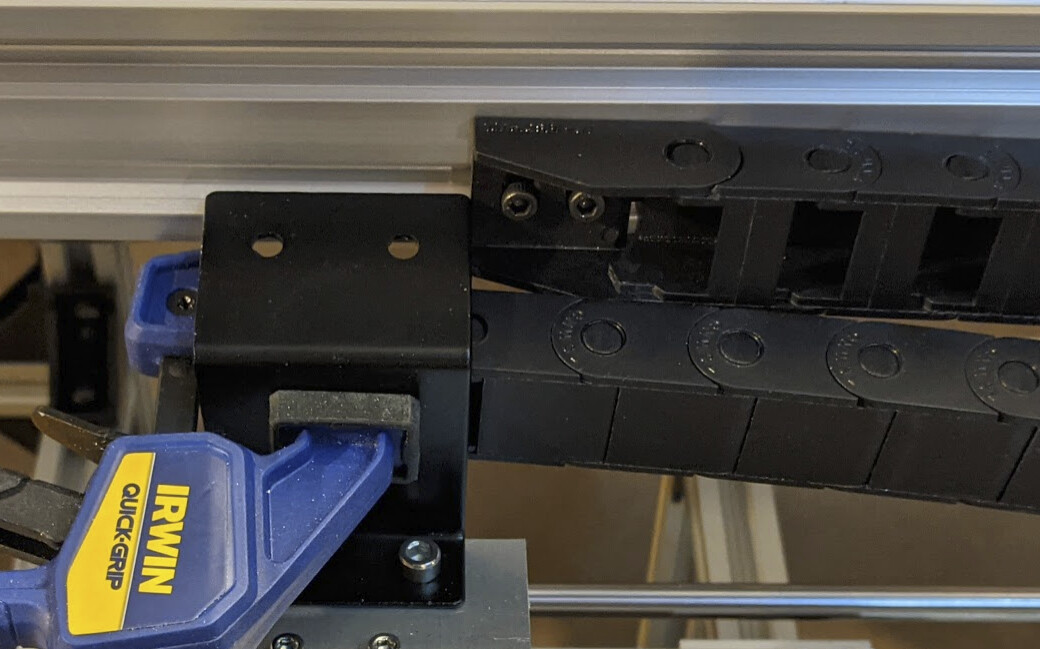
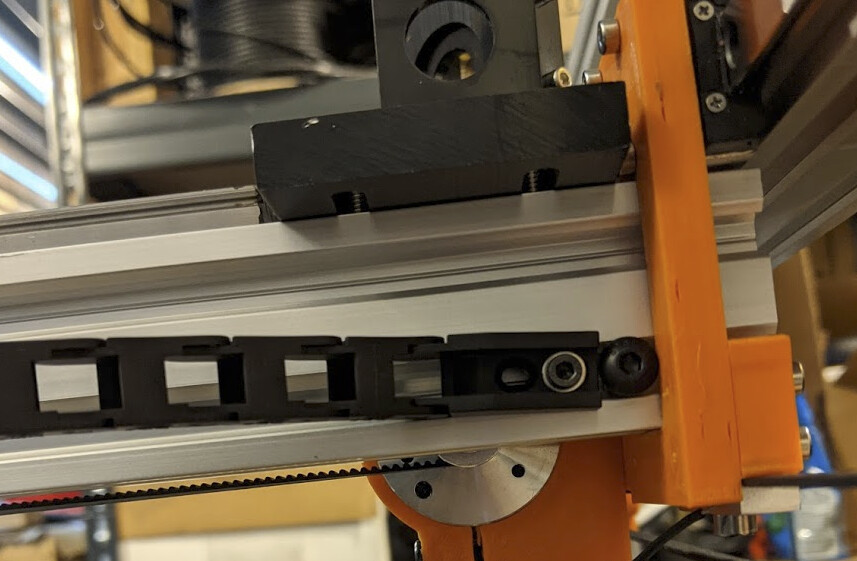
Additionally, the bracket interferes with the cable at the rearmost end:

My edge-to-edge design strikes again!

I put it back the way it was before. I thought about running a vertical chain to get the air from the back to the gantry, but decided to try horizontal instead first. I can always change later if I need to, but it looks like this will work. I can play with preload as required.

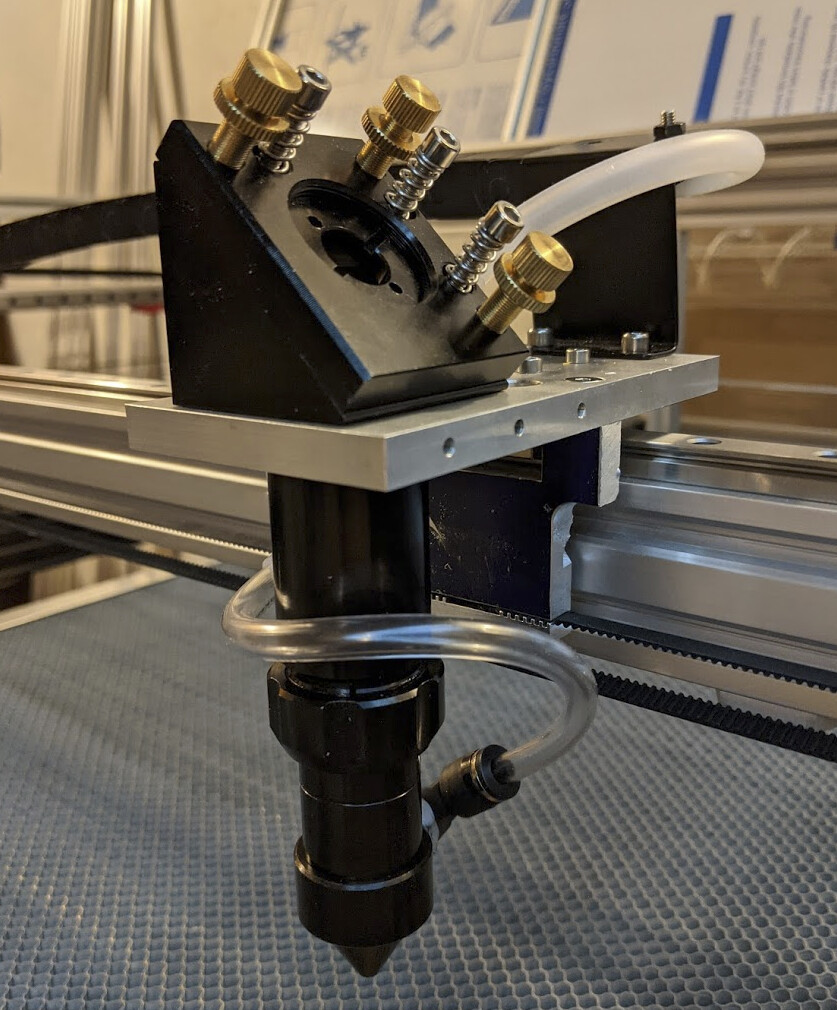
I bought silicone 8mm ID / 5mm ID hose for air assist because it is relatively large ID (low impedance) and bends easily, and because I thought that the fitting for the air nozzle was ⅝" / 8mm. Reader, it was not. But it turns out that it is either 6mm or ¼" and that ¼" vinyl tube fits in it, and the silicone tubing fits securely over the vinyl tube.

I wrapped the air tube around the nozzle, which works both at maximum extension (for 100mm lenses):

…and at minimum extension:

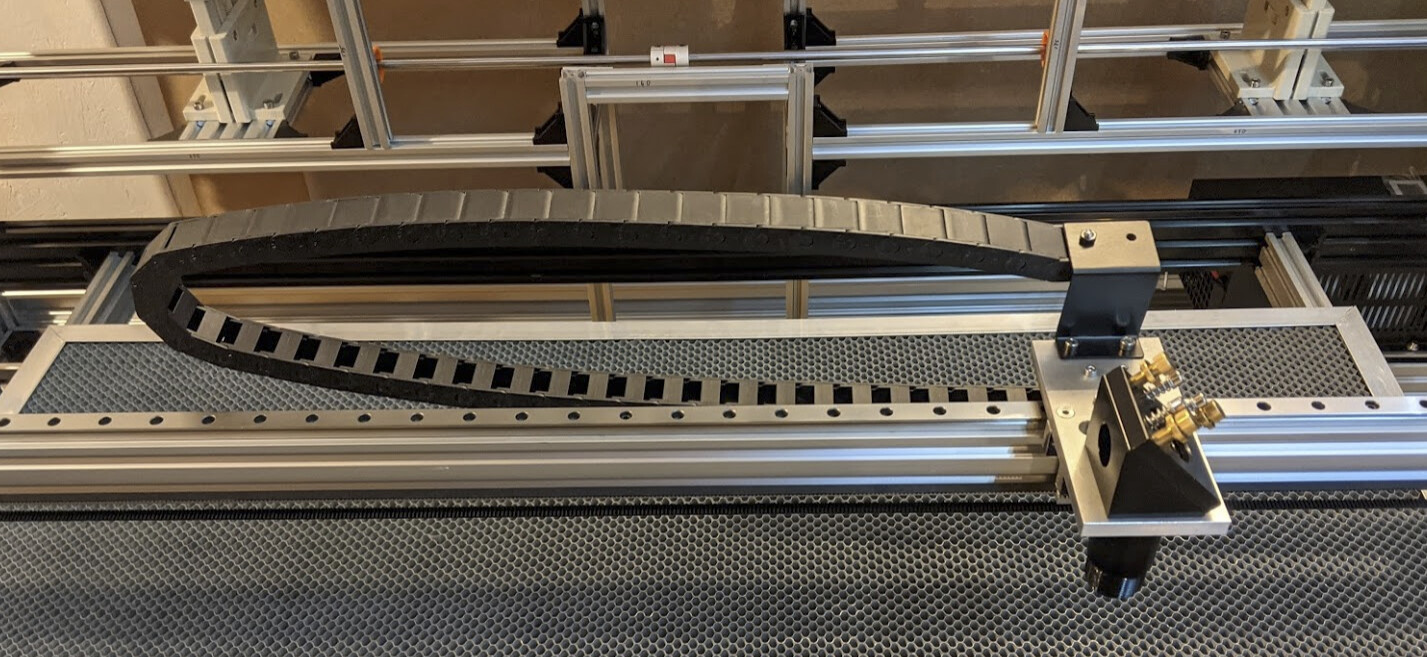
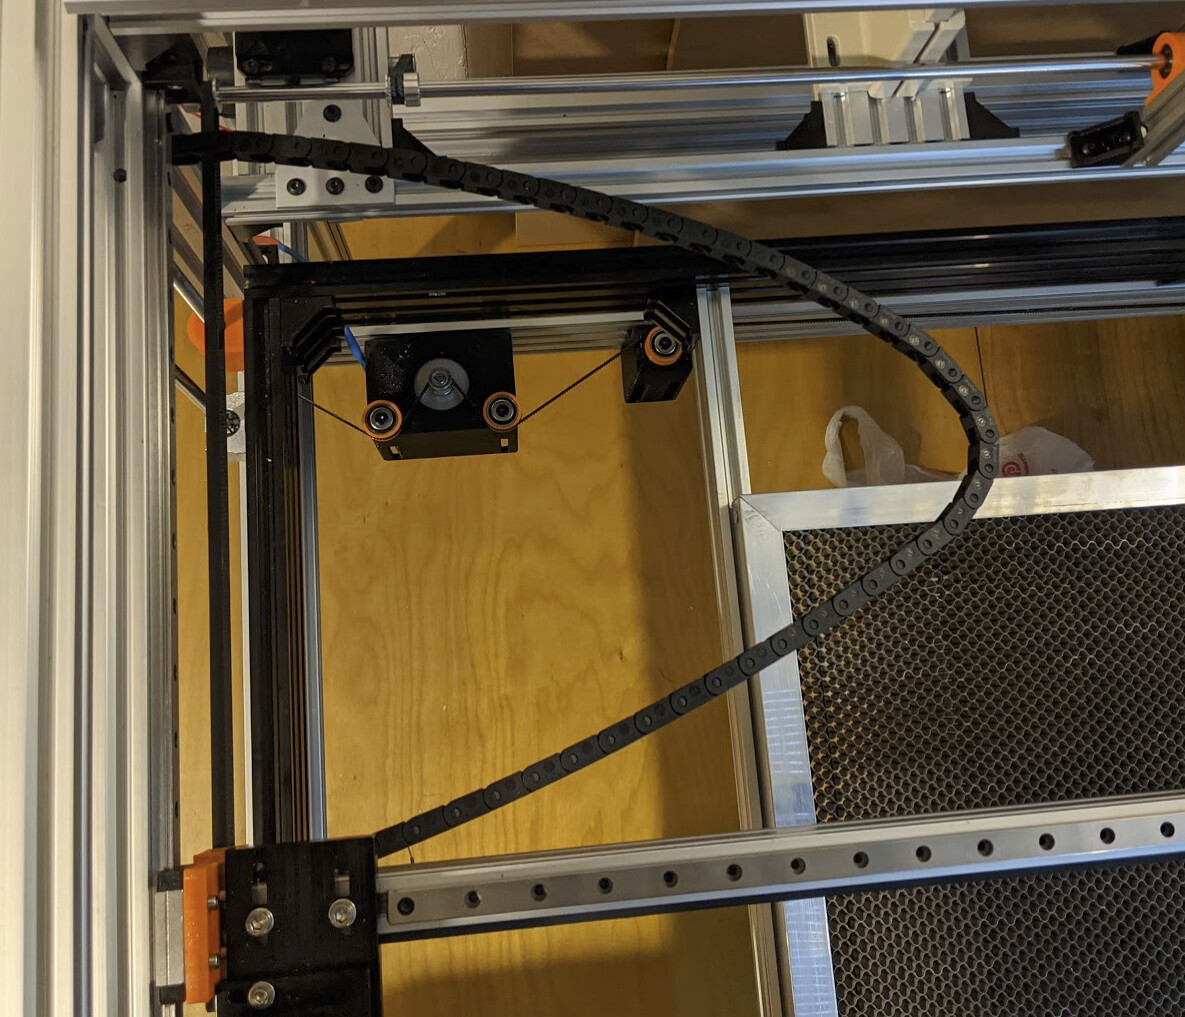
Then I looked at running drag chain to wire up the X servo. While I had earlier thought of running it horizontally in the side, above the extrusion holding the Y linear rail on the left side, I instead tried mounting this one horizontally as well:

I’m not sure if I’ll leave that this way, but it is at least worth trying. I’ll have to design another part that connects to the gantry mount if I want to run it vertically between extrusion members on the side.

2 Likes