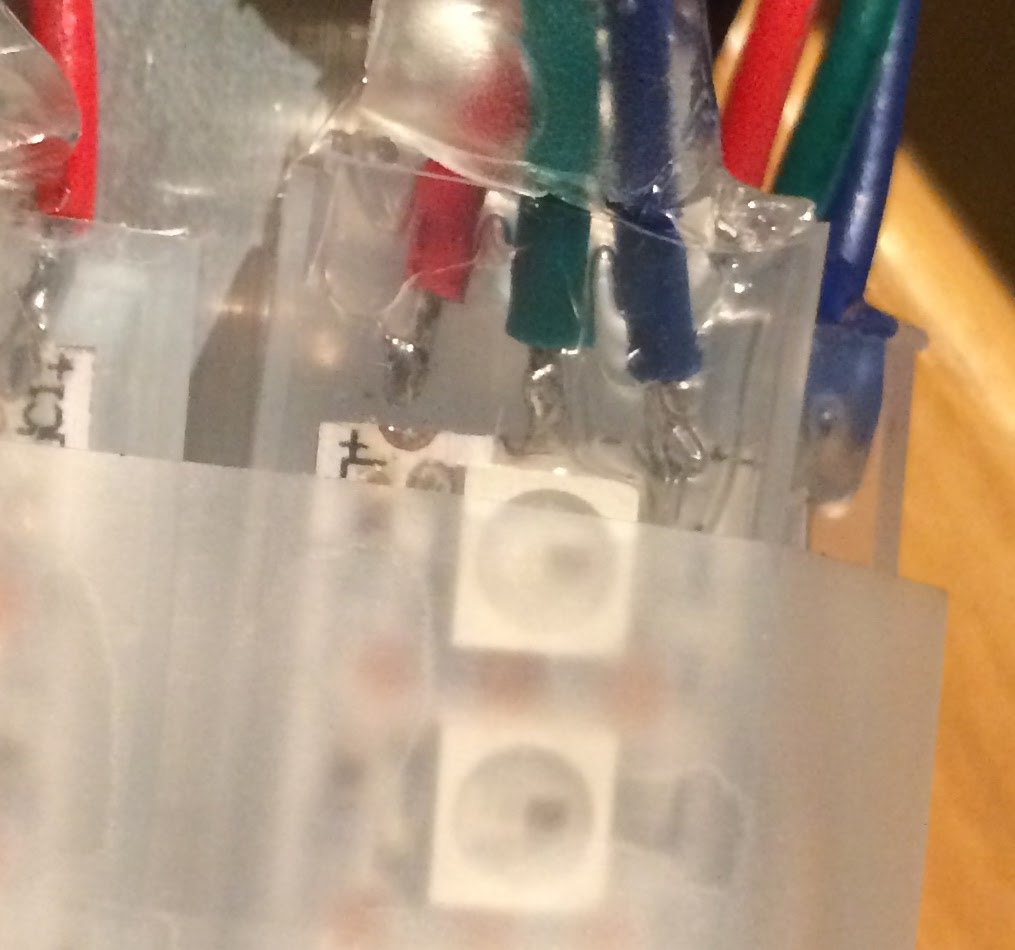
Note well on the leftmost joint how Our Lady of Perpetual Adhesion and the ridiculously tiny pads one has on the 144 LEDs/m strips have conspired together to royally screw me in the arse.
Realising this earlier I thought I might be better off “skipping” the LED on the end of the strip and wiring in after it, but that turns out not to work. I guess you’d have to desolder/scrape the LED off so it didn’t interfere with the chain.
I’ve skipped the first led on ws2812 strips because of bad pads and had no problem using the 2st one without any issues. Power flows I’m all ways but data only moves one way.
@Larry1 I tried it and it didn’t work. But now I think of it maybe that was back when I had the power wired backwards (that’s another story—things got very melty very quickly. Fortunately the 22AWG cable I had plugged into the power supply took one for the team.)
I need a better solution for sealing the ends, too. You’ve kind of got to babysit the E6000 once you pour it into the silicon tubing otherwise it either all flows right in or all flows right out, depending on which way up you hang the tubing while it cures.
FWIW, I had a similar problem on one of my LPD8806 strips. In my case, I was able to solder onto the bottom of the strip (there were copper pads on both sides) and get it working successfully.
So here’s a thought: expose a bit of wire and cut the data one shorter than VCC and GND (about the distance between the two LEDs.) Then solder VCC and GND on the large pads between the first and second LED and use them as strain relief for the data line when you solder at the very end. It’s also worth trying to scrape off some of the mask around that center pad and make it a bit larger, or look at the bottom for it and solder there.
@Robert_Atkins
I would try Larry’s suggestion.
Skip the first led. Solder the wires on the pads between led 1 & 2. And cover it with a piece of ‘heat schrink tube’ (correct wording ? In dutch it is ‘krimpkous’). This will also make it a little stiff to give more resistance to the bending. (Ofcourse don’t forget to glide the heat shrink on your wire before you solder )
VCC and ground aren’t the problem, as @Ashley_M_Kirchner_No notes, it’s easy enough to solder them into the second set of pads (on the underside, even.) The problem is that when you cut the strip, you’re necessarily cutting the data pad in half and it’s not much more than 2mm diameter to start with.
Another difficulty I’ve come up against is when shrinking the heat shrink over the end of the silicon tube it’s hard to heat it evenly (using a jet-flame lighter, maybe that’s my problem?) and it comes out all kinked and doesn’t stay in place.
I’m away for a few days but when I get back I think my strategy is going to be to sacrifice the end LED, solder to the bottom of the strip, and use a couple of short lengths of the tinned copper braid I just bought as the power “bus”, meaning I can run the power wires in a straight line down to the bus, instead of kinking and stressing them by trying to connect them straight to the main power cable. Fold the whole lot into a strip of gaffer tape for insulation.
Used the heat shrink in many applications and never had that problem but i’m using a ‘candle lightner’ (with a normal lightner you burn your fingers …). And sometimes you have to compensate the diff in diam by shrinking first a smaller one on the smallest diam. For ledstrips i first shrink a small one on the end of the cable as close as possible to the strip and on top the second one covering also the strip. (And as suggested above the second one could be transparant covering also the led(s) , but this i didn’t try yet myself)
Has no one else here tried using regular silicone sealant, it’s very easy to apply and sticks very well to the silicone sleeve, you can pump it in and build it up to act as strain relief for the cable as well. Plus it’s cheap as chips!
@Anthony_Ollerton be careful with silicone sealant. Some of that stuff releases Acetic acid during the cure. Acetic acid will eat copper, tin and lead causing your solder joint to fail. Look for neutral cure or Acetic acid free curing. The last I checked GE Silicone II was acid free curing and many other companies sell (expensive) electronic silicone adhesive/encapsulant.
Thanks for the info @Michael_Sharnet , I wasnt aware of this, have only completed two strips so will see how these fair with the acidic stuff.
Looks like the non acidic ones are about the same price so will pick some up when I come to finish my project.
@Anthony_Ollerton I found out about the acid thing late in a project and while you couldn’t clean the acid off the connections inside the silicone - I did take some rubbing alcohol and clean the entire area that was exposed to the fumes. Even after cleaning, I expect the damage has already been done.
So far, I have two (out of eight) failures. But I can’t say for certain that the acid is at fault. In both failures the solder joint fell apart (solder crumbled).
@Larry1 I’ve just tried your theory about skipping the end LED on a WS2812B strip (because I there’s not enough room to solder to the end pads) and confirmed it doesn’t work. I’m sure I have the power around the correct way this time too.
Any clues, anyone? I guess I can desolder the end LEDs but that will be a prick of a job (everything’s already soldered to power and embedded in the silicon tubing.)
 )
)