New Widget: Super Touch Plate
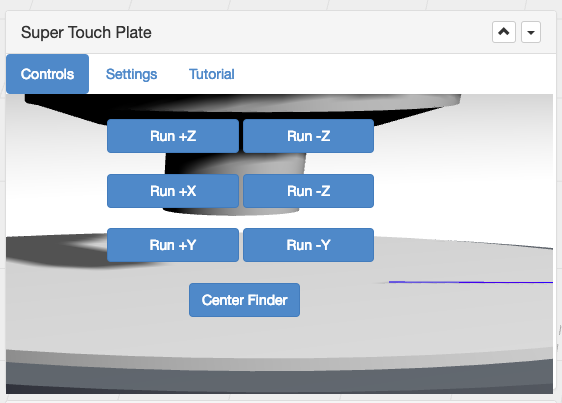
If you’ve ever used Chilipeppr’s Touchplate widget and seen how easy it is to set your Z origin, have I got the tool for you! I present the Super Touch Plate widget! It’s pretty self-explanatory, requires no modifications to your machine, and should be stable! This widget allows you to use the zeroing technique of the Touchplate widget on all three axes of your machine one at a time. You’ll need a special kind of touch plate that has a point of electrical contact in all three axes, and I’m working on sourcing one of those and/or making one. When that’s all set, I’ll make a video demoing this widget for your learning pleasure.
If you want to test it out on your machine, you’ll have to go to my workspace, as it is not in the normal TinyG workspace. Note that this only works on TinyG, I don’t have a GRBL machine to test with, my apologies to GRBL users. I’m sure porting is not a hassle, and I would be willing to port it when I have a GRBL test platform.
The workspace link is: http://chilipeppr.com/pyroavr-tinyg
I could use this to set the corners of a sheet of aluminum as an example, right?
@Andy_Meyer already forked the main tinyg workspace on github (which can be seen at http://chilipeppr.com/tinygStaging . Just changed the name of the workspace and replaced the existing touch widget with this one. We can add it in ourselves once it’s tested a bit. For which the dedicated workspace is the way to go!
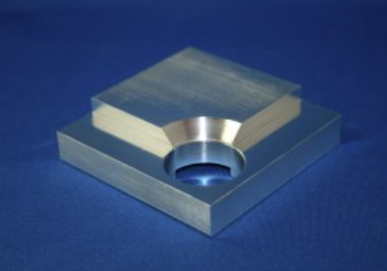
@jlauer I’m working on actually making one such touchplate, but here’s a model for what it should look like that I drew in the Three.js editor. It will eventually replace the small round touchplate in my version of the widget. If you download the following gist and import it at http://threejs.org/editor it will show you what it looks like! https://gist.github.com/PyroAVR/b8cdc321f21b1b4df932
I’ve been doing some work on the touchplate design, and unfortunately, the one I put in the gist in the comment above is probably more hassle than it’s worth. I would recommend against it.
@jlauer I’m afraid not, I haven’t had access to a working machine in quite a while. I would love to make one as soon as I can, but I can do it without an example video feed if that would be acceptable.
My only comment: for the X and Y probing is to also allow inside and outside probing i.e. probing in x+ or x- and y+ or y- direction Why I hear you ask? for fixtures similar to the othermill fixture plate, which I’ve started using for my PCB work. I would like to probe in the X- and Y- direction against and inside edge plate https://othermachine.co/support/fixturing/pftcs/https://othermachine.co/support/techniques/locating-bracket/
I can add that easy, @Stephen_Eaton . It’s just a matter of timing. I’m starting my first semester of college now and I don’t have access to a machine to run ChiliPeppr on, so I would have a rough time testing whether it works. That said, I’ll try adding the changes soon and see how it goes. I too made this for PCB work, so I’d be interested to see how it would be useful in that scenario.
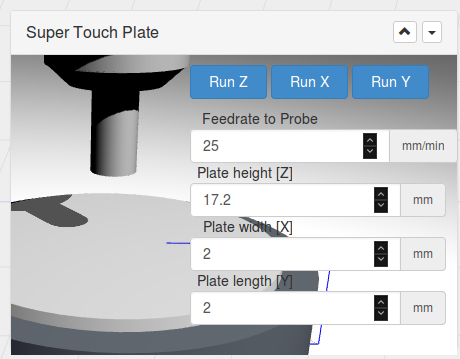
I think the widget would have to get modified to allow a reverse direction probe. It sounds pretty cool though and probably not that bad of an edit. Maybe a 2nd tab in the widget for reverse probing? The font sizes in that widget were always a bit of a problem on different machines.
 Thankyou!!!