
The digital meter doesn’t measure power at all, and how the numbers it shows relate to current flowing through the tube can be different not only from one machine to another, but also can change over the lifetime of the tube. An analog meter is very inexpensive, just a few dollars.
It’s sad that manufacturers persist on selling units without them, often even representing “digital” as better. ![]()
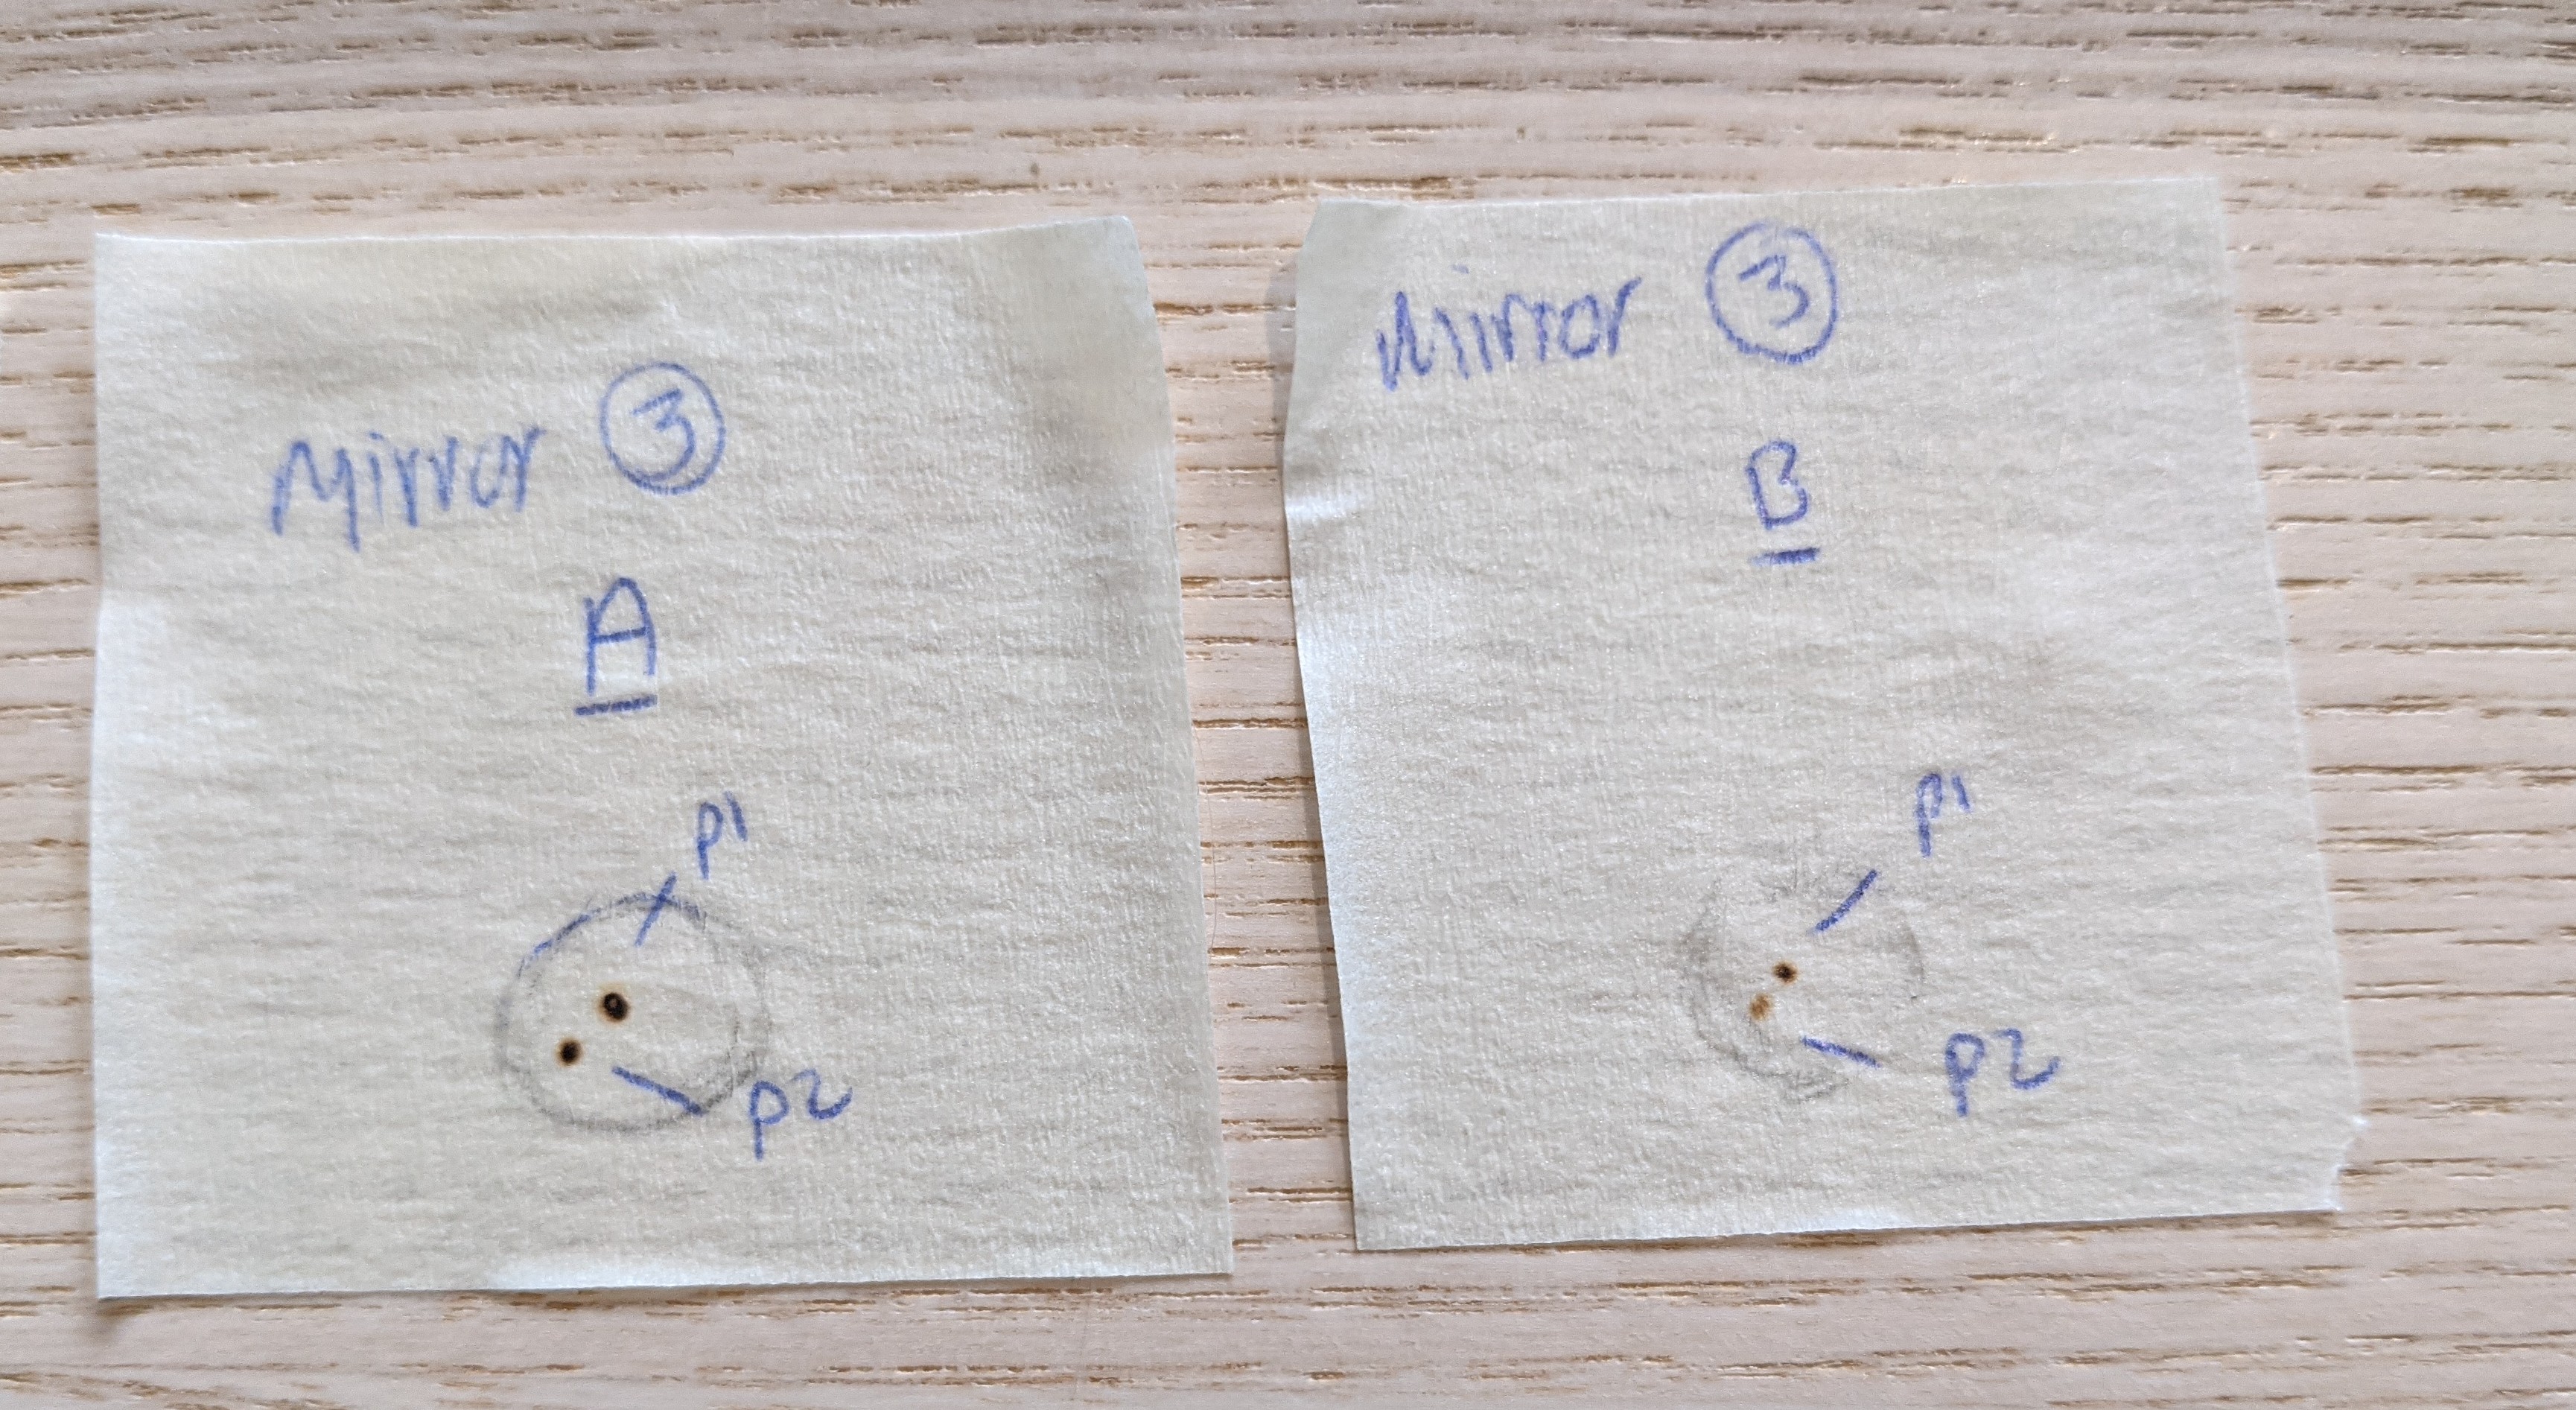
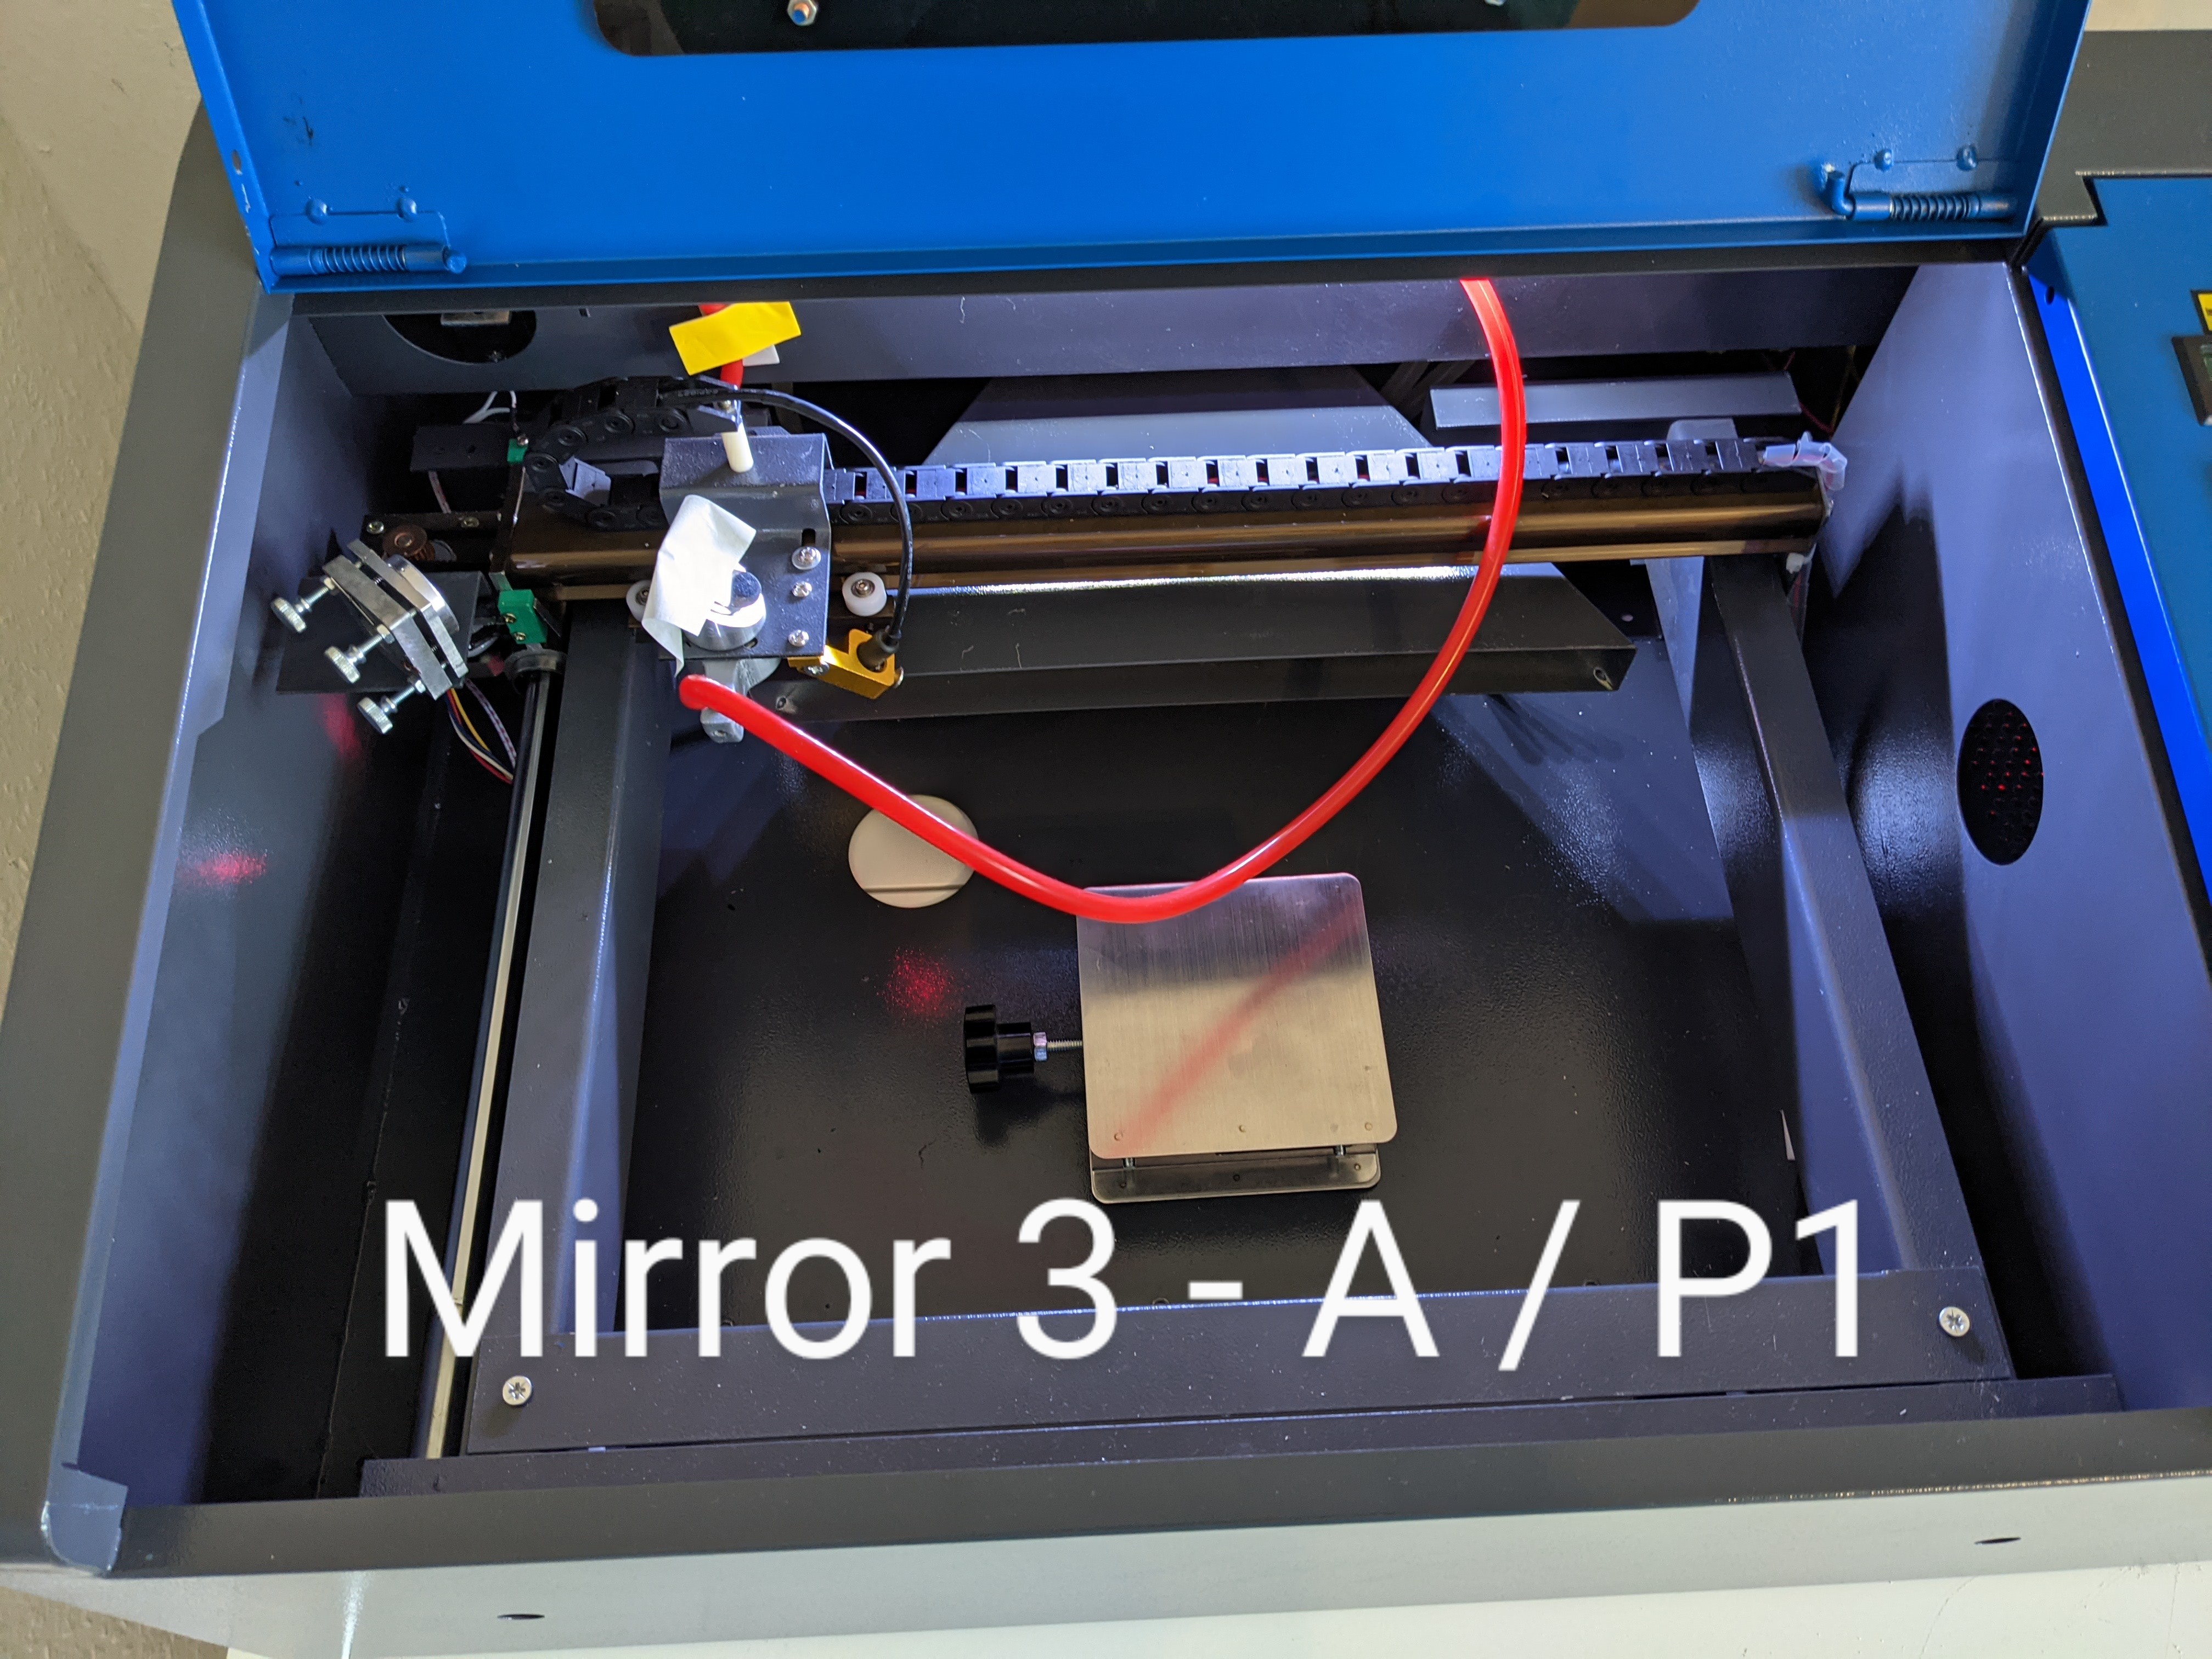
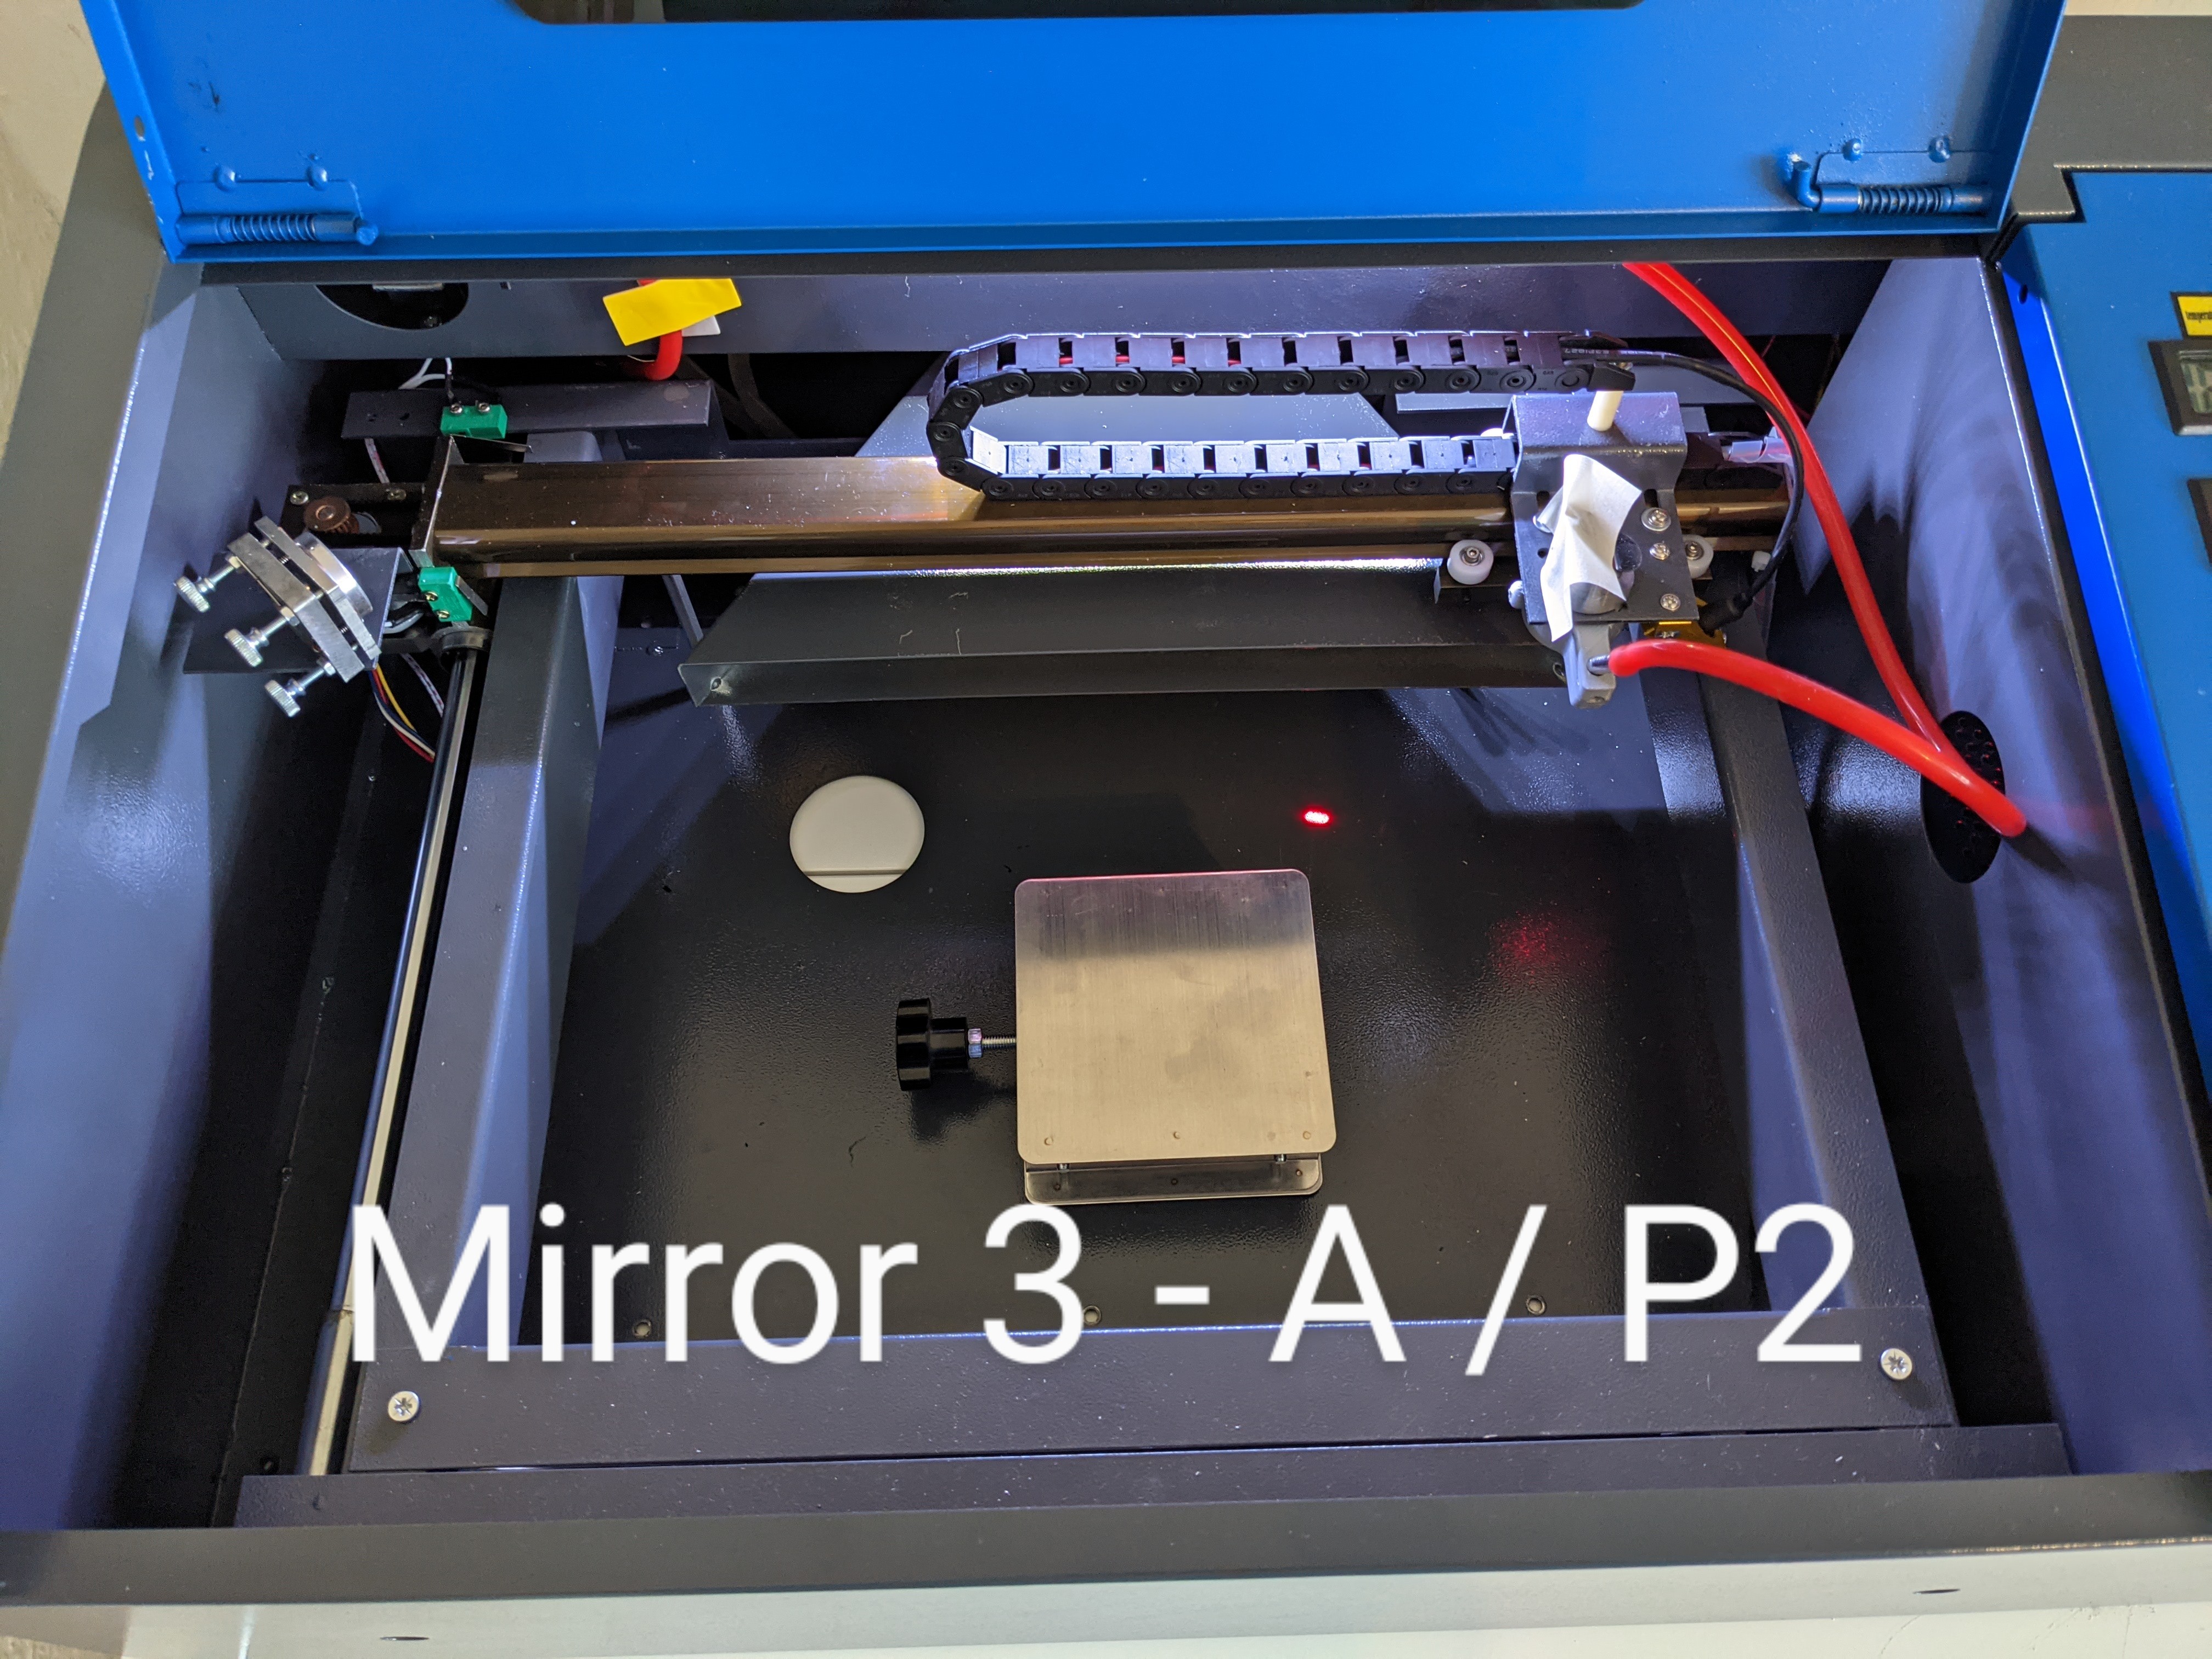
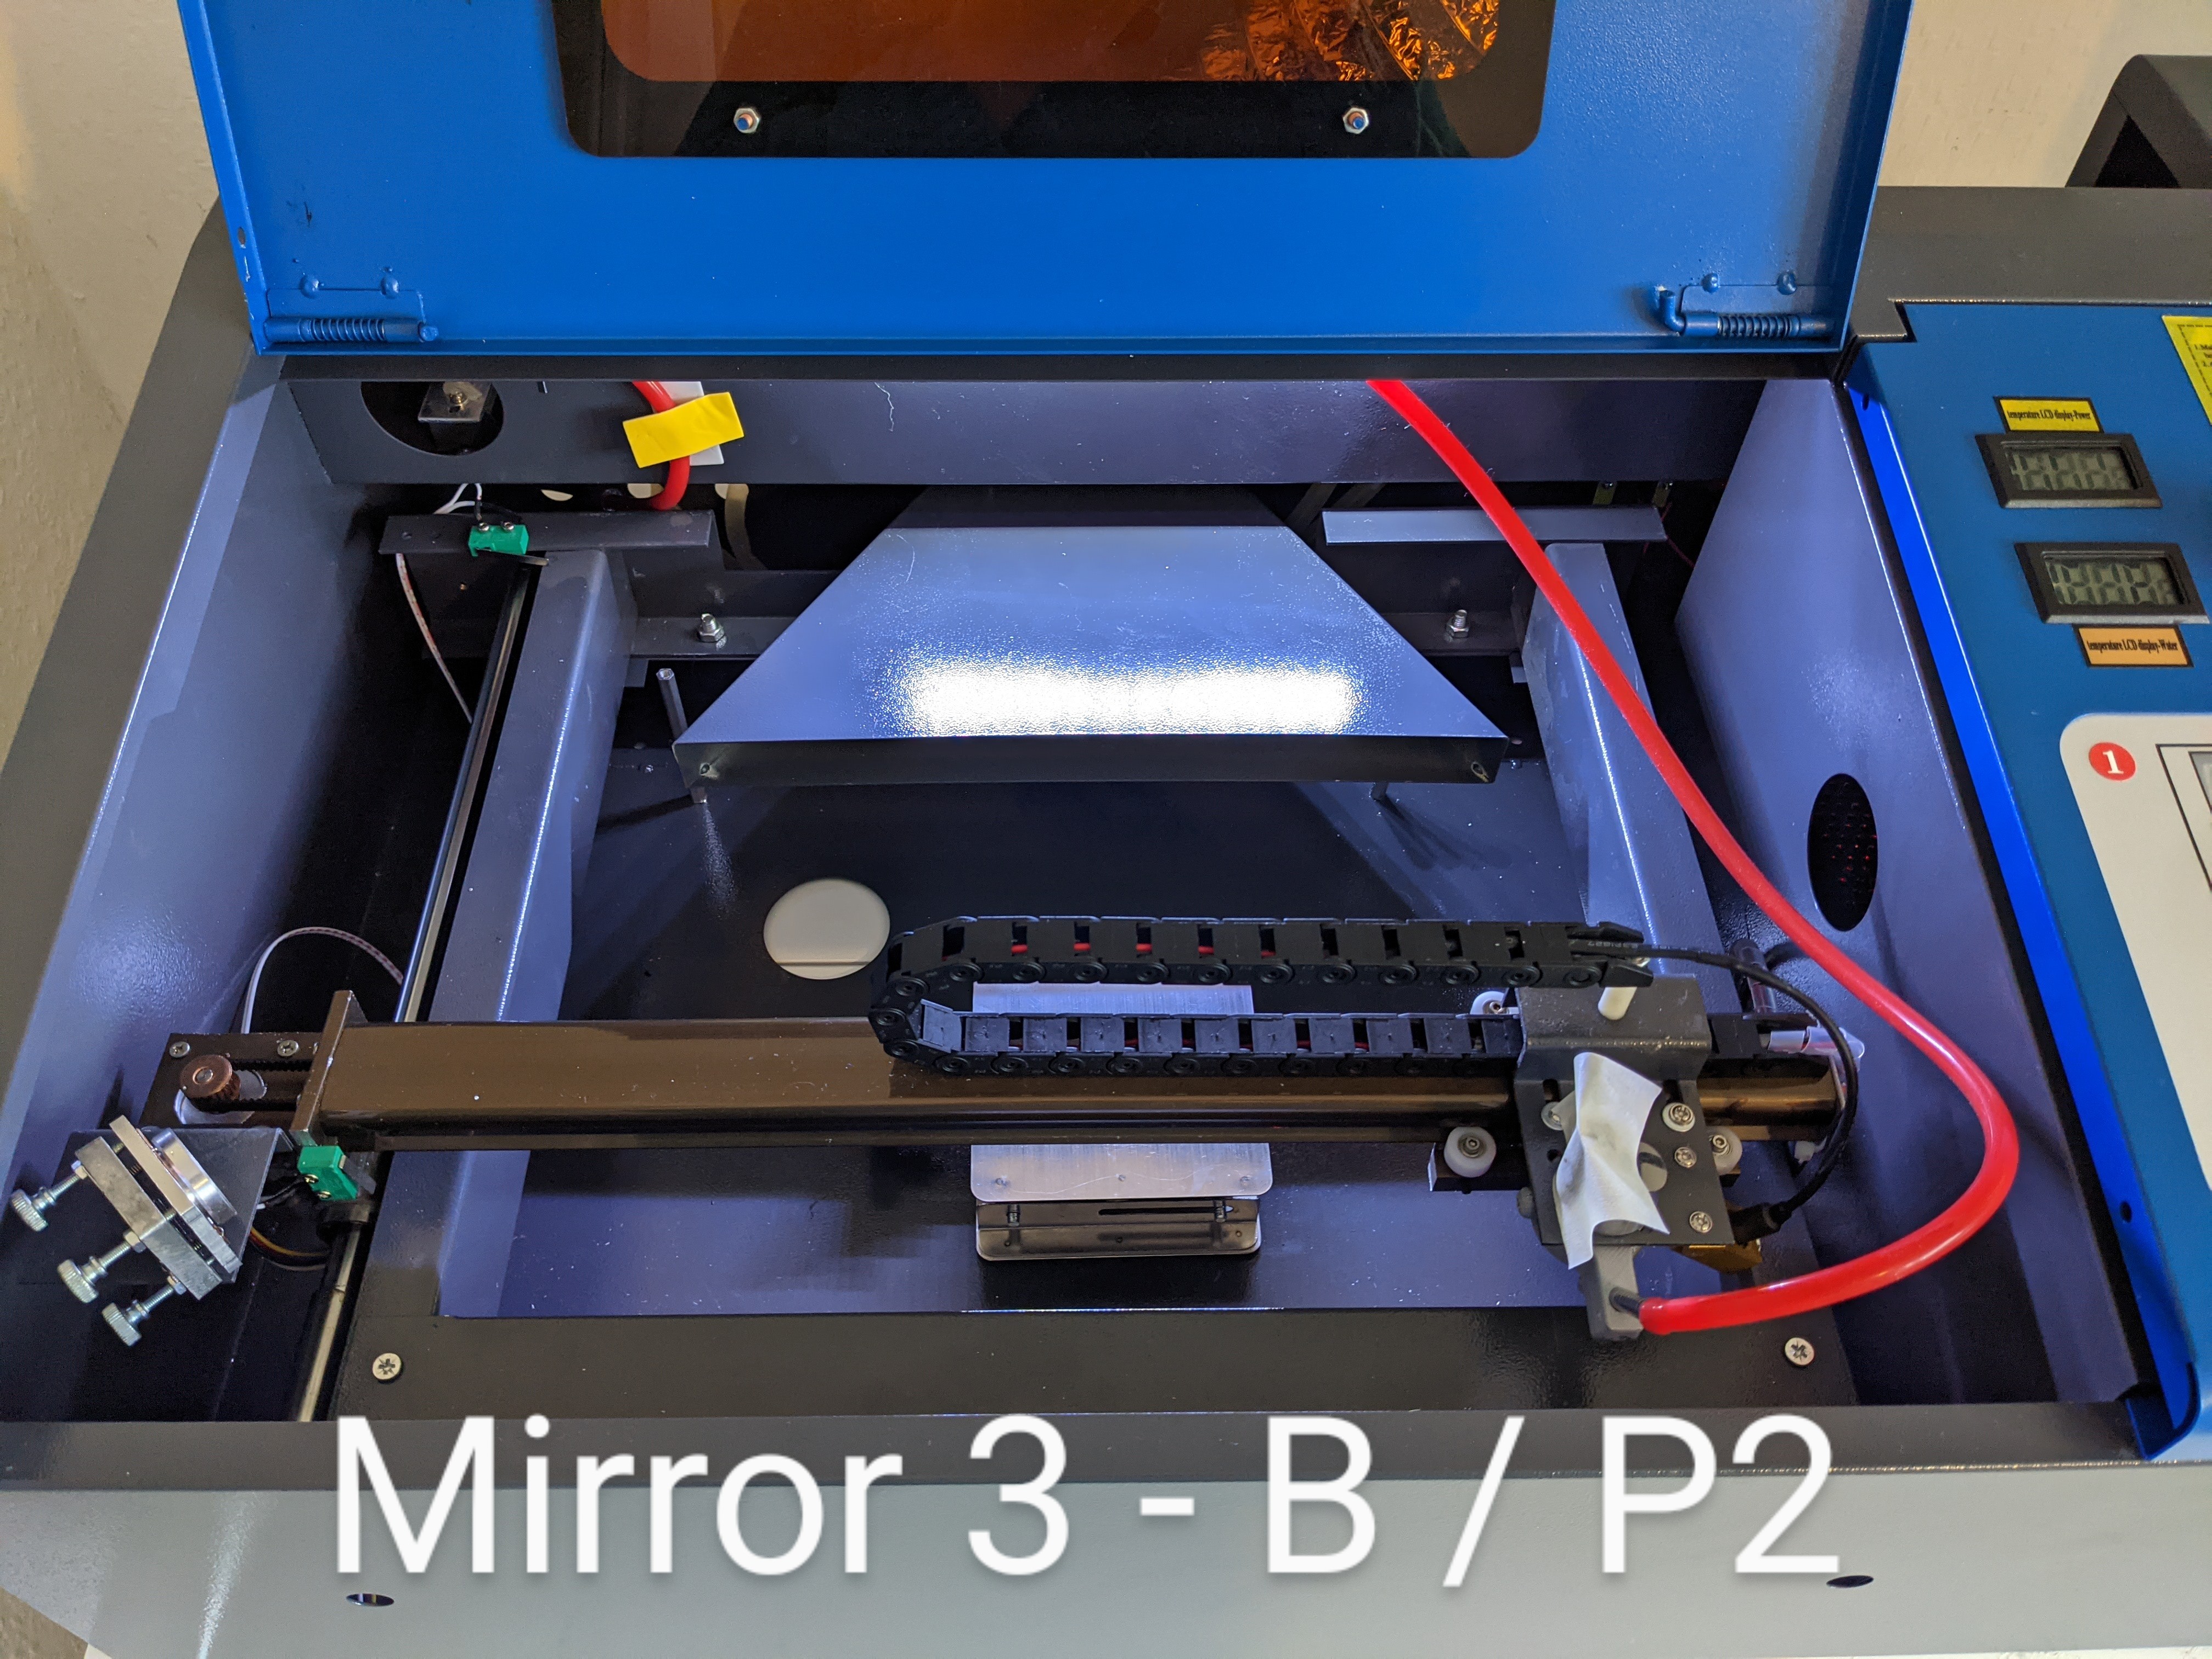
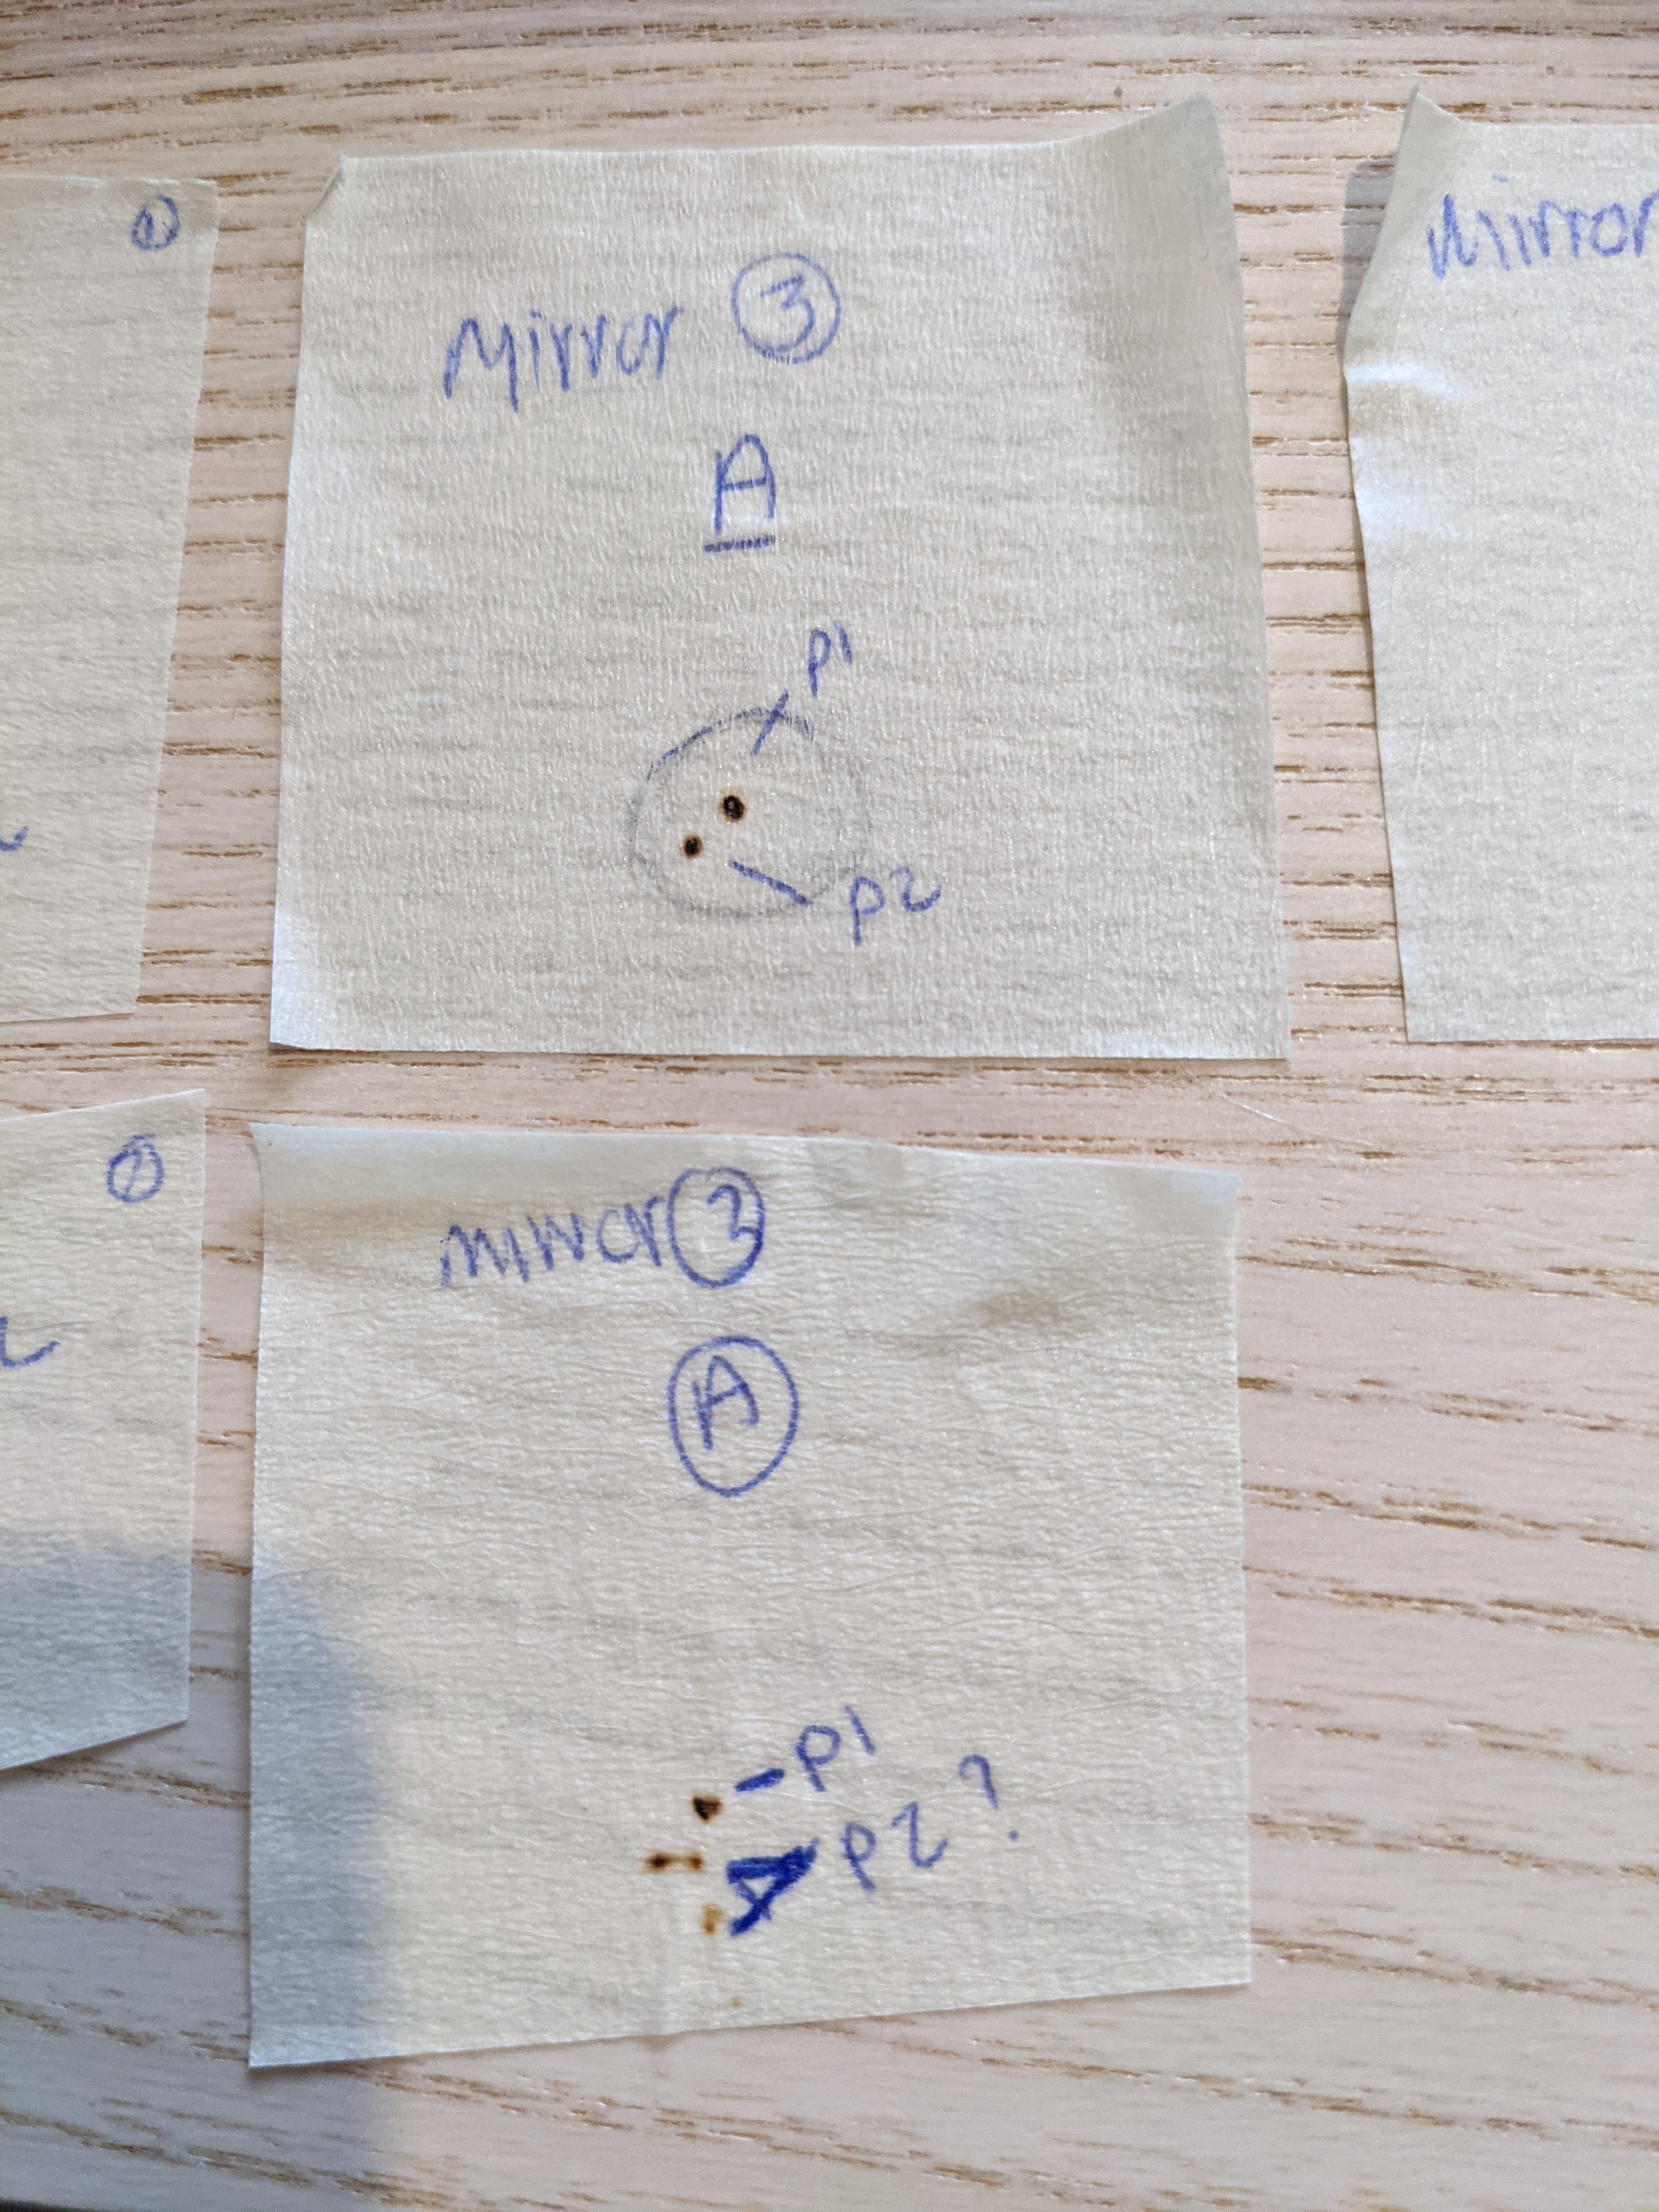
For mirror 3, what you really want to do is make sure that the beam is centered in the nozzle. You can remove the nozzle, put tape on the bottom of the down tube under mirror 3, and shoot a test. Mark the edges of the tube on the tape so you can see whether the beam is centered when you remove the tape to look at it. Ultimately you want the beam centered in the middle of the tube regardless of the position of the laser head. If the beam isn’t centered in the nozzle, it will be bouncing off the edges of the nozzle opening and will make quite the mess.
Your test shots do demonstrate that the mirrors aren’t yet aligned. This confirms the most likely diagnosis!
If this process ends up being super frustrating, do consider the visible laser backwards alignment tool I linked in my post. Being able to see the beam can make this a less frustrating process…
2 Likes
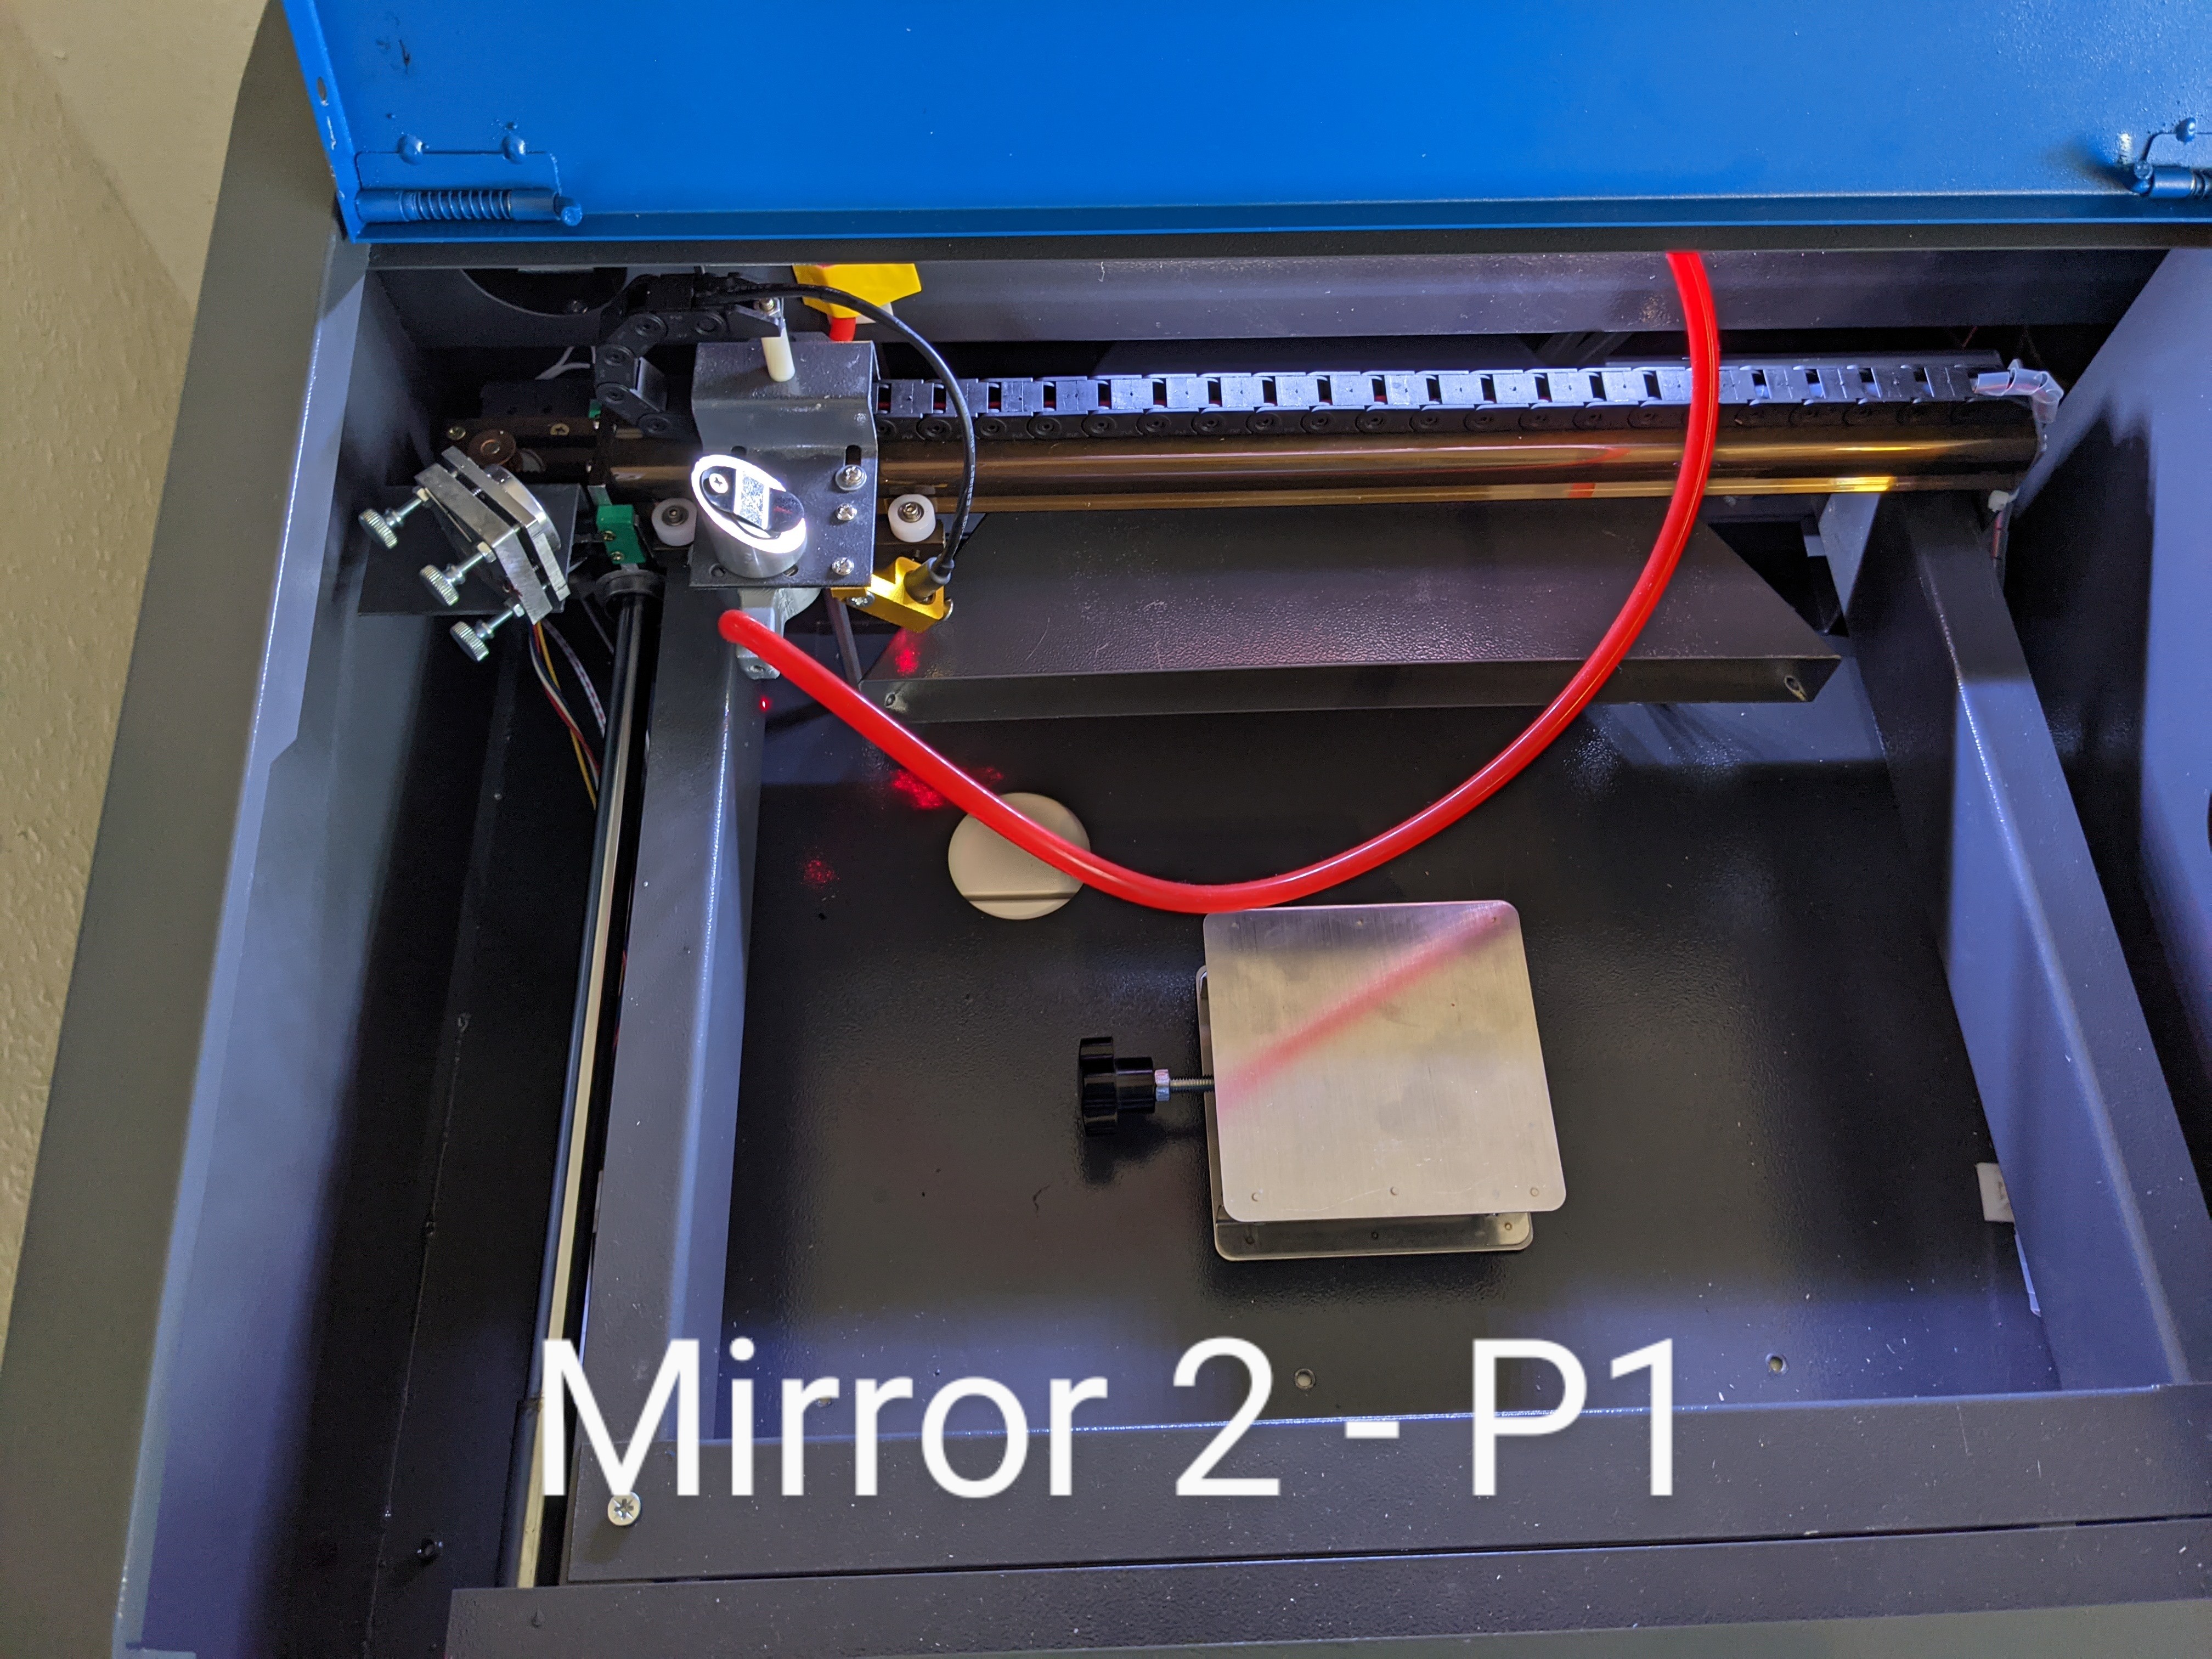
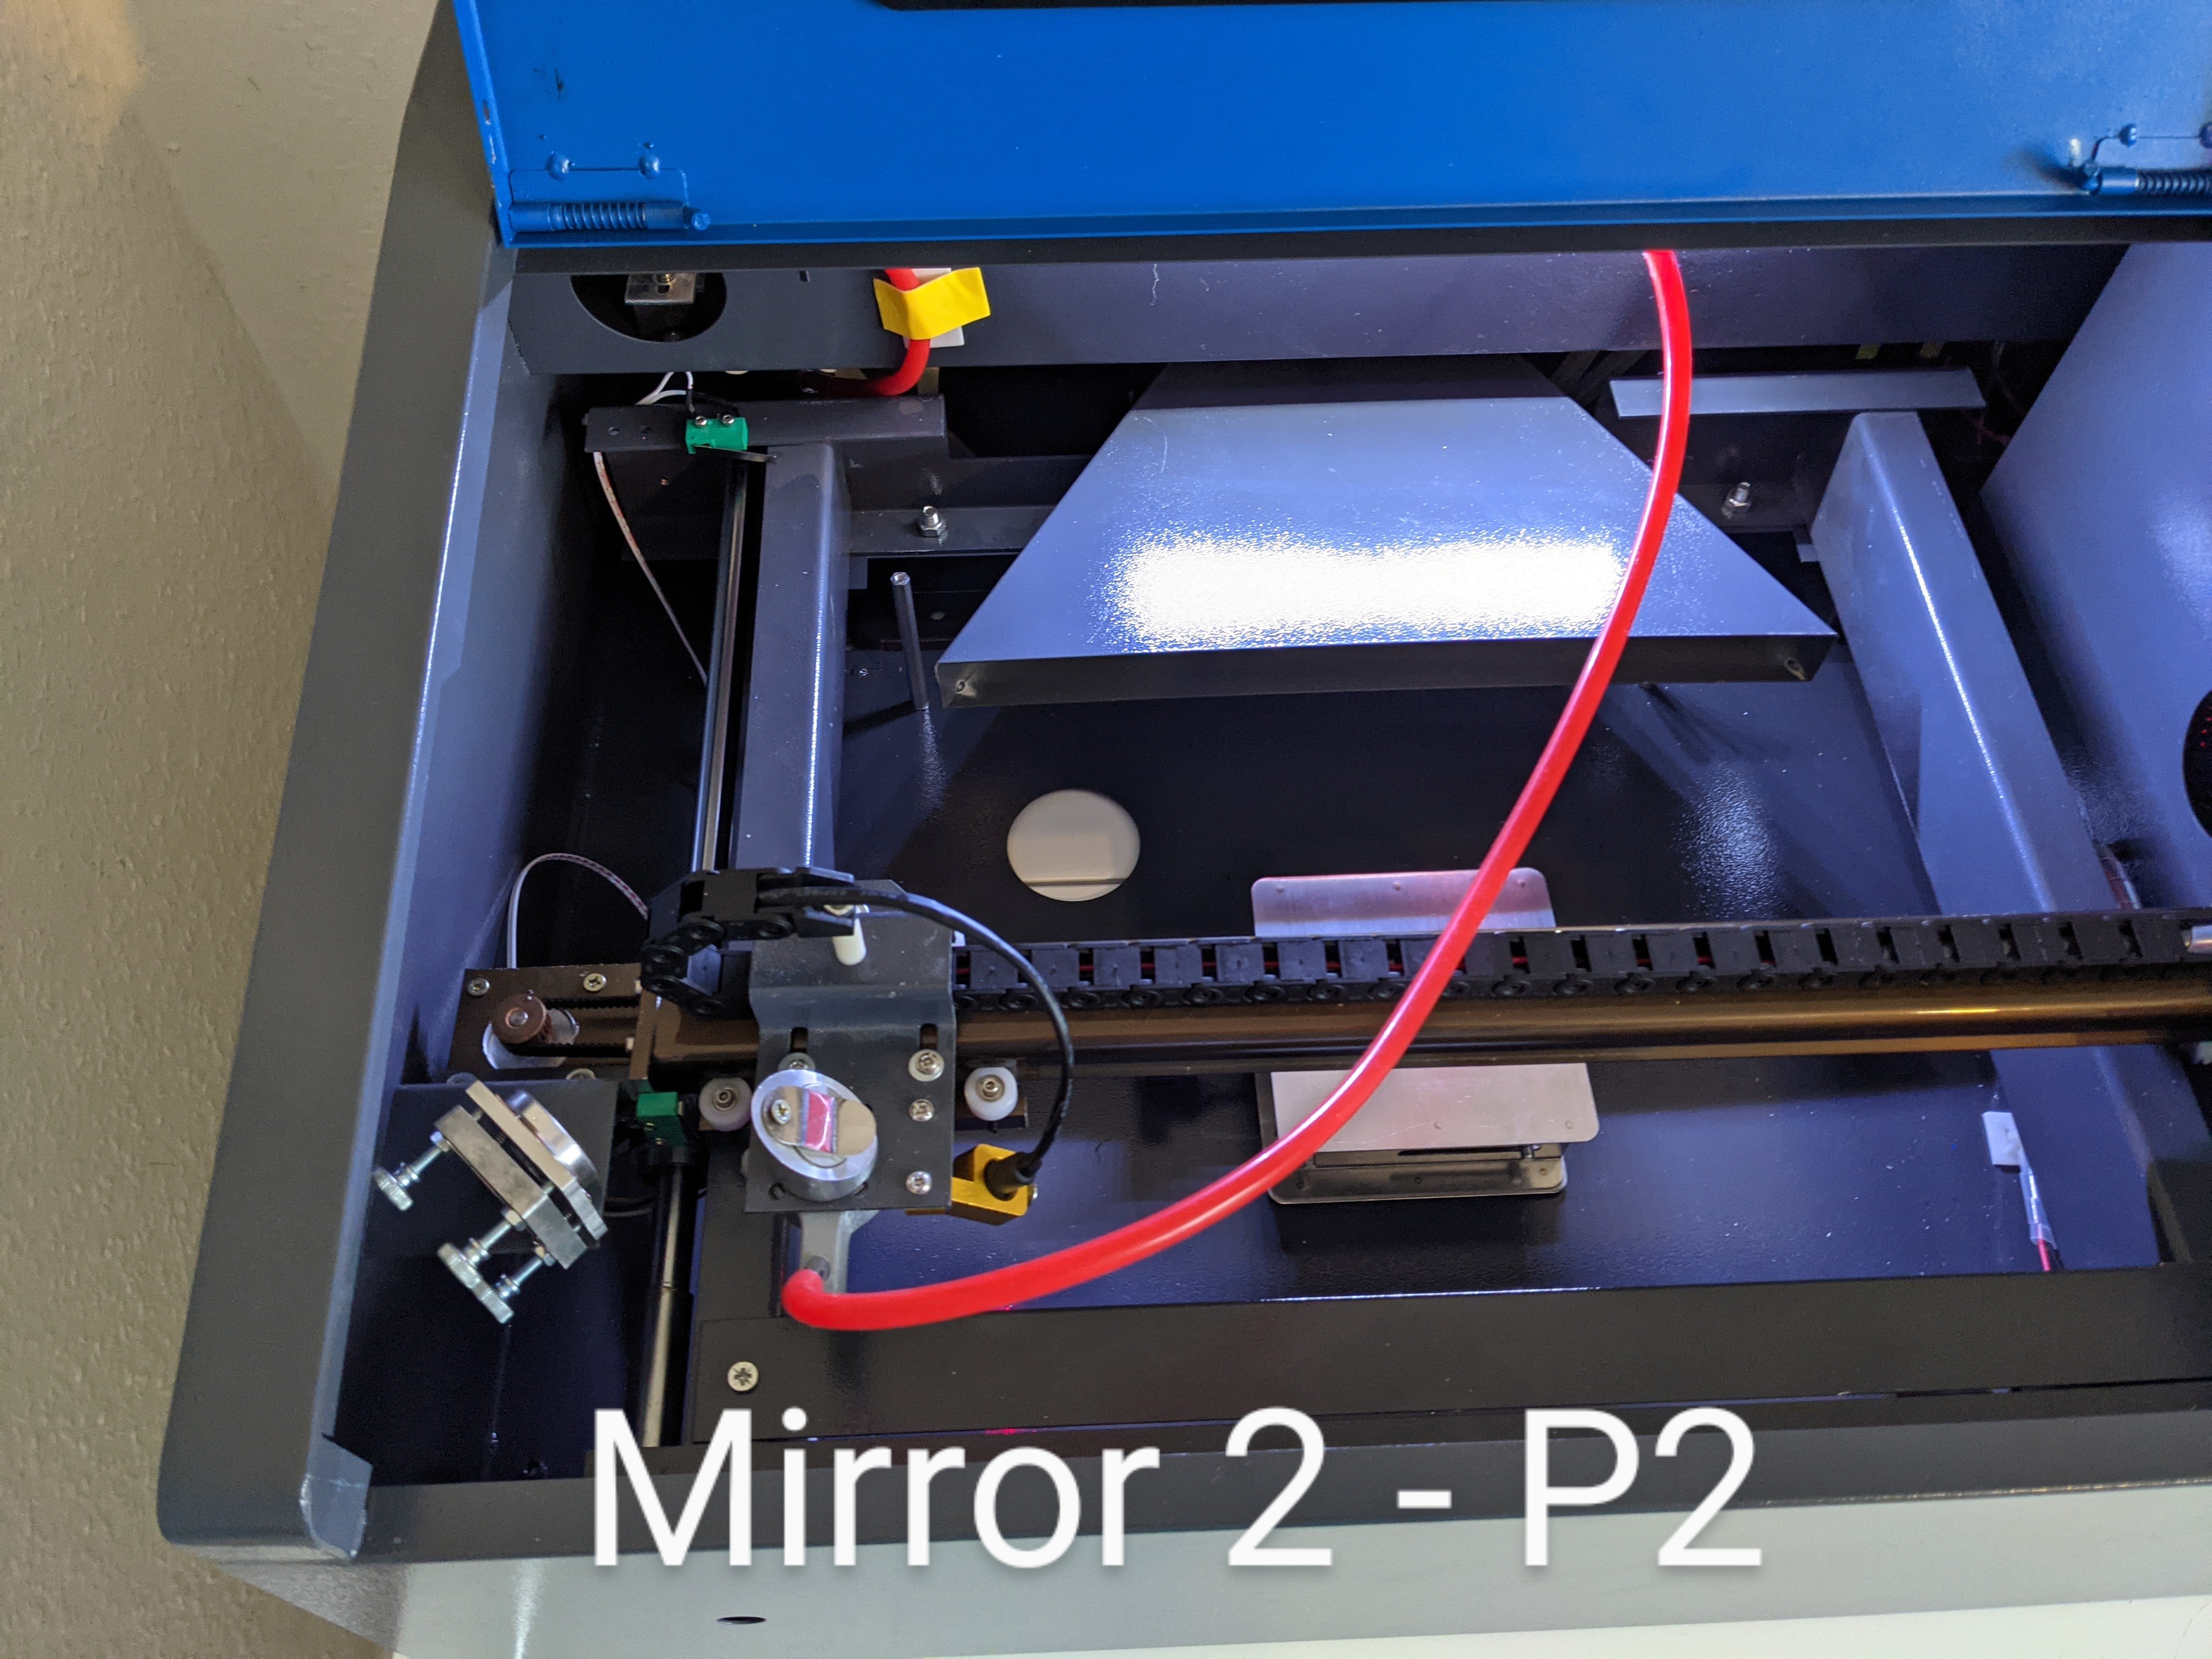
Thank you - will try the tape under the laser head now  … I’ve had a little weird thing happen tho - I’ve aligned mirror 1 + 2 (to the Y axis and mirrors, both make fits into of each other) but when I fire to mirror 3 on position 2 (top right corner) it’s making a double dot? Is this reflecting off the rim of the lens opening? Thanks again for helping! X
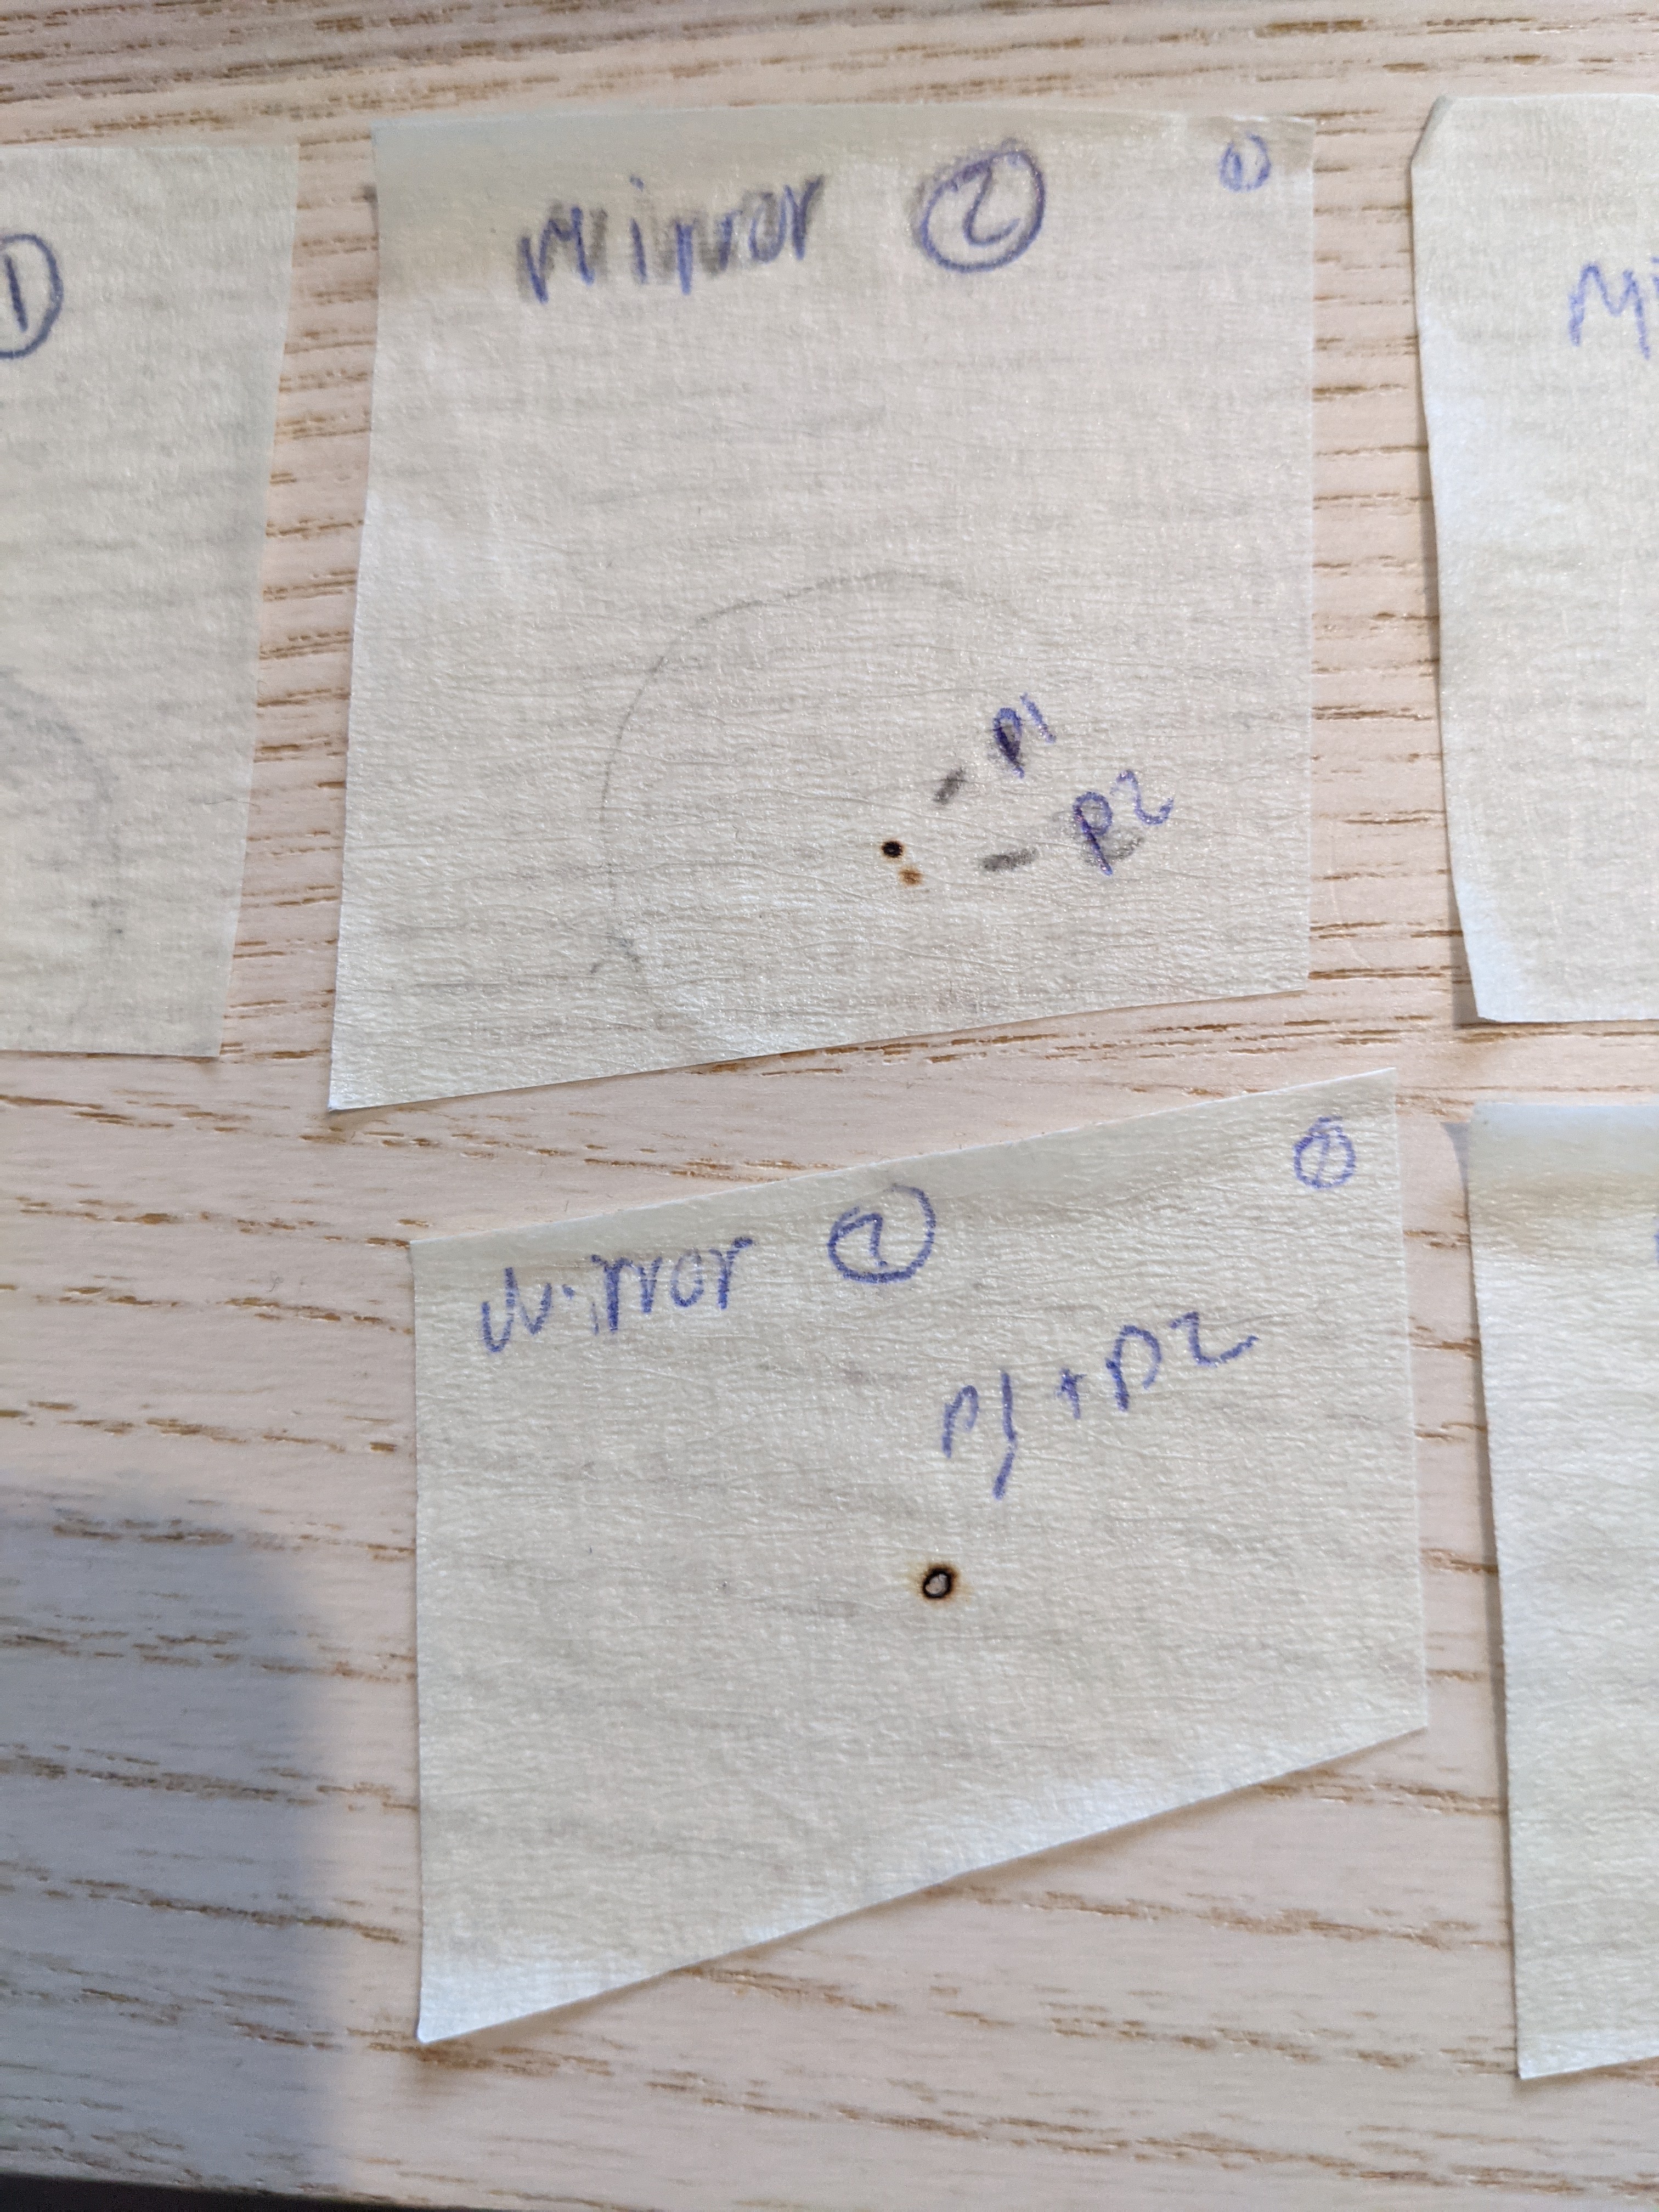
Stopped the double dot - but now the cut has a haze around it! I’ve ordered sone new lenses which should arrive tomorrow - I think I may need to raise the laser up a little because after I aligned mirror 1+2, mirror 3 dot was nearly at the top rim! The dot under the laser head was centred - abit confused about what’s happening tho! I hope I can figure it out eventually!
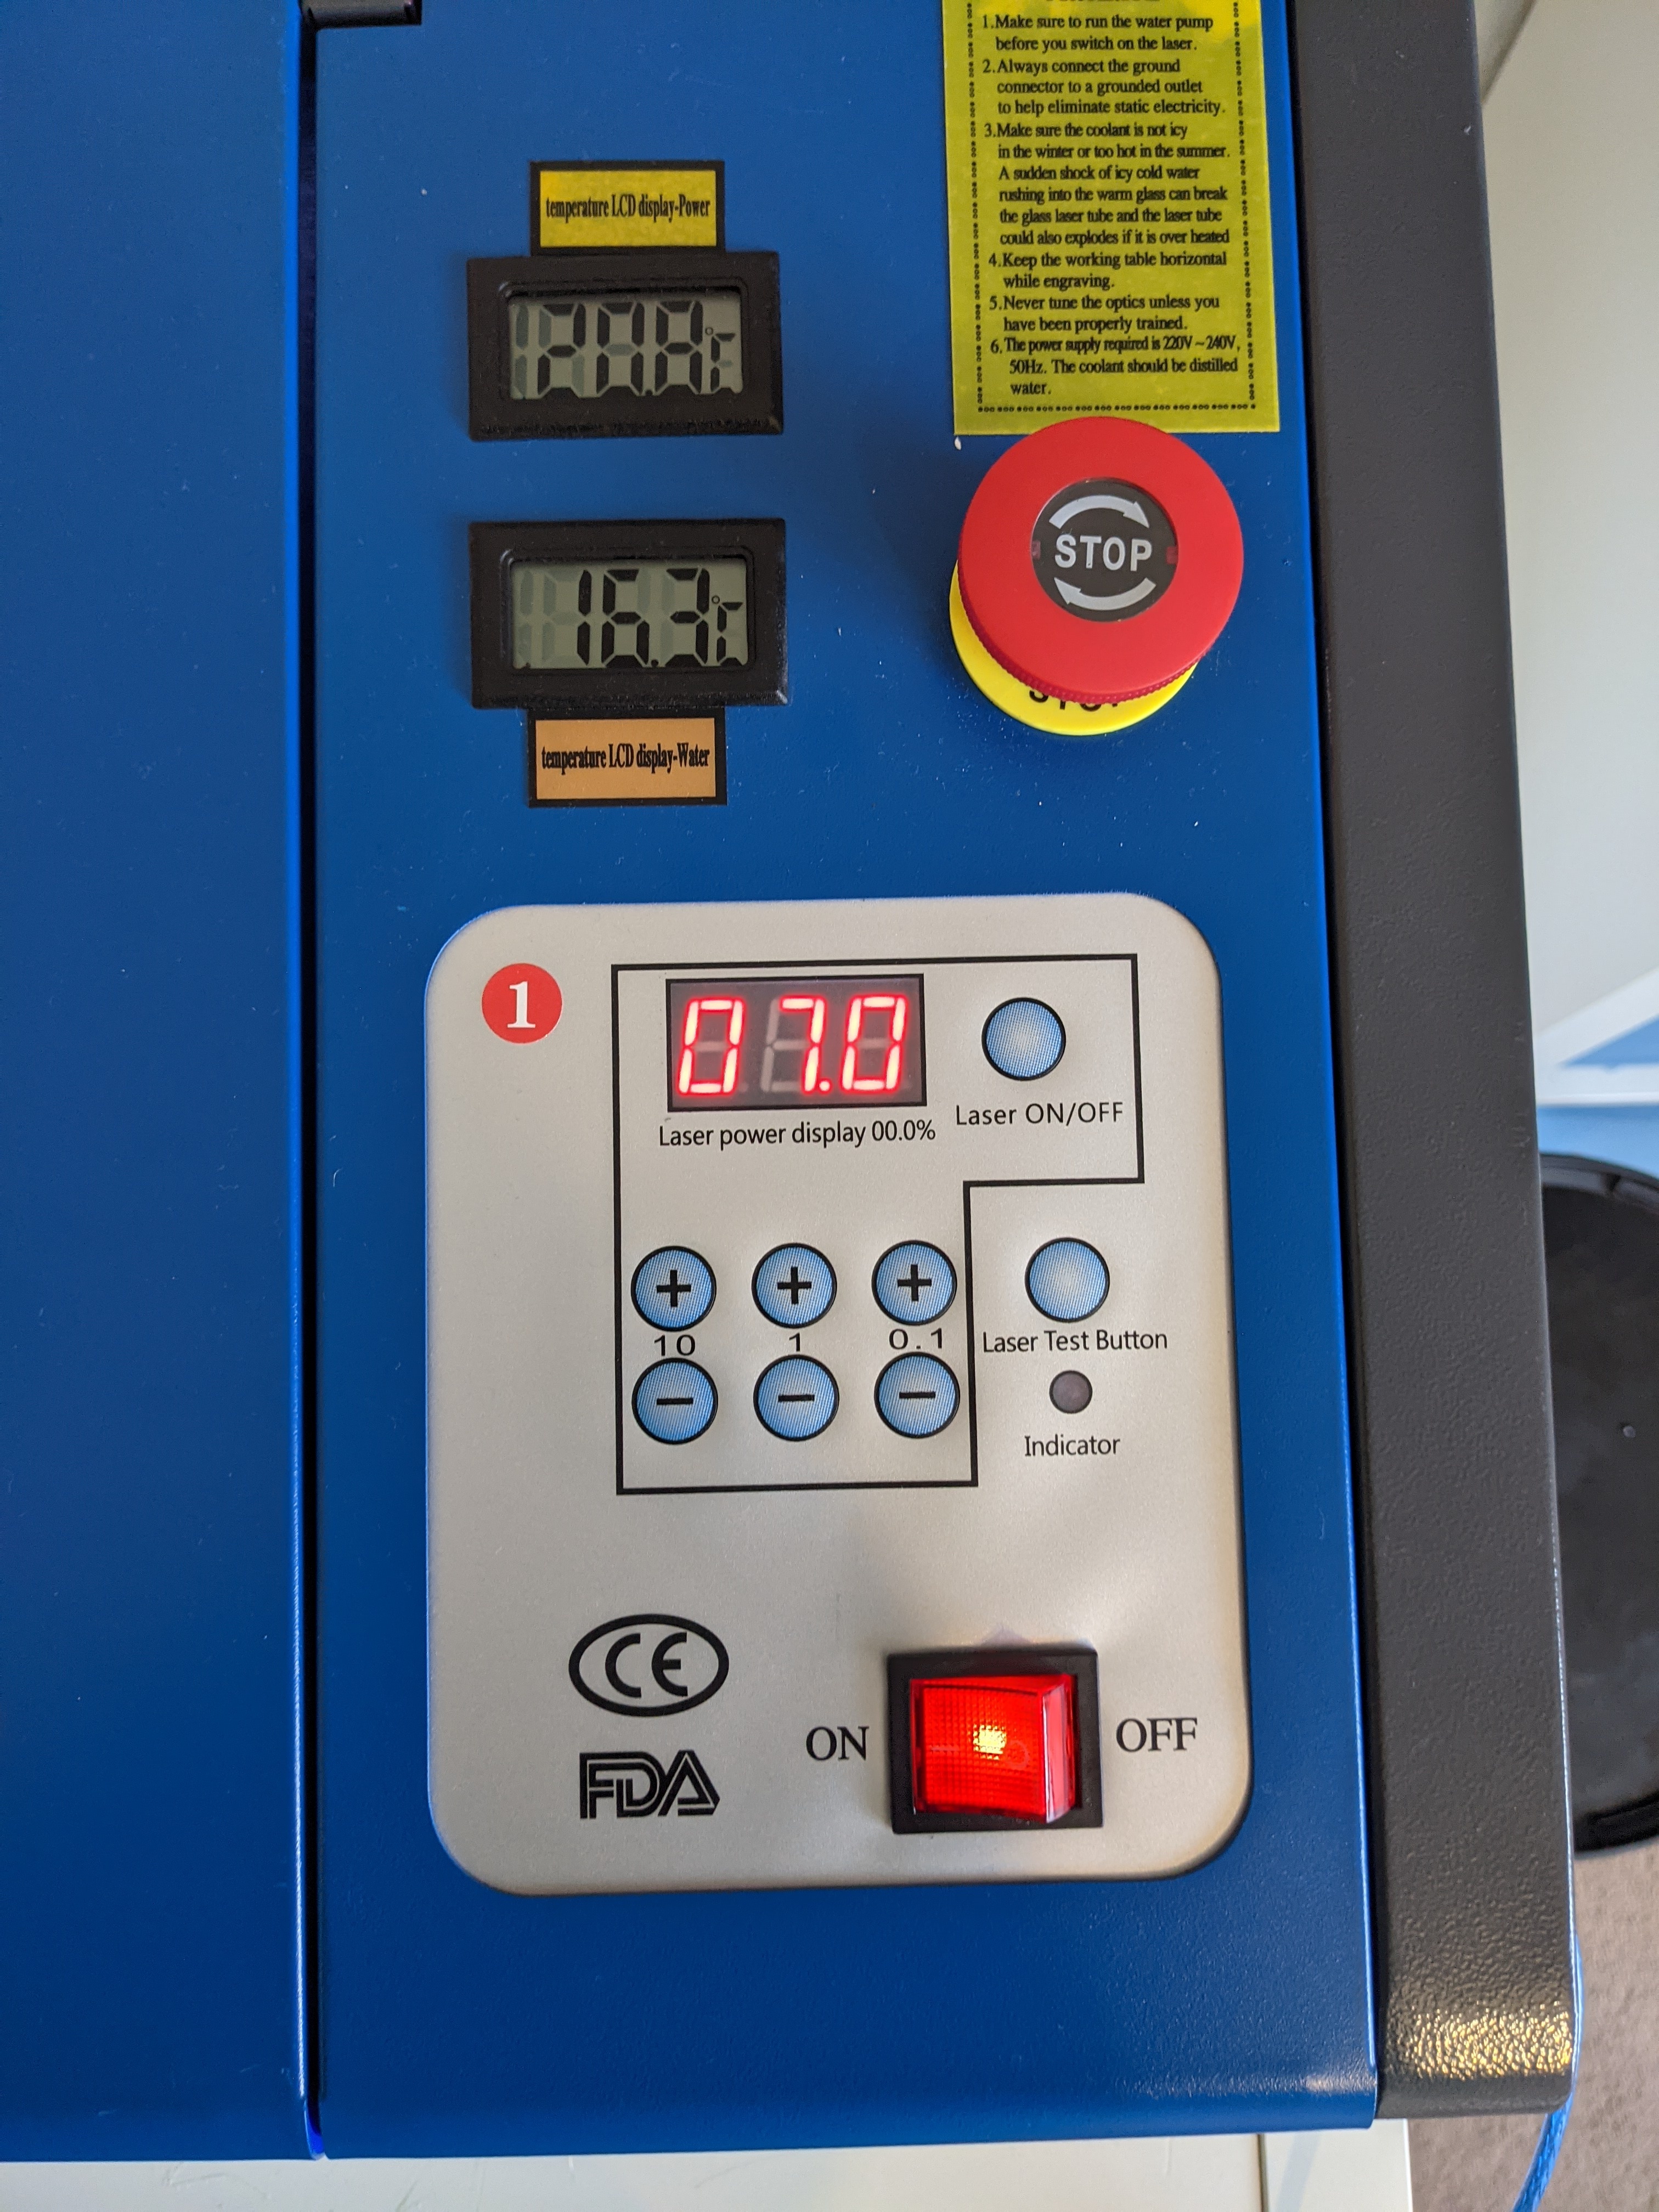
Glad you’re working out your alignment issues but you should not be running the laser at more than 40% on the digitial setting without knowing what the real power level is. I’ve seen people burn out their laser tube in less than a year thinking they were only running at less than full power when anything over 45% on their machine was 24mA.
Please read through all of the K40 Intro at the top of this page, one section specifically mentioned not setting the digital power meter over 40-50% because it can over drive your laser tube. In the Don’t section here:
That’s really good to know - I’m hoping to run it at the lowest power possible that achieves a nice cut etc, but right now not even full power cuts 3mm balsa wood  I’ve ordered some new lenses and laser head with built in air assist … will try again tomorrow!
Until you install an analog milli-ampere meter or directly measure with a multi-meter, it is highly recommended you set the power level to the minimum possible to do your mirror testing and lens calibrations( ramp testing ). Remember, setting that digital display to anything over 40% is likely over driving the laser power supply and the laser tube and these cheap laser cutters are not designed to last long when that is done. Hence the many recommendations to use an analog meter and never drive the machine over 18mA(this would be your 100% level ).
As for getting new parts, if it is a new machine you should not need new parts at this stage and although your pictures are from above, it looks like it already has air assist. Can you provide a couple of pictures of your laser head from the side so we can see what you are working with?
Once you know you are getting a single dot through all mirrors and out the laser head lens the very next thing to do is a ramp test so that you know where the focus point is. This test will also expose other problems regarding the lens like if it is installed upside down. You should not need new parts until you know there is something needing to be replaced.
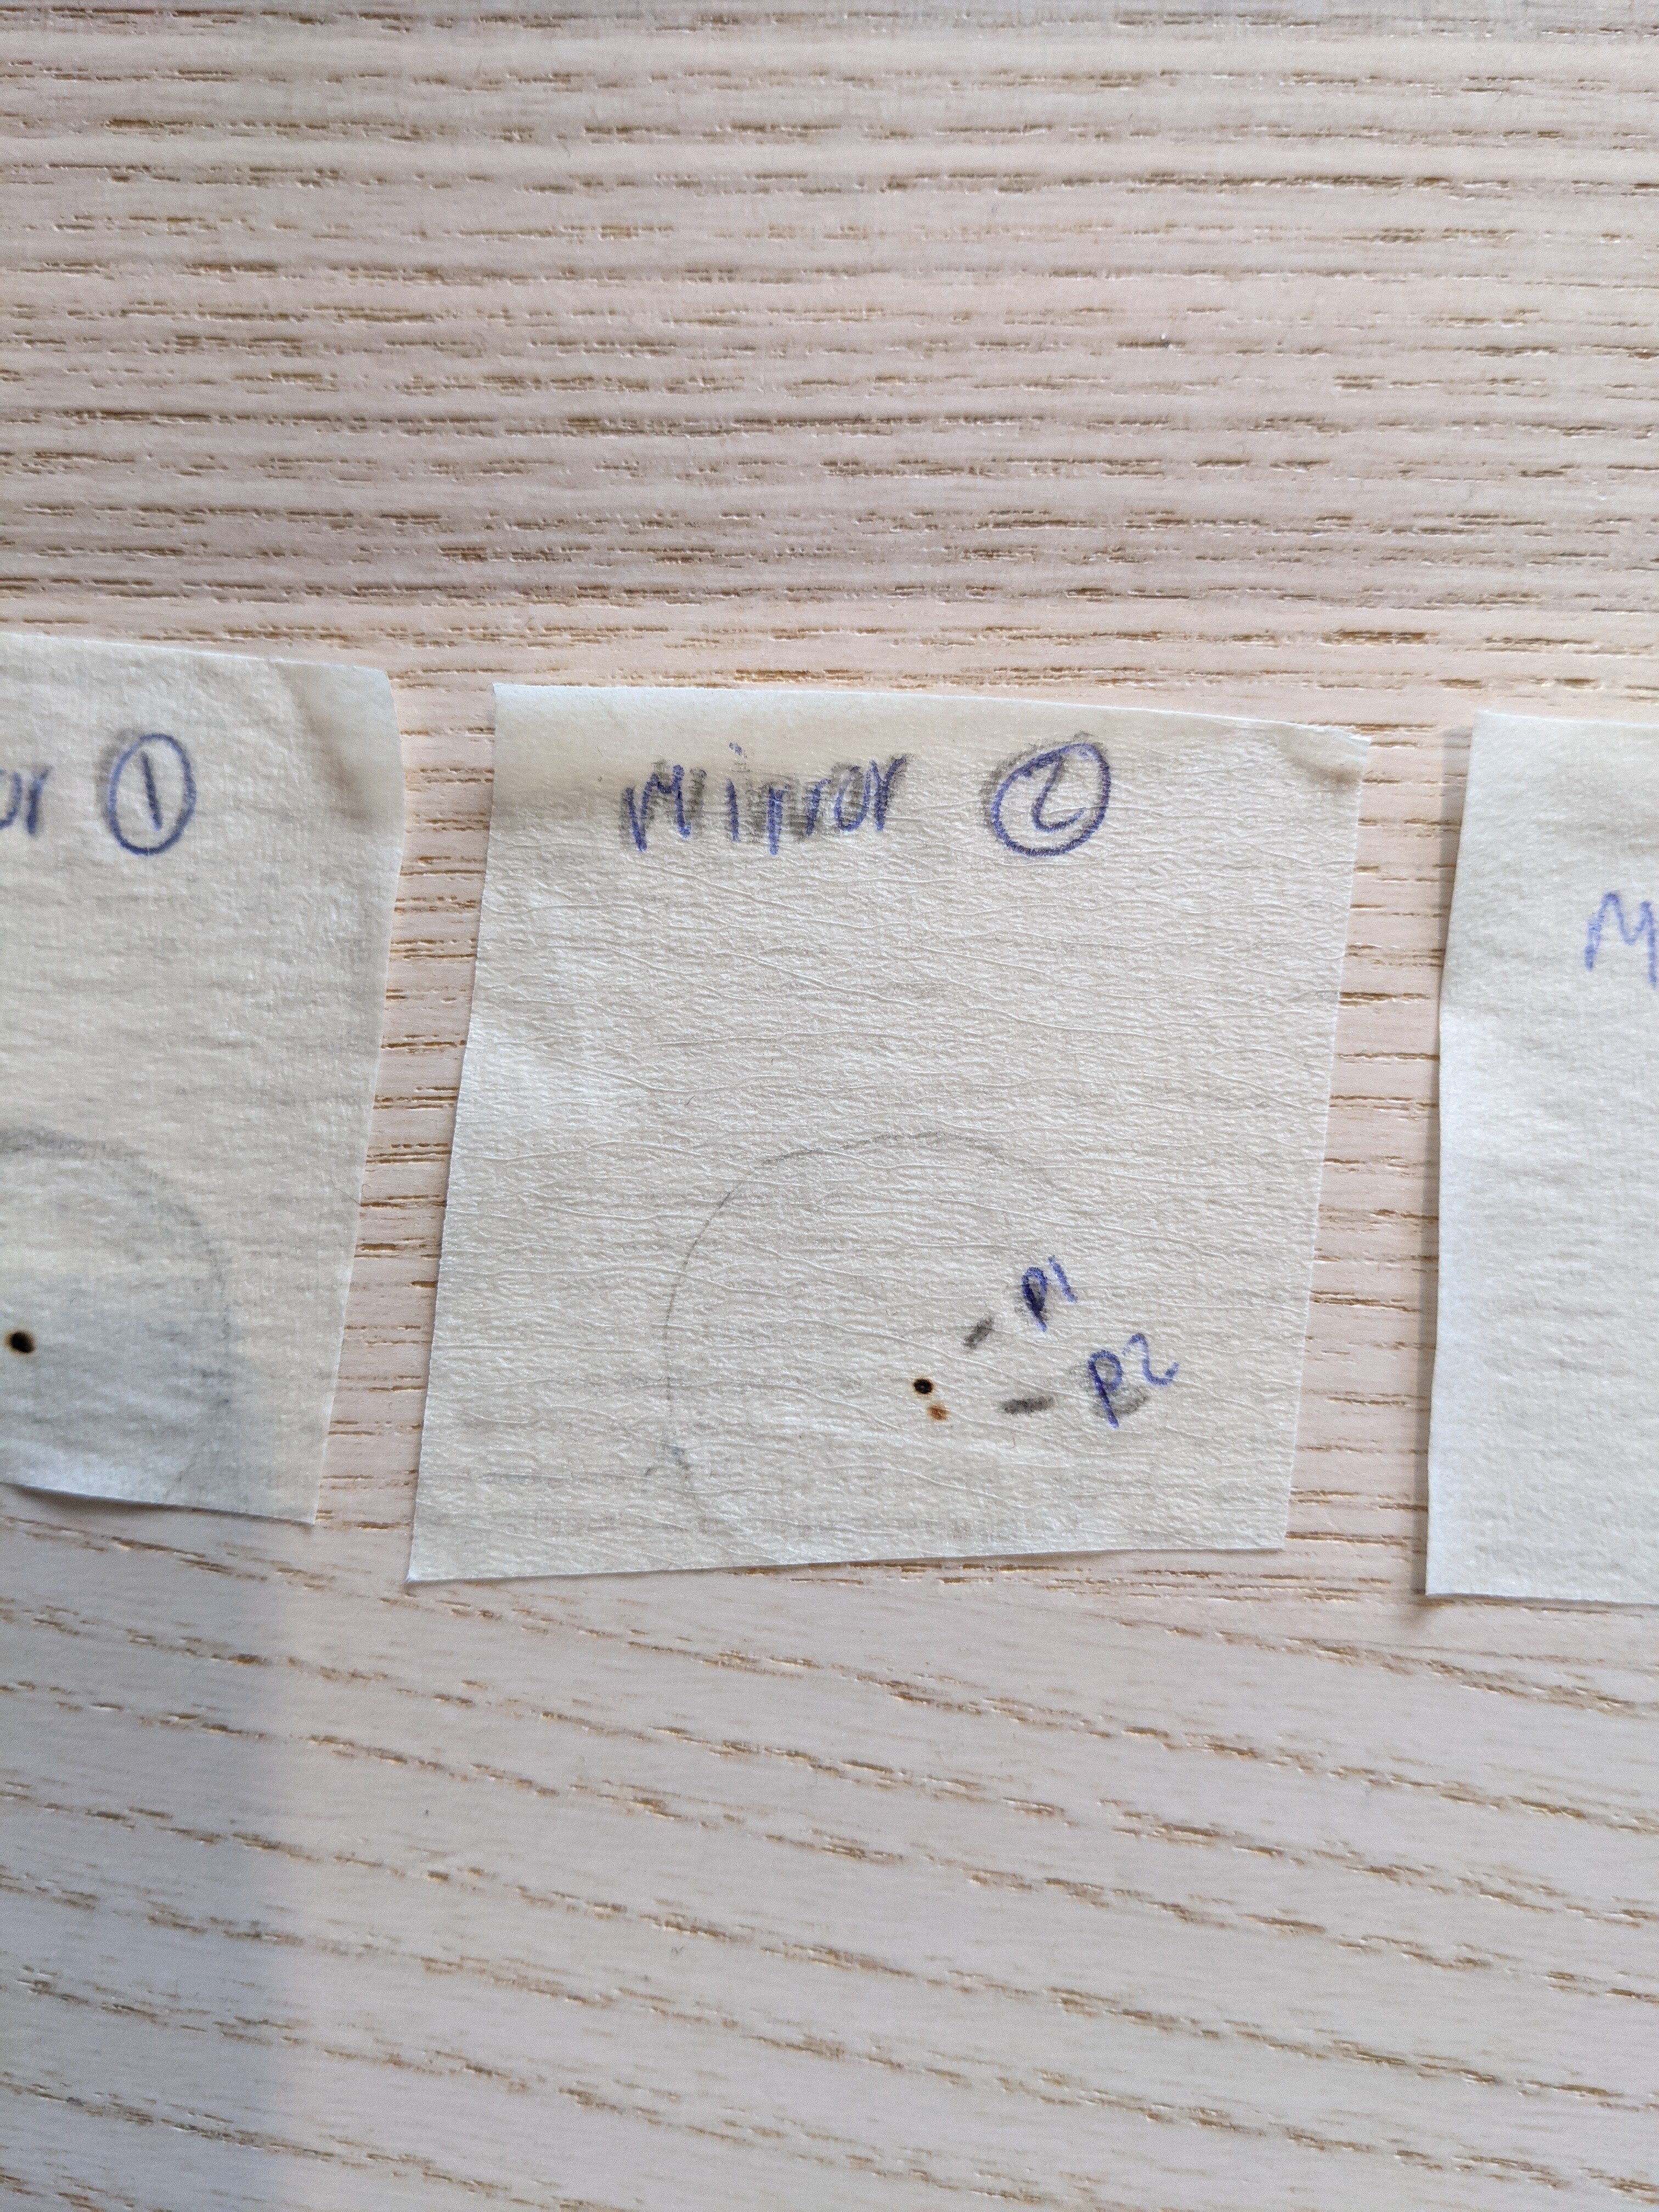
One more thing, I see you are using tape in front of your mirrors to determine the laser alignment and while you will find people saying to use tape, do not use tape unless you put something behind it so that any burn-through does not splatter molten glue onto your mirrors. Far better to use paper which has no glue on the back and at worst will put a little ash on the mirror which could be blown off with compressed air.
The other thing I noticed was the markings on the tape shown in the pictures are not burning through the tape. Is this because you have lowered the power level to the point it only marks or are you still setting the output to 80% or so?
I’ll definitely do post-its next time - I was a little worried about the scorch tests dirtying the lenses so I got a little acetone on a cotton bud to clean them - is this ok to use?
Yes, in a little cautious using high power, so lowered it to 7% - I have to hold for 5/6 seconds to get a burn mark in the far right if the laser - is this normal?
Decided to try and fit an Amp meter and a safety switch to the lid - do you know of any good video instructions for this? I have no electronics experience and really feel the fear when dealing with high voltage like this!
Thanks again for the help x
1 Like
I have not looked at lots of detailed instructions on installing the milli-amp meter so maybe someone else on this forum has familiarity with which one is best for someone without any electronics/electricity skills. Simply put, it’s a matter of removing the RETURN wire from the laser power supply, connecting it to one side of the mA meter then add a wire to the other side of the mA meter and connect it back to the laser power supply where the original wire was connected. IIRC the marking on the power supply is “L-” but the instructions should show and describe it better.
Good job lowering the output power to just mark the tape. And yes you can use acetone to clean them mirrors with a swap but be advised, the technique is to gently move the swap while rotating it one turn, repeat with the cotton swap at the other end of the Q-tip(they have 2 tips) then throw it away and use another. You don’t want to cause friction/rubbing on the mirror using particles removed from the mirror. Yes it can take up lots of cotton swaps to clean a mirror.
Great thank you for the tips on cleaning the mirrors - mirror 2 was pretty grimey! And for the Amp meter info, will get my hubby to help with that, he’s computer savvy but not electrical (if that makes sense!) but hopefully between us we can do it safely 

I am a little disheartened tonight, really want to get it working properly and finally make something nice! I was aligning the mirrors for a good couple of hours but it seems like they’re worse now! Mirror 1+2 are aligned but having real issues with mirror 3 - I can’t get the dots to sit on top of each other in all 4 corners of the laser bed - I’ll have to do some more research
Thanks so much again, all this help and Information has been amazing xx
1 Like
Make sure that the lens is installed correctly. The concave side must face up and the planar flat side must face down to the work piece or work area. In order to cut wood you need to be in focus. A few mm out of focus and the cutting is not happening. I always replace the Chinese lens with a proper USA ZnSe lens. Be care full with handling lenses since three are slightly radio active. User gloves. Good luck.
Thank you - I’ve just re- watched and taken notes again from John Cabrer alignment videos - had a little aha moment and realised I was adjusting at the wrong points with mirror 3 + not moving mirror 2 into the path of the beam and instead wrongly adjusting the screws - I’m going to re-do all this tomorrow when the new mirrors arrive - just realised I didn’t order a new lens for the laser head - would this be something I should do also straight away or see how the new mirrors function?
Sorry for the tonnes of questions and pictures! I hope this can be helpful to someone else who is starting out too! Definitely a novice right now - but I’m deturmined to get it right!  X
X
Back when I first got my K40 I read the K40.se site FAQ from front to back, actually did it before the machine arrived, and later as more people purchased K40s and mirror alignment issues were plenty, the author of the site went back and wrote a step-by-step method many said was the best around. I don’t know if that still holds true but maybe read through this and see if it has something not in the one you followed:
And remember, sometimes the black frame all the motion stuff sits on can be out of whack too. Some have had to put washers/shims under one or more of the 4 bolts holding it down to get all the mirrors and motion elements on a single level plane with the laser tube. FYI, on high-end machines the frame the tube sits on, the mirrors and the motion elements are all one structure. The K40 is great for the price but sometimes we have to adjust things to make it work well once it’s in our own work space.
“The fear you are feeling is a good thing” — but perhaps this will reassure you a bit. Fortunately, you are installing the ammeter on the low voltage side of the tube. There’s 20,000 volts or so going into the end away from the mirror, but on the side where the beam comes out, the side you attach the ammeter to, it’s close to zero—might be around 10 volts between the tube and the ammeter, and closer to zero between the ammeter and the terminal on the power supply.
There is one important caveat: Make sure the connections on those wires connected to the ammeter are secure at both ends. You don’t want them to break, and you don’t want them to detach. As long as they are connected, you are fine, but if they break, paradoxically they are more dangerous…
I think the videos at American Photonics mention that this can be the case. It’s one of the reasons why their tool can really make the process less frustrating. But even if shipping to you is inconvenient, you might find their videos very helpful. For example, I think they explain @Paul_de_Groot’s point about how the lens needs to be mounted to work.
So much better than not asking! ![]()
The usual complaint among regulars here is when people don’t ask questions first and get themselves into trouble.
Please keep asking. Questions can include asking what to buy, including posting links to things to ask whether they are the right thing to buy.
2 Likes
That’s really good to know, I’ve just had a quick eyeball at the gantry and it dies look pretty square but will check this properly after I’ve fitted the new mirrors + lens today! Crikey I hope it does the trick! I’ve bought a new laser head as well with the 20mm mirrors etc, hopefully that will give me a little more wiggle room with alignment! I’m literally going to have a party if I get this cutting! X
Thanks so much for the lovely comment and encouragment - you all have really helped me keep calm the last few days!
I will re-read all this info when I fit the Amp meter! and thank you looking at all my pics etc, gives me a little more confidence in the things I’m doing so far! Hehe x
2 Likes
SUCCESS!!! OMG SO HAPPY!! thank you everyone, for being so helpful, you’re amazing!!
So, finally have everything aligned and in focus - the magic mods that made this possible are upgrading the Mirrors + lens (plus the old lens was in upside down and was really messy!) … now the power is Uber strong I’m so glad I put the time into installing the air assist! I didn’t switch it on while doing a test shot and there was flames! No flames at all when the air is flowing so really chuffed about that!
I’ve put together a check list of all the extras I’ve bought to get my laser to this working condition - thought it might be helpful for someone else thinking of getting into this - it’s definitely been an education for me!
K40 laser - Orion Motor Tech - £429.99
Air Assist:
Compressor - £35
2 x Silicone tubing - £12.38
Adaptors (eBay) - £8
Distilled water - £10
25l bucket - £11.50
Mirrors x 3 - £33
Lens - £17.28
Scissor jack - £12.99
Combination square - £6.50
Honeycomb work bed - £35
Mini fire extinguisher - £20
4"duct hose - £15.98
Cloudray safety glasses - £36
Total spend: £683.62
The first laser I looked at was a glowforge, but the £3000 price tag for the basic was out of my range - I’m really chuffed with what I’ve got now for the money - and I feel alot more confident maintaining the laser after the crash course this week!
I’m sure there will still be bumps in the road and more upgrades to do, but for now I’m a very happy laser girl
Thank you so much for all you help, your all flippin fantastic! 

5 Likes
Trying to post pics but keeps failing - I’ll set up done links instead 
