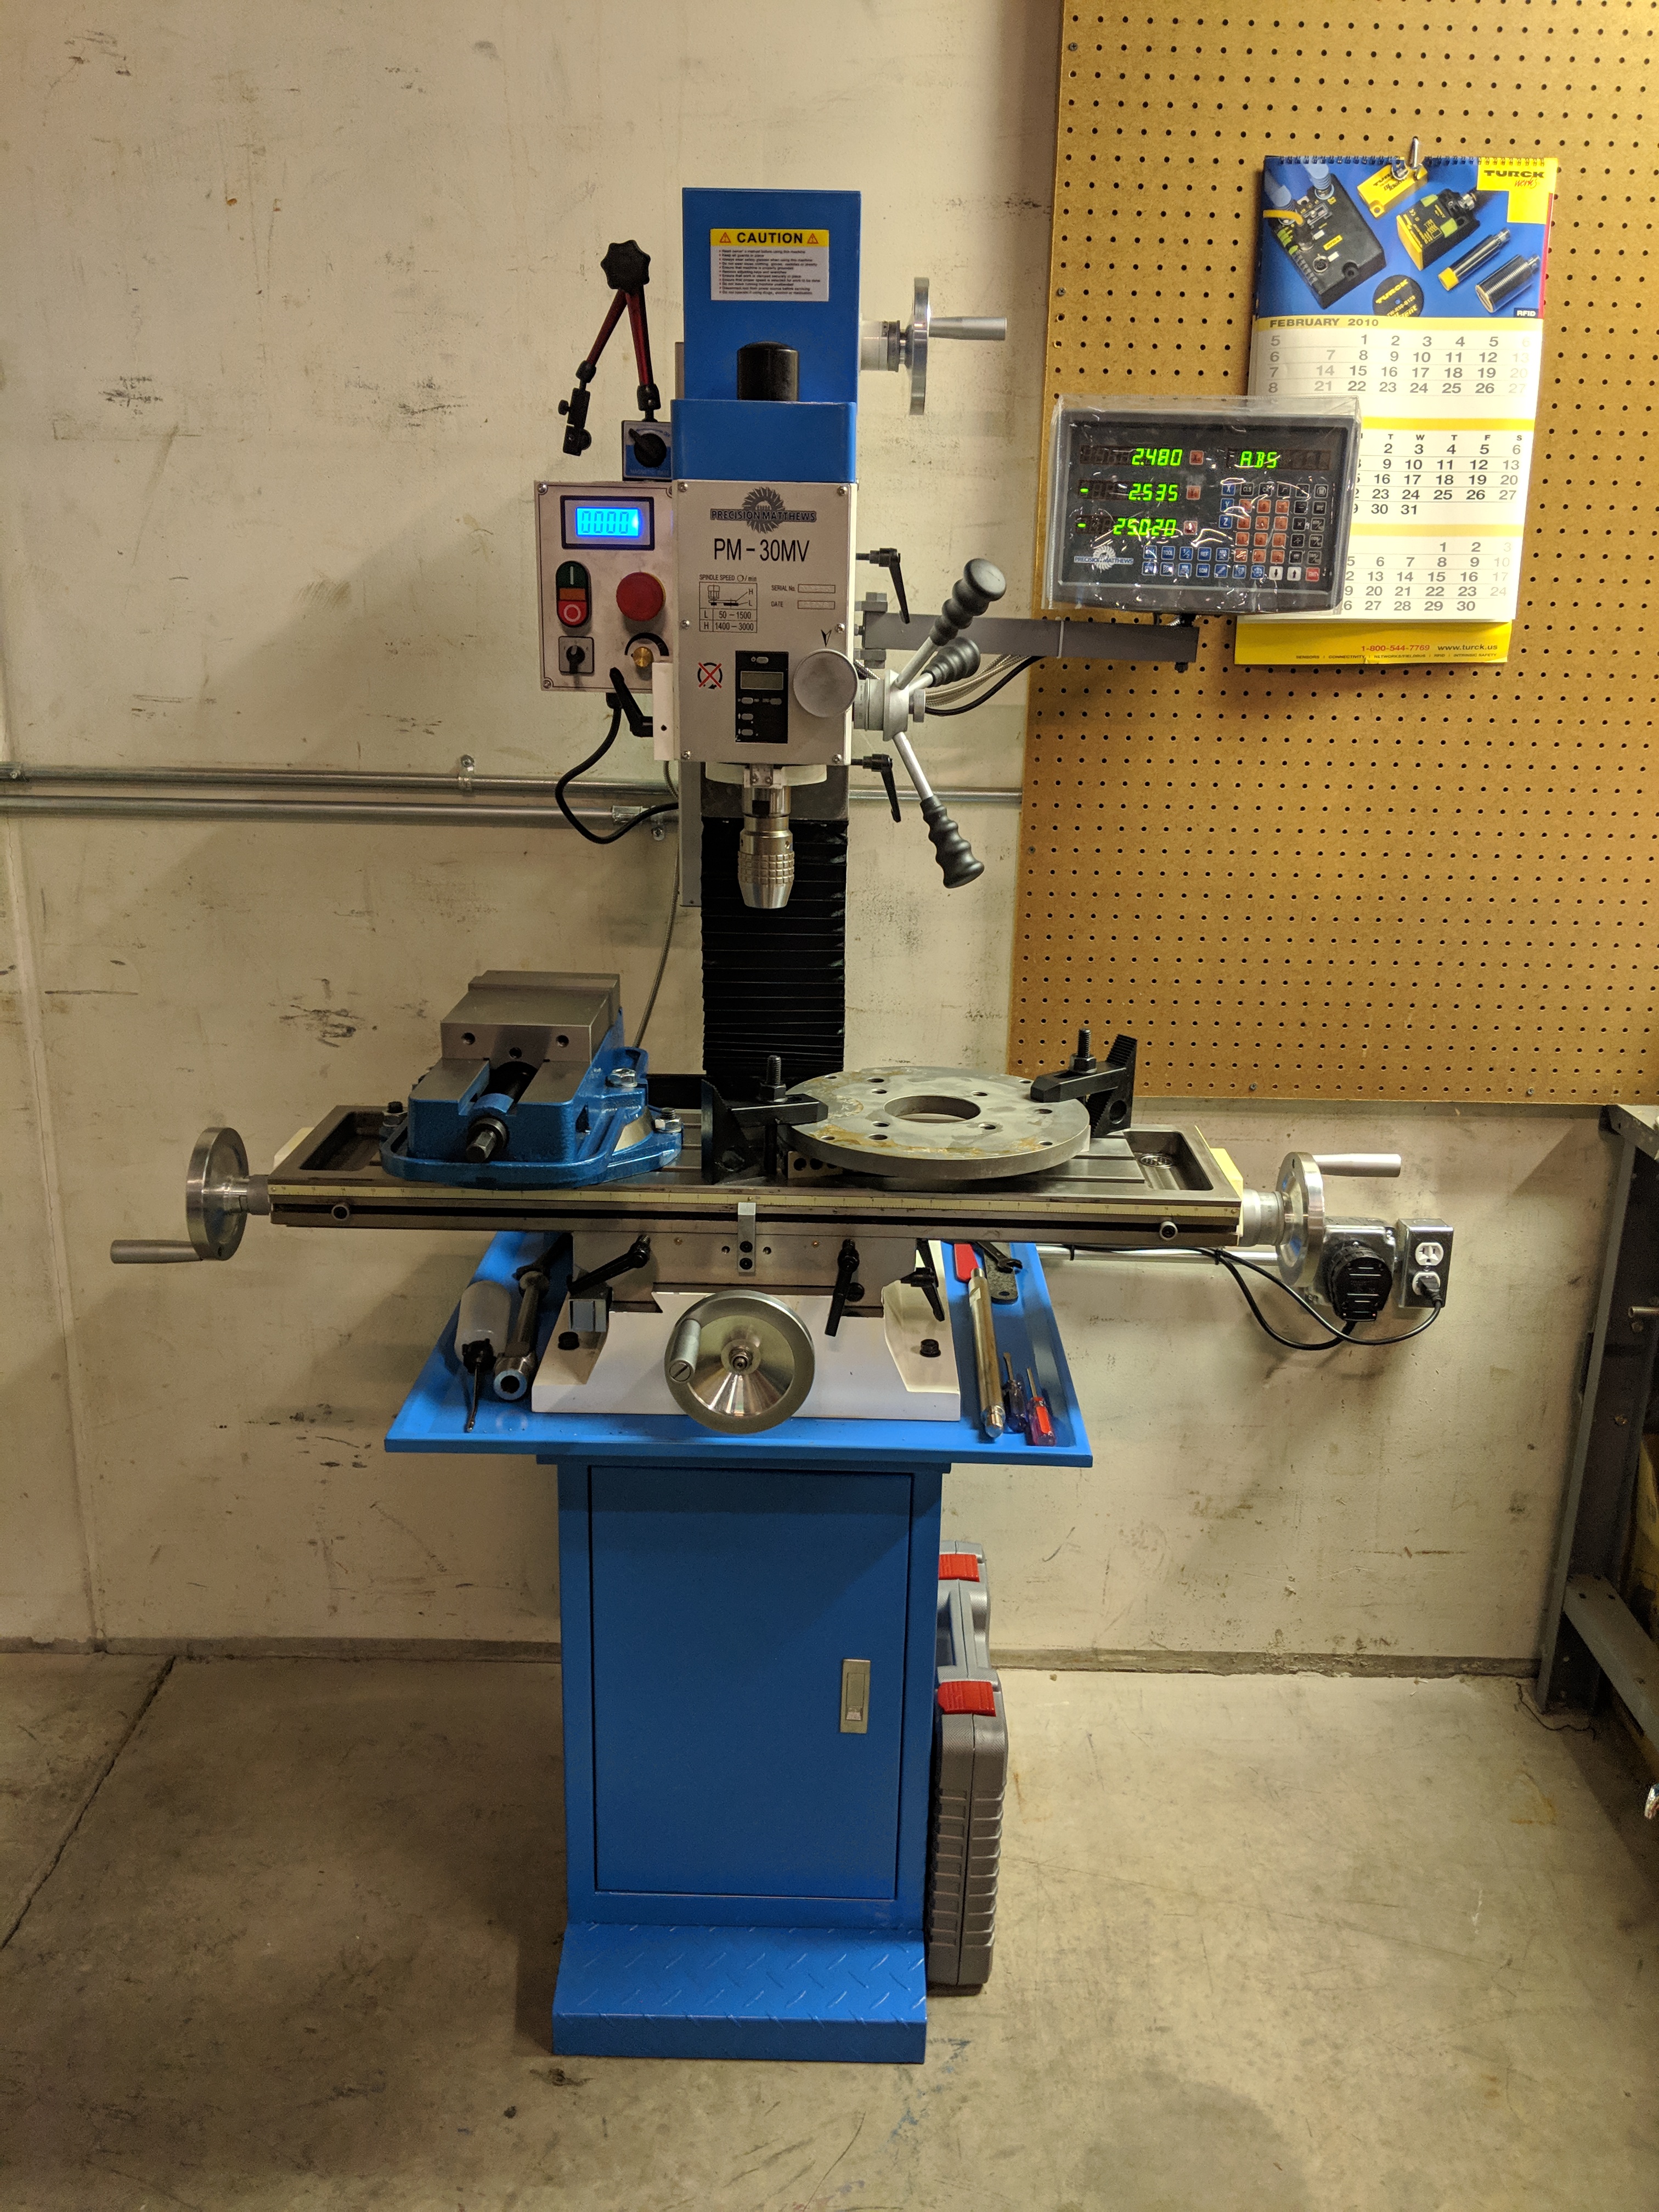
Not CNC, but manual mill… Last year I bought a mill that has a heavy head with no power Z feed. I was making a power feed for the head when Google announced that they were moving up the Google+ use-by date from August to April, so my Z feed project went on standby. A few days ago I started playing with that project again. Today I ran the head up and down under power for the first time.
I still have to do the electronics and put a switch on the front of the mill to control it, but that’s the easy part. Mostly it’s ordering the right momentary-contact switch and waiting for it to arrive!
I found that stand too low, as well as too narrow, and regretted buying it. I ended up going to Home Depot and picking up a large rolling case to put it on instead. So now I have a stand for which I have no use.
I bought the X power feed and wonder whether I would have been happier fabricating my own. It is kind of clunky, and if I’d hooked up stepper motors I could know my feed rates; as it is I’m guessing. And the limit switch block is big and interferes.
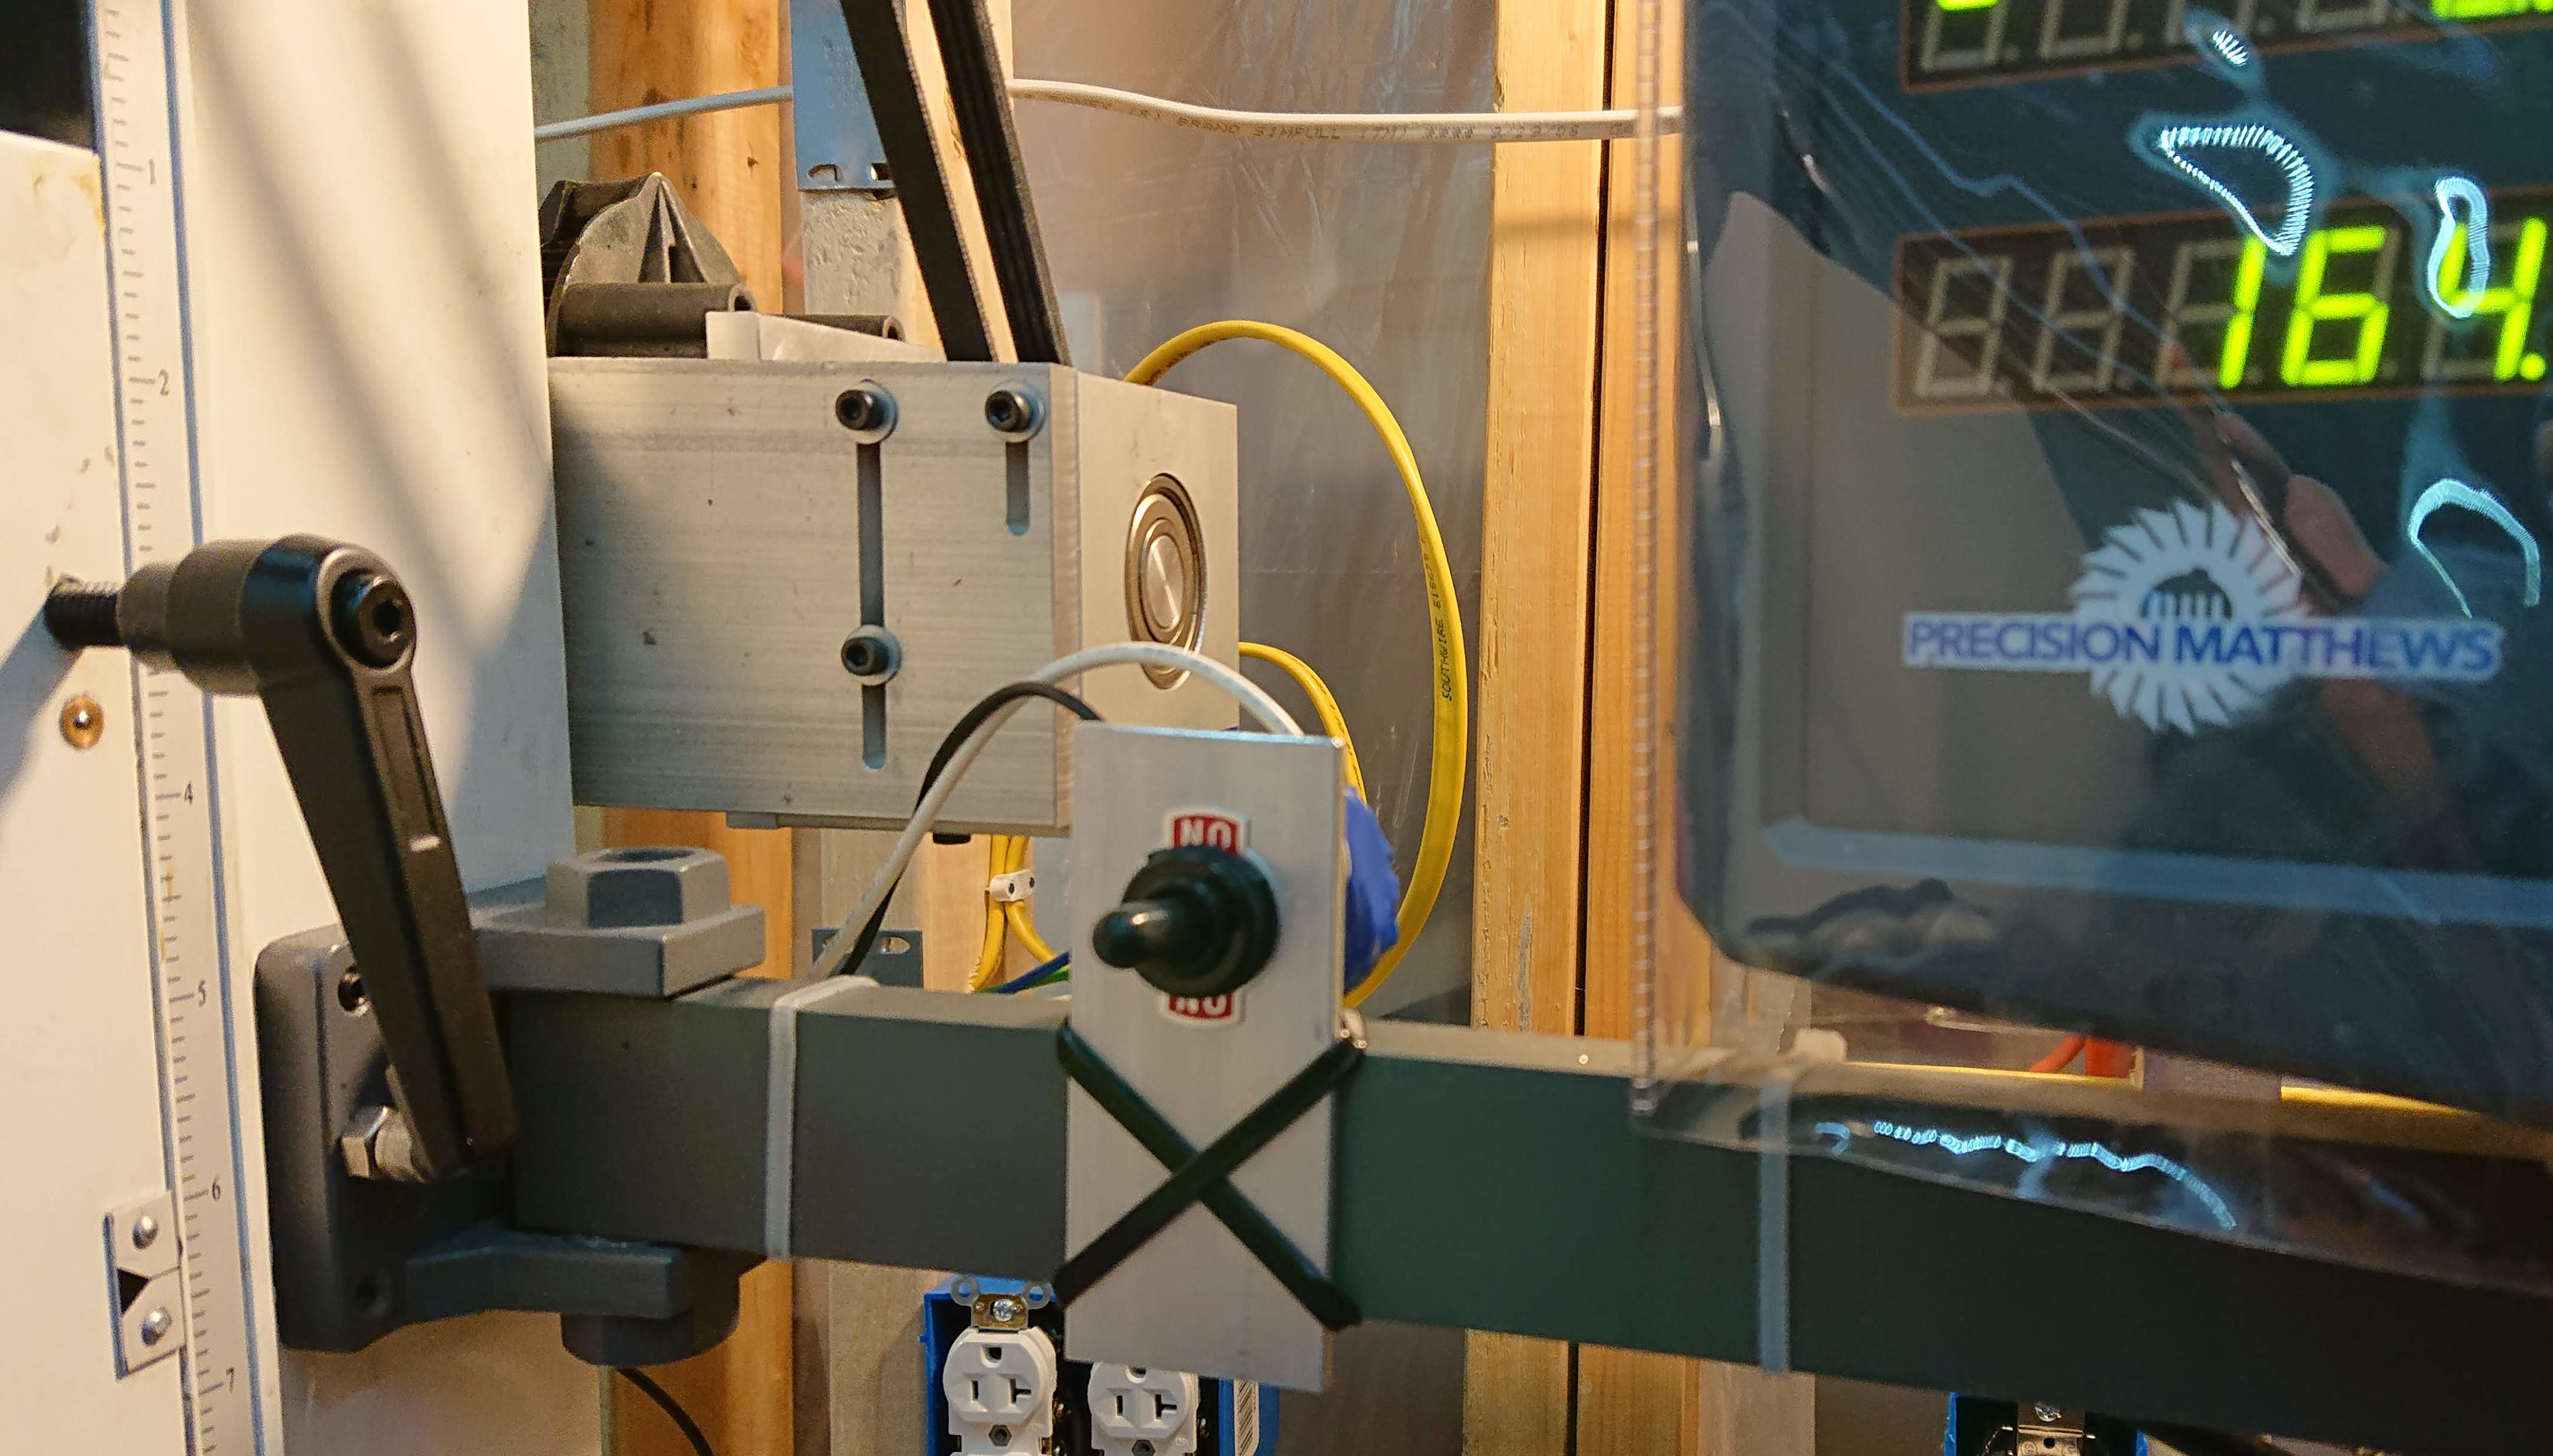
Tonight I went looking for a switch to complete my build.
I have a DPDT (on)off(on) momentary switch, which I can use to run the motor forward or backward. However, the brush trimmer — that sacrificed itself (in my hands, as I was using it) to make this project possible — had a nice feature that when it wasn’t supplying power to the motor, it shorted the motor to stop it more quickly.
I could do this and also be able to switch polarity so that I can run the head both up and down with a 3PDT or 4PDT (on)on(on) switch, but so far I’ve found exactly one of those with screw or spade terminals, and it’s $50. So I think I’ll hope that with the load of running the head the motor stops easily without being shorted!
I had been thinking of mounting the switch in the hole that used to hold the wires for the safety shield that gets in the way of, you know, actually using the mill. (It’s very safe as long as you don’t turn it on or tip it over!) But there’s not enough room inside the head for the body of the switch; the hole is too low.
So now I’m trying to decide whether to 3d print a switch housing and fasten it to the electronics box, or drill a hole in the electronics box, or something else.
It “coasts” a little moving down, so I need to stop early and “bump” it a little or crank the last half an inch or so by hand to avoid a crash, so if I run across a spare 3+P3T (m-on)on(m-on) switch I’ll hook it up to short out the motor in idle. In the meantime, I’m just dealing with it. I need to keep my brain engaged all the time while using it anyway!
Still not big enough, but better than the mini-mill that I’m CNCing!
Max. Drilling Capacity 1-1/4″
Max. End Milling Capacity 3/4″
Max. Face Milling Capacity 3-1/2″
Table Size 8-1/4″ x 33″
Cross Travel (Y Axis) 8-3/4″
Longitudinal Travel (X Axis) 23″
Spindle Travel 3″
Net Weight (Not Including Base) 530 LBS
The Y travel is less than listed because of the DRO scales.
Y travel has been the most limiting factor. If I had a do-over I would consider https://www.precisionmatthews.com/shop/pm-833t/ instead. It’s twice the weight, adds several more inches of Y travel, and has one-shot lubrication. But on the other hand I really like the variable speed of the DC motor, and the PM-833T doesn’t have a quill DRO which seems like an inconvenient limitation; I use quill DRO often.