I waffled on openbuilds gantry sets vs. linear rail for X and Y.
I just ordered 1440mm long X rail with short (C) carriages, and 2 850mm long Y rails with long (H) carriages. I went with MGN12 to be wide enough to attach over T/V slots, but saw no reason for wider and thus heavier MGN15 or MGN20. I went for H carriages on Y for additional resistance to tangential racking forces to avoid potential binding from the overconstraint. (I’m also thinking about using a custom 3d printed plate to attach the Y carriages to the X rail in order to bend instead of bind if anything goes wrong.)
No, I didn’t buy real hiwin. Not for 1440 X and 2 850 Y rails. But if they are loose, I don’t think that I’m going to notice the lack of precision relative to the width of the laser beam; if the bearings are tight, I’ve successfully stoned the grooves in MGN rail to run smooth after replacing bearings and discovering that the new bearings were a little larger than the previous ones. Also, if they run rough, I can stone out imperfections. So right now I’m betting on “good enough is good enough.”
For reference, from banggood, MGN12-1C-1440 was $50, and MGN12-1H-850 were $40 each, plus $36 to ship the three. $166 total.
The rails I got don’t run perfectly smooth out of the box. They aren’t the worst knock-off rails I’ve experienced, and definitely not the best. I haven’t yet cleaned and re-lubed them; I’m hoping that solves the problem; if not I’ll stone the rail slots with an ultra-fine diamond card.
A very light coat of light lithium grease made them run fine. They aren’t Hiwin, but they’re good enough.
I’ve designed and am now printing the second iteration prototype of blocks to hold the (X) gantry to the Y rails. I still need to add blocks to attach the Y belts at each end and hold the drag chain on the left side, but there’s clearly room.
Here’s the design, which currently requires the realthunder branch of FreeCAD because of saving out individual files for version control:
These are designed to hold a particular servomotor, but they are parametric, so can be reasonably adapted to other round servomotors. Steppers are probably even easier but need more change.
I had a design mistake that made my right gantry block not fit the idler pulley (I padded a sketch too short), so I fixed that for the third iteration. My corexy is currently printing a large print for a family member, and I just recently got the new “energetic” PEI-coated spring-steel bed installed on the cantilever bed-flinger pandemic printer and re-adjusted Z height, so now the third iteration is printing overnight on the pandemic printer. Hoping the third time is the charm. I’ll find out in the morning!
Third time was indeed the charm. The printer needs a stabilizer but it’s so much better than my original gantry printer it’s night and day. I drilled out the M3 holes to 3.2mm clearance, and filed out the 2040 cutout for a snug fit so that nothing rattles, and it looks good.
I made some simple little blocks to which to clamp the belts using 40 x 9 x 5mm toothed clamp blocks typically used with 3D printers, such as these.
I had already printed the main gantry blocks, so I just drilled holes in them, but I also modeled the holes in case I print them again, or mill new main gantry blocks from aluminum after proving the concept.
I ended up needing to lower the axis plane for the servomotor and idler pulley, and reducing the thickness of the servomotor fixture straps, so I ended up printing a new set, so it was a good thing I had modeled the holes.
I’ve gone through a few revisions on the bracket to hold the optics, and tonight finally everything else seemed to be working when I realized that I had forgotten to set up for the 15mm wide hole pitch on the MGN12 compact block I am using for X. So one small piece needs to be re-printed.
Like the Y blocks, it’s all modeled in the realthunder branch of FreeCAD:
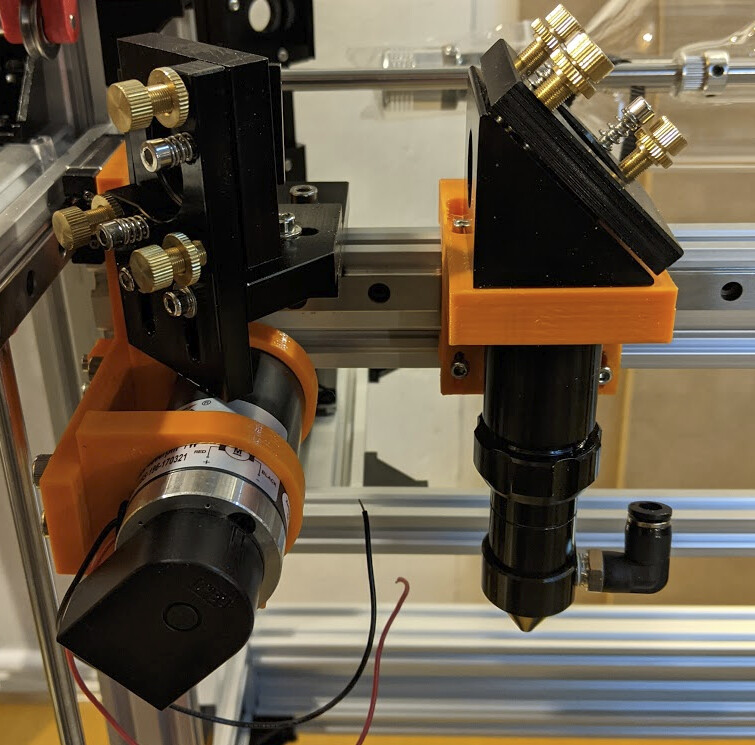
This is starting to come together. The really thick block holding the last mirror is to match the thickness of the two plates holding the second mirror, so that the mirrors are co-planar.
Here’s a shot from the side. It’s three pieces screwed together. The little piece behind is to clamp the belt to. I’m not at all sure it will work as a printed piece; it might need to be aluminum. But I’m trying to see how much of this I can make work without having to mill parts, since more people have access to a 3d printer than a mill.
That thick block also has countersinks on both sides. You can see the countersunk slots in the top, but also their are four countersunk screws underneath that screw into the 45° angle head. This was a challenge to print without supports. But for the round countersink holes, I was able to use a very flat chamfer to print successfully in this orientation. Check the model if you care about this technique.
The plastic laser head block is not rigid enough. I’m going back to aluminum.
But in the meantime, I changed my design goal to include not having to have a machine shop for someone who wants to follow along.
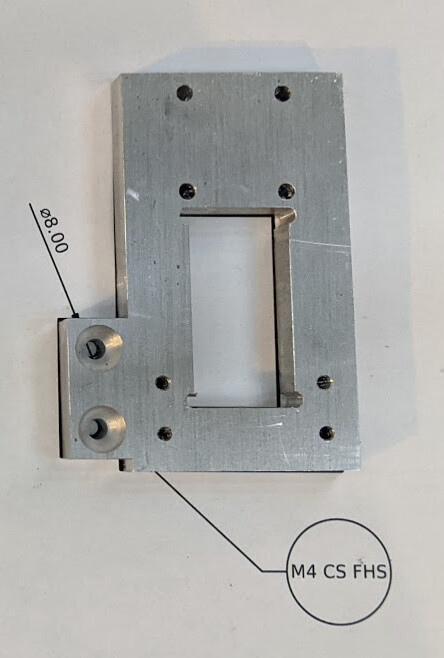
I now realize that the cloudray head was designed for HGH15 rail mounted on the top of the gantry, because the screw holes are M4 on a 26mm square pitch. Now I decide whether to buy new rail to match, add 15mm x 20mm M3 clearance holes to the existing block to match the MGN12C, or to machine an entirely new piece to match.
If someone else wants to build a monocle without a machine shop, they can just buy HGH15 rail that would match the head, and X gantry mounting blocks are parametric and can be modified to let the extrusion sit lower to keep the laser plane the same. That would preserve my design goal, even if I don’t change anything now.
However, this does mean that I need to move the linear rail from the side to the top of the gantry, and probably means I should re-design the drive system. Moving the belt to the top of the gantry would have the additional benefit of increasing the maximum cutting area because less of the Y travel would be restricted by the servo, at the cost of some more cable routing. Still thinking about this.
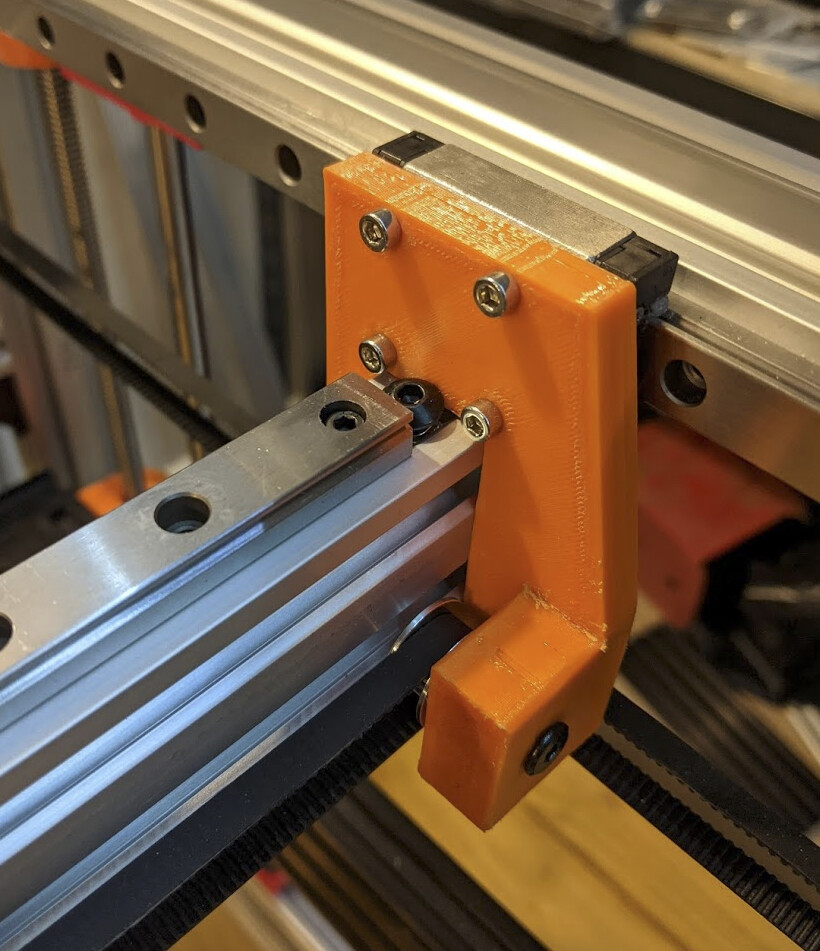
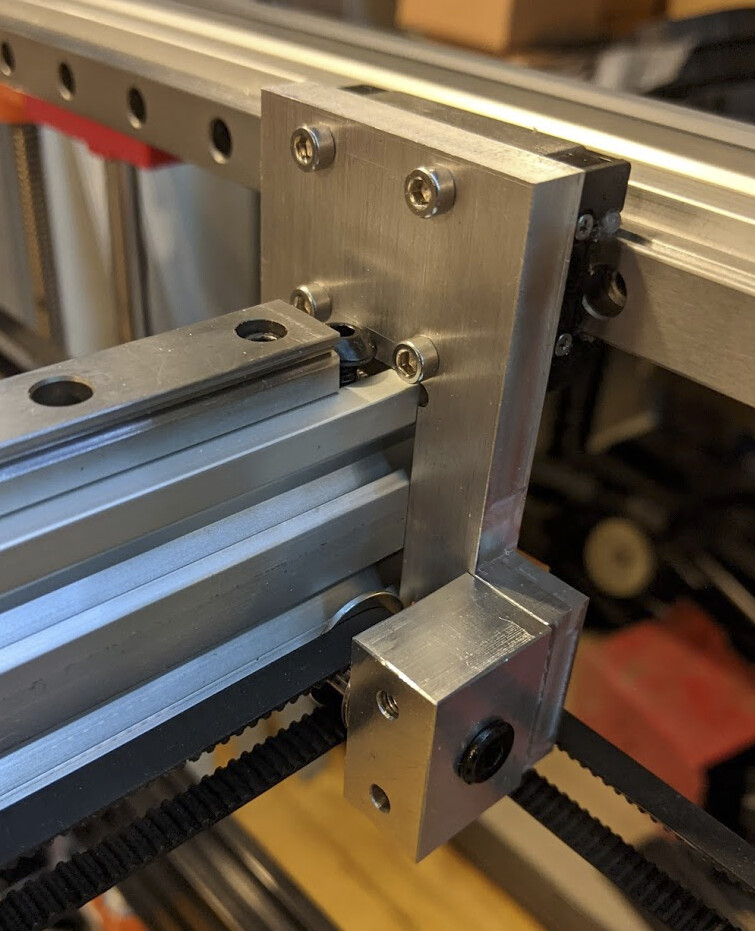
The plastic gantry blocks are probably OK, but so far no one else has expressed interest in following along, so I’m relaxing my design constraint for now. I decided to go ahead and put an aluminum gantry block on at least one side; if there’s any compliance in the plastic it will “give” to match the aluminum.
I looked at moving the belt to the top, and I don’t like it. If I want more room, probably I should just use a stepper instead of a servo; in fact, I’m getting cold feed on using the servo. I could use a rather light stepper for this purpose, as it is only moving the laser head.
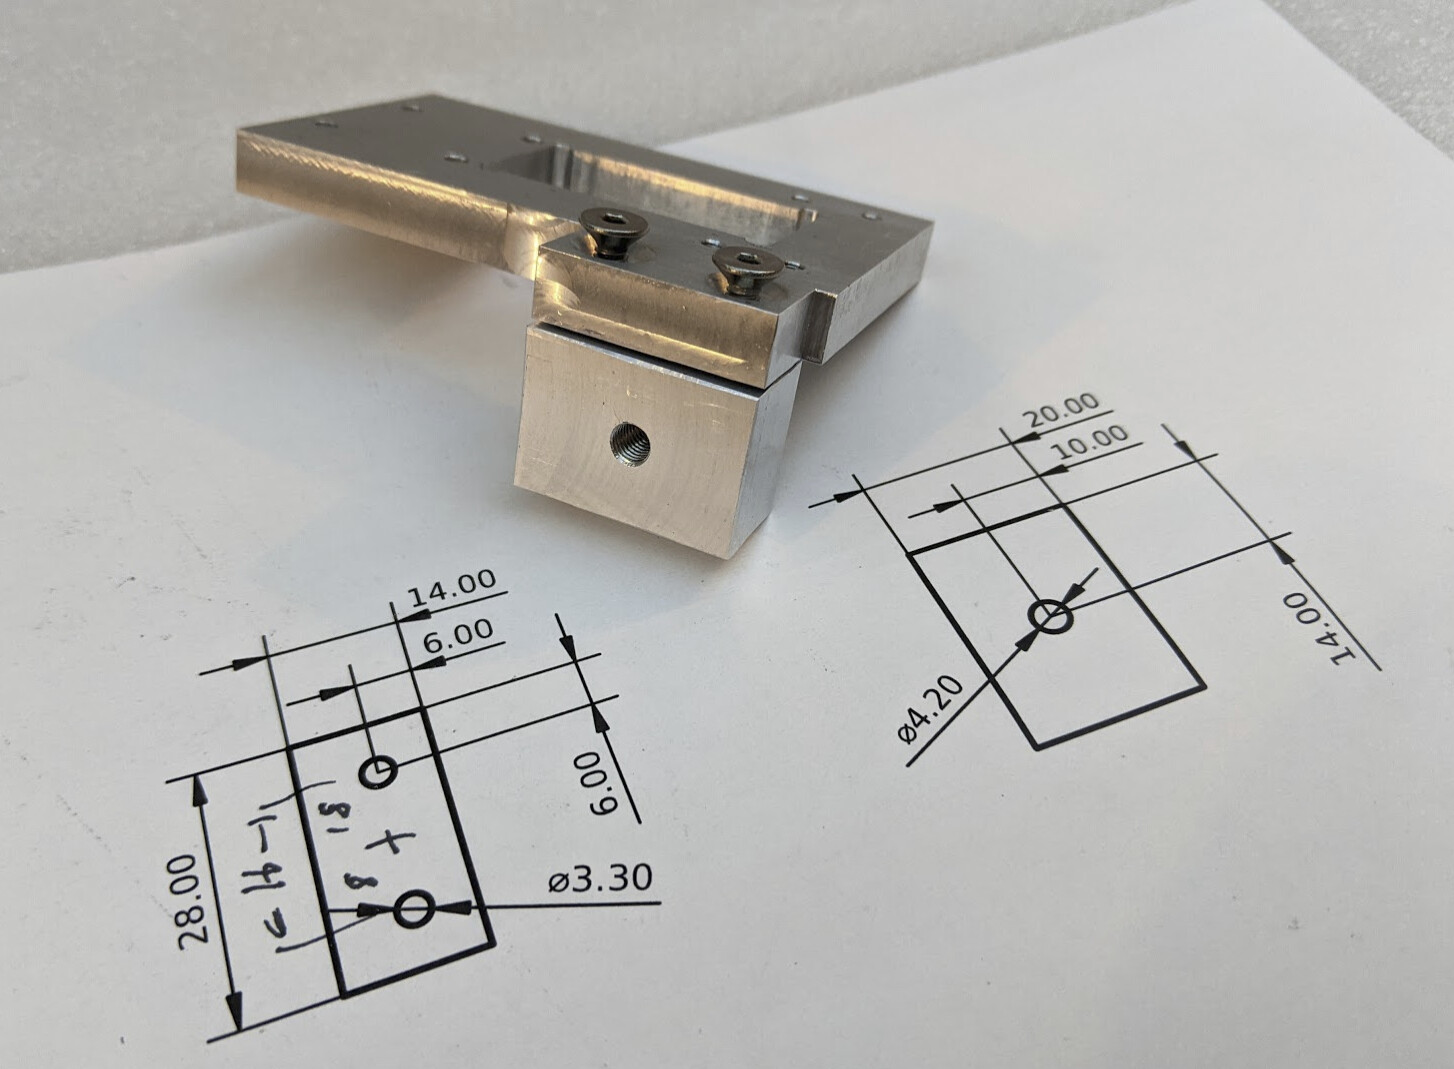
It was tricky to tension the belt with the printed version. For the aluminum version I designed the idler block as a separate piece that is screwed to the gantry plate. I haven’t made the idler block yet, but my youngest and I spent a few quality hours together in the shop, and he did most of the saw and mill work to make this:
We finished the inside cutout with a 3mm endmill and made I-beam dogbones to stay clear of the 3.2mm holes on 20mm centers for mounting to the MGN12-H carriages.