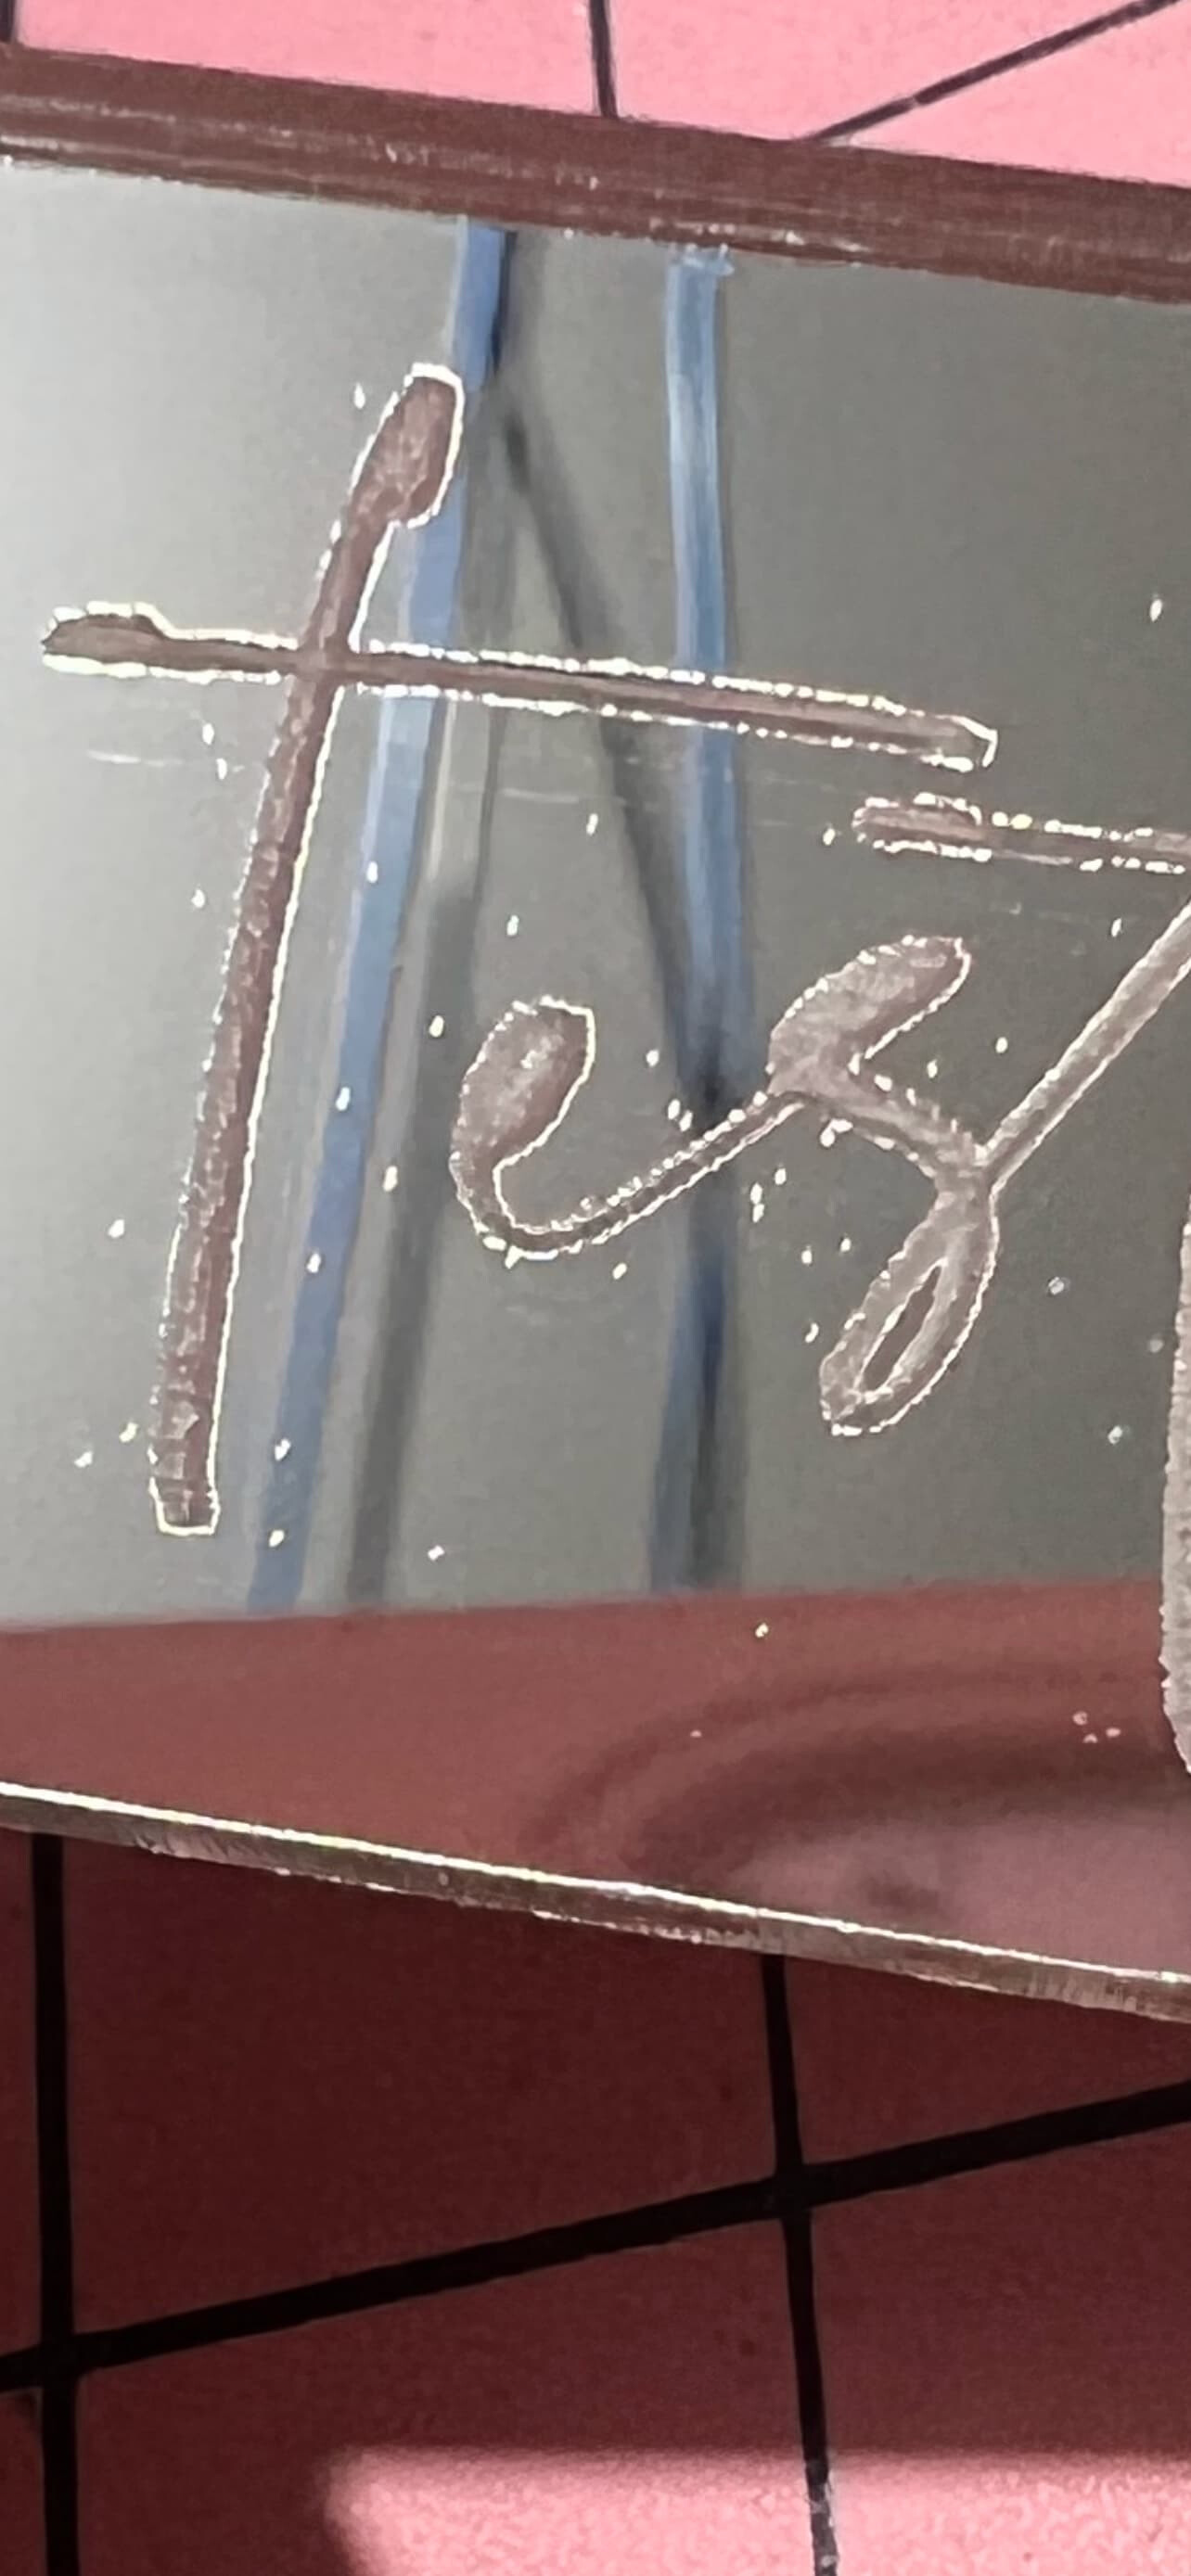
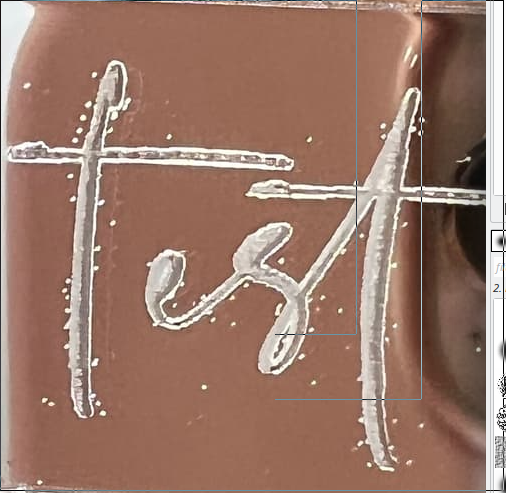
The speckles get closer to the text letters when the speed is dropped to 150mm/s(from 300mm/s).
My theory is that acceleration is set too high, causing the LPS-24V to glitch as the drivers try to accelerate too fast and this causes a glitch in the LPS-L circuit( 5V ? ) which triggers the laser to fire for a moment.
I don’t know if the Ruida settings for acceleration, or other settings, can be file based as opposed to fixed/saved in firmware.
Ya I was thinking the pulses were going to be too fast for a meter and the user does not have an O’scope nor the skills. Good idea on trying vertical fat lines to see how that expresses the issue. I’ll ask and post results.
Turns out it also does it with RDWorks… She just did a test on leather to prove to someone, who didn’t read the thread, that it’s not the mirror material and it does it on leather and she did the test on both LightBurn and RDWorks.
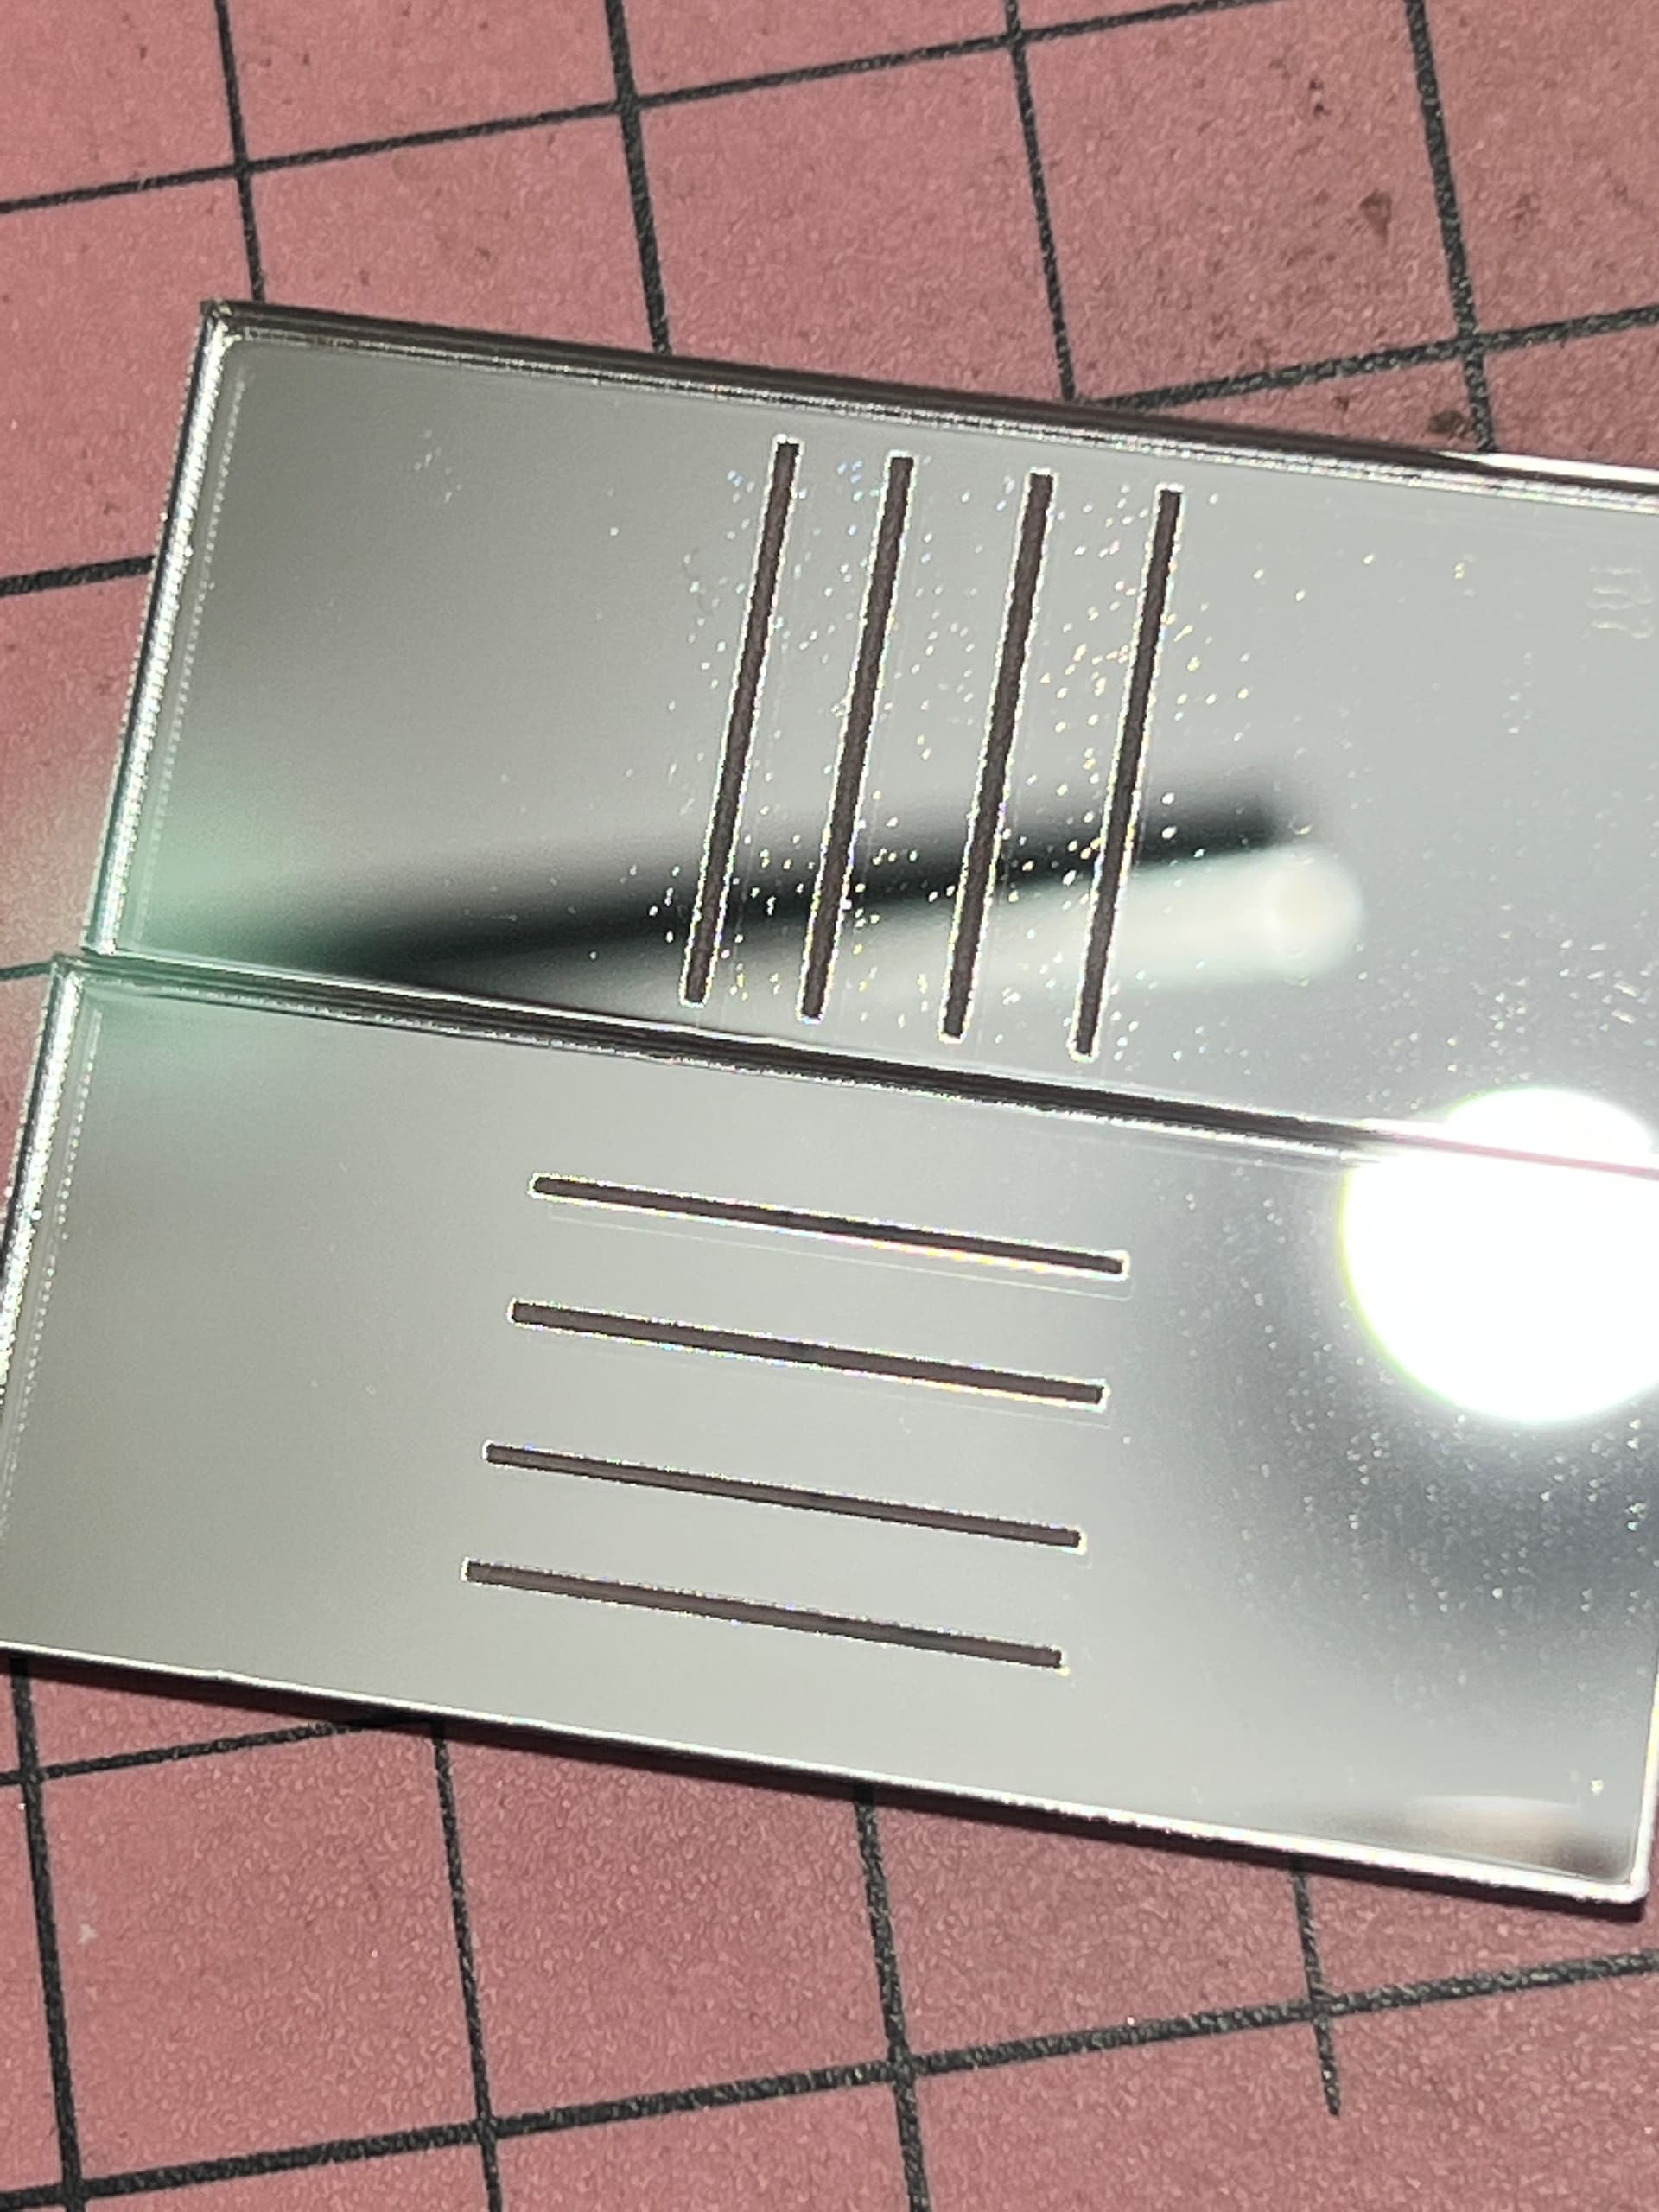
it is intermittent and showed it does it less on larger blocks/boxes of engraving as opposed to letters. When she created 4 vertical and 4 horizontal lines, left scan angle at 0 and engraved both sets of lines, the horizontal lines showed no signs of speckling dots. Therefore I didn’t bother going to vector testing since when the laser is on for longer periods of time it doesn’t erroneously trigger outside the area and the laser head never really travels outside the lasing area.
the manufacturer had her drill out the hole in the nozzle and she said they even tried it without the nozzle. Seemed like it could be a vibration thing so asked if all mirrors and mounts had been checked for any looseness and she said yes. All mirrors and the lens had been replaced. So too was the LPS and the controller and tube.
ya it’s a strange one and made worst now that it was shown that it does it in RDWorks too since previously it was stated to not do it in RDWorks.
It’s a 40w Bodor she has used for 2.5 years without problem and she said she’d been working with the manufacturer who provided and recommended replacing all those parts and has since declared defeat.
When I’d asked to slow it down and saw the speckles move closer to the text engraving I thought for sure it was something causing erroneous triggers. A grounding issue associated with vibration might be worth looking into.
From her initial post:
Troubleshooting so far:
New tube
New power supply
New controller
New USB cable
New mirrors
New lens
Air up, air down
Different fonts
Different material
Different laser head nozzle
Different settings
Alignment is bang on
Since the power supply, controller, and even the tube were already replaced, there isn’t much left except the wiring and noise.
If the machine doesn’t have an EMI filter installed, I’d install one. It also reduces incoming noise.
Next, I’d inspect, retighten, and measure every grounding connection and confirm that the chassis and the chassis of every power supply is grounded.
I’d check the voltages of the low-voltage power supplies. Just to make sure.
The minus from the power supply which powers the controller needs to be connected to the G pin of the high-voltage power supply. Tug, retighten, and measure.
If there is a separate power supply just for the steppers, that one doesn’t need to be connected since the inputs from the stepper drivers are optically isolated.
Finally, I’d try to improve the routing of the cables. L+ and L- should be as close as possible to each other and as far away from everything else as reasonably possible.
It’s similar with the “high voltage” motor wires. A+ should be next to A-. And all of those motor wires should be bundled together and go straight to the motors while keeping their distance from the logic-level PUL/DIR/5V cables and all the other logic-level wires which go to the controller.
Also, for testing, I’d run the jobs from internal memory and not have anything connected via USB or Ethernet. Might be a good idea to start with this to establish a base line.
Another laser user is having the same problems but his machine is a 50W big blue Chinese machine and not a 40W Bodor like the original user. Both are using Ruida controllers. This 2nd user mostly does cutting so the glitches don’t happen and he said when he does engrave on acrylic, if he leaves the paper on it’s not enough power to mark through the paper and effect the acrylic. So they are very brief glitches.
He’s also put a bunch of filter/chokes on power lines and ohm’ed out chassis and grounds. Said his OCD made him chime into the thread since he can not figure out what’s the cause nor solution.
He’s also using a separate 24V PS and for a test, added another 24V PS with one powering the motors and the other powering the Ruida. Same results.
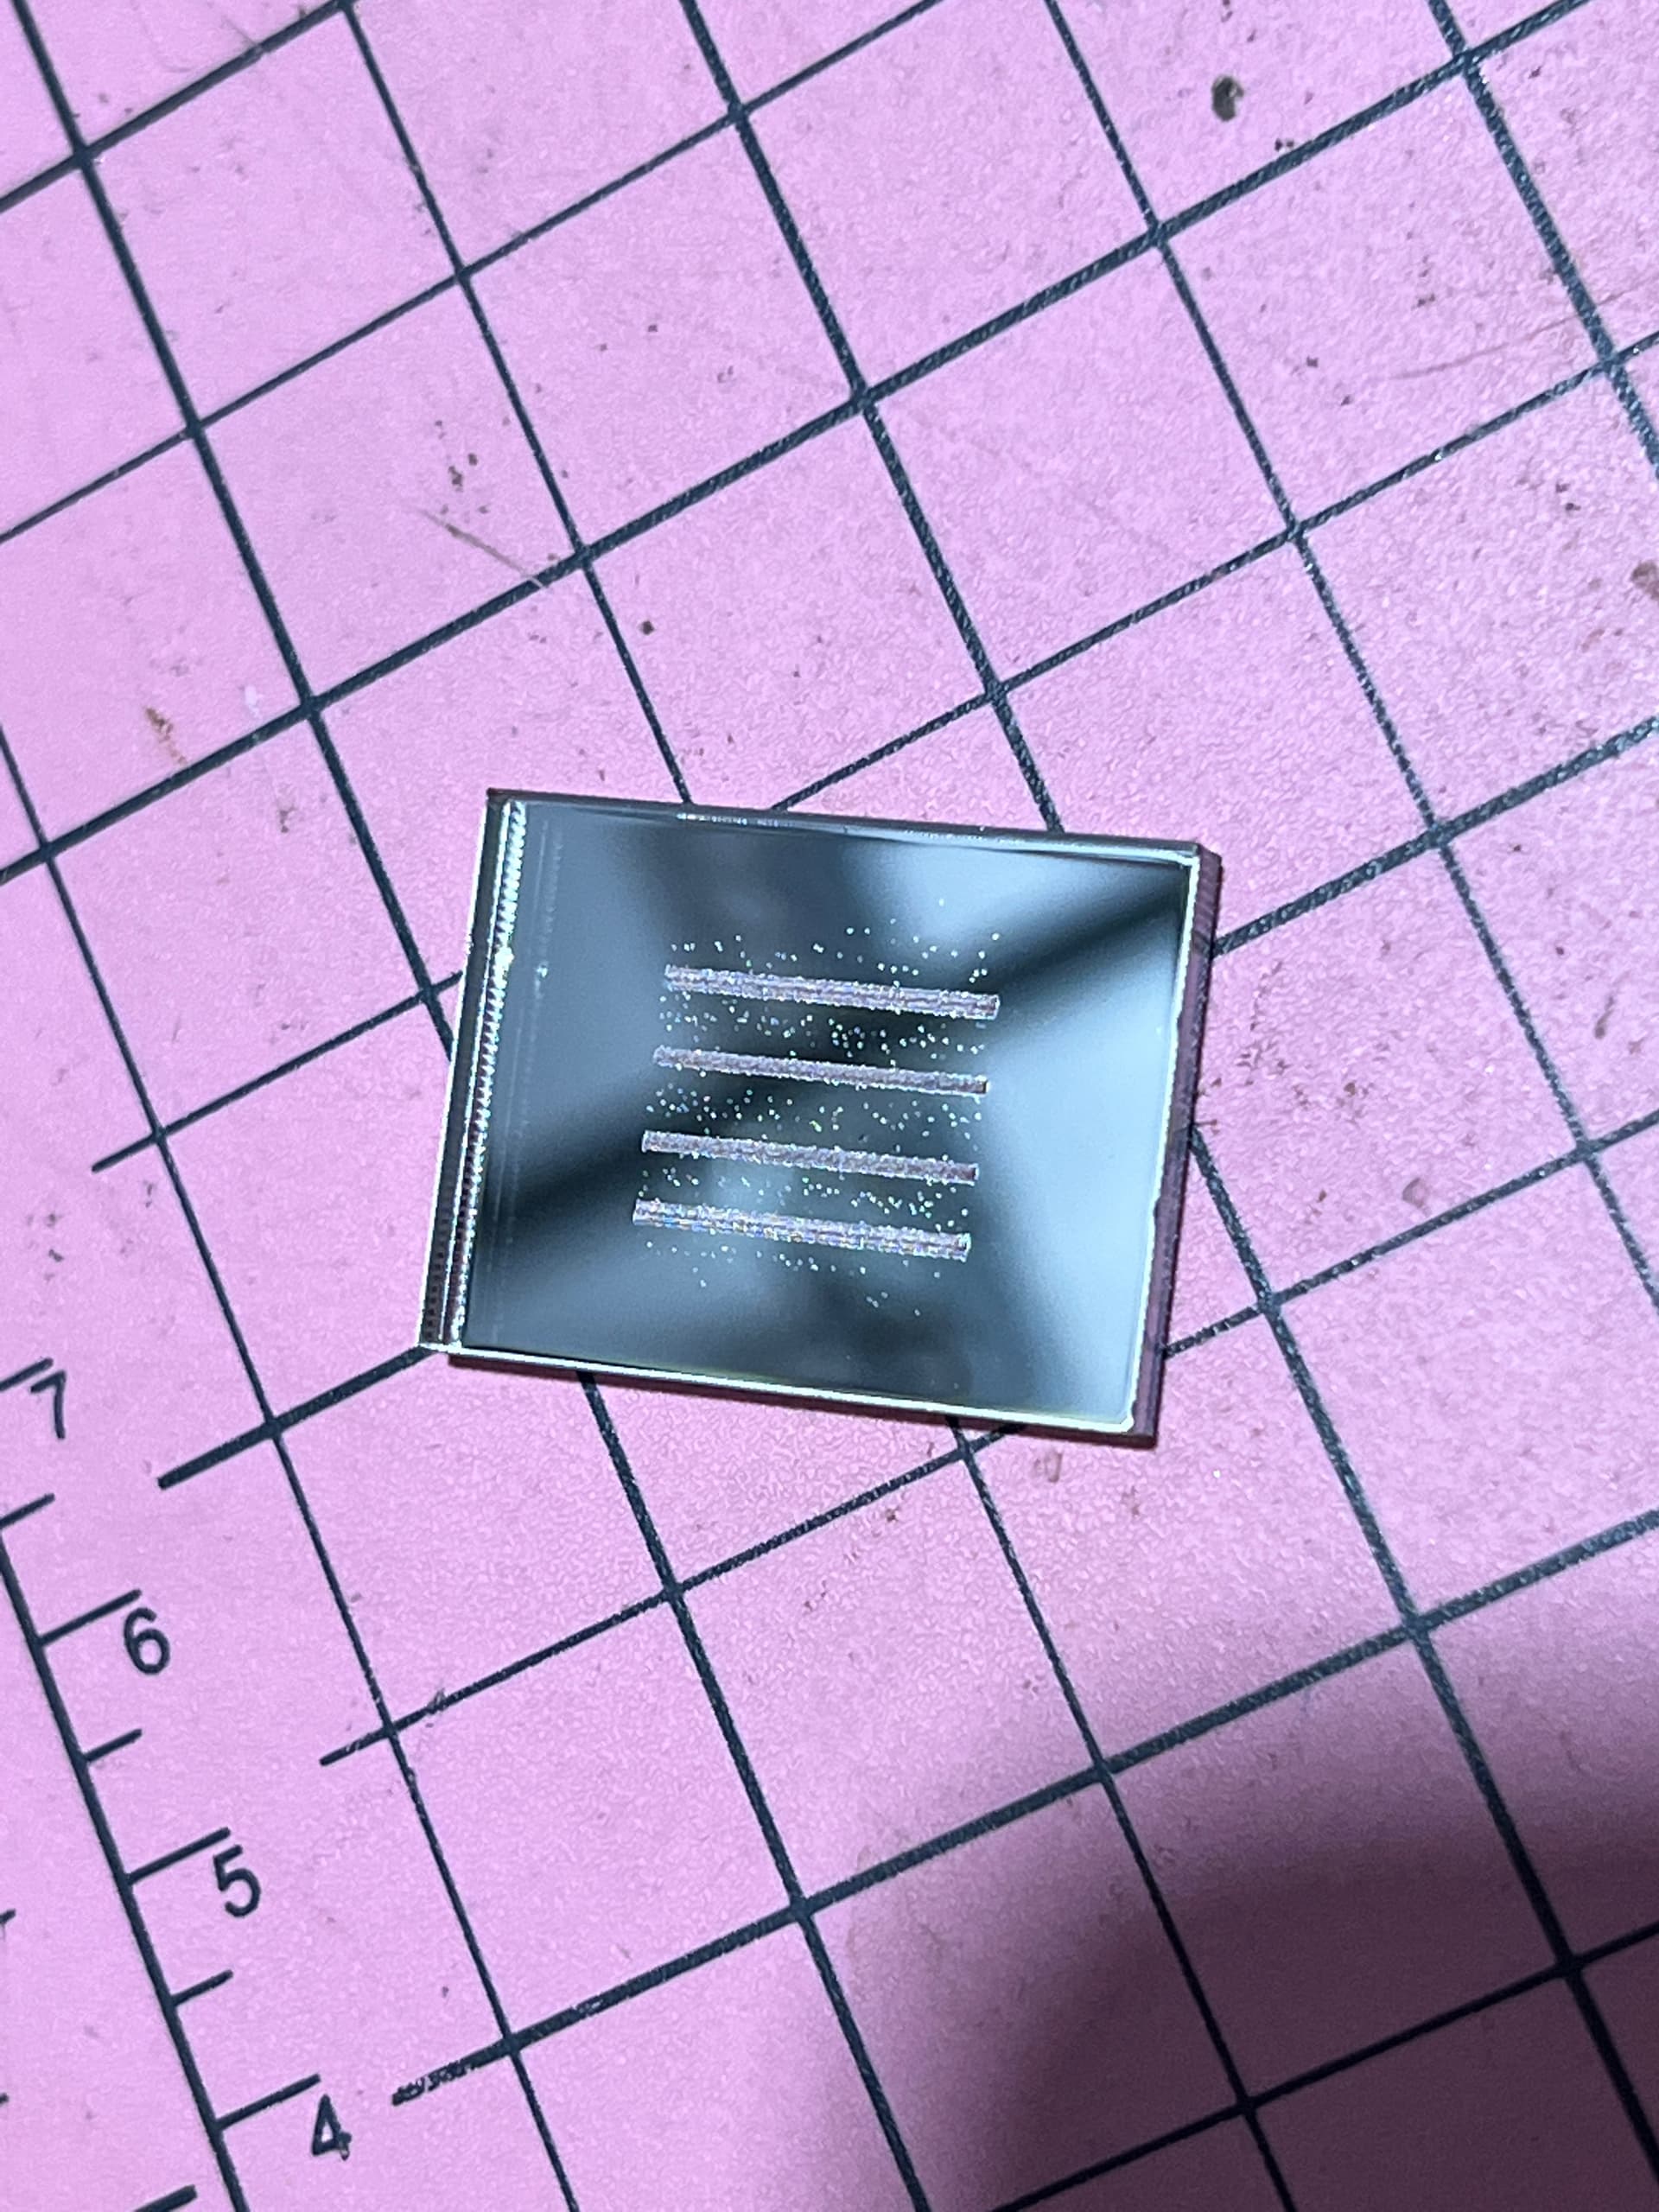
Yet another person chimed in about having the same problem and posted a picture of a test he had done. Look at the distribution, it is shaped like an hour glass on its side. weird.
This user found if he keeps power out of 18-20% it does not do the speckling dots.
The hourglass may make sense?
The problem is somehow manifested and related to the vertical axis. Effectively the vertical axis delta gets smaller as you approach the center of this design.
Starting to feel like a weird Rudia problem… does it only show up with that controller?