My only fly cutters are cute little things that I bought for my mini mill and which take miniature ¼" tool blanks.
I’m nowhere near convinced that this is a good idea, but I have some ½" tool blanks, a ½" left-hand turning tool and ground inserts for it, and a chunk of 1⅞" 1018 cold-rolled steel rod…
No plan of mine survives first contact with the machine shop.
I added dimensions for all the holes indexed to the tip of the tool where I can pick up a reference.
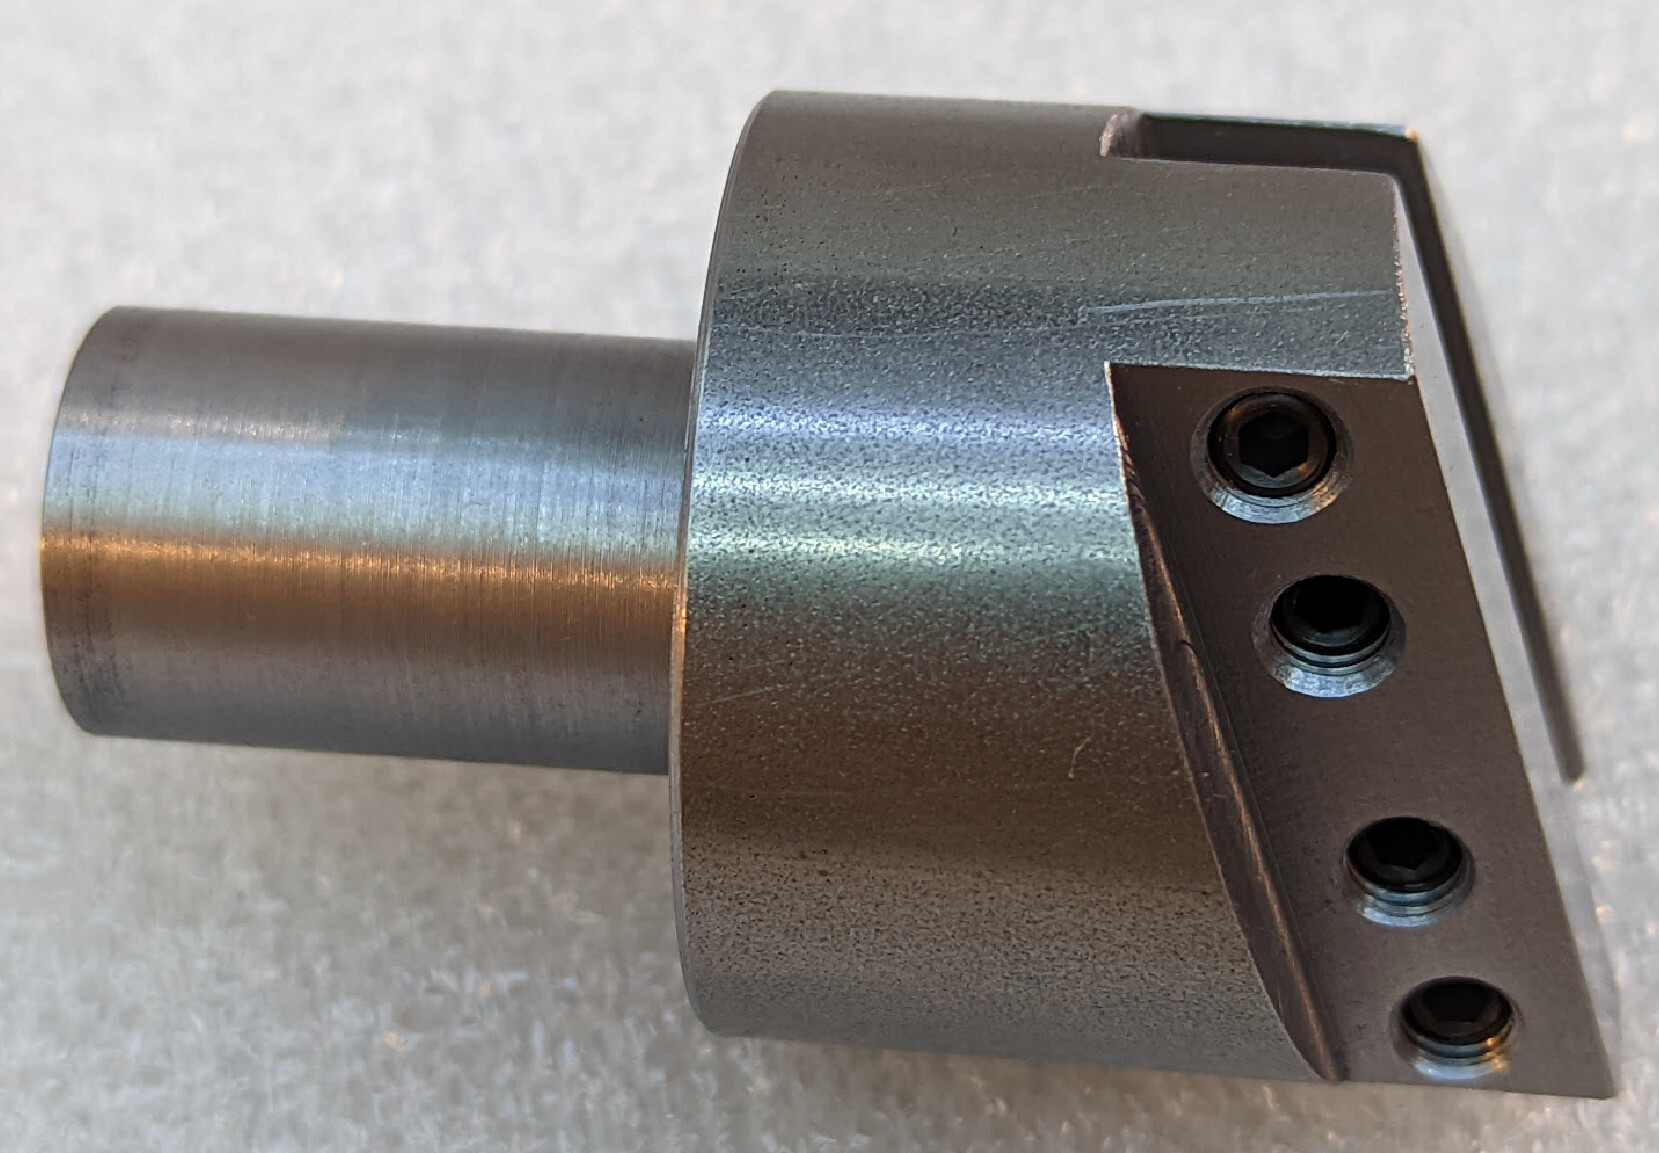
While I was at it, I made the set screw holes not line up back to front so that I can add more in the long face, which gives me more clamping options. The screws in the back are primarily for if I use this with a bar that is less than ½" thick. It turns out that my left hand indexed lathe tool with CCMT inserts is slightly thinner than the ½" tool blanks; to fit the tool blanks I need the slot thick enough that I’ll want to pin it to the center reference surface from the other side. But four holes in the primary surface mean that I can reasonably pin a tool in just three of them for extra reach if I want to.
When I created the sketch for the tool groove, I didn’t notice that I was sketching on the wrong side of the face. Then I quit worrying about handedness because I had solved that problem; think about one thing at a time!
I’m impressed that I completely finished it before mounting a lathe tool in it and noticing that I had made a backwards fly cutter. That is, I’ll have to run the mill in reverse. I feel dumb. On the other hand, that lets me use all my right-handed lathe tools, I have a lot more of those than I have left-handed ones, and my mill doesn’t really care what direction it is running. So maybe it’s actually a fortunate error?
Other than that minor problem, it looks quite nice.
Forgot to switch to a polished insert for my finishing pass on the shaft, so the finish is rough, but it’s exactly at dimension so I don’t want to polish it further
Should have done a cleanup pass on the body on the lathe, to ensure that it is exactly concentric with the shaft. I haven’t tested its runout.
Cut too long in the band saw, and removing stock with the face mill is excruciatingly slow in my bench mill, so the body is taller than I designed for.
Accidentally used a bad face on an insert in the face mill, leaving tool marks on the bottom face.
Ran the face mill too fast.
Things I did right:
Did all the rest of the mill work at appropriate feeds and speeds, using plenty of oil and slowing down whenever it smoked to stay cool.
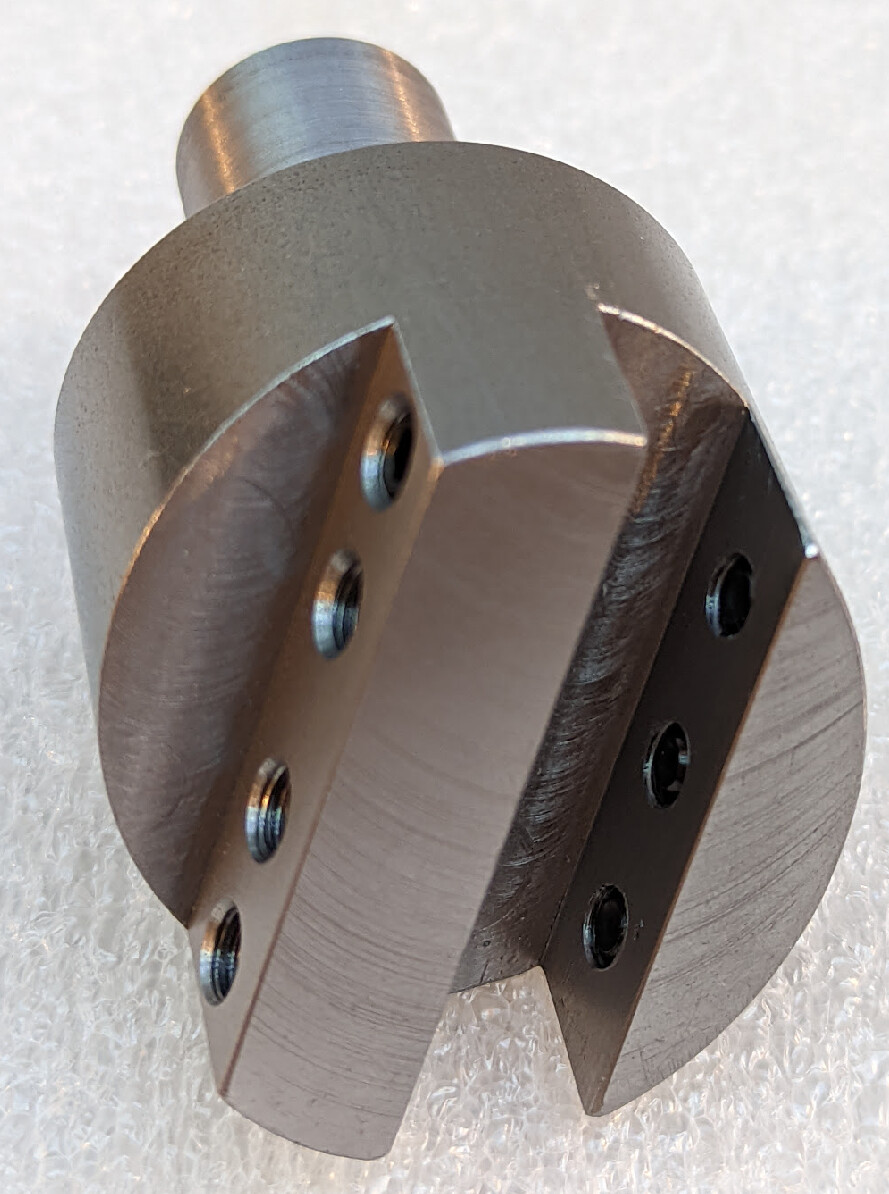
Cut the ½" slot with a ⅜" mill in the middle of the gap (sooo slowly; ⅓mm DOC, very slow feed), then opened out the sides to ½". Conventional milled to 0.1mm remaining, then cleaned and climb-milled for a smooth face.
Made the slot 12.5mm deep instead of 12.7mm so that the tool stands slightly proud of the slot; easier to feel that it’s fully engaged that way.
Drilled the holes with a slightly oversized drill bit made power tapping with a spiral flute tap easier. Didn’t break the tap.
Used an end mill to cut flat spots for the holes on the curved surface.
Chamfered holes before tapping.
Locations of the set screws worked well.
Surprising win: That slot is a tight fit for ½" tool blank. I cleaned the bottoms of the holes by pounding a tool blank through the slot and it sheared off all the swarf from the holes.
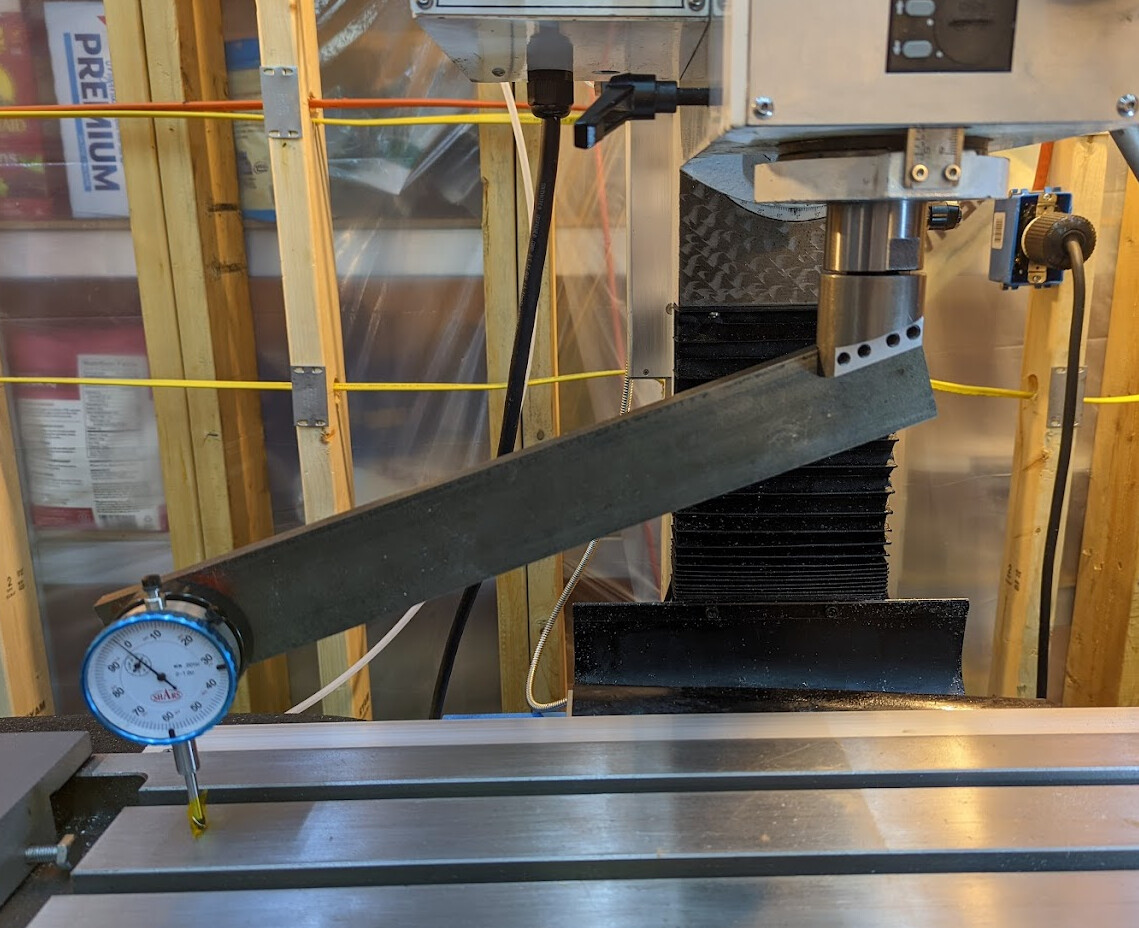
I just put a ½" x 2" bar in it long enough to tram my head. It reached near both ends of the table when I turned it, and I was able to get the head within a thou over the entire reach of the table. The apparently out-of-square indicator stem is mostly illusion from the camera angle.
The pressure clamping the tool into the flycutter should push the leading edge of the bit to centerline of the spindle, right? I was thinking the screws in the center rib shouldn’t be used as they’ll push the tool away from cl.
@NewbieLoren That’s quite right. However, the slot is a very close slip fit for my larger tool blanks, so if I’m using those I can get a little extra grip for sketchy setups with more than reasonable stick-out. I probably shouldn’t actually ever do that, but I drilled the holes as long as I had the setup in place.
(I was originally expecting to use this to do very very light surfacing of a plate that exceeded the Y travel of my mill, before I ended up not needing to do that after all.)