Hey, folks, Like the title said I am converting an old electric dryer into a shop heater. The electronics is the only thing I’m struggling with. I want to eliminate the original controls and run the heater through a line voltage thermostat. I have the wire diagram for both the dryer and the thermostat. Help on how to make this work would be awesome! Thanks for checking it out and helping me with my project.
If it were me, I would stick with its current 2 heat settings and then put the thermostat on the main power input with a solid-state relay. The dryer has its own non-re-settable thermal fuse so you wouldn’t want to exceed its highest temperature setting.
1 Like
I like the idea of maintaining the temp selection. If I’m understanding everything is basically routed through the ssr? Sorry still a newbie at modifying a circuit. I’m usually just tracing a problem somewhere lol.
yes. You’d disable the timer so it never turns off and then you use the new thermostat to power/depower the heater via an SSR. For example, if you can turn it on manually, see the temp hit 65 in your shop and turn it off then you can get a thermostat/SSR to do that for you.
OK. The start switch being a momentary on won’t interfere in any way? The way I understand the dryer motor to work the start switch initiates the motors rotation and then a centrifugal contact inside the motor completes the circuit while it runs.
Look at the schematic, L1 and L2 go across the heater circtuit at the bottom of the drawing. There’s just Timer Switch 2 and the part of the Push To Start switch(on the far right). All the stuff above that is for timers and stuff unrelated to the heating elements/circuit.
So why not bypass all that stuff you don’t want and just use the heating element circuit controlled by the SSR? What about moving the heat around? Were you planning on keeping the fan too? If so then you’d want to put that in parallel with the heater on the SSR although it doesn’t show a fan in the drawing that I noticed.
Yea the fan is attached to the motor and I’m just going to modify the sheet metal to redirect the air flow out the front and use the ducting from the dryer to do so. I plan to keep the motor attached and just cut the shell around it to shape and cover as needed with whats cut off. Ok I’m pretty sure I have it down now. I’ll have to try and make a diagram to make sure its working in my head lol, but that helps. thank you much sir. i will have to post updates and pictures if your interested.
1 Like
yes, please do and good luck with the project.
1 Like
I hope he gets a good heat sink for the ssr …
The best advantage is the ssr will switch on a mains zero crossing.
![]()
I went through the shop heating thing.
An open coil in a shop can be a fire hazard especially if the shop gets dusty from cutting and sanding wood.
Be careful how you set up the heater control.
I ended up getting one of these heaters: Amazon.com
It is mounted from the ceiling 18" from any surface.
I added a timer so that I could not inadvertently leave it on. You can only start the heater from the timer …no override.
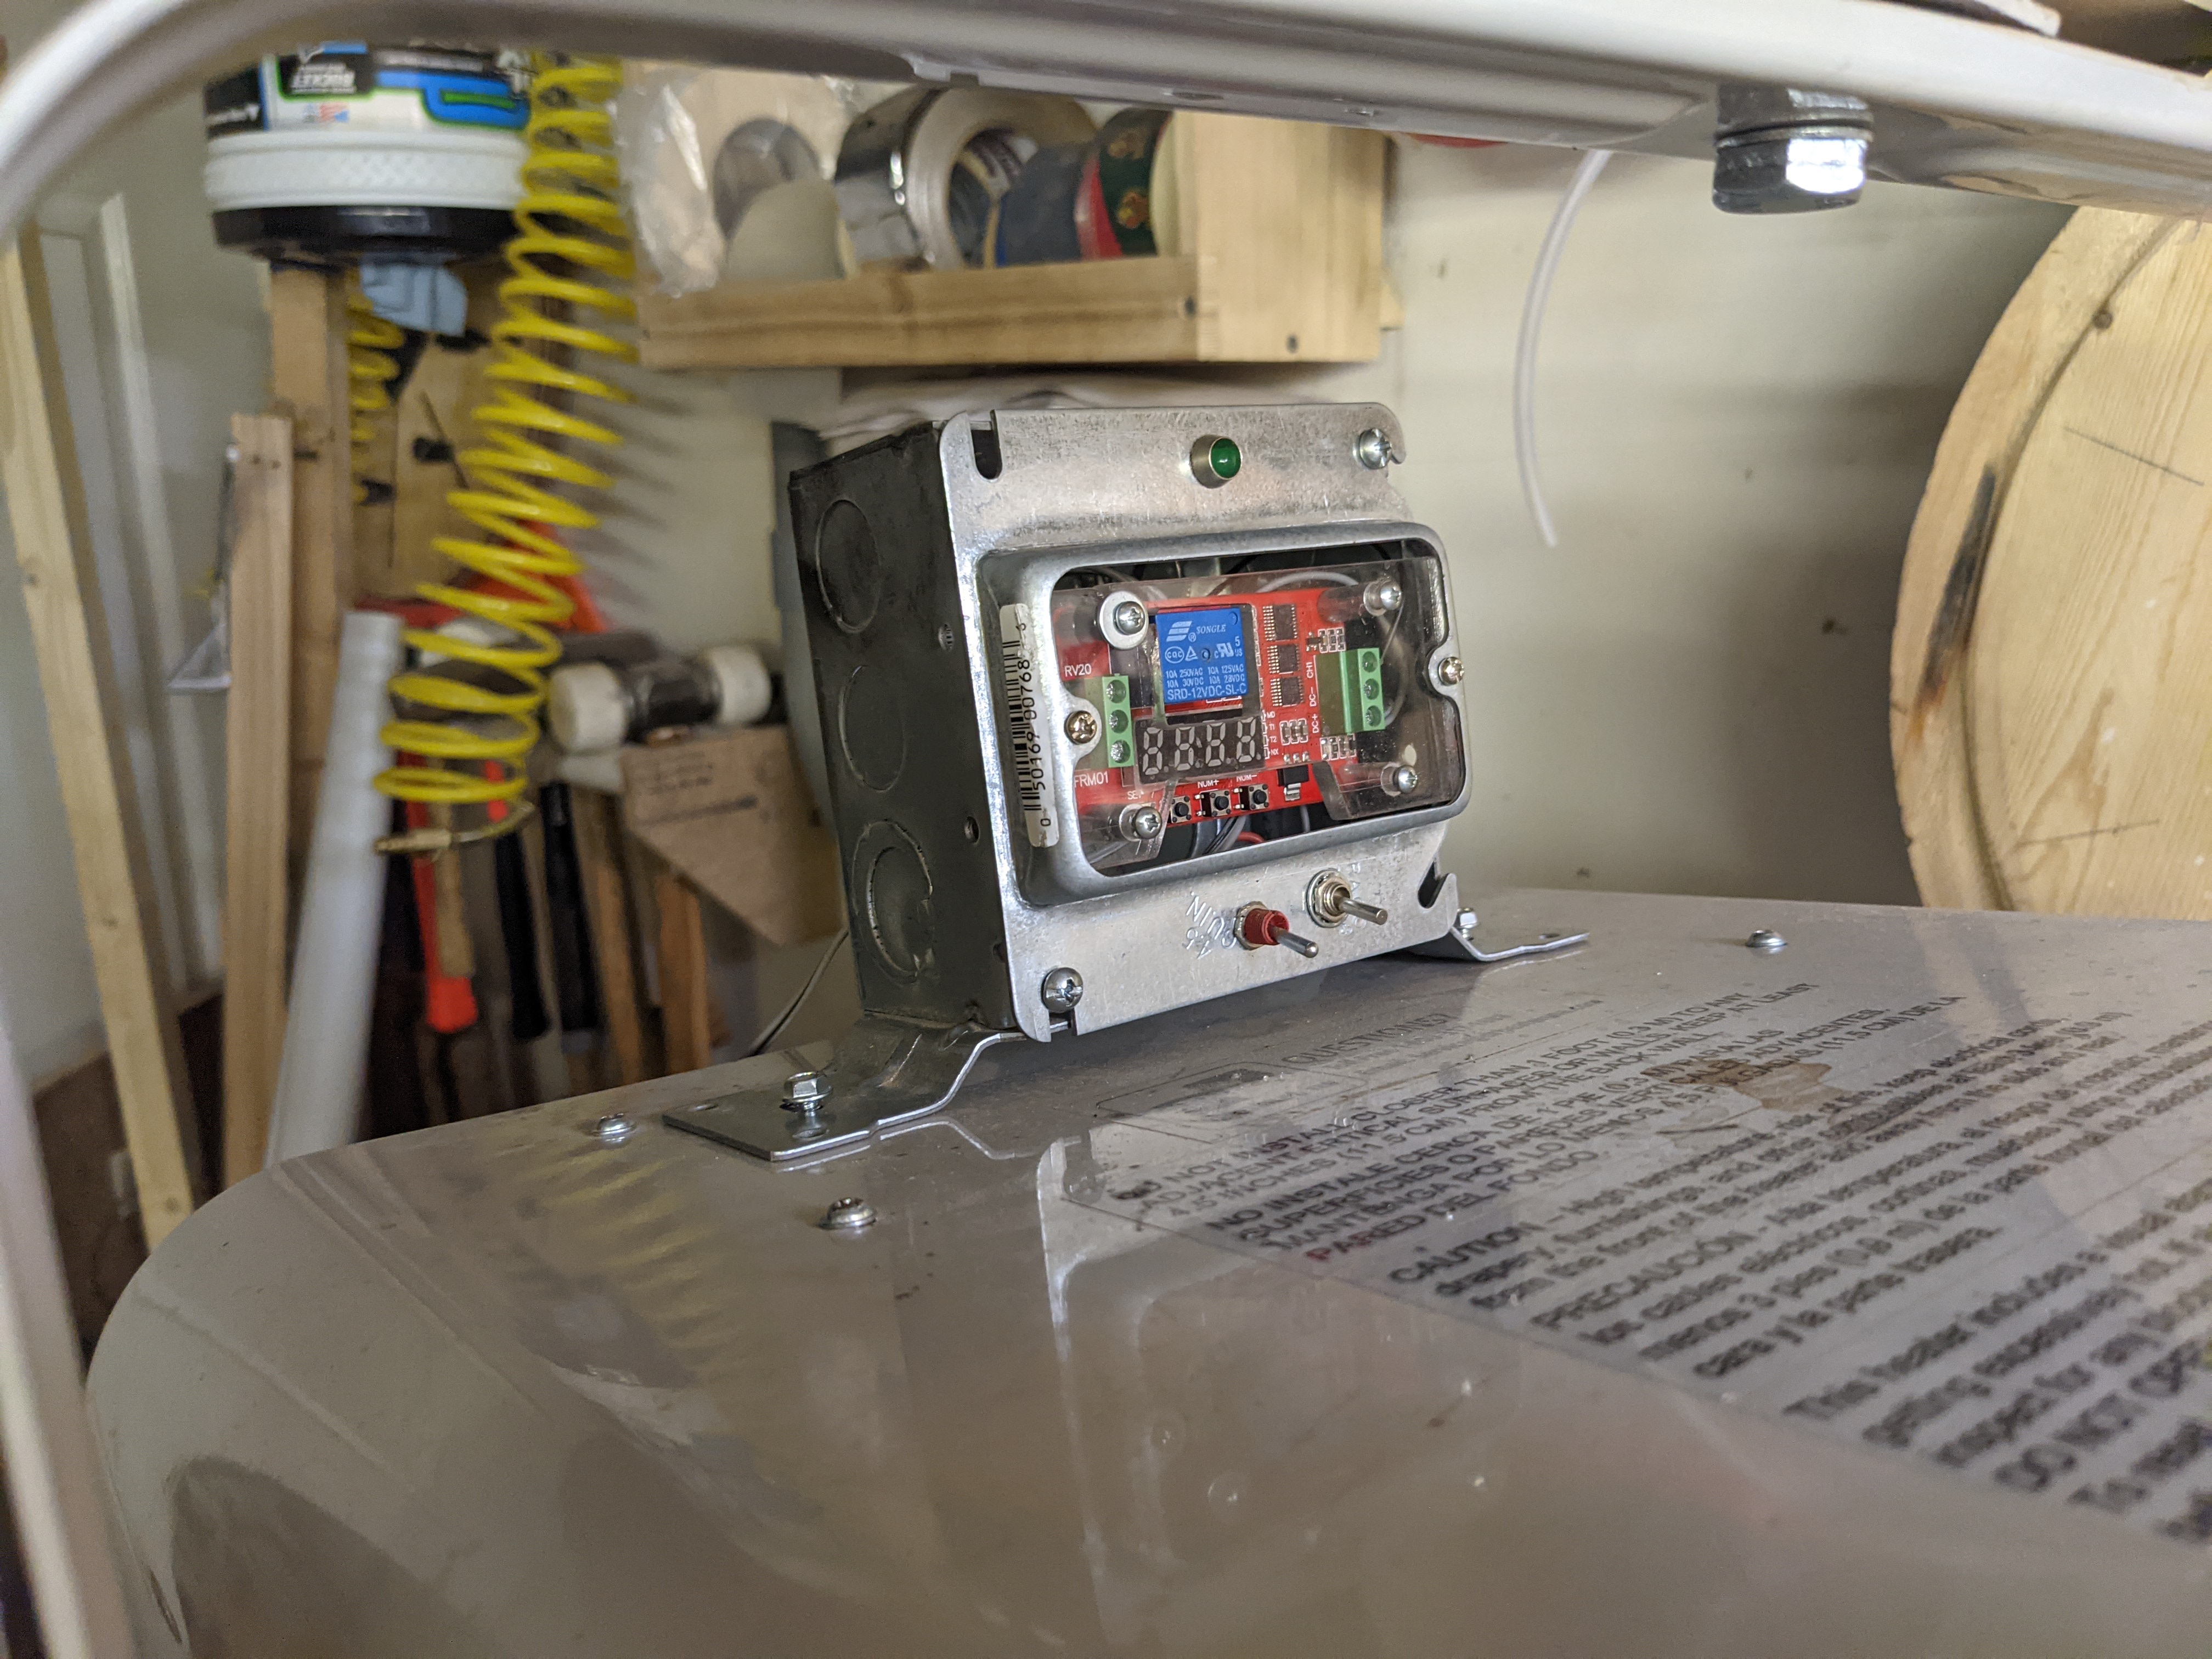

The heater is controlled by an SSR, note the smoke detector above the unit
With a BIG heat sink:

Some learning from that project:
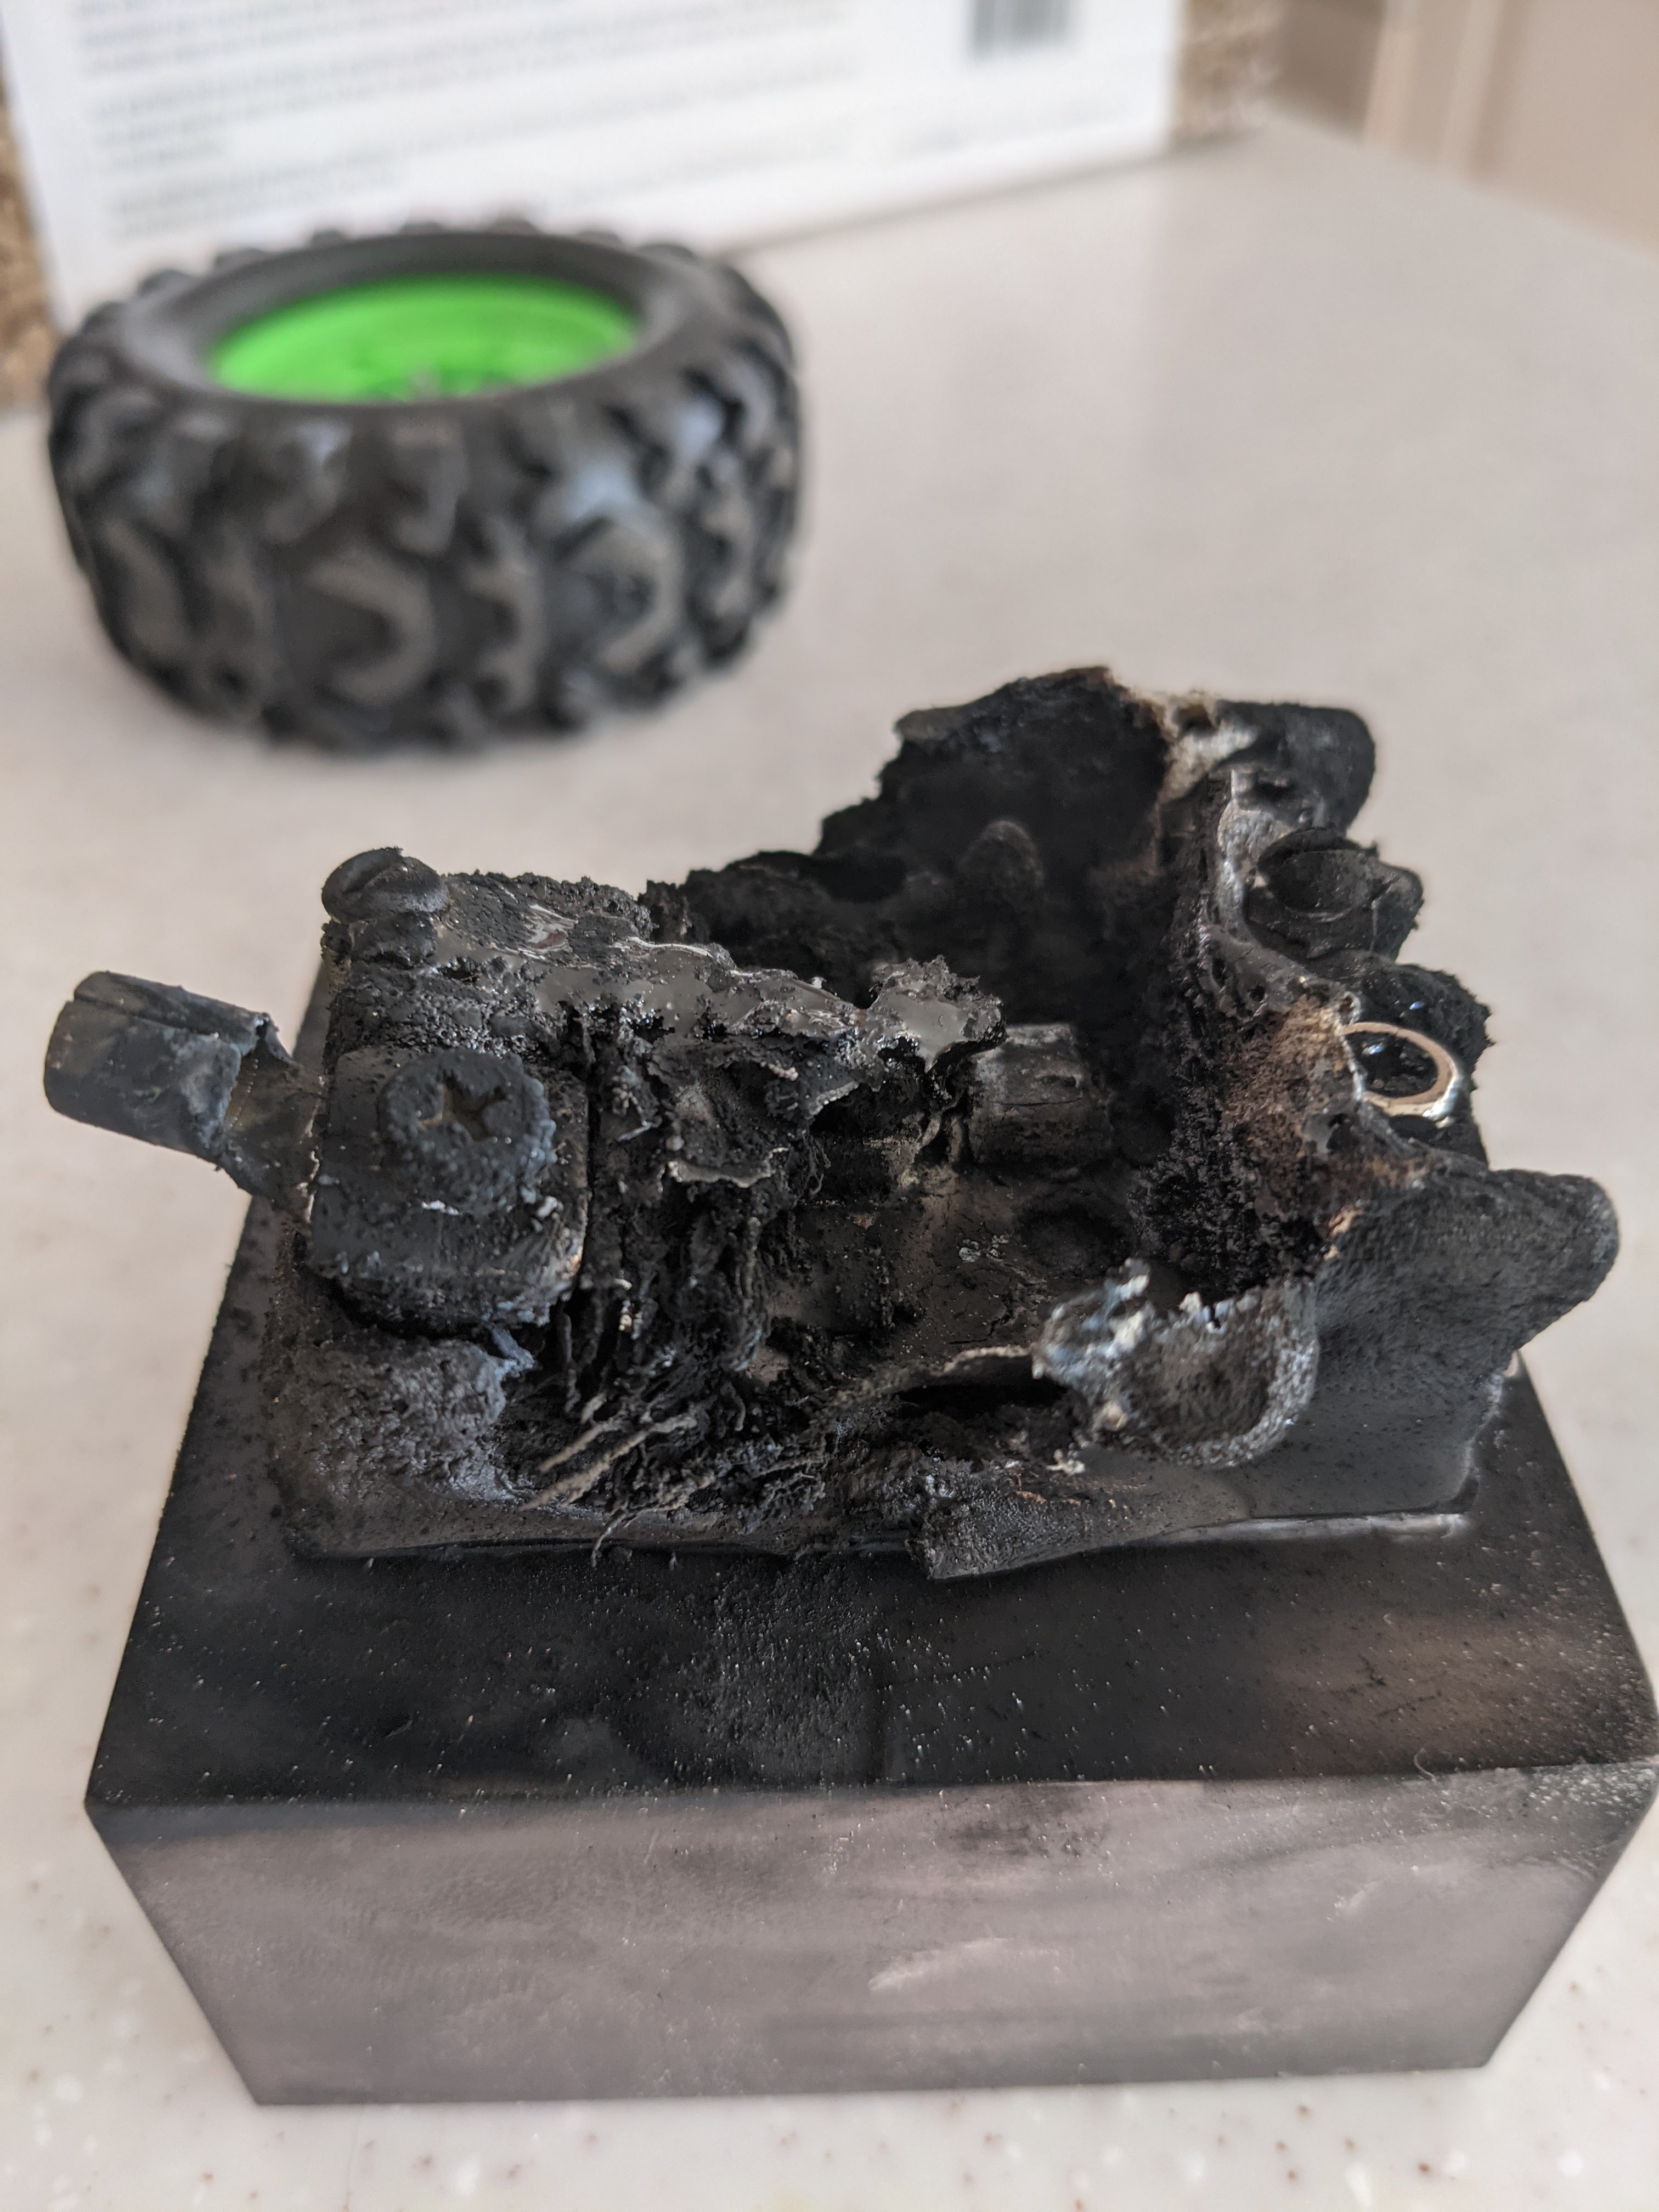
- Enclose the SSR as much as possible so that on failure flowing plastic will not drip and start a fire.
- Look for SSR’s with UL approved plastics. How do I know? My SSR overheated, melted and dripped on a table below and caught the surface on fire. The shop smoke alarm did not go off. Luckily I was in the shop when it happened… :(.
Note: when approved plastics are used for these devices that plastic does not flow like this. Cheap crap …
Use a large heat sink and check the temp of the SSR when running.
3 Likes
Thanks for the heater link… just what I was looking for…
What a mess with the melted plastic… Was the heat sink too small and you lost the ssr to that or do you know?
![]()
The original SSR capacity was marginal. I found a larger capacity one, increased the heat sink, and improved how I attached it to the heat sink.
2 Likes
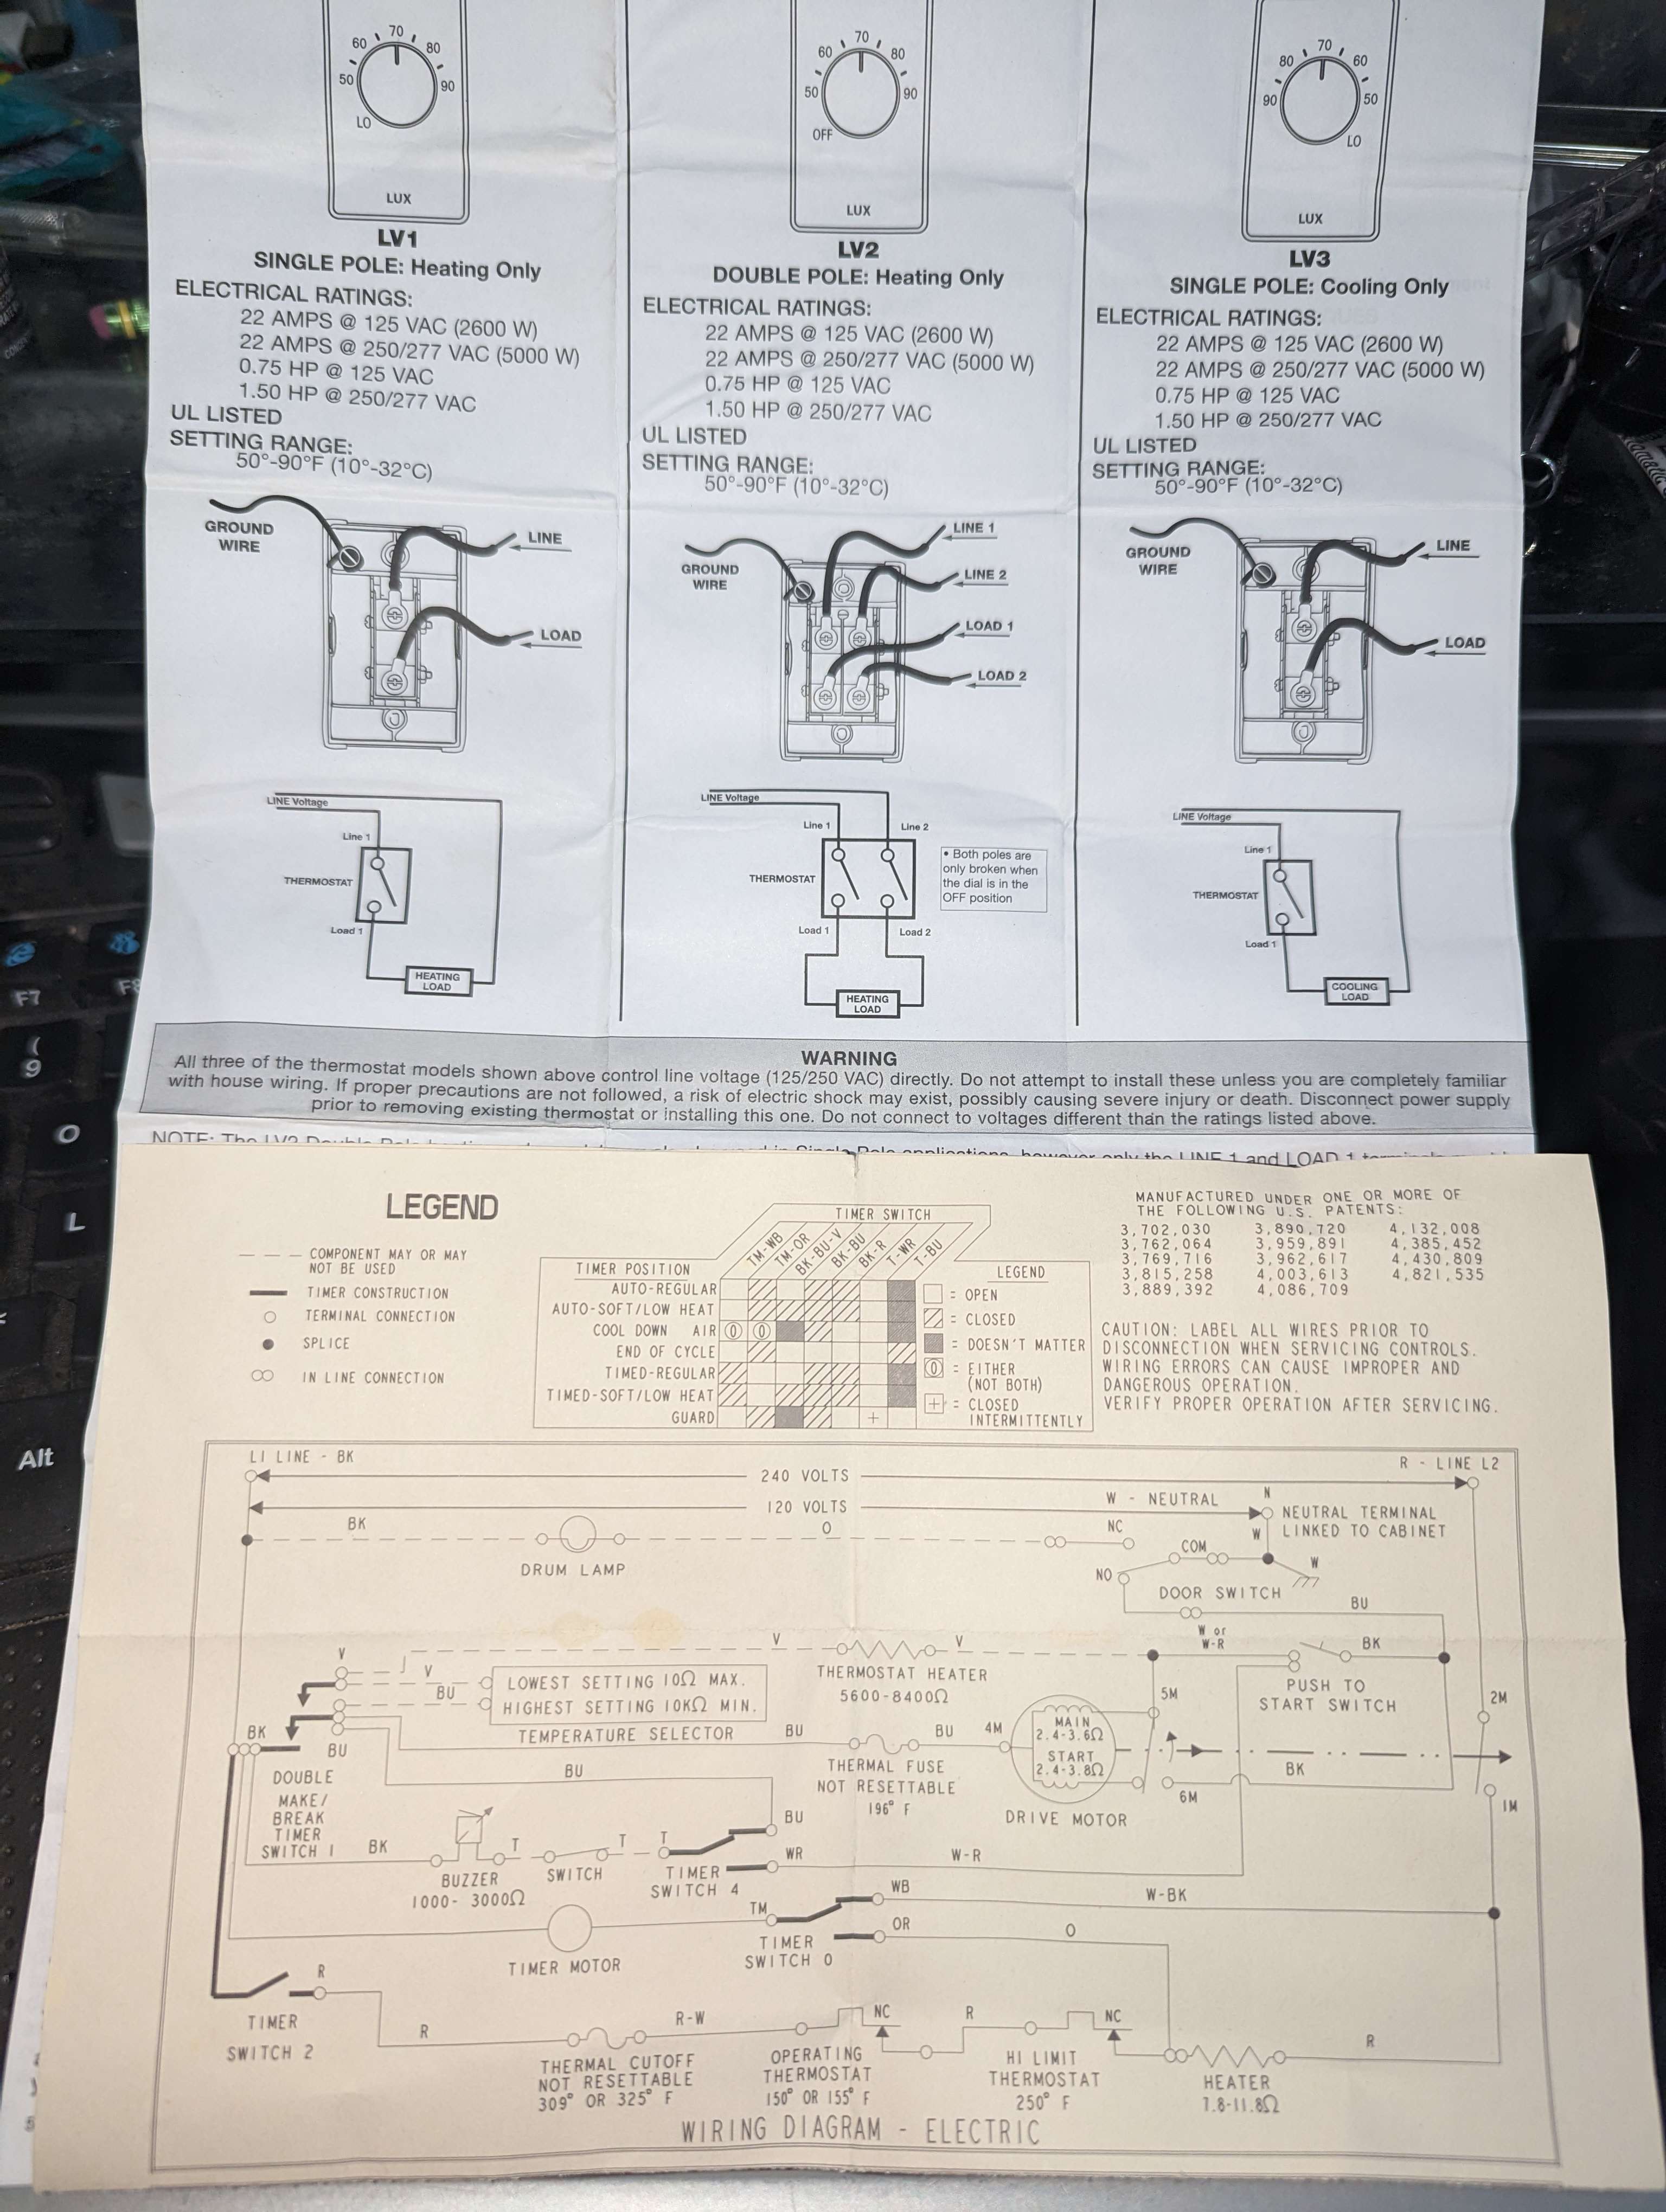
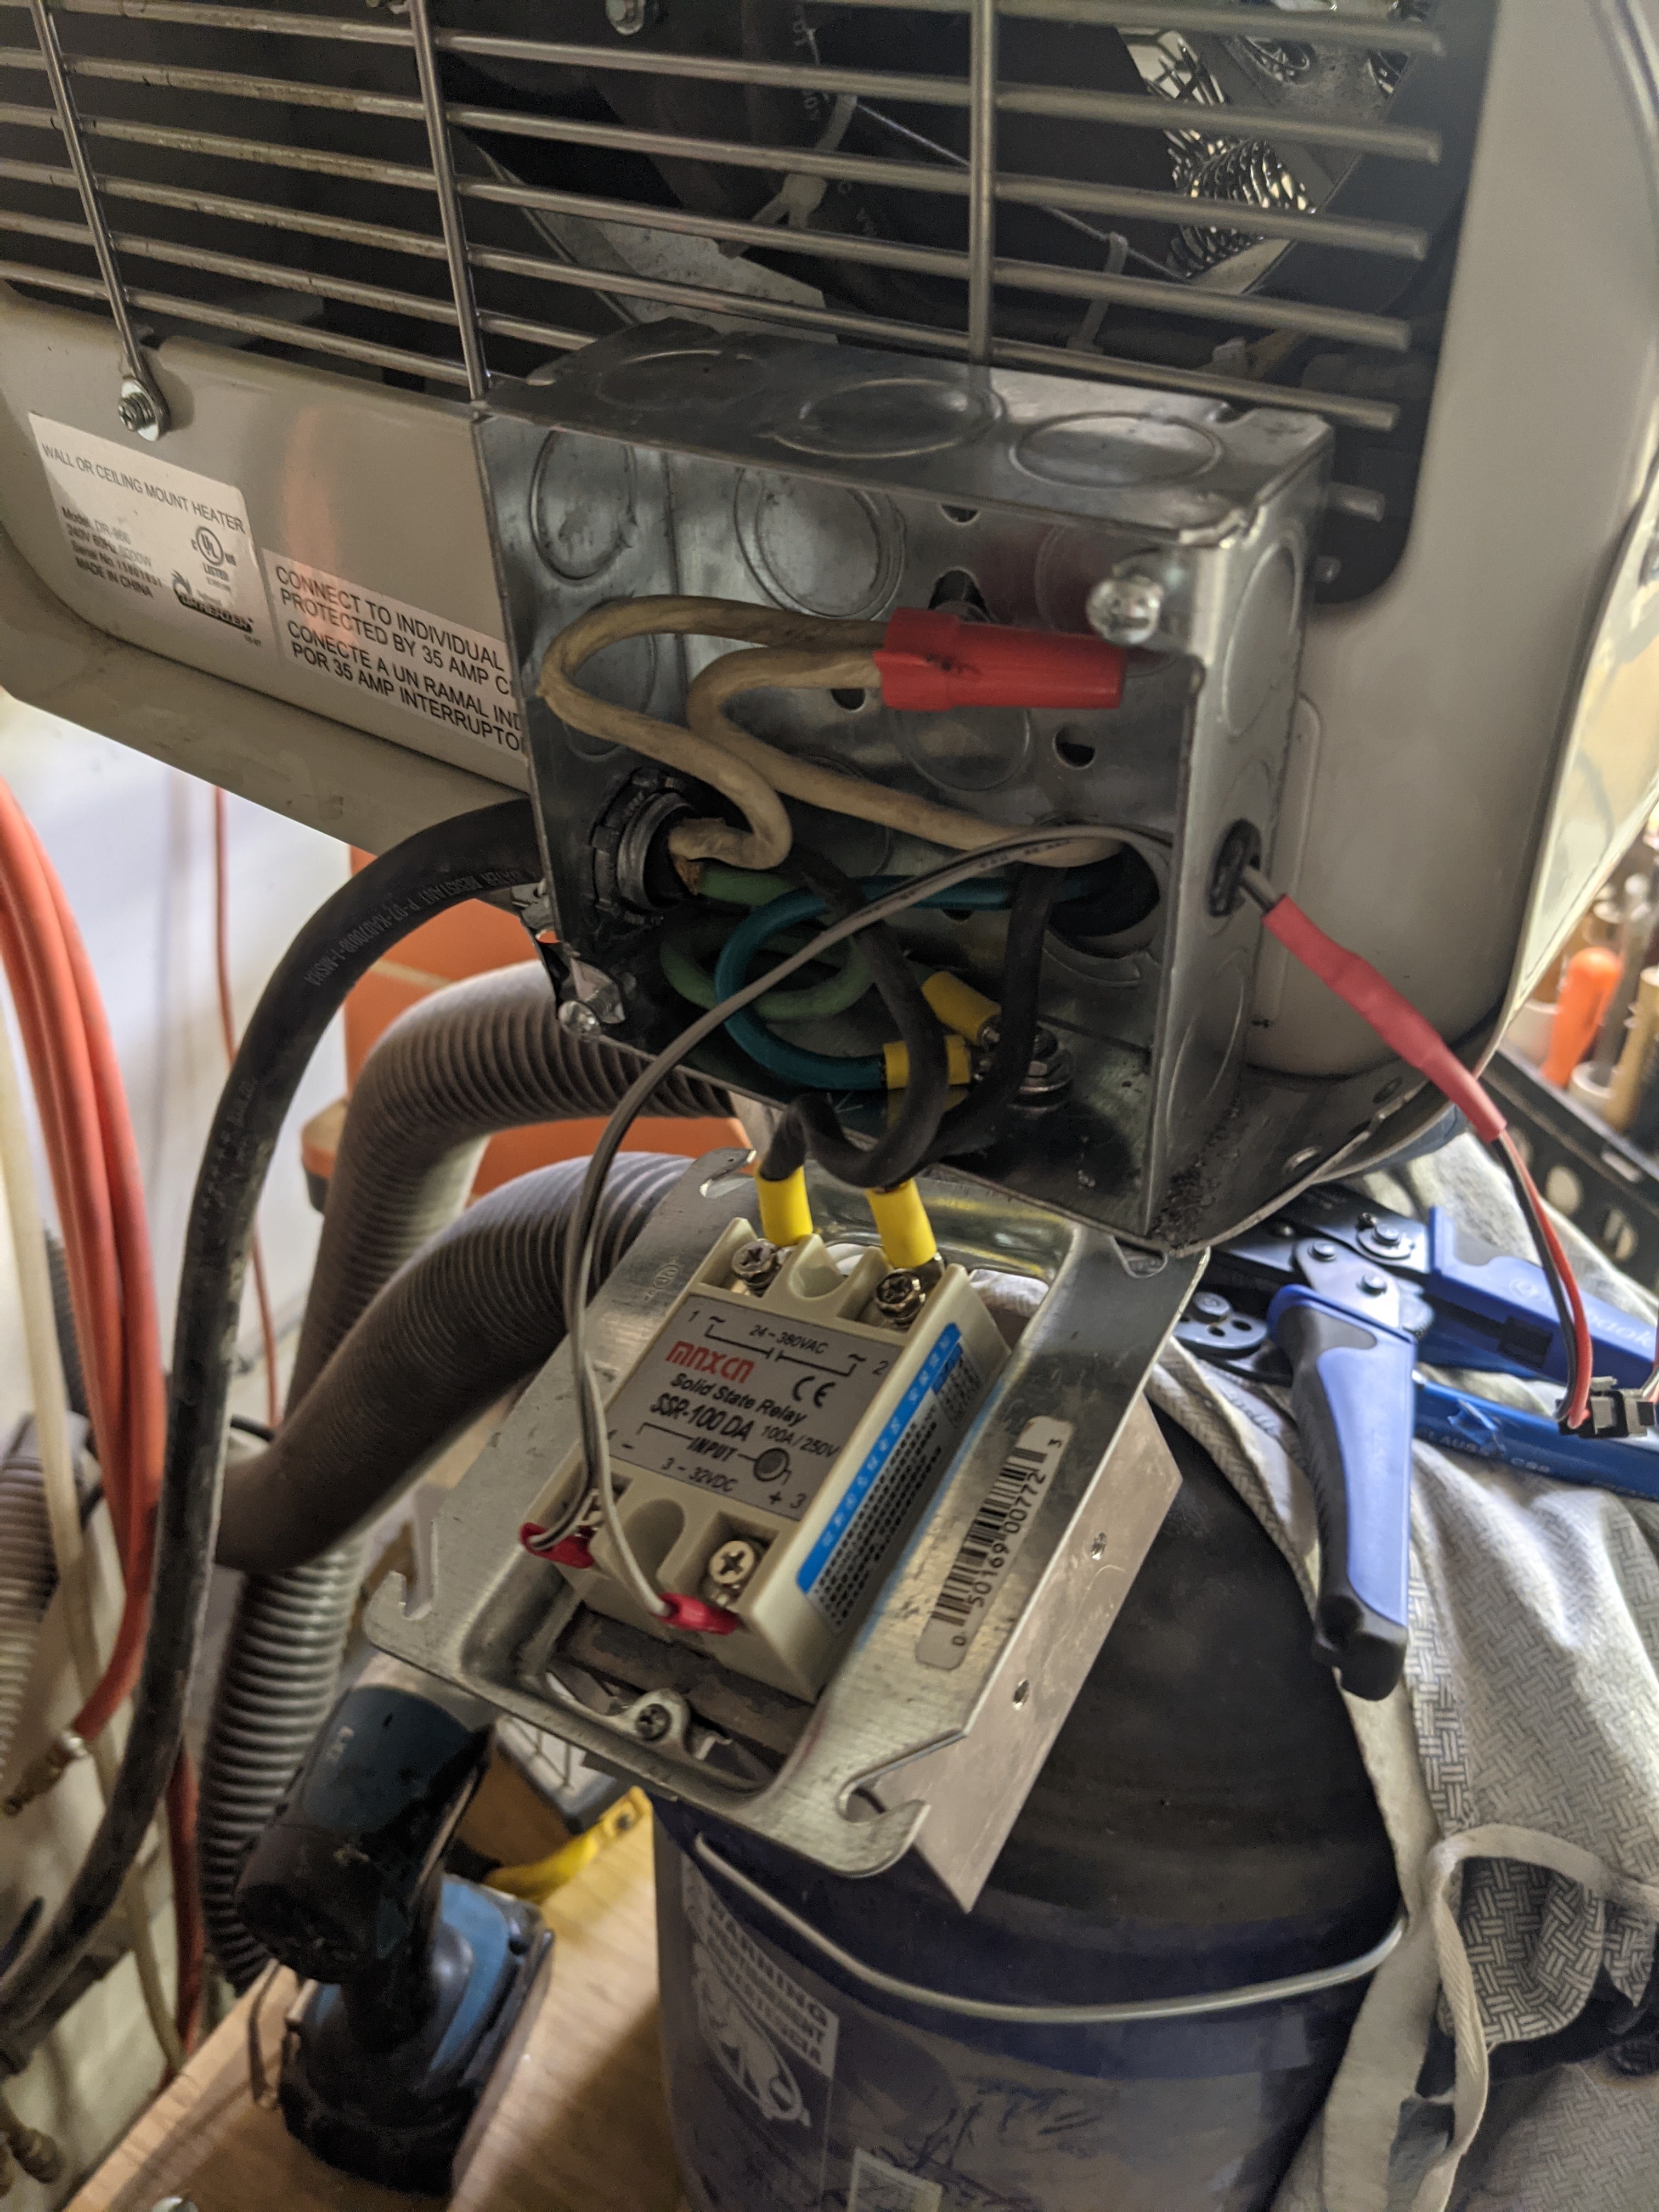
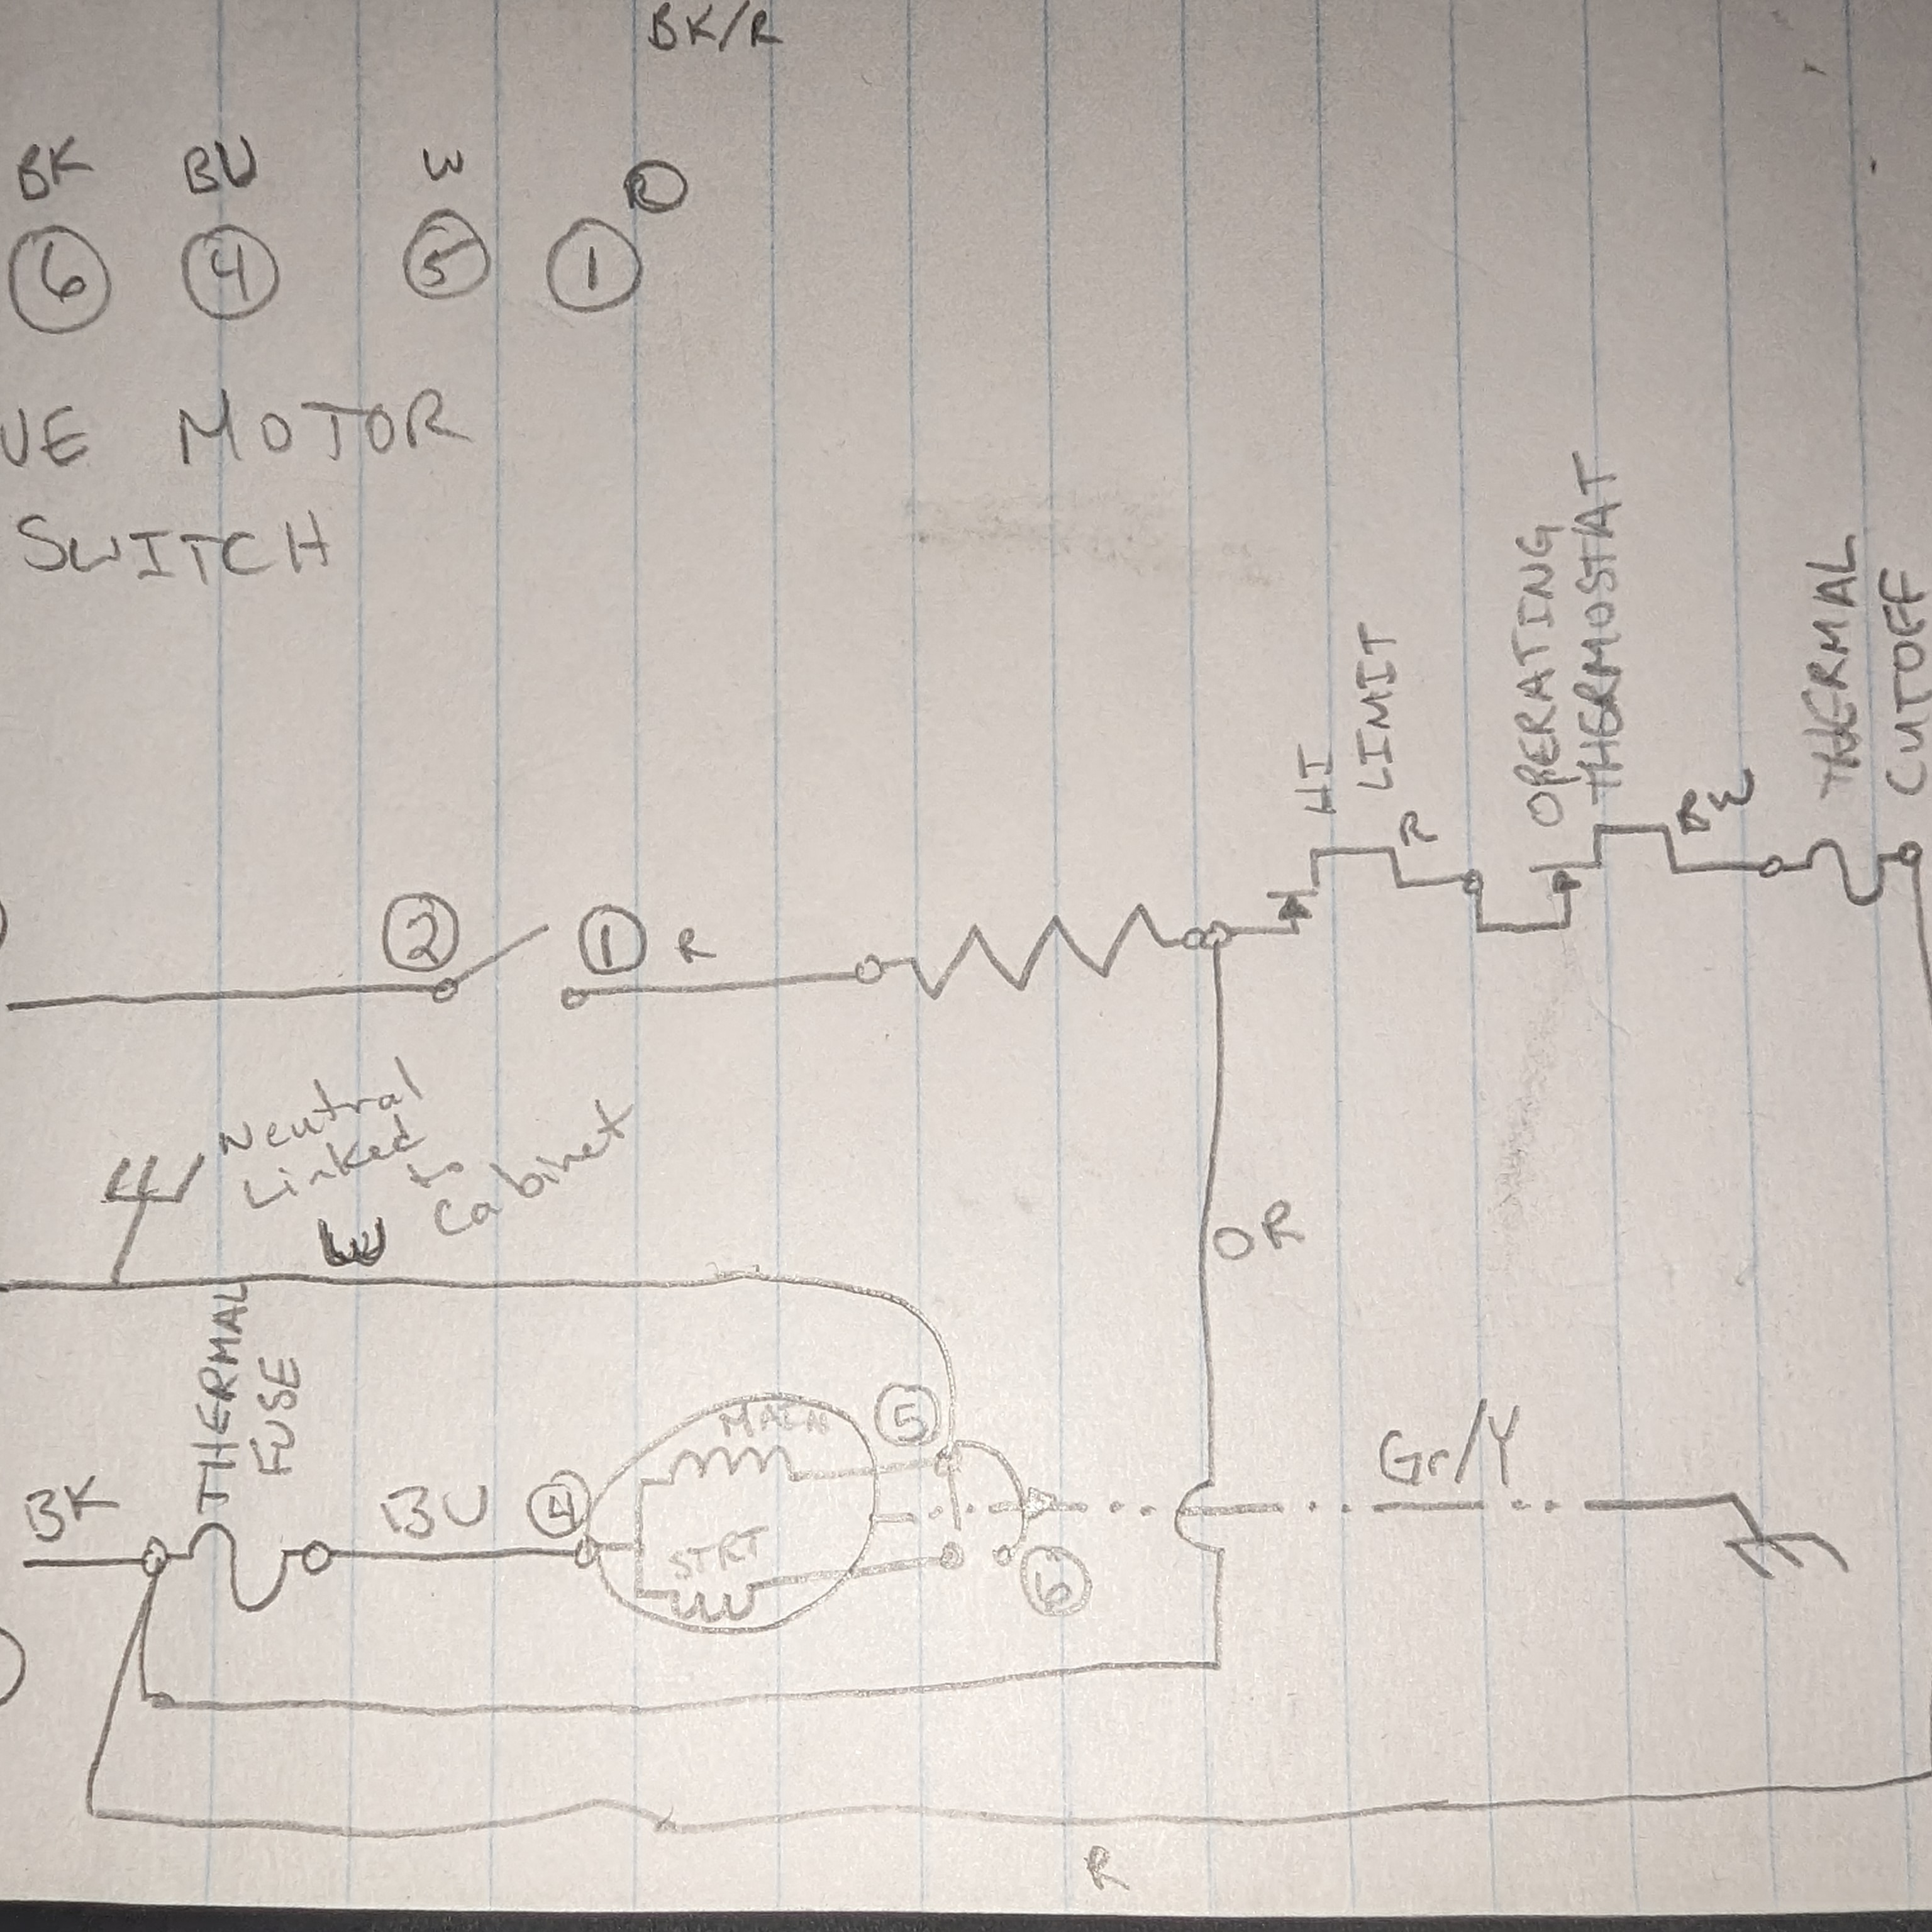
Ok so after studying the heck out of this thing and how it operated I believe I have it rewired eliminating the timer controls and running it off of a line volt thermostat without adding any other electronics. I’ve drawn up a diagram that I hope makes sense if anyone wants to make sure I’m not going to set myself on fire.
1 Like
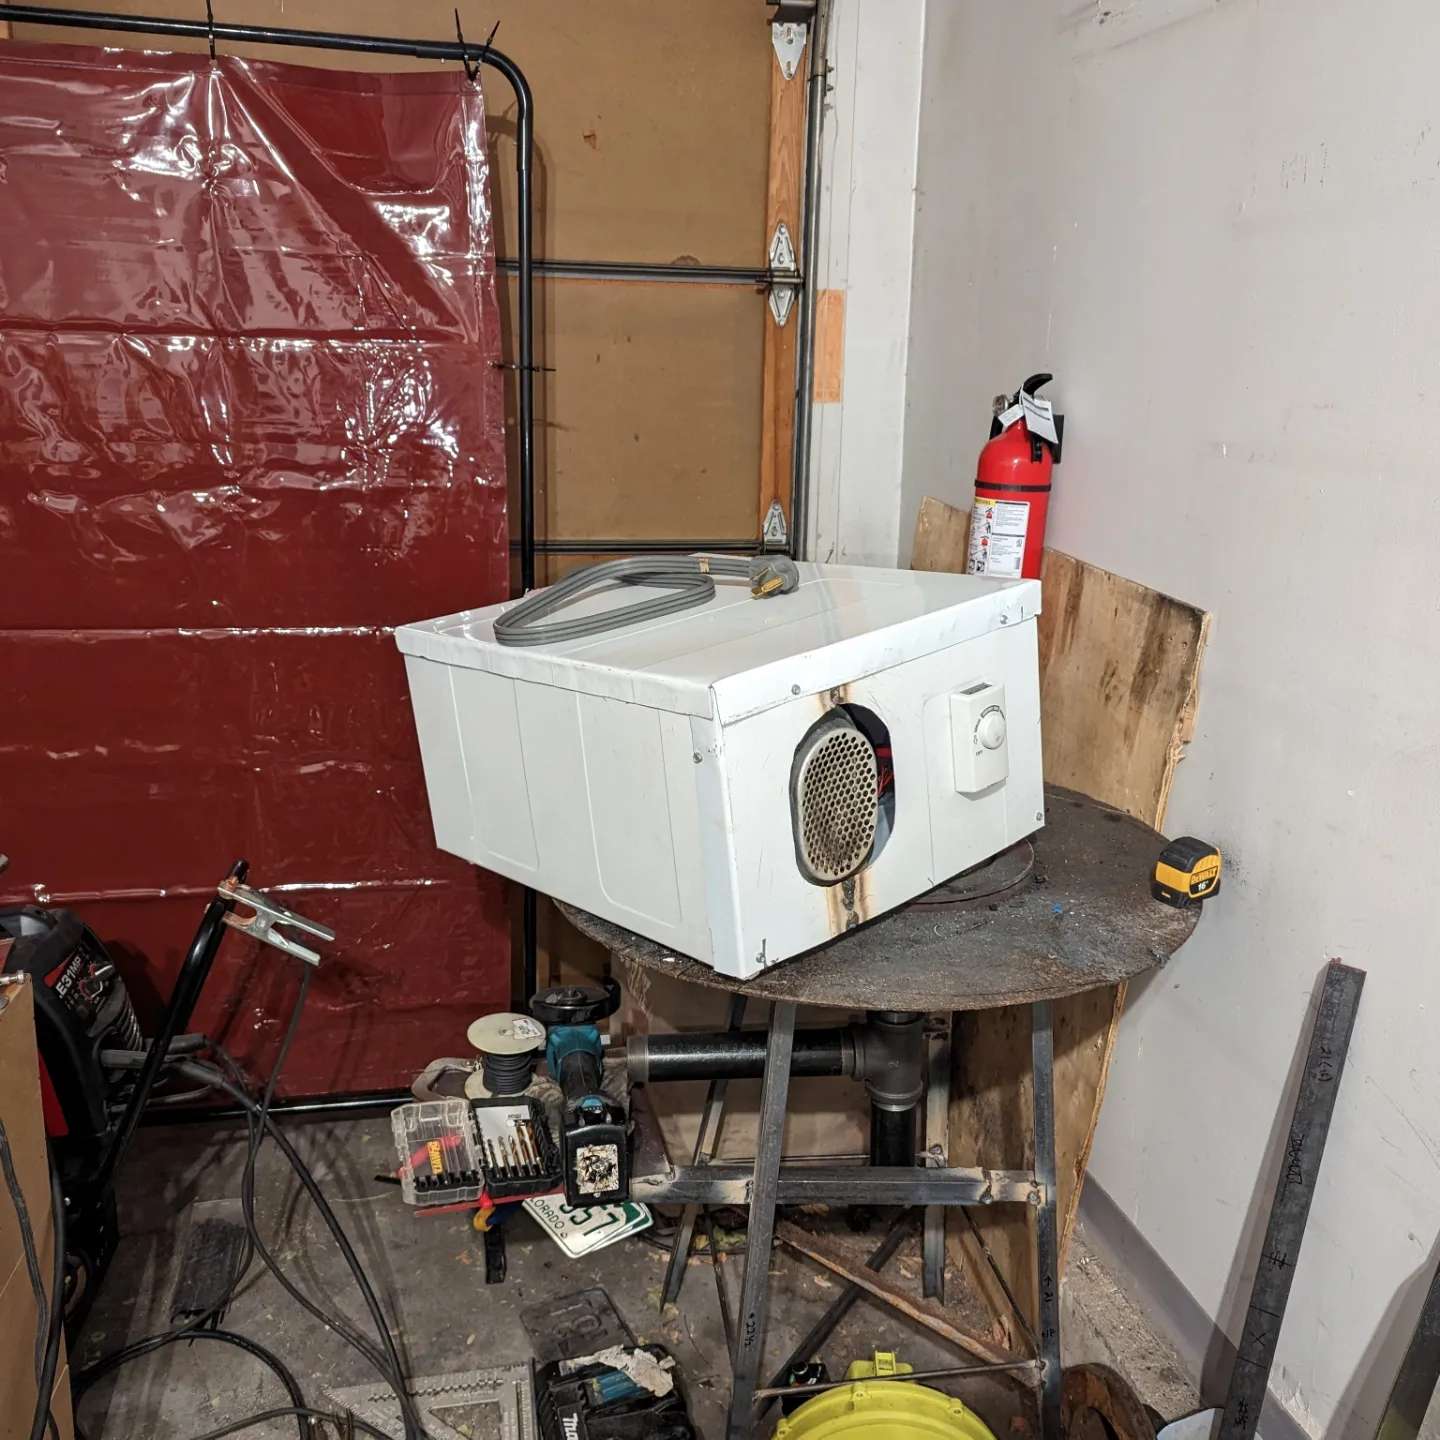
still gonna throw a filter box on the back so i can reduce wood dust getting into the element, but she is all done.
2 Likes
Wow, that does not look anything like a clothes dryer. ![]()
![]()
Looks like a nice build.
The forum could benefit from some details on how you built and wired it?
1 Like
That’s great and very nice repackaging work!
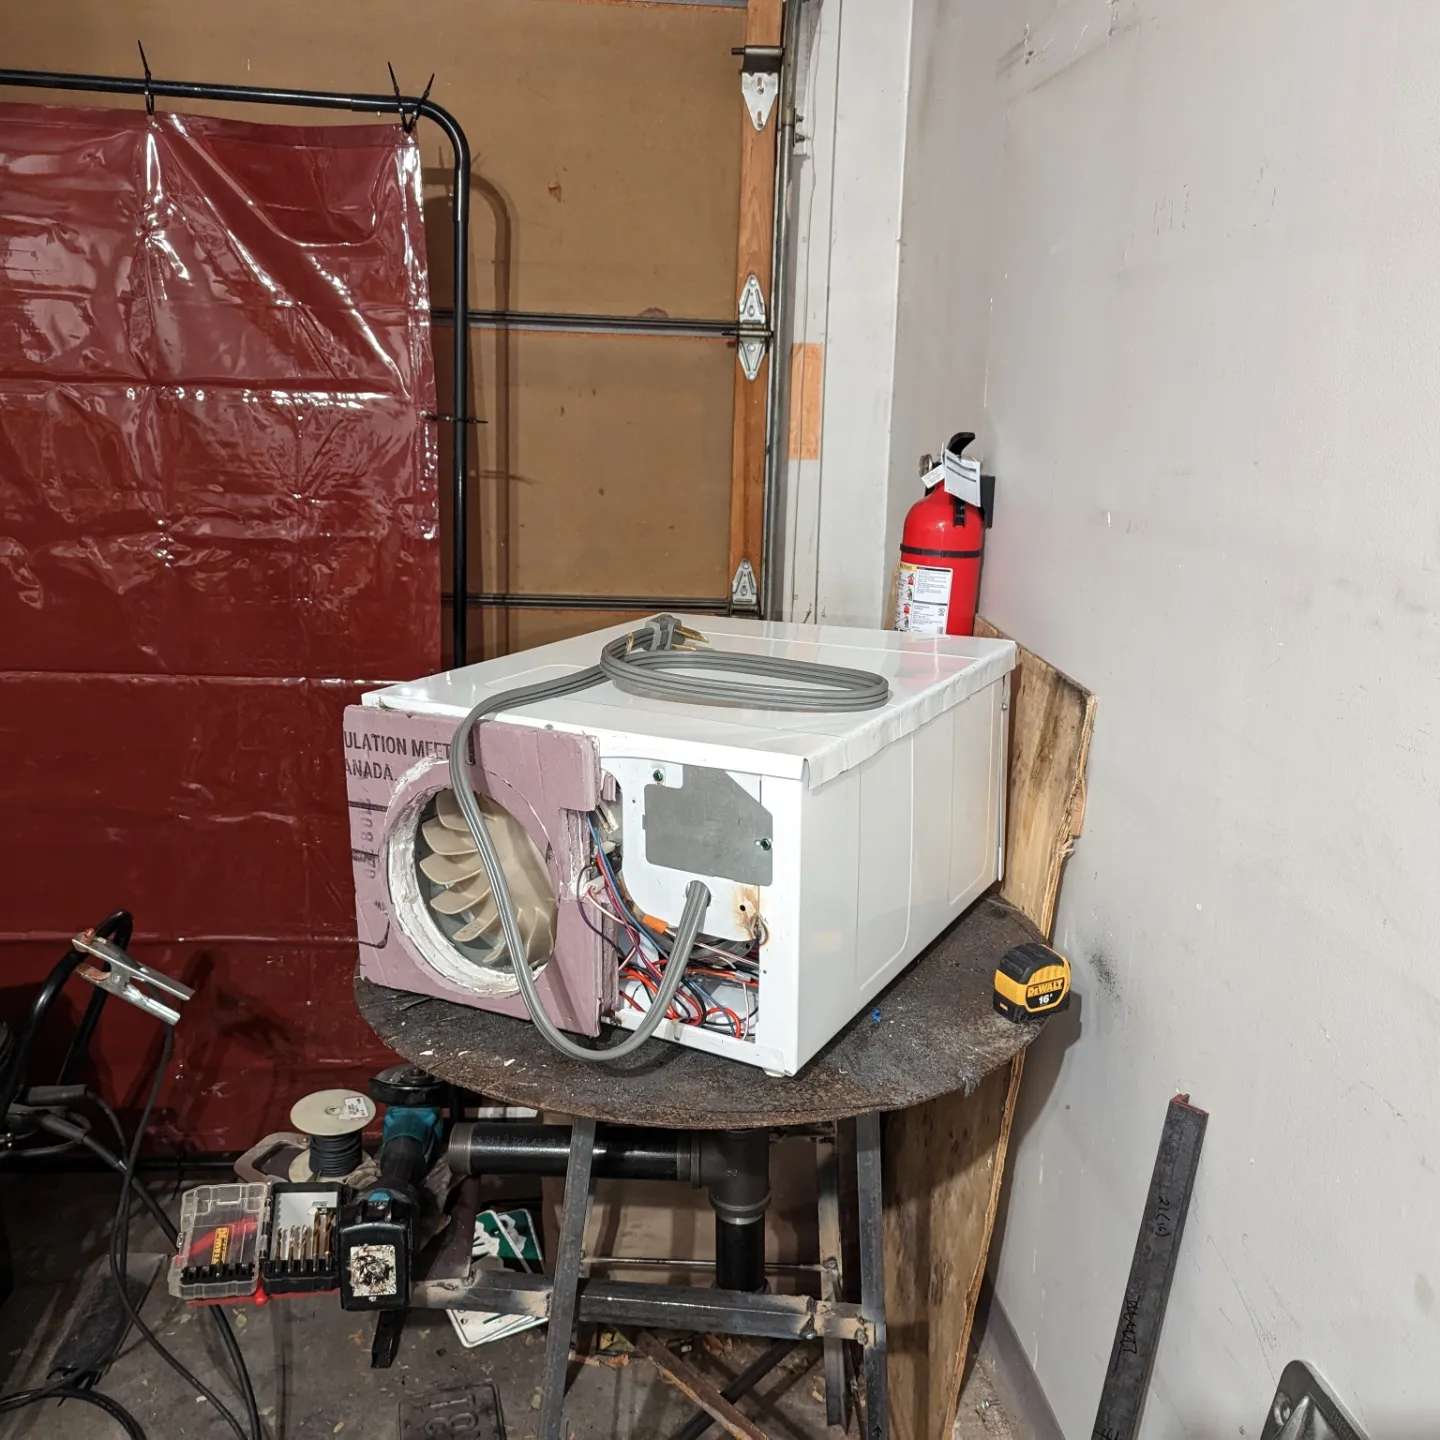
Yea, I will try and draw up the wire diagram a bit better and take the top off to take some pictures. I’ll be honest I have not test run it since I completed it only because I don’t want to test it in my laundry room lol. So until I can put an outlet in the garage to test it as far as I know, it works as intended. I did do a test run after I completed modifying the wiring before I started to reshape the box and it did operate as intended for the few seconds I let it run, but have not done a real test run yet. Still, can’t wait to run this and see how it performs.
1 Like