The hardest part (I suspect), the duct, printed successfully. 13 grams in total. And when I pointed my heat gun at the intakes of the ducts to get rid of PETG frizz, I put a finger between the nozzles and definitely felt hot air coming out, so the impedance shouldn’t be too bad; cooling ought to work.
I’m now printing the other two pieces, but am also confident enough to post the files in the current shape.
The README has printing and installation instructions.
When I installed it, I found that the volcano model or the BP6 model i was working from didn’t match what I had, such that the bottom of the duct was approximately co-planar in XY with the tip of the nozzle. That won’t work!
Additionally, two of the holes I was going to use to attach the duct to the carriage are blocked by the linear rail from attaching in the back and aren’t necessary anyway.
So I cut down the mounting bracket and raised the ductwork. That will also shave a few grams off the final print.
It moved lots of air, so that part isn’t a problem.
Of course, with this now installed on the printer, I can’t use this printer to re-print its own part, so I’ll print this on the other printer.
Edit: I took a rasp to the bottom of the original duct and it works fine as is. I’m still printing with the original, but expect to eventually replace it with the improved model.
It’s been a busy week, not much time to play with the printer. But the few prints I tried failed.
I must have done something wrong with PROBE_CALIBRATE in Klipper after installing the new extruder setup, because tonight when I sat down to diagnose the problem, I discovered that the nozzle was too close to the bed. Rather than try to use PROBE_CALIBRATE again right now, I adjusted manually, and now have been printing off one-layer 0.3mm thick coupons to dial in the first layer, changing the [probe] z_offset by .025mm at a time, and labeling my coupons with the z_offset so that I can choose what actually works.
Then I can start printing for real.
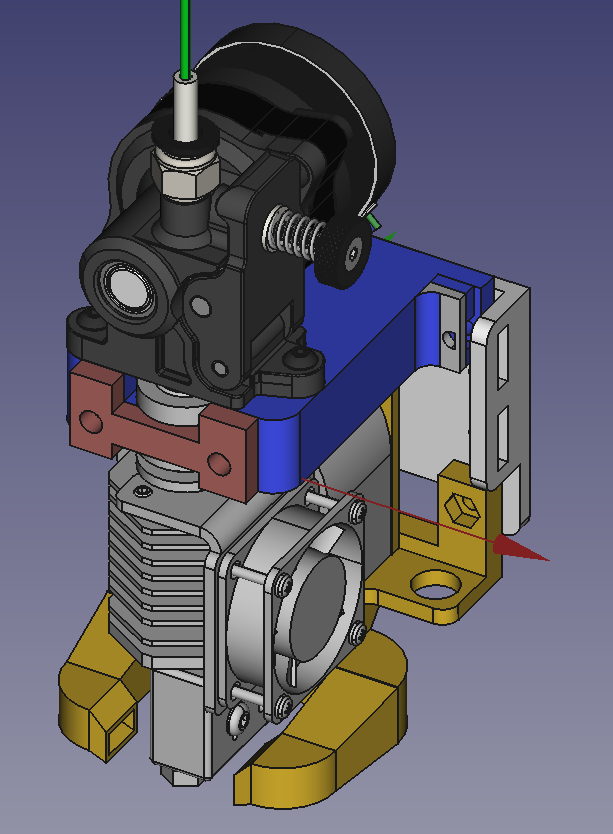
I’ve discovered the one thing I don’t like about the orbiter: with no exposed gears to turn, I can’t load filament manually, I really have to use the Extrude button to grab the filament and pull it in.
I love the fan presentation that makes the nozzle easy to remove and replace with a couple screws.
Hopefully I’m close to back to a printer that my kids an also use and not just me mess around with.
I’ve spent way more than that on failed prints, and I don’t have any idea why.
Using the same slicer and same slicer settings, test coupons are printing great. I have confirmed that the settings are the same by using diff to compare the gcode files for the part and the coupon and looking at the embedded settings. I also ironed a single-layer test coupon at 0.3mm and it measured .31mm thick, so that’s close enough to work.
Printing the coupons works fine, but printing the part doesn’t. I’m getting skips from the extruder and failed extrusion. I don’t see how it can be a clog because immediately after failing to print the part, I can still print yet another single-layer test coupon of the same first-layer thickness, even though it’s about the same size and same thickness.
I’ve re-sliced the test print multiple times. I’m running low on ideas for what could be wrong.
I gave up and printed another part entirely and it was just about perfect.
A few days before Christmas, a replacement constant-force spring arrived, and with my digital hang scale I measured its force as within spec.
Today I received a set of redesigned bed brackets that implement the changes I suggested to maximize build volume within the frame constraints. I can get rid of the workaround I used for the back bracket. I can also adjust the X position of the bed a bit easier with the new design of the front brackets.
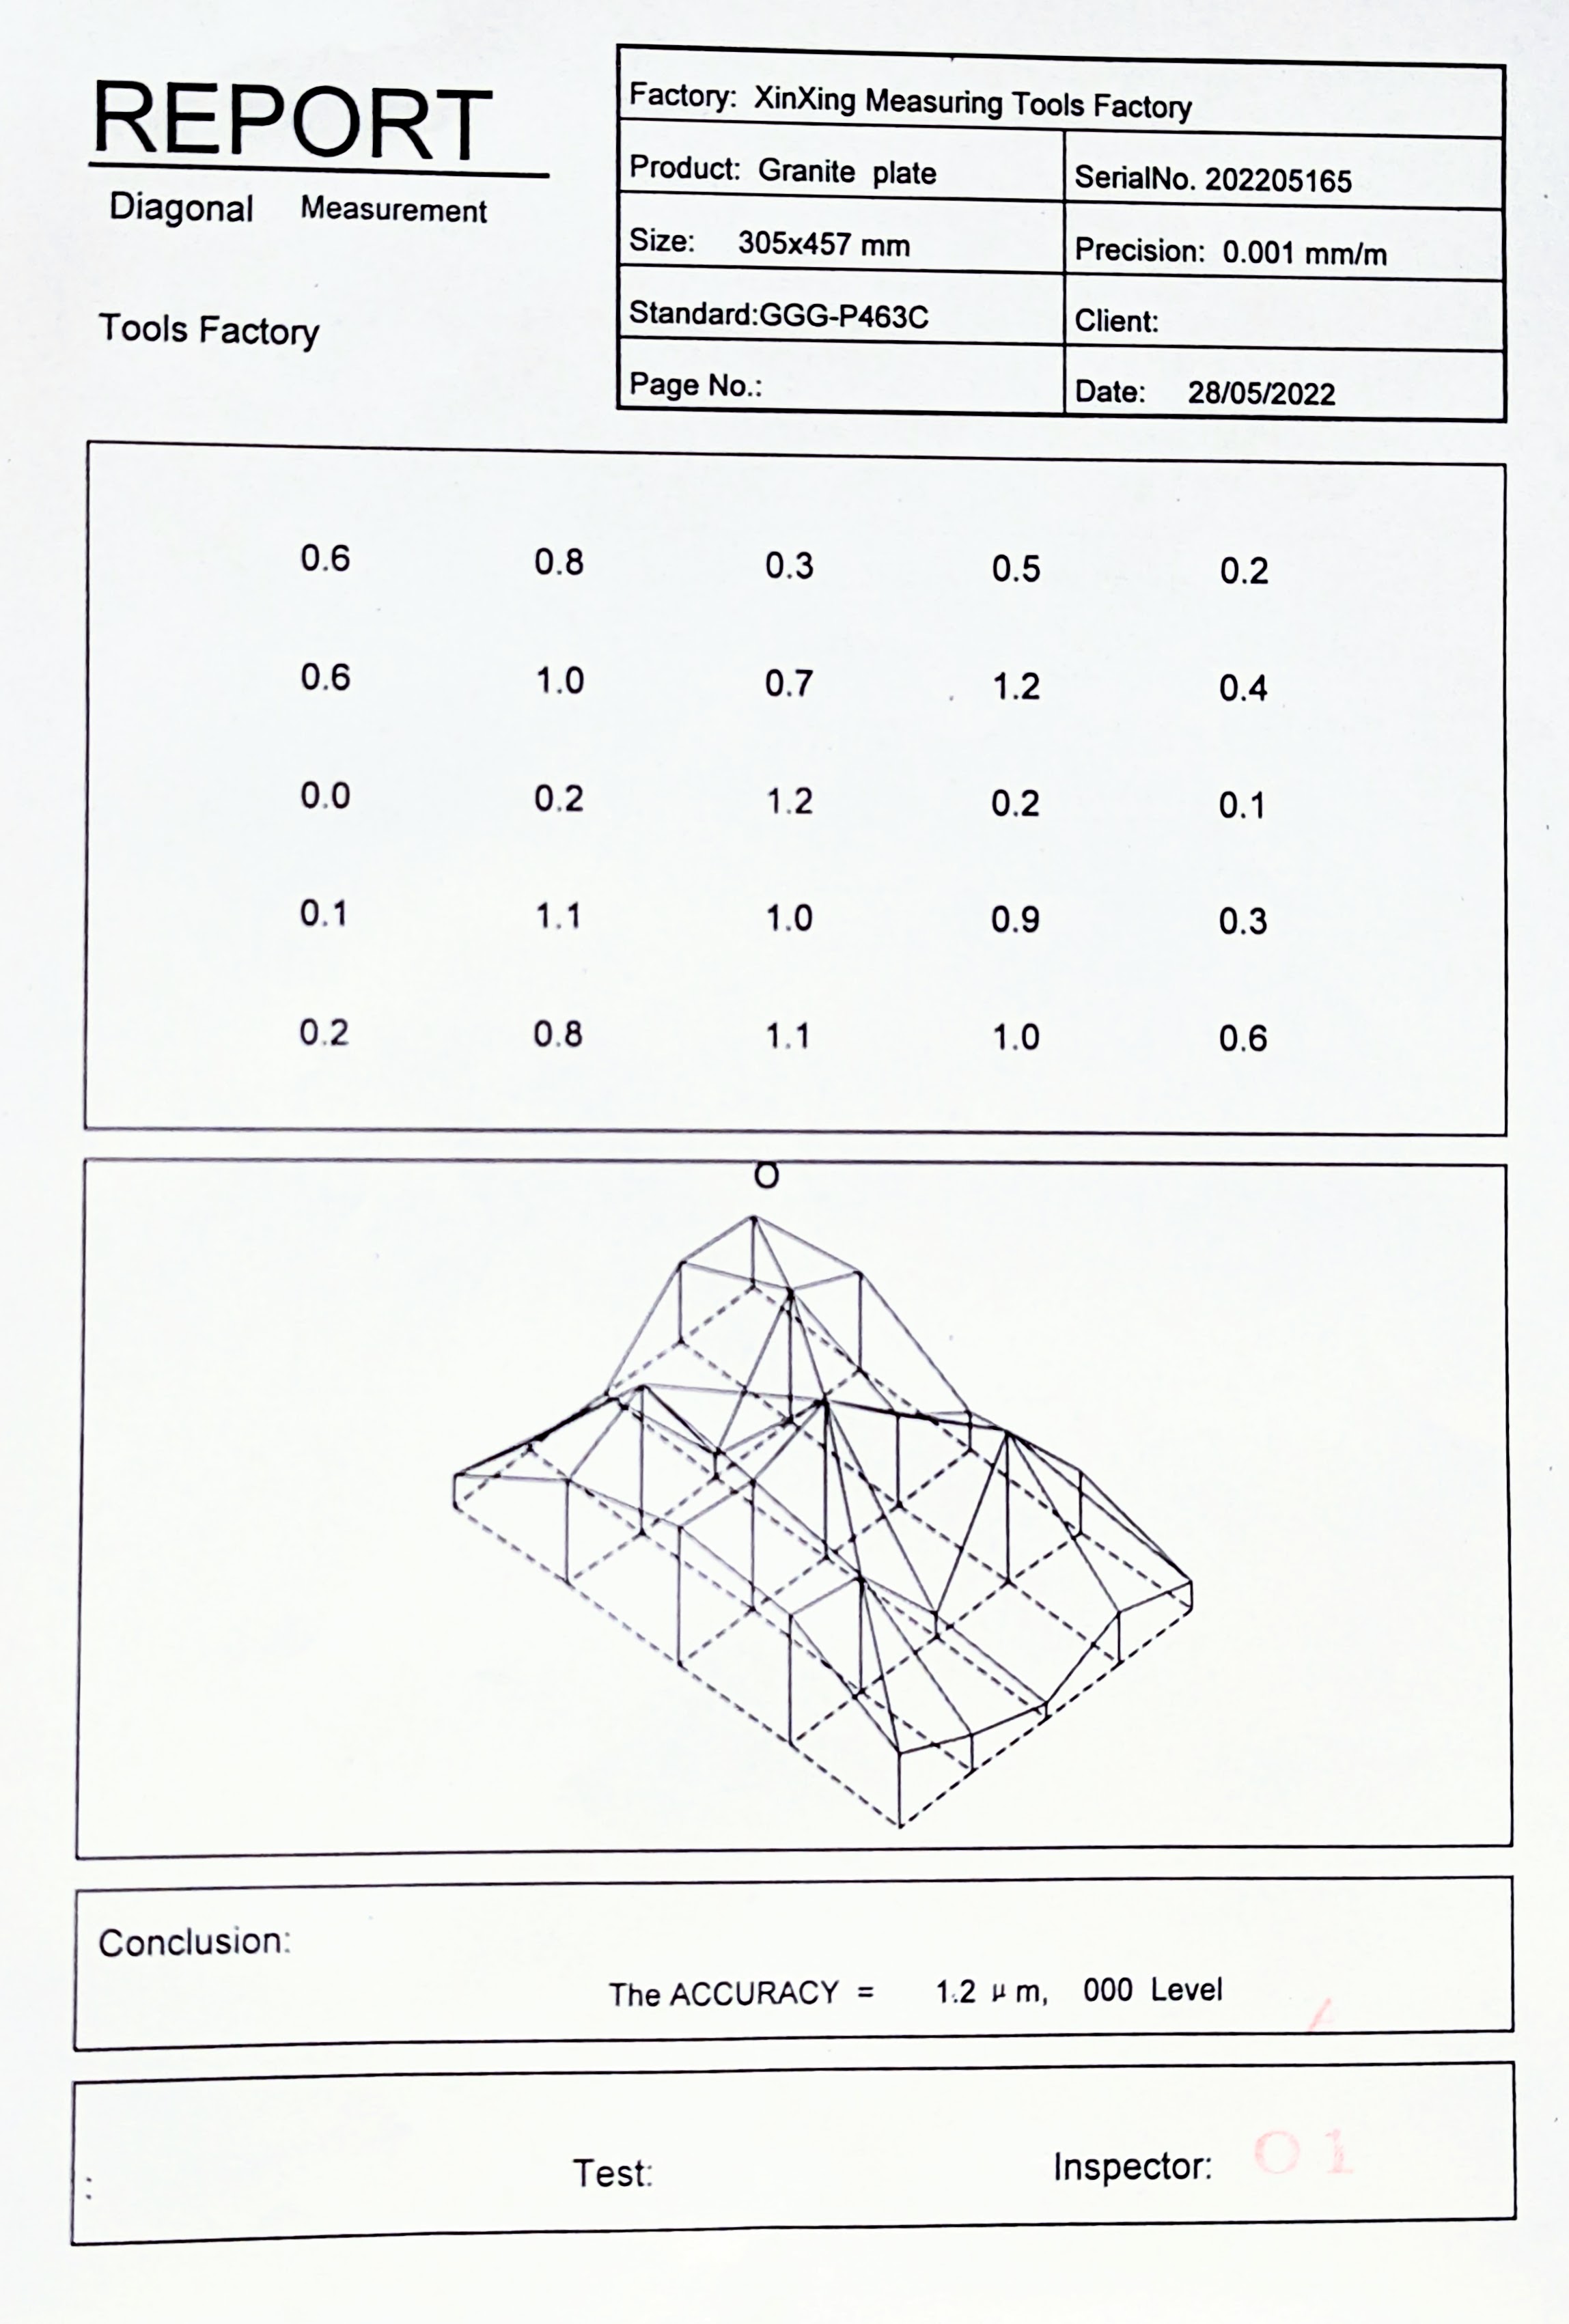
I tore the magnetic sheet off and probed the bare aluminum bed. 0.681500 mm variation across the bed. I have provided that data and asked one more time for a complete new set.
Update: SecKit has agreed to replace the bed with one that is more flat and is covering shipping.
If I were starting this journey today, I would have added the Jubilee to my list of possibilities. Given that I complained about not getting quite all 350x350 mm on the SK-Tank, though, I probably wouldn’t personally have chosen a 300x300 kit. Others might have different size considerations, and Filastruder producing the kit makes me optimistic about quality.
The replacement bed came almost twice as flat as the old one, 0.35mm variance measured across the bed. It had been CNC surfaced and rough sanded on both sides. This time I probed the bare bed before installing heater or magnetic sheet, and I’m not going to put anything on it until I decide whether to try to flatten the aluminum.
I’d still like flatter than 0.35mm variance. I’m wondering how much work it would be to bring it down to 0.1mm or less variance. Judiciously marking the bed contours and sanding down higher spots? I definitely learned that Sanding (or planing or scraping?) magnetic sheet for flatter bed? doesn’t work well, but aluminum should be better-behaved.
I’m definitely going down a rabbit hole here, but I found a relatively affordable surface plate that will be big enough, I think. It has at least one dimension larger than the bed… My 8x12 surface plate doesn’t have a lot of working room anyway.
I sincerely doubt at that price it’s actually A grade, but it should meet my needs.
Tonight I re-measured the bed in the printer. Not just probing it with the non-contact induction probe. I ran a dial indicator across it, attached to the print head, showing that it wasn’t flat. I even took a video of the dial indicator as it tracked back and forth across the bed. But then I took the bed off the printer, set it on my mill table, attached the dial indicator to the mill spindle, and ran it across the same track that read almost .01" of variance when I read it on the printer, and it read much flatter on the mill, .002" at most.
This must mean that the printer gantry is out of square in a complicated way.
The original bed definitely wasn’t flat. I could use a straightedge and it rocked on the bed in some ways, and I could slip a shim under the middle other ways. This bed has a few places that can pass a .001" shim under a straightedge, but not nearly as bad as the original. It might be good enough.
I have been looking at the bed mesh and I can’t figure out what combination of unsquareness of the machine could result in the mesh I see. I tried relaxing all possible screws through the linear rail and that didn’t help. Still trying to work out what could be wrong.
@DimitaXO, I don’t know why you added to what I wrote a link to the tronxy x5s. I did not write that nor would I link to it as a suggestion. My current other printer started out as a tronxy x5s, and it was such hot garbage that I threw away most of it and used the frame, motors, and a few other components to make a new printer that was mostly my own design. I have edited your post to make the quote be what I actually said. The site you linked to looks like a SEO site to me.
If you really want ideas, read the whole thread, not just one later comment linking to an interesting new printer. I started with a fairly wide price range.
My experience trying to get to a flat bed has been frustrating, and I walked away from this for a while.
I finally realized that the Y frame members to which the Y linear rails are attached is itself not flat.
It would be a lot of disassembly to take them off and square the top surface on the mill, so instead I’m just shimming the rails above the frame members to make the rails true as installed.
The X rail clearly droops because it’s not attached to anything to straighten it, but for now I’m not going to worry about that. I’m finally going to put the new bed together with the heater and magnetic surface and get back to printing.
Ultimately I didn’t get the rails perfectly flat; I just accepted some unflatness. I want a working printer, and perfect has become the enemy of better. This is the printer that I want my kids to be able to use, and I haven’t been giving them that opportunity while I’ve been puzzling this over.
When I ordered it, it said it was in stock. A few days later, they notified me that it was not actually in stock, oops. A few days shy of half a year later, it has shipped to me and I have a UPS tracking number.
This is long after I realized that I don’t need it for this purpose, but on the other hand I do actually want a bigger surface plate in my basement machine shop. So, OK I guess?
If that’s an accurate and representation of the surface, then it would be within the definition of a Grade A surface plate. But 25 samples on a 12x18 surface plate doesn’t sound like much to me, so while it’s good enough for my purposes, I don’t think that (e.g.) Starett has anything to be afraid of.
What’s really fascinating to me is that it looks like they could have claimed better. It’s not relative to the bottom. Unilateral flatness is just the minimum distance between two parallel planes such that all the surface points lie between them. If their test points were representative, it seems clear that they didn’t optimize the planes for minimum reported unilateral flatness.