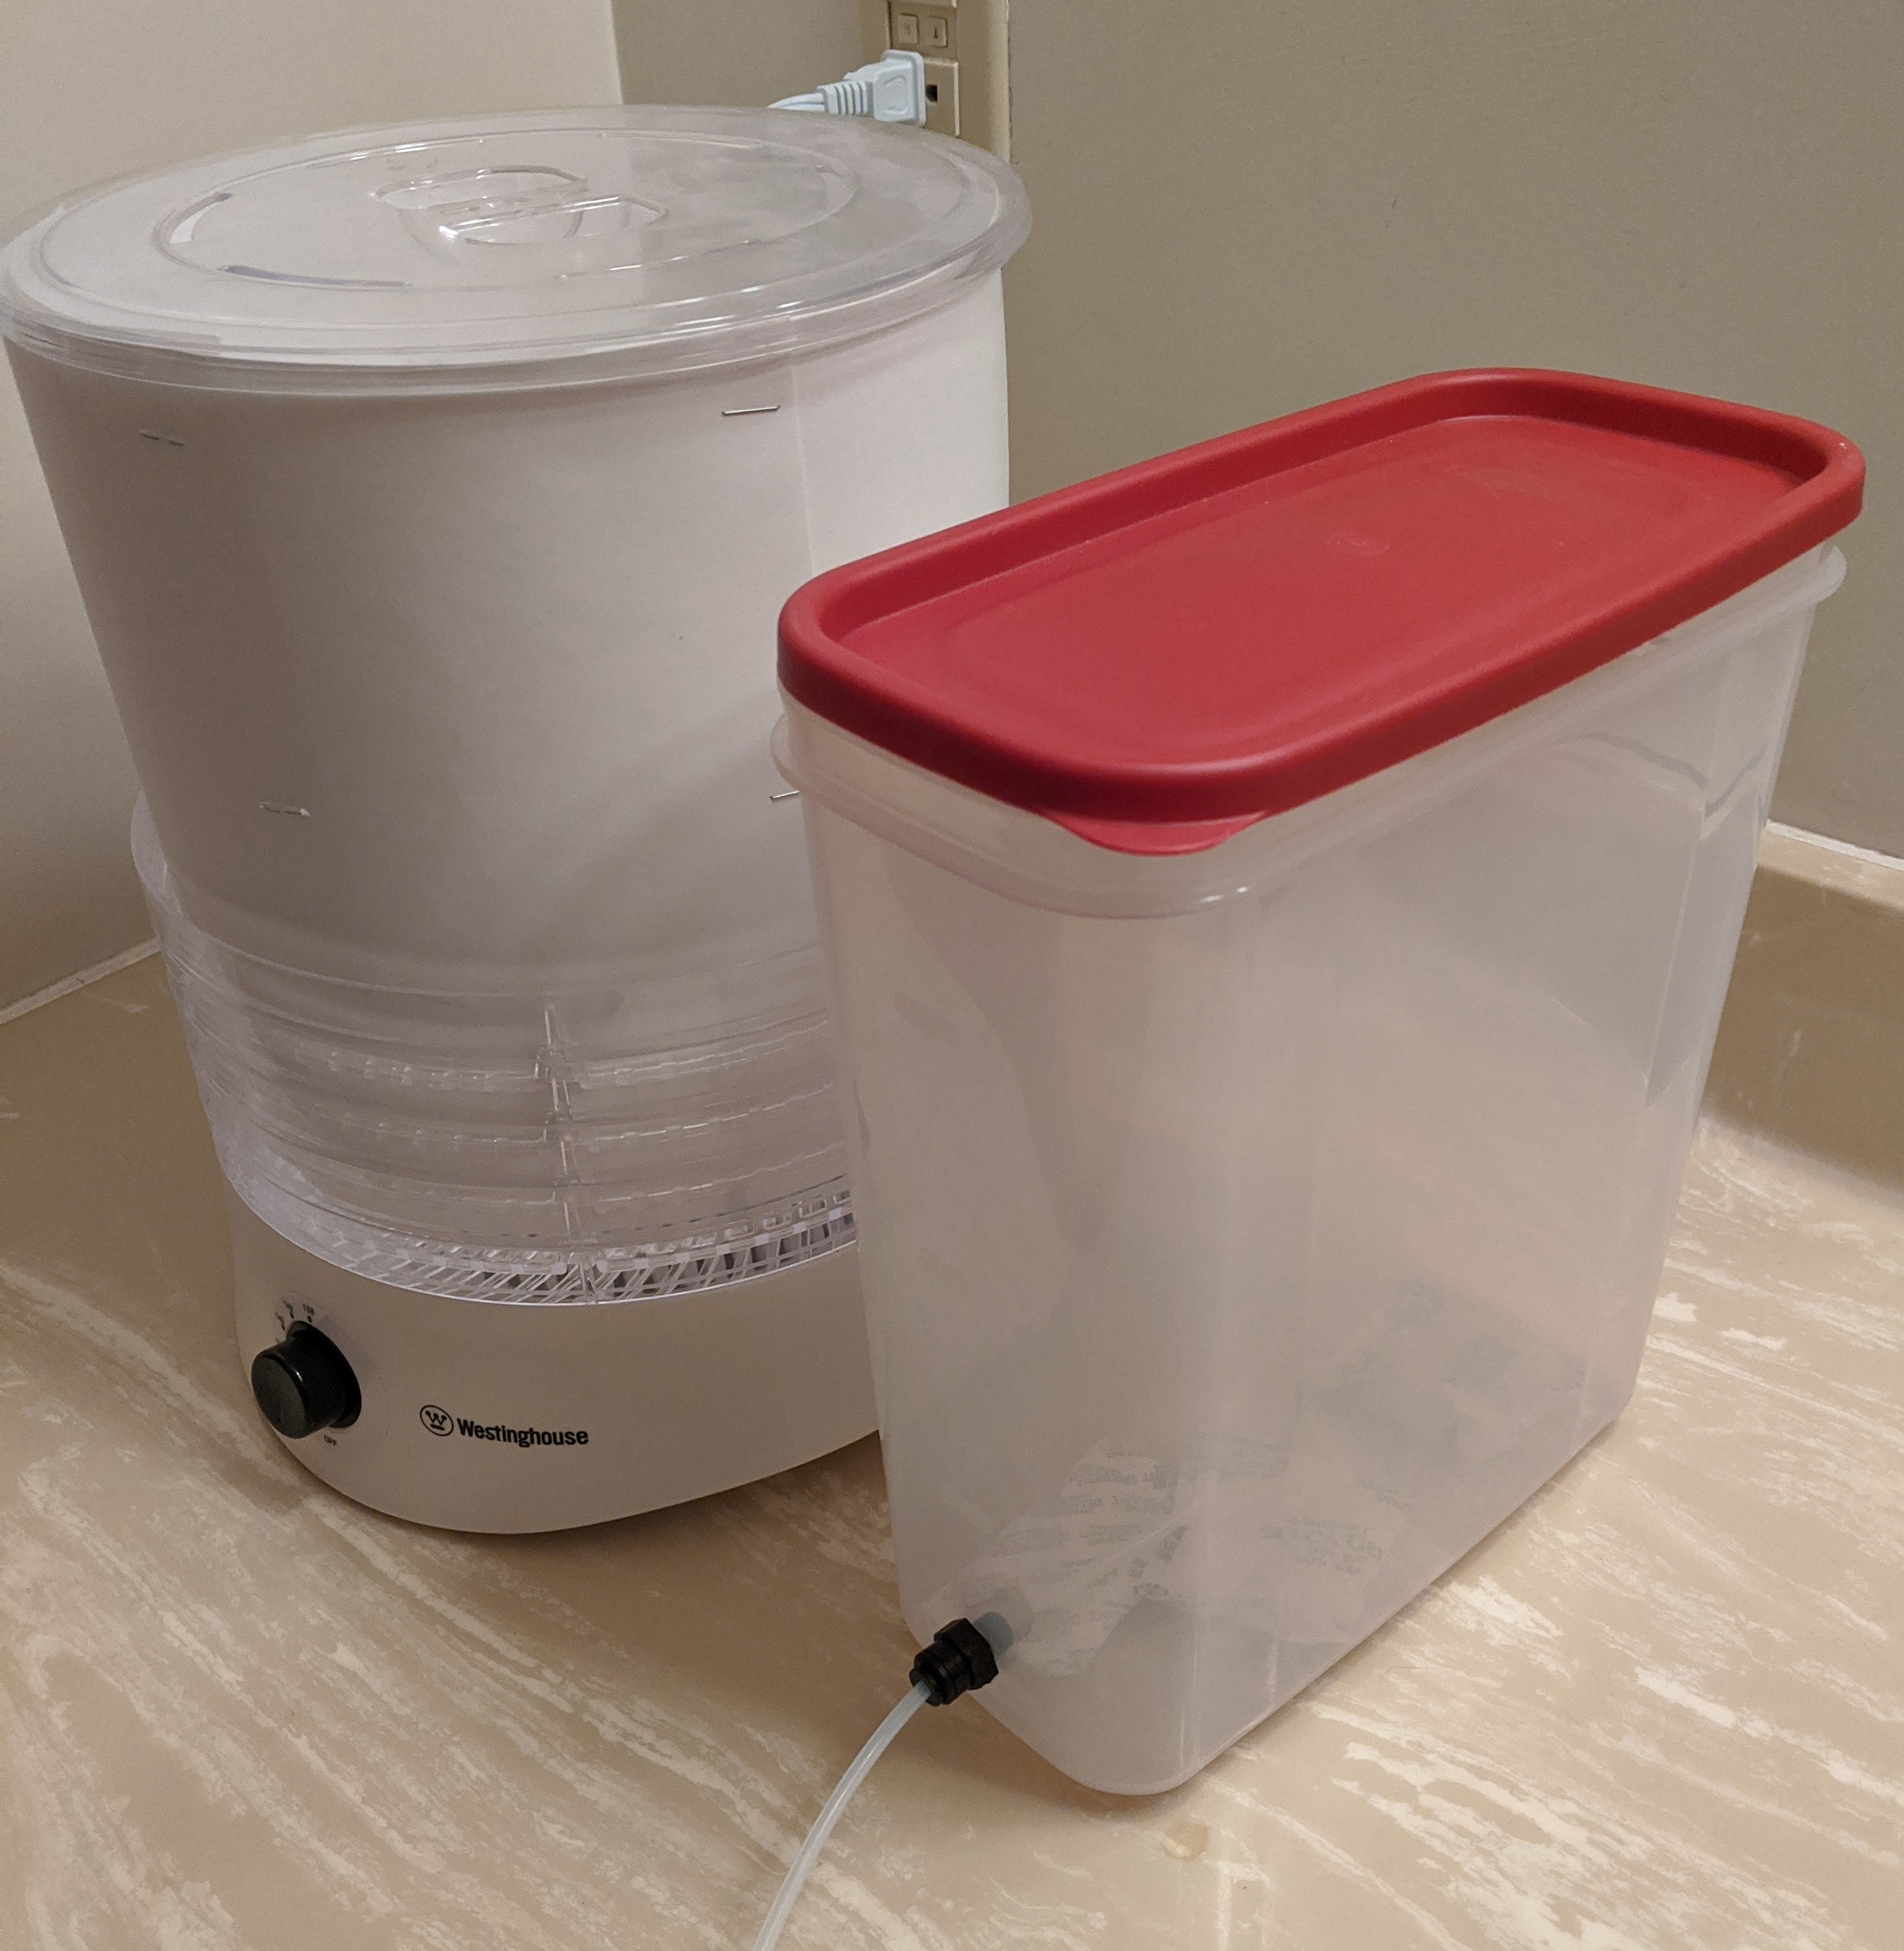
I built a filament drying oven mainly from leftover parts from my tronxy x5s, and it works great. I don’t care whether the heated bed in my drying oven is flat!
I’m noticing that PETG that I dried yesterday is already stringing a little bit today, and I’ve heard that if I start printing polycarbonate (as @Eclsnowman suggested to me on twitter) it’s advisable to print out of a dry box because it soaks up water so fast.
I noticed that a filament spool fits nicely into a bucket. I could see putting several filaments that I’m currently using into a bucket, making small holes in the side for the filament to come out, and having desiccant in the bucket to keep it dry. Any size bucket with a standard 12" top, with a gamma lid on the end, and a rod through the middle somehow to put the reels on, seems like a cheap and easy way to get a dry box. I could put it between my printers (once I get the second printer up and running) and have it feeding both printers simultaneously.
Uses a Rubbermade 21cup container, thread in a 4mm pushlock fitting or bulkhead, print a bearing spool roller for the bottom, add refreshed desiccant packs you get packaged in new spools.
I ended up buying a Sterilite 21quart box because Target had them and we needed to get some other stuff at Target anyway. I expected them to hold two spools with some room to spare; it turns out they easily hold four spools with a little room to spare. I’ll see how well their lid gasket works; worst case I can use some mold release or plastic wrap and elastomeric caulk to make a better form-filled gasket. I’ll be able to put the box between the printers and feed both printers at once, so I’ll only need one heater.
Thank you! The TPU cap from that build will save me some effort. I’m drying some ninjaflex right now and was expecting to have to model a cap myself. I screwed M6 4mm push fittings right into the box lid; I drilled 5mm tapped M6 with a spiral flute tap, and put M6 nuts on the back to keep them from coming loose.
I have some of those temperature/humidify sensors arriving today, and a reptile heater arriving tomorrow or so. In the meantime, it’s still better than nothing!
For suspending the rolls of filament, I didn’t yet do anything interesting. I just put chunks of styrofoam in each end, and cut a slot to suspend a length of EMT conduit across it. That will keep me going for a while. I’ll probably insulate the bottom too when I add the heater tomorrow, just to make sure I’m heating the filament, not the desk.
Rather than cut a big hole for the heater cord, I just taped the reptile heater pad to the bottom of the box and then taped the box onto a piece of insulation. It’s a 7W heater and that’s really not optimal for 21qt. It’s about 10⁰F warmer than room temperature and relative humidity is at 25% with a large silica gel bag in it.
I also found out that the PTFE tube I was using was low quality and was binding the filament, which worked poorly for ninjaflex. I’m just using it as a guide not a bowden feed. I’d like to get some higher-quality tubing but I don’t think I want 1.9mm ID tubing. Better-than-junk 2x4mm PTFE seems right. But finding consistently high-quality source of PTFE tubing seems to be difficult, based on reviews.
Just out of curiosity, why are you heating the box if you are using a silica gel desiccant? When you increase the temp of silica gel it starts to lose it’s adsorpbing capacity.
But less so than the reduction in relative humidity, I thought? I dropped another temp/humidify sensor in the box and it’s 86⁰F at the bottom by the heater and 81⁰F at the top, and 25% relative humidity. The relative humidity with silica gel and no heater was 28% IIRC. But this is stuff I don’t know, so happy to be edumacated!
Well, it turns out that there is not much temp dependency, capacity wise, at %RH below about 35% for silica gel at the temps you are giving. Depending on the accuracy of your sensor I’m not sure how significant is a 3%RH difference. Of course the higher temp is also going to be getting you to equilibrium sooner, which could explain the difference.
This morning, the box is at room temperature, so the heater already died in only a few days. Good thing I wasn’t depending on it for heat for a pet reptile! So when I return it, I shouldn’t replace it, and I don’t need to hook up a system to add heaters to my storage dry boxes. Glad I didn’t poke holes for a heater cord!
This sent me down a bit of a rabbit hole last night as it’s been a long time since I’ve thought about sorption isotherms and water activity in solids.
I now have a greater understanding of why PLA is prone to absorbing water (multiple modes of hydrogen bonding). Didn’t run across any papers on PLA filament but it’s been studied for the food industry as thin films.
So, I agree that there appears to be no real advantage to heating the box in conjunction with silica gel on a constant basis. It’s possible that heating the box for a short time could get you to equilibrium quicker, but for filament that’s already dry (below an acceptable moisture content) that’s not going to be an issue. You could alternatively add a small fan to circulate the air a bit.
Thank you! Since I now have a filament-drying oven and for a long time I’ve stored all open filament in sealed boxes with desiccant, I clearly don’t need a dry-box heater or fan.
The heater wasn’t broken; the heater control had been bumped and was set to a lower temperature, so PEBKAC there. But I switched it off yesterday.
With it switched off, I’m back to room temperature and 28% relative humidity on both sensors in the box. I don’t know about the accuracy of the cheap sensors, but I’m seeing what look like consistent measurements. I also note that the ones in my room environment measure 35-38% RH (varies; my dehumidifier in the next room is set to its lowest setting, 35%). They respond relatively quickly; when I held one in my hand while transferring it from the shipping box to my dry box for about 30 seconds, I saw that it read 45% RH.
So, maybe I should repurpose the reptile heater I bought for sourdough incubation?
Going back to my original idea of using a bucket, though; a bucket might be great for a filament dryer even though it’s not a great idea for a dry box to print from. I built a filament drying oven that was rectangular in shape and I don’t think I’ll invest time in another build right now, but a bucket seems like a good shape for a filament dryer.
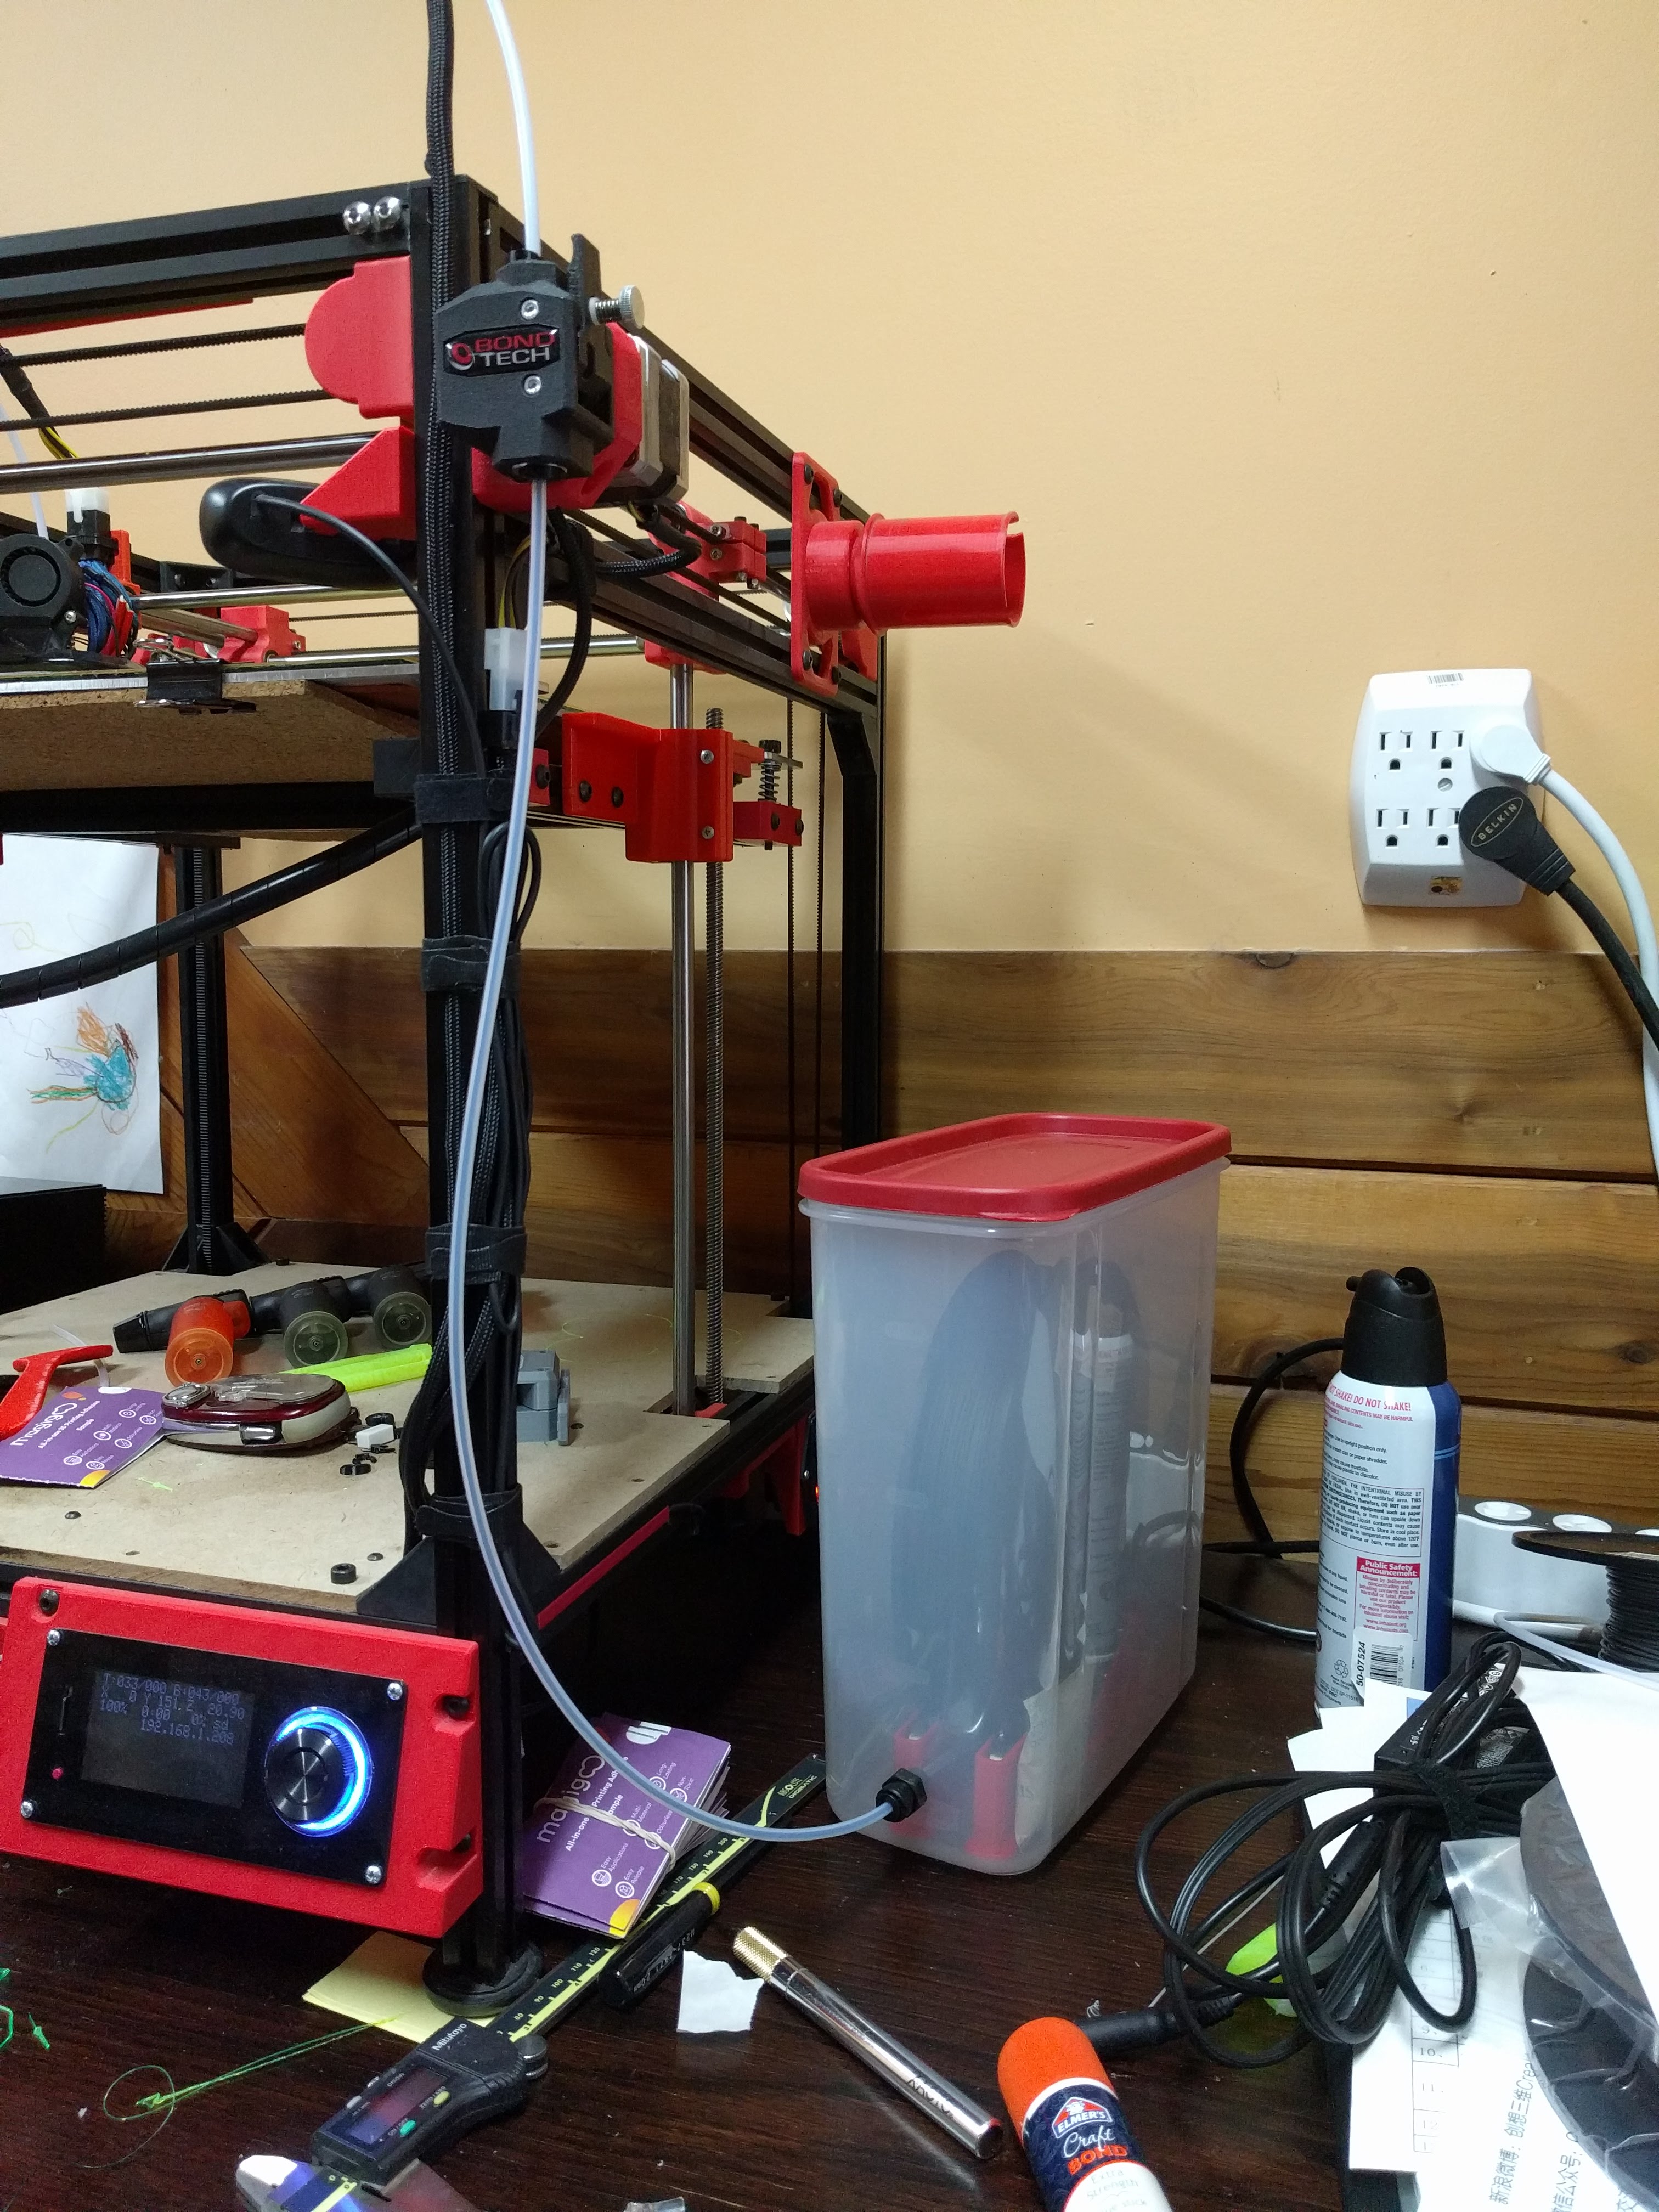
Because I had a batch of bad PTFE tube, I ended up running the filament through the normal fitting without tube, from the box to the printer, for now. There’s not a lot of airflow through a single 2mm hole stuffed with 1.75mm of filament, it turns out.
I’ve been too busy printing PPE to get back to putting ninjaflex in for the port covers from the Jocholos box @Eclsnowman linked to. I have a pile of ninjaflex print jobs that I need to do, but PPE keeps taking priority.
I’m getting months of service out of a bag of silica gel even without ever getting around to printing the ninjaflex caps.
If I were doing it over again I think I would run the filament out the side rather than putting the fittings in the lid; turns out it’s quite a dance getting the lid on without tangling filament on the spool. Lessons learned.
Meanwhile, the reptile heater has been repurposed to the family hydroponics experiment.
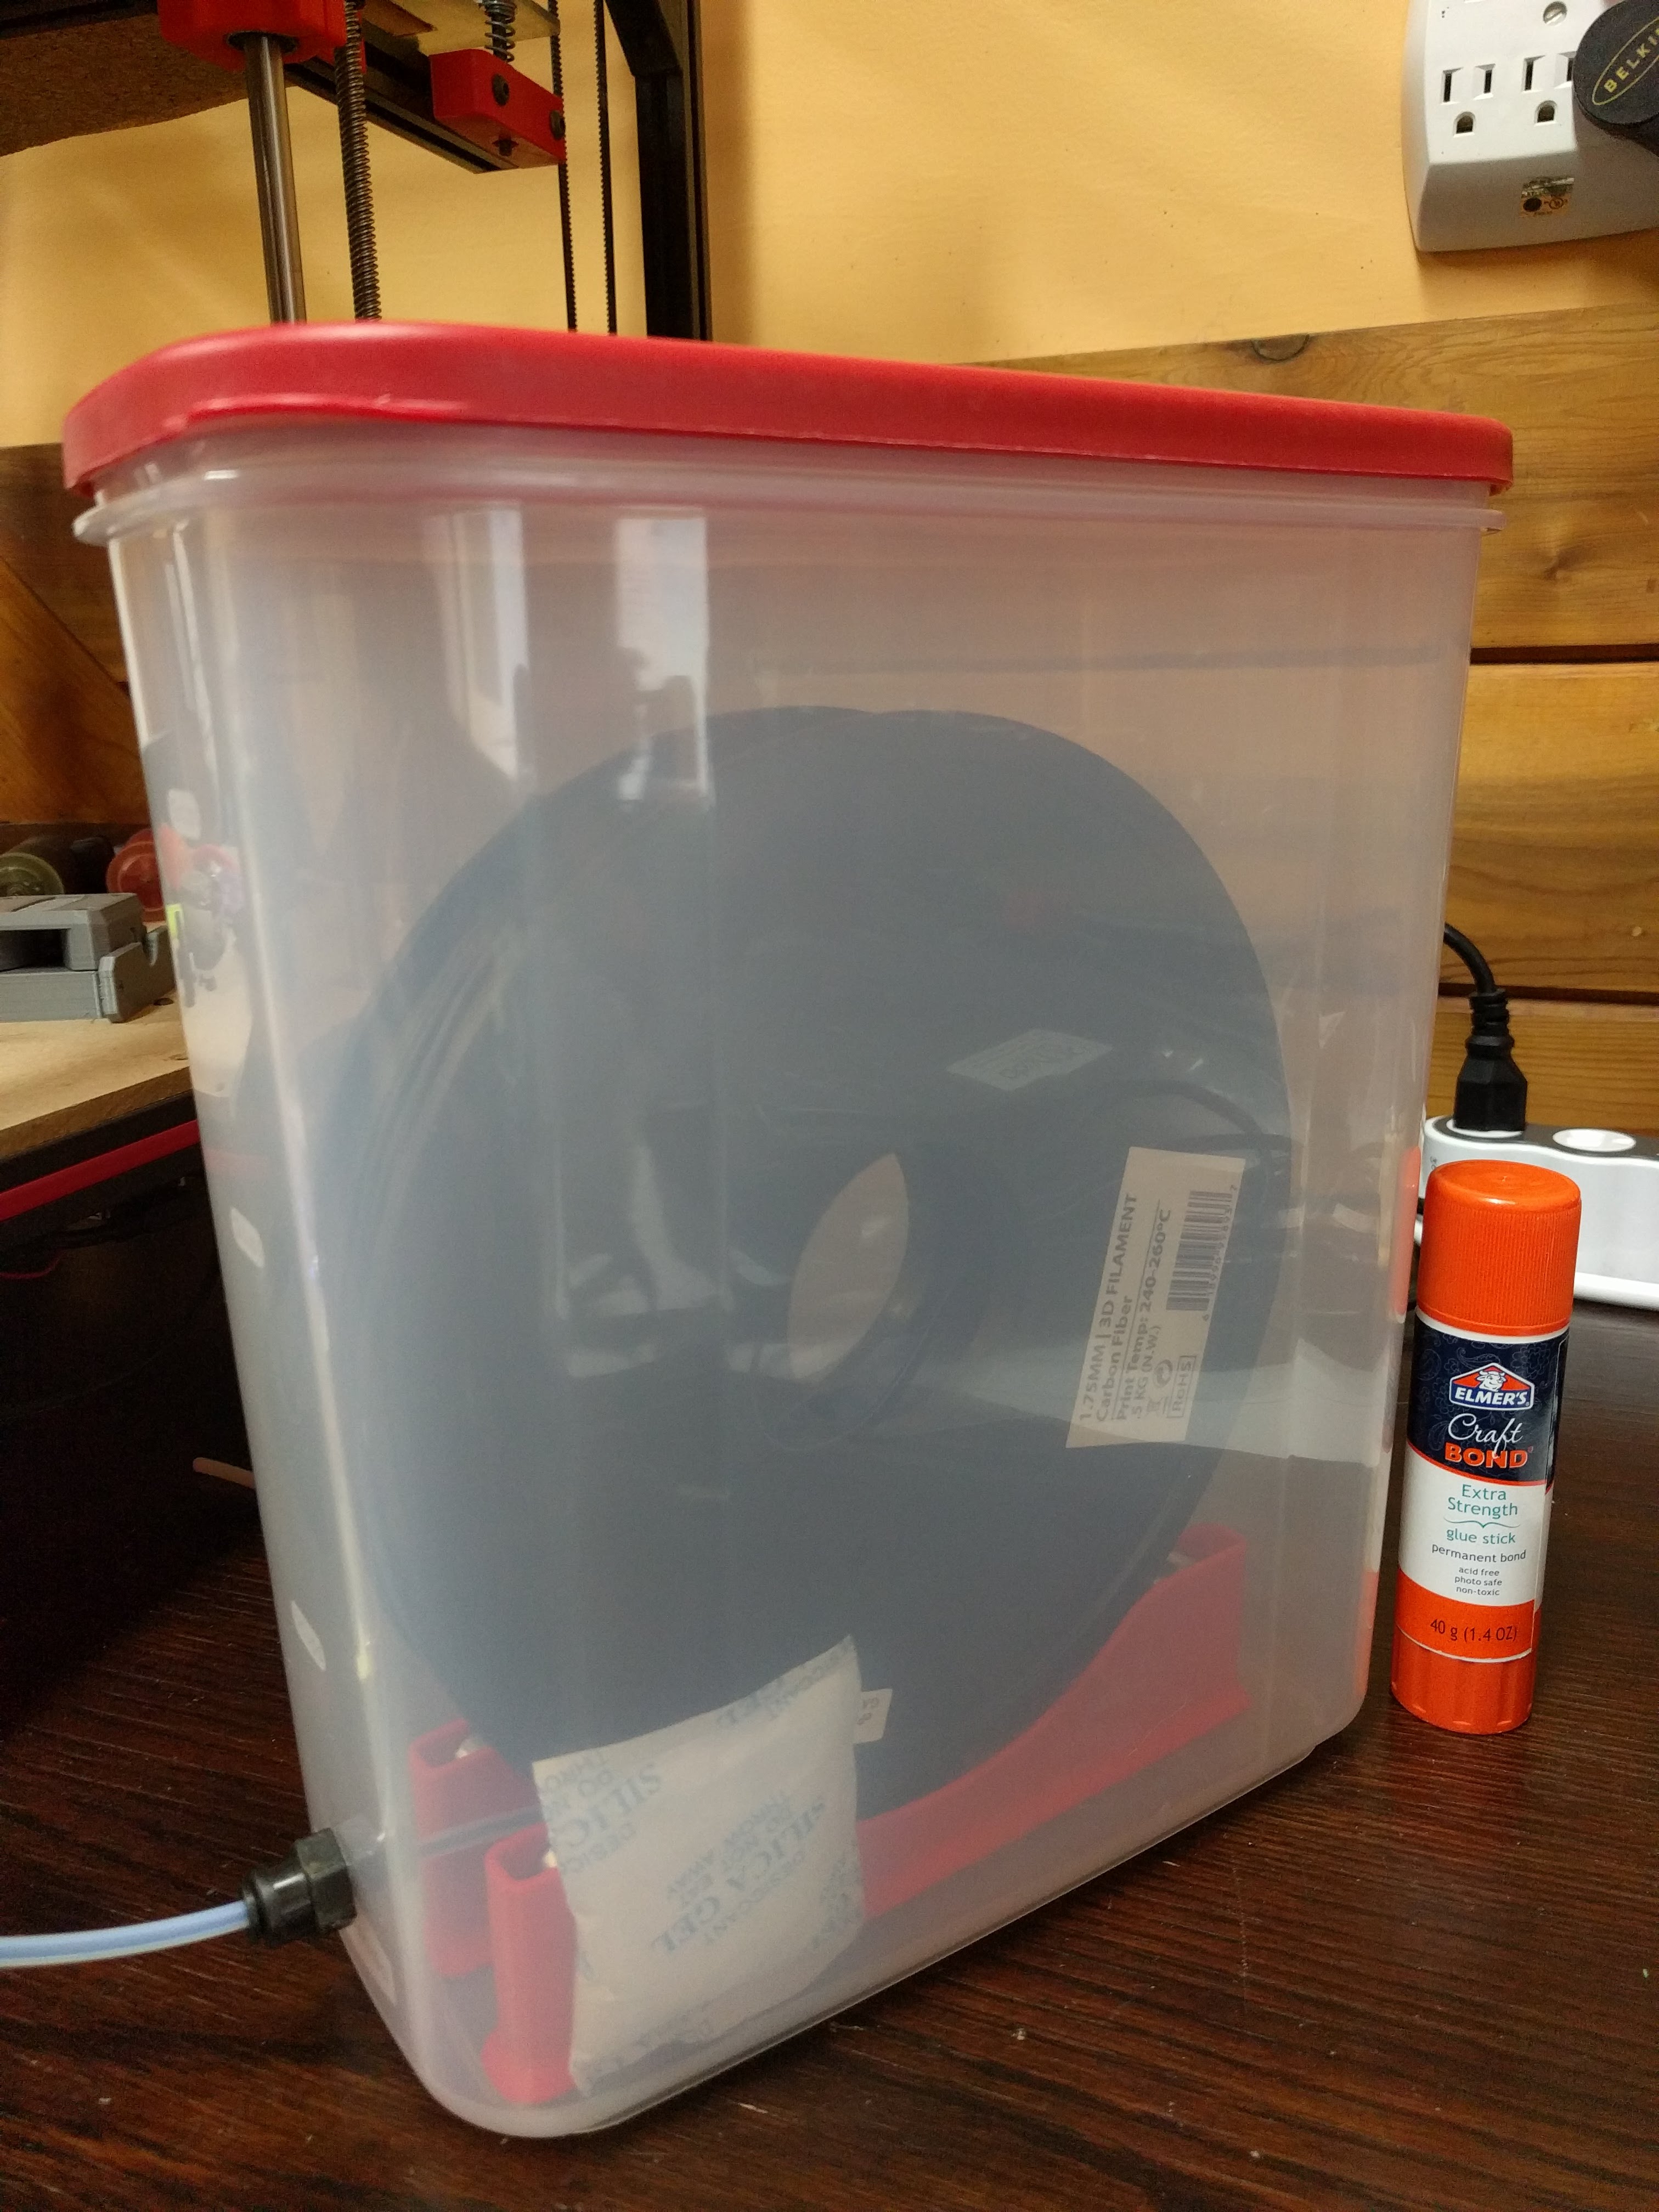
 I screwed M6 4mm push fittings right into the box lid; I drilled 5mm tapped M6 with a spiral flute tap, and put M6 nuts on the back to keep them from coming loose.
