THE STORY
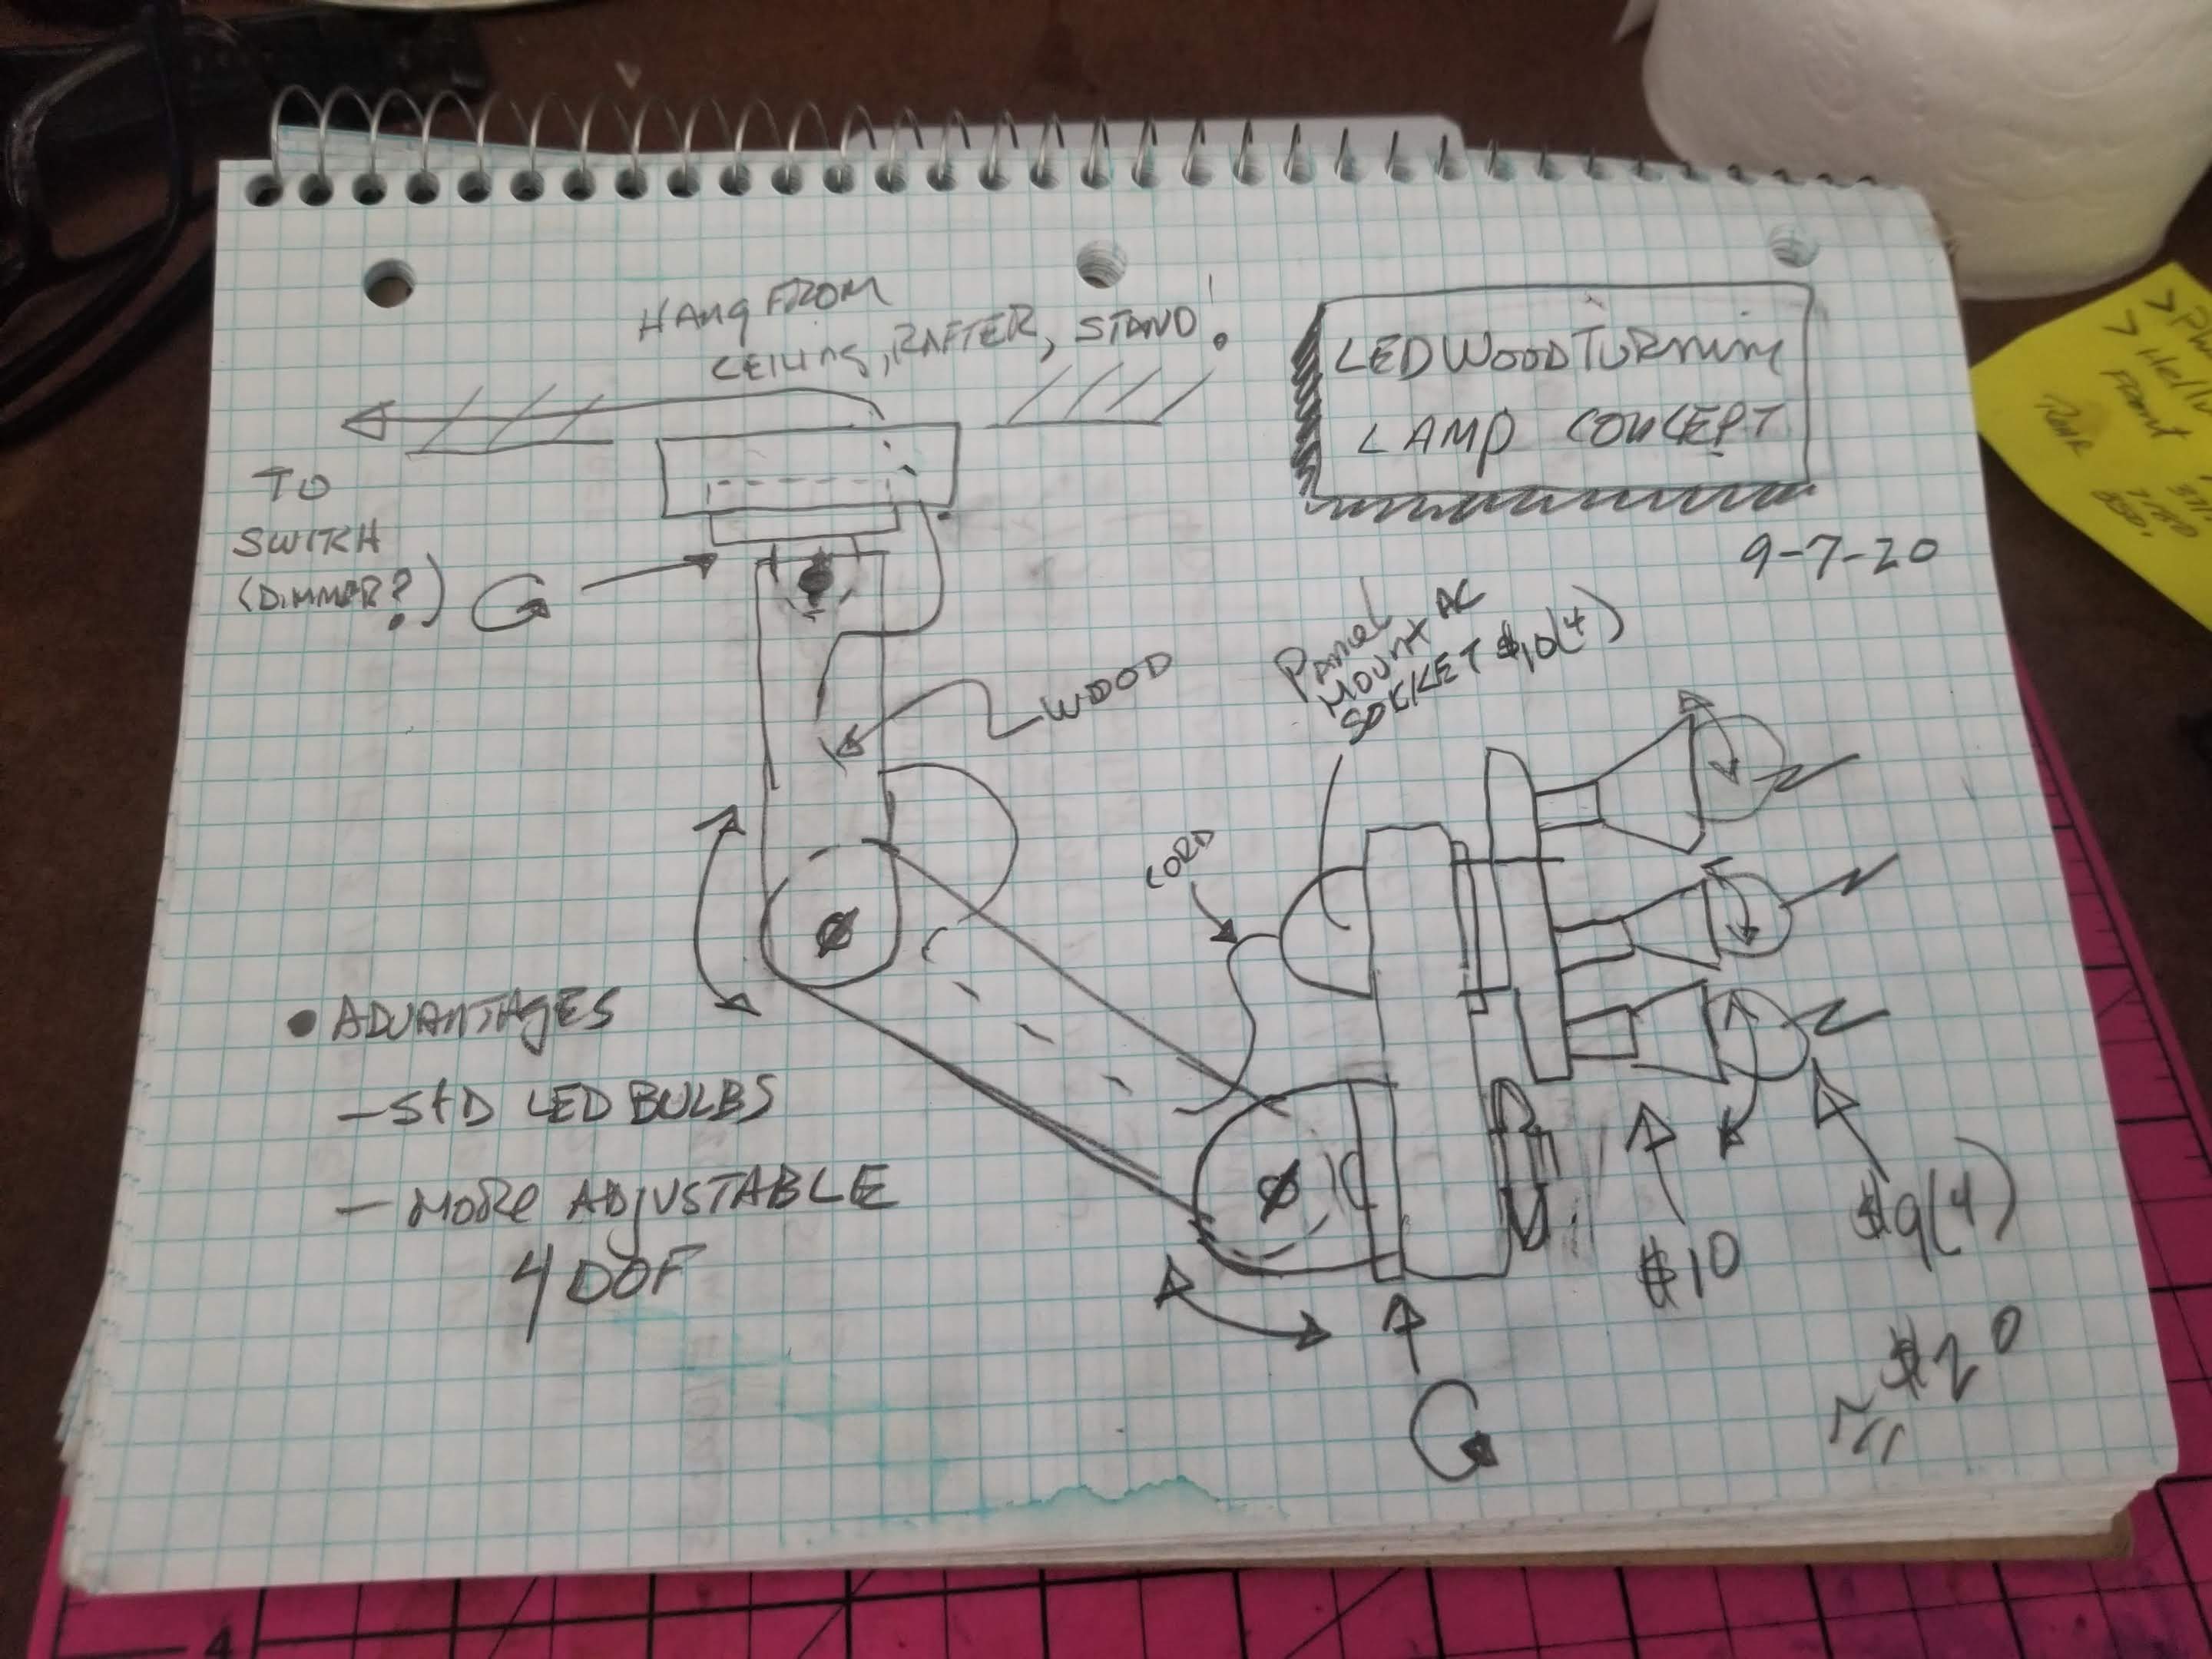
Having strong and directionally adjustable light is important and enhances the safety and quality of work in almost any maker space.
In the case of a wood lathe its light should be able to be adjusted to illuminate from various angles as the back, front and inside of vessels need turning and finishing. Additionally, the light should be able to be positioned at any place along the path of the bed.
Ideally, you want direct lighting for turning and indirect light for finishing.
I had a makeshift set of Zenon lamps mounted above my lathe for some time and always wanted a better setup. However, making on the lathe always took precedence over making a better light.
You can buy lathe lights but they are expensive and mount to the lathe or are positioned with a stand near the lathe, none of which I liked.
I also wanted to upgrade to LED technology as the Zenon bulbs burn out with vibration.
INITIAL CONCEPT
Got refined to this


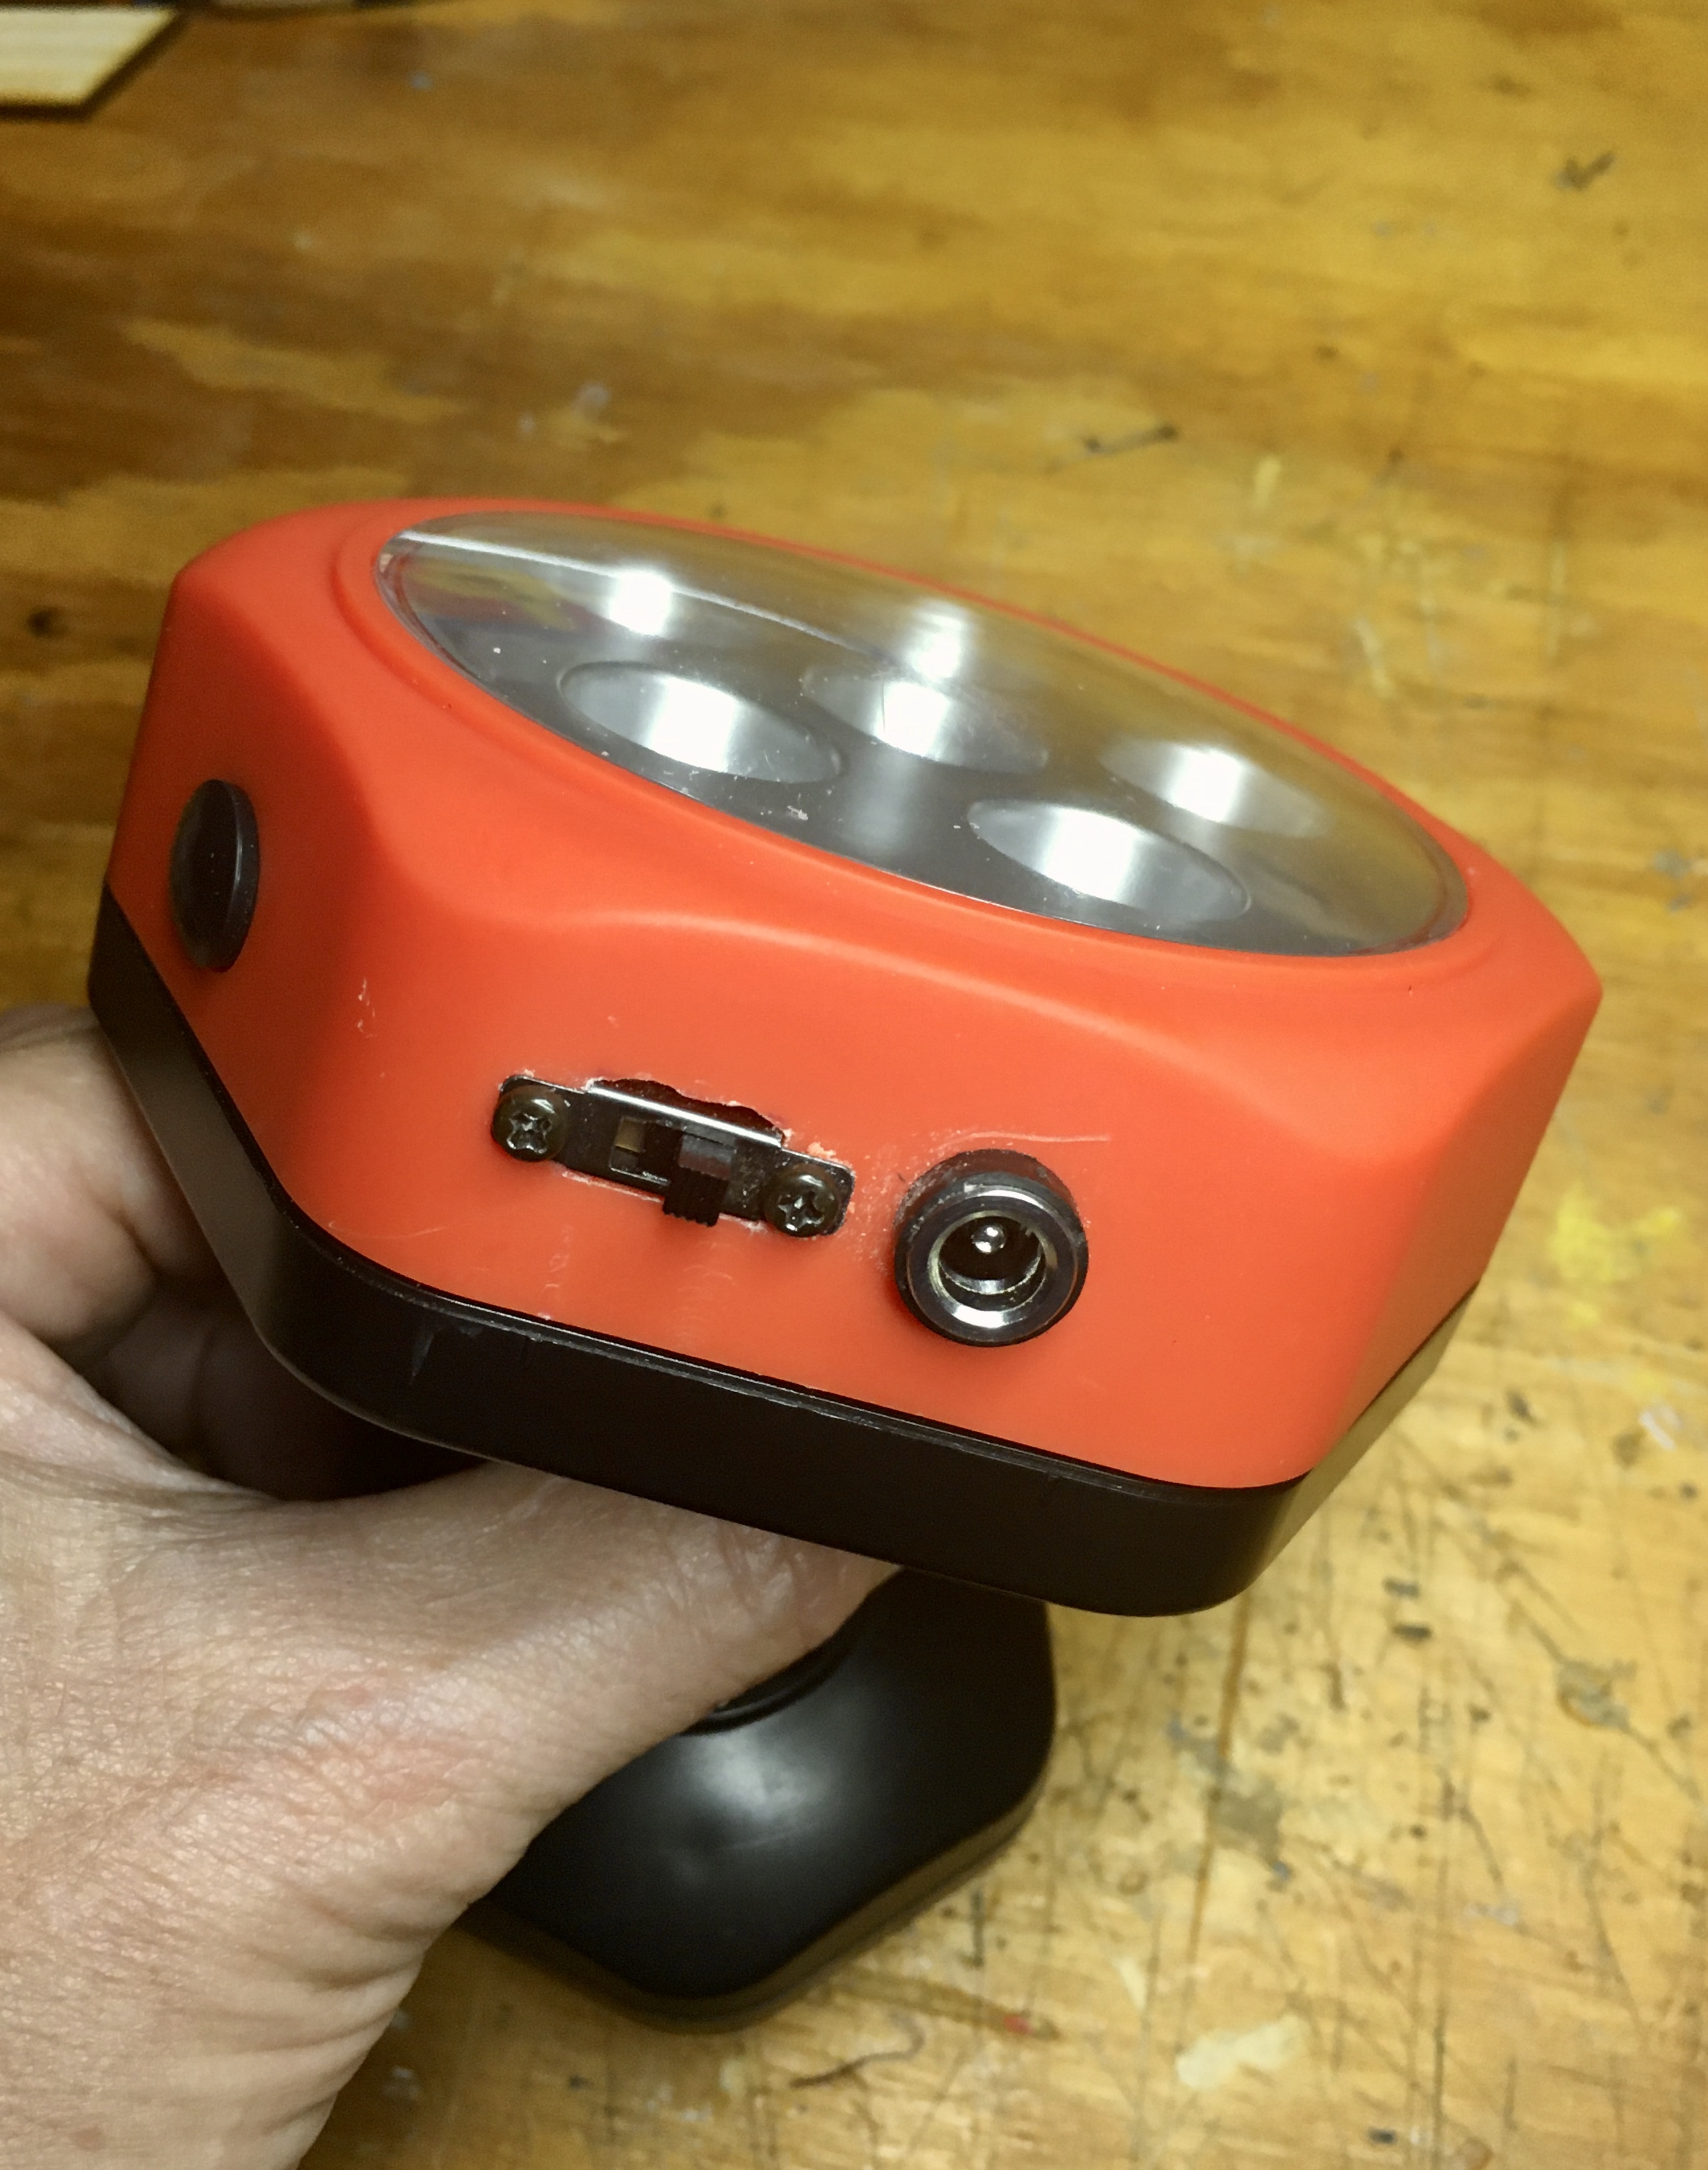
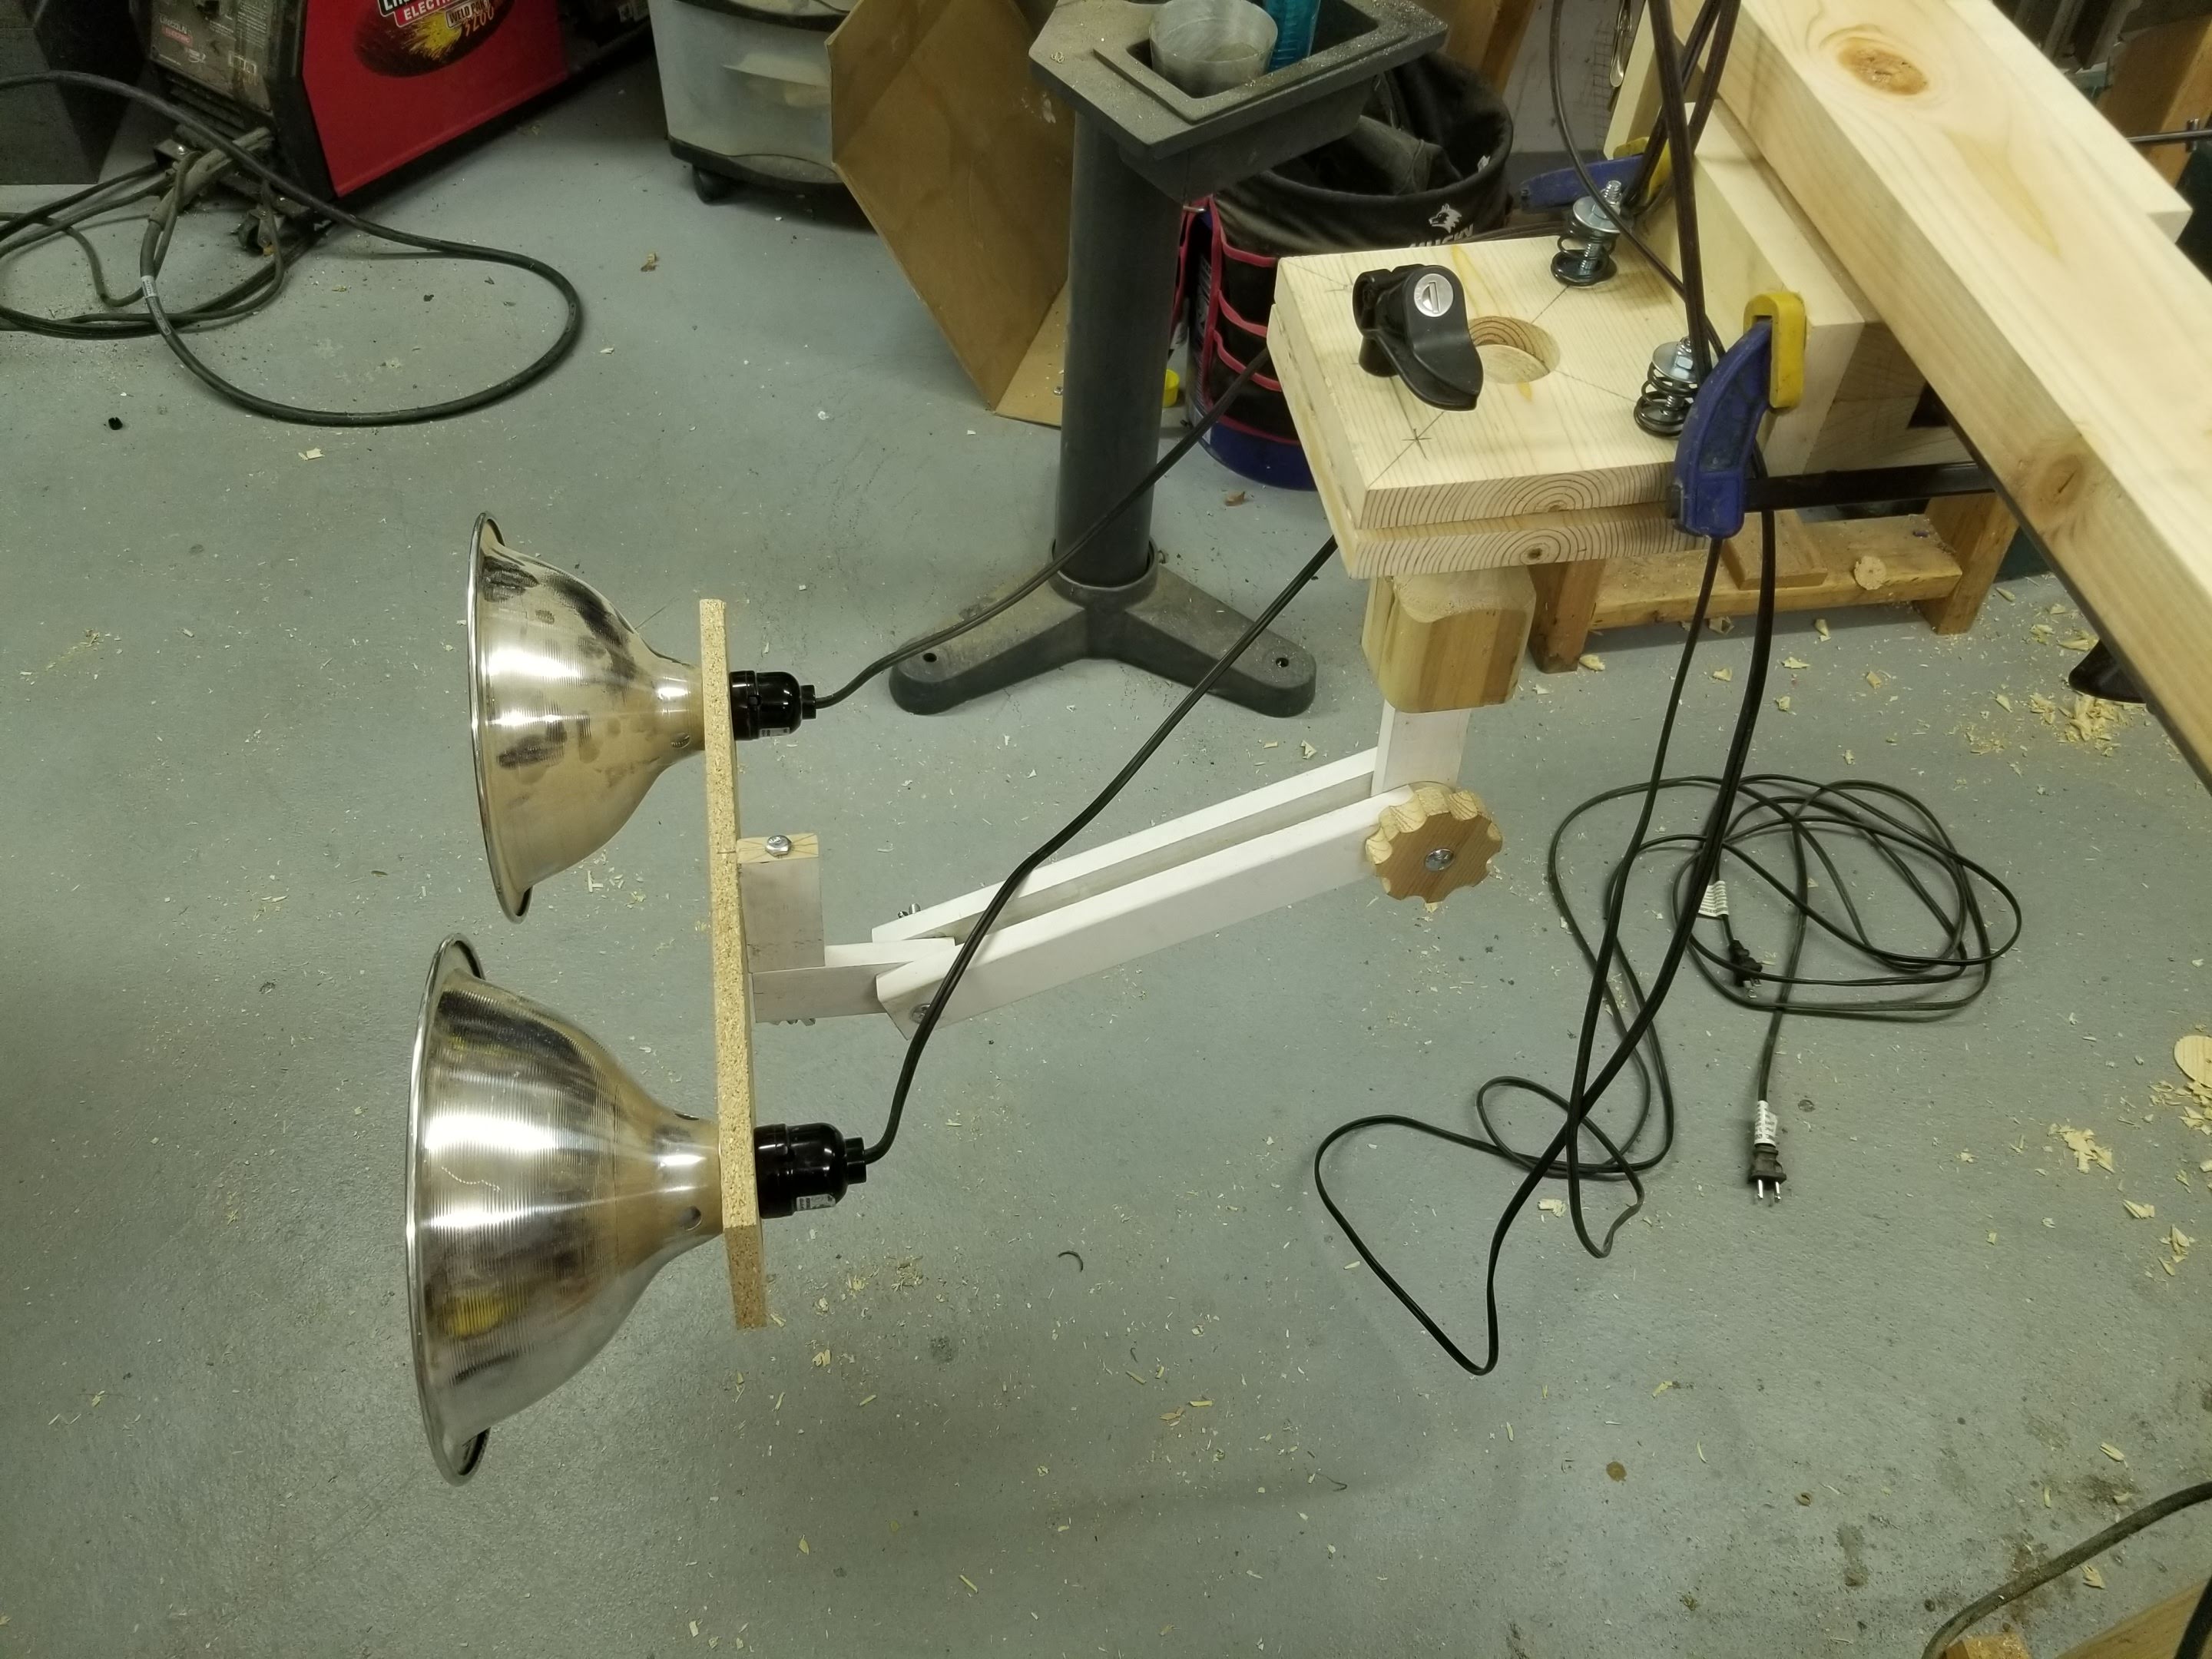
The key to the design is a slideing carridge that is held in position with the weight of the light cam-ing the back of the carridge againse the slide mount. To slide you lift up on the a light which releases the cam enabling you to slide it into a new horizontal position
THE BUILD
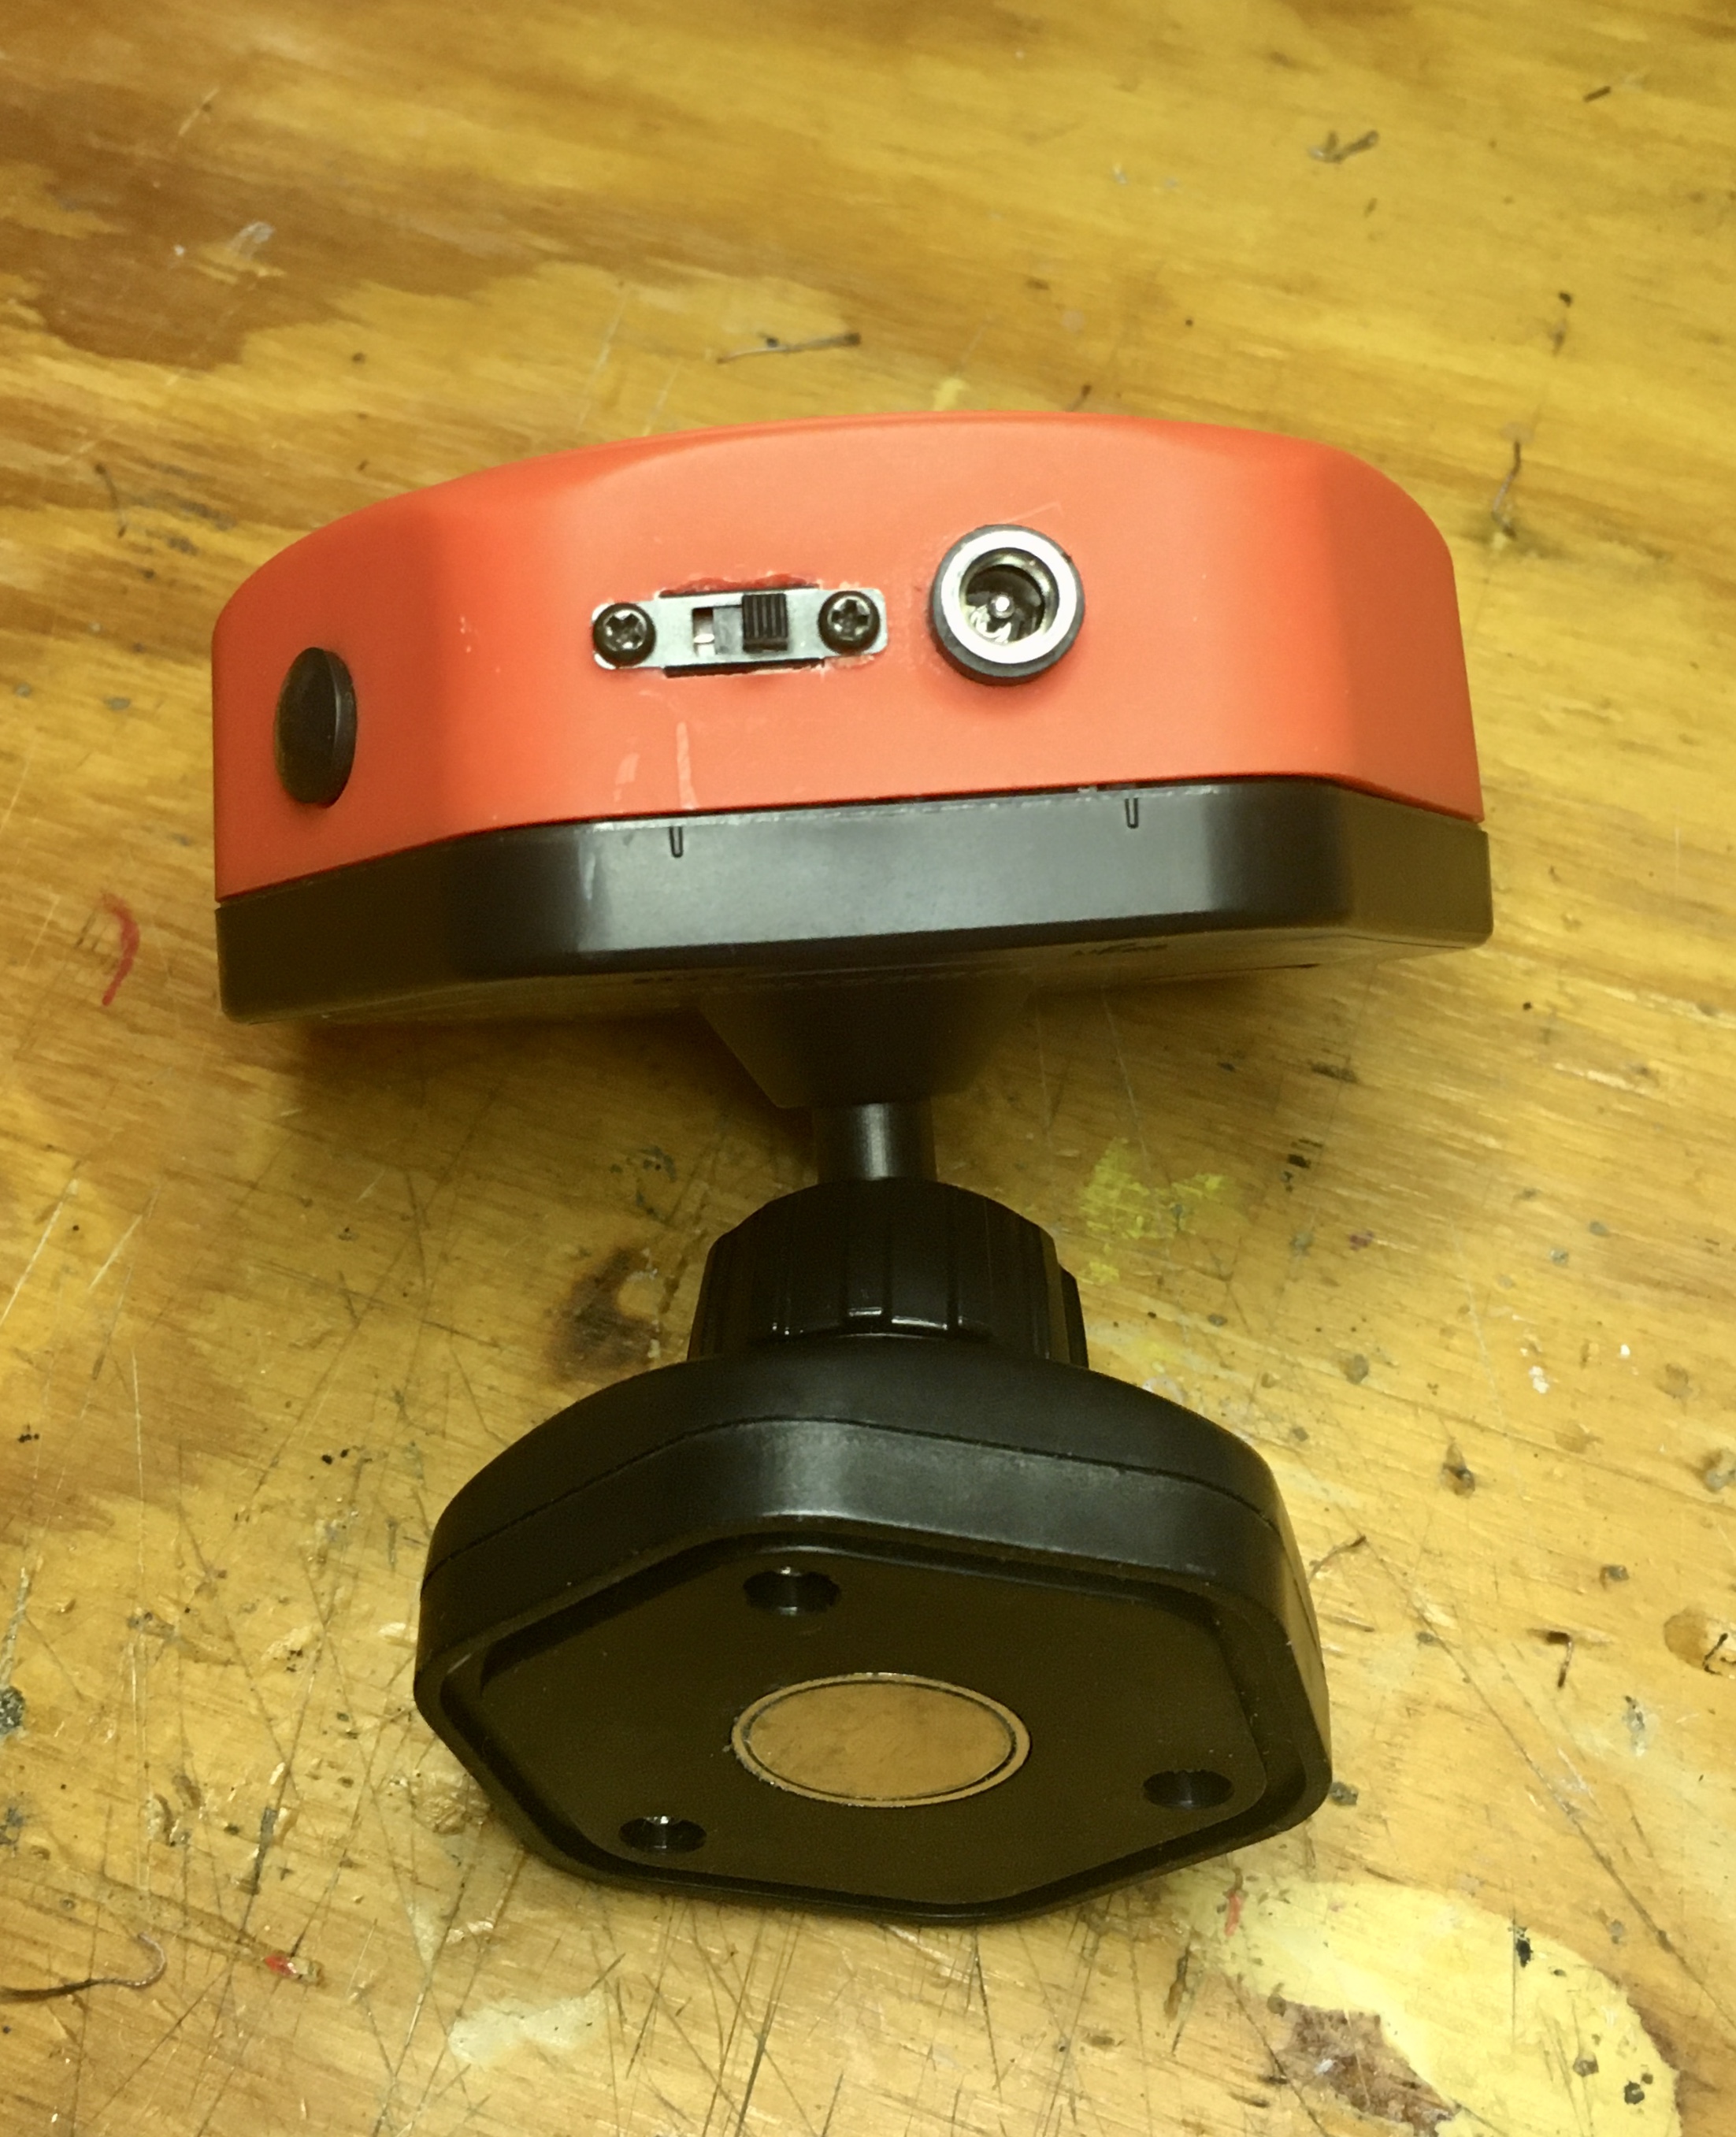
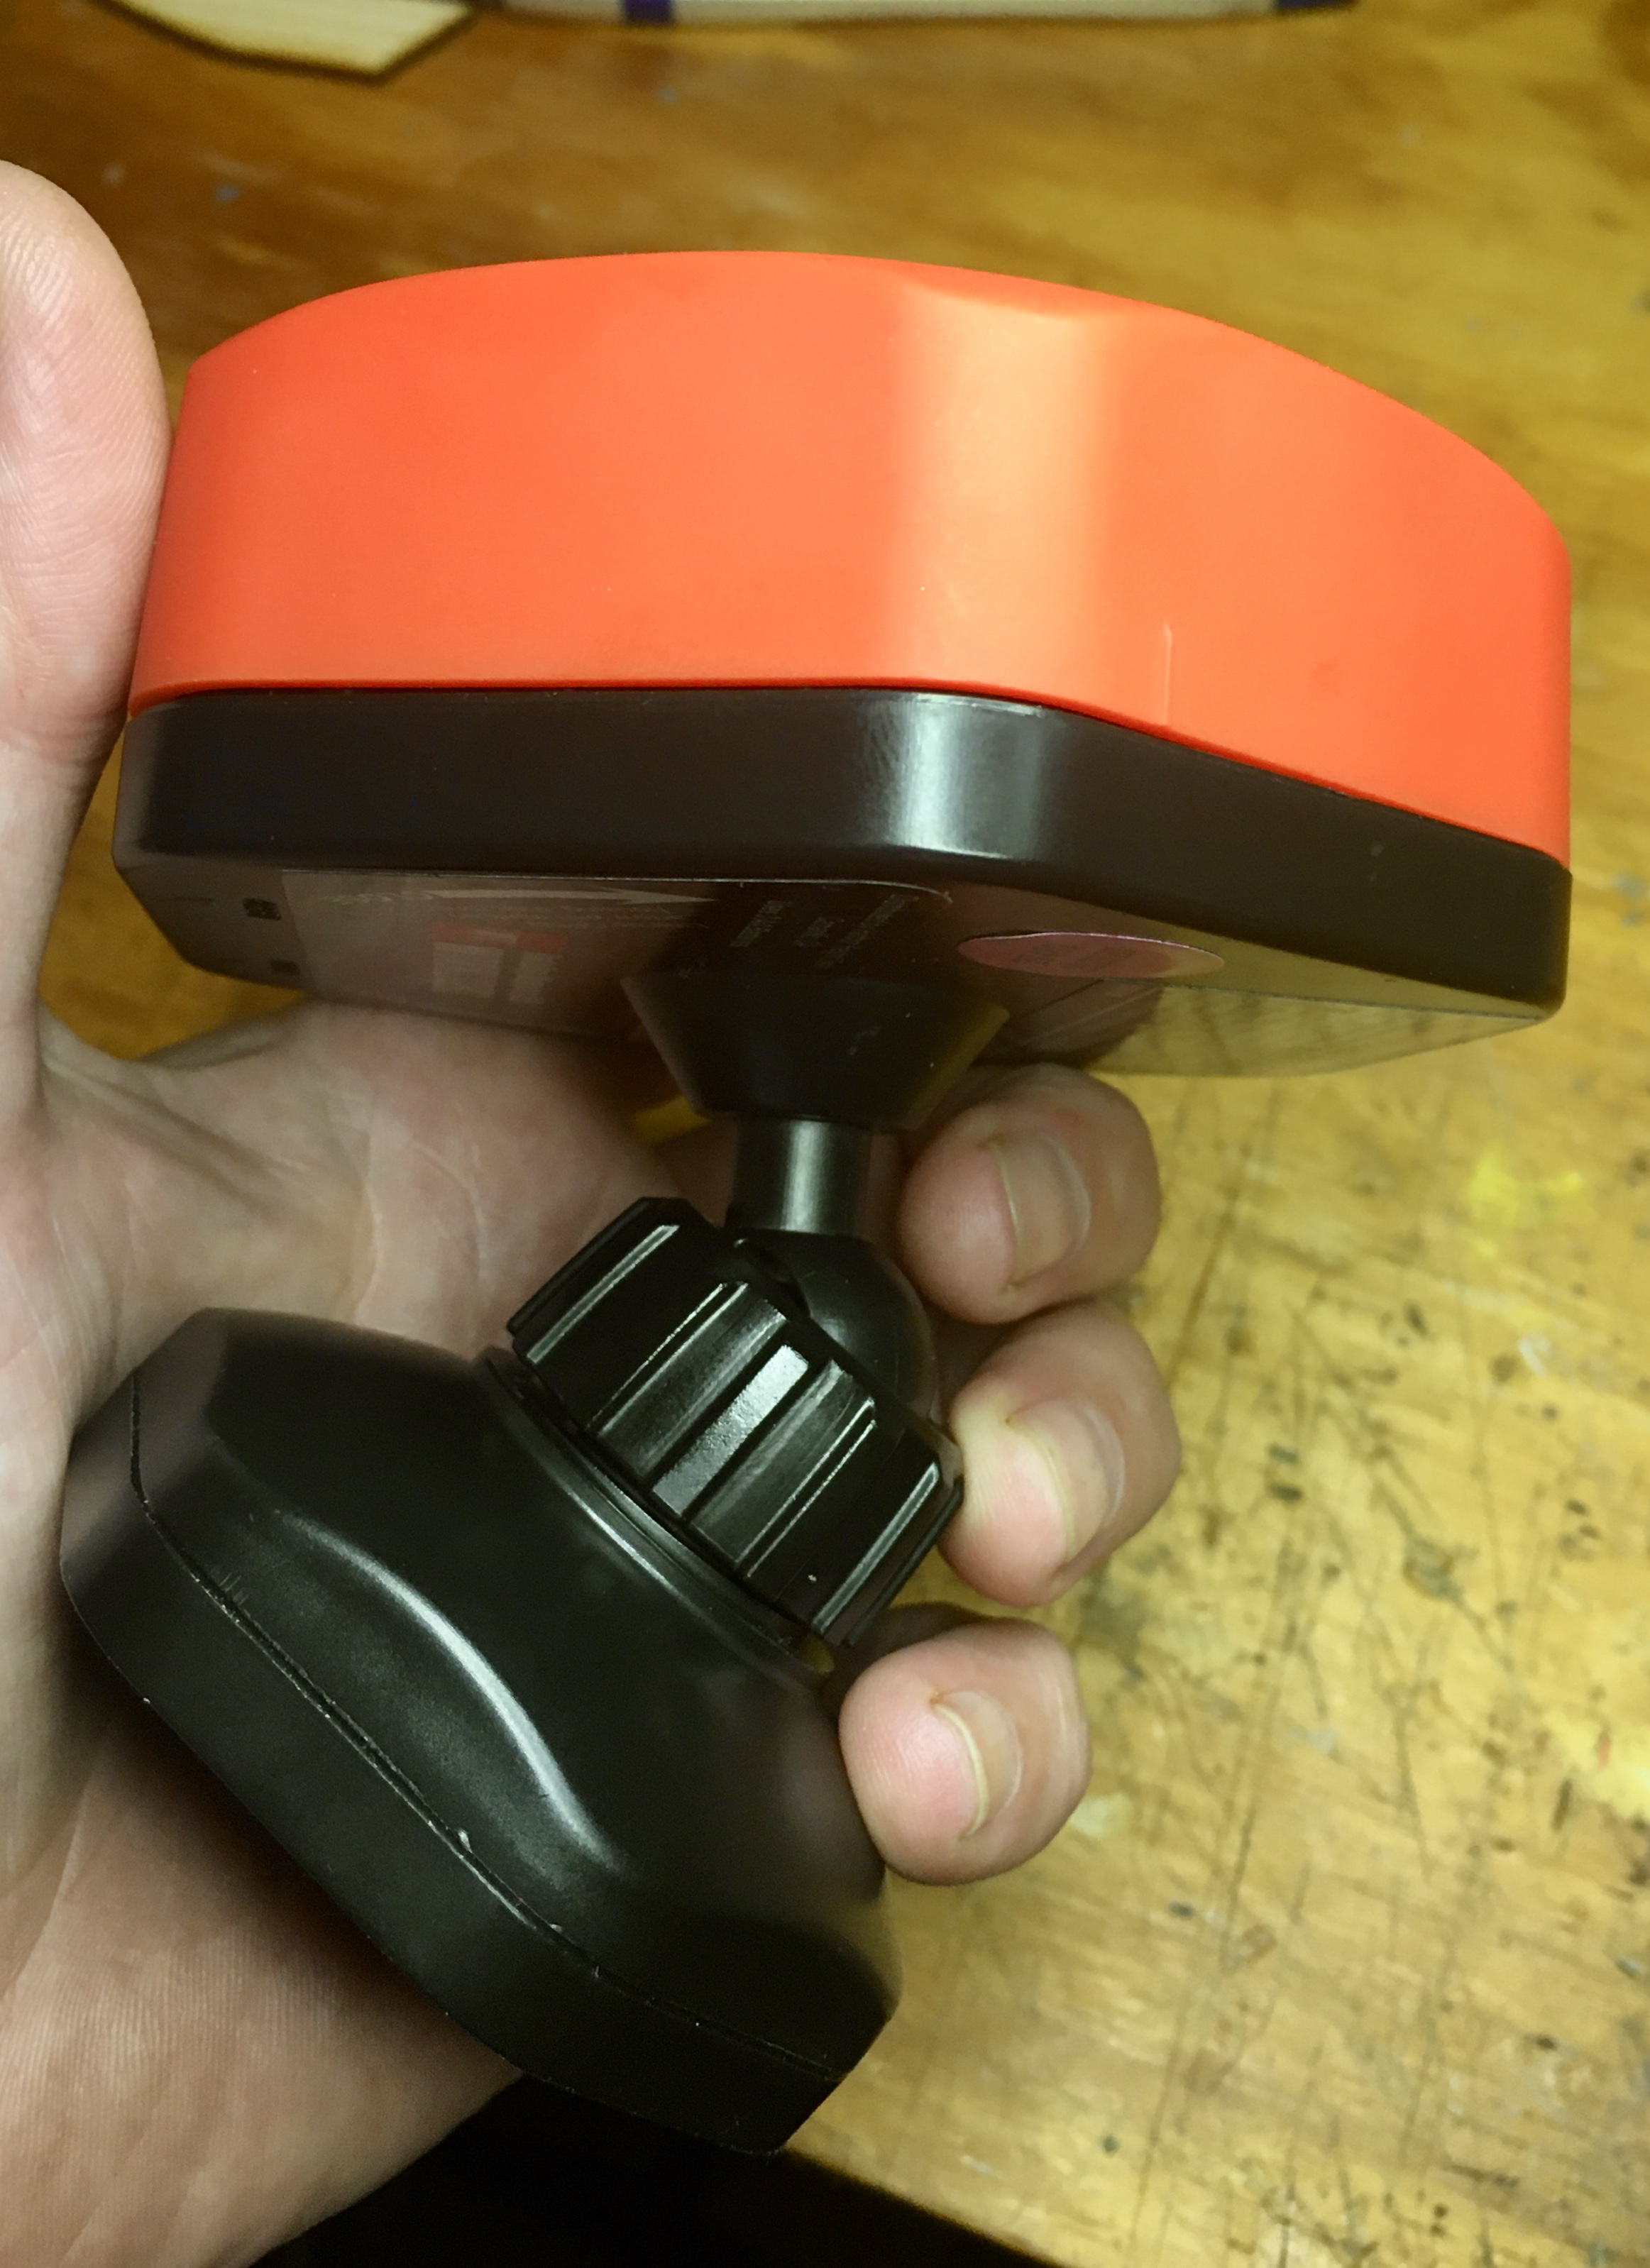
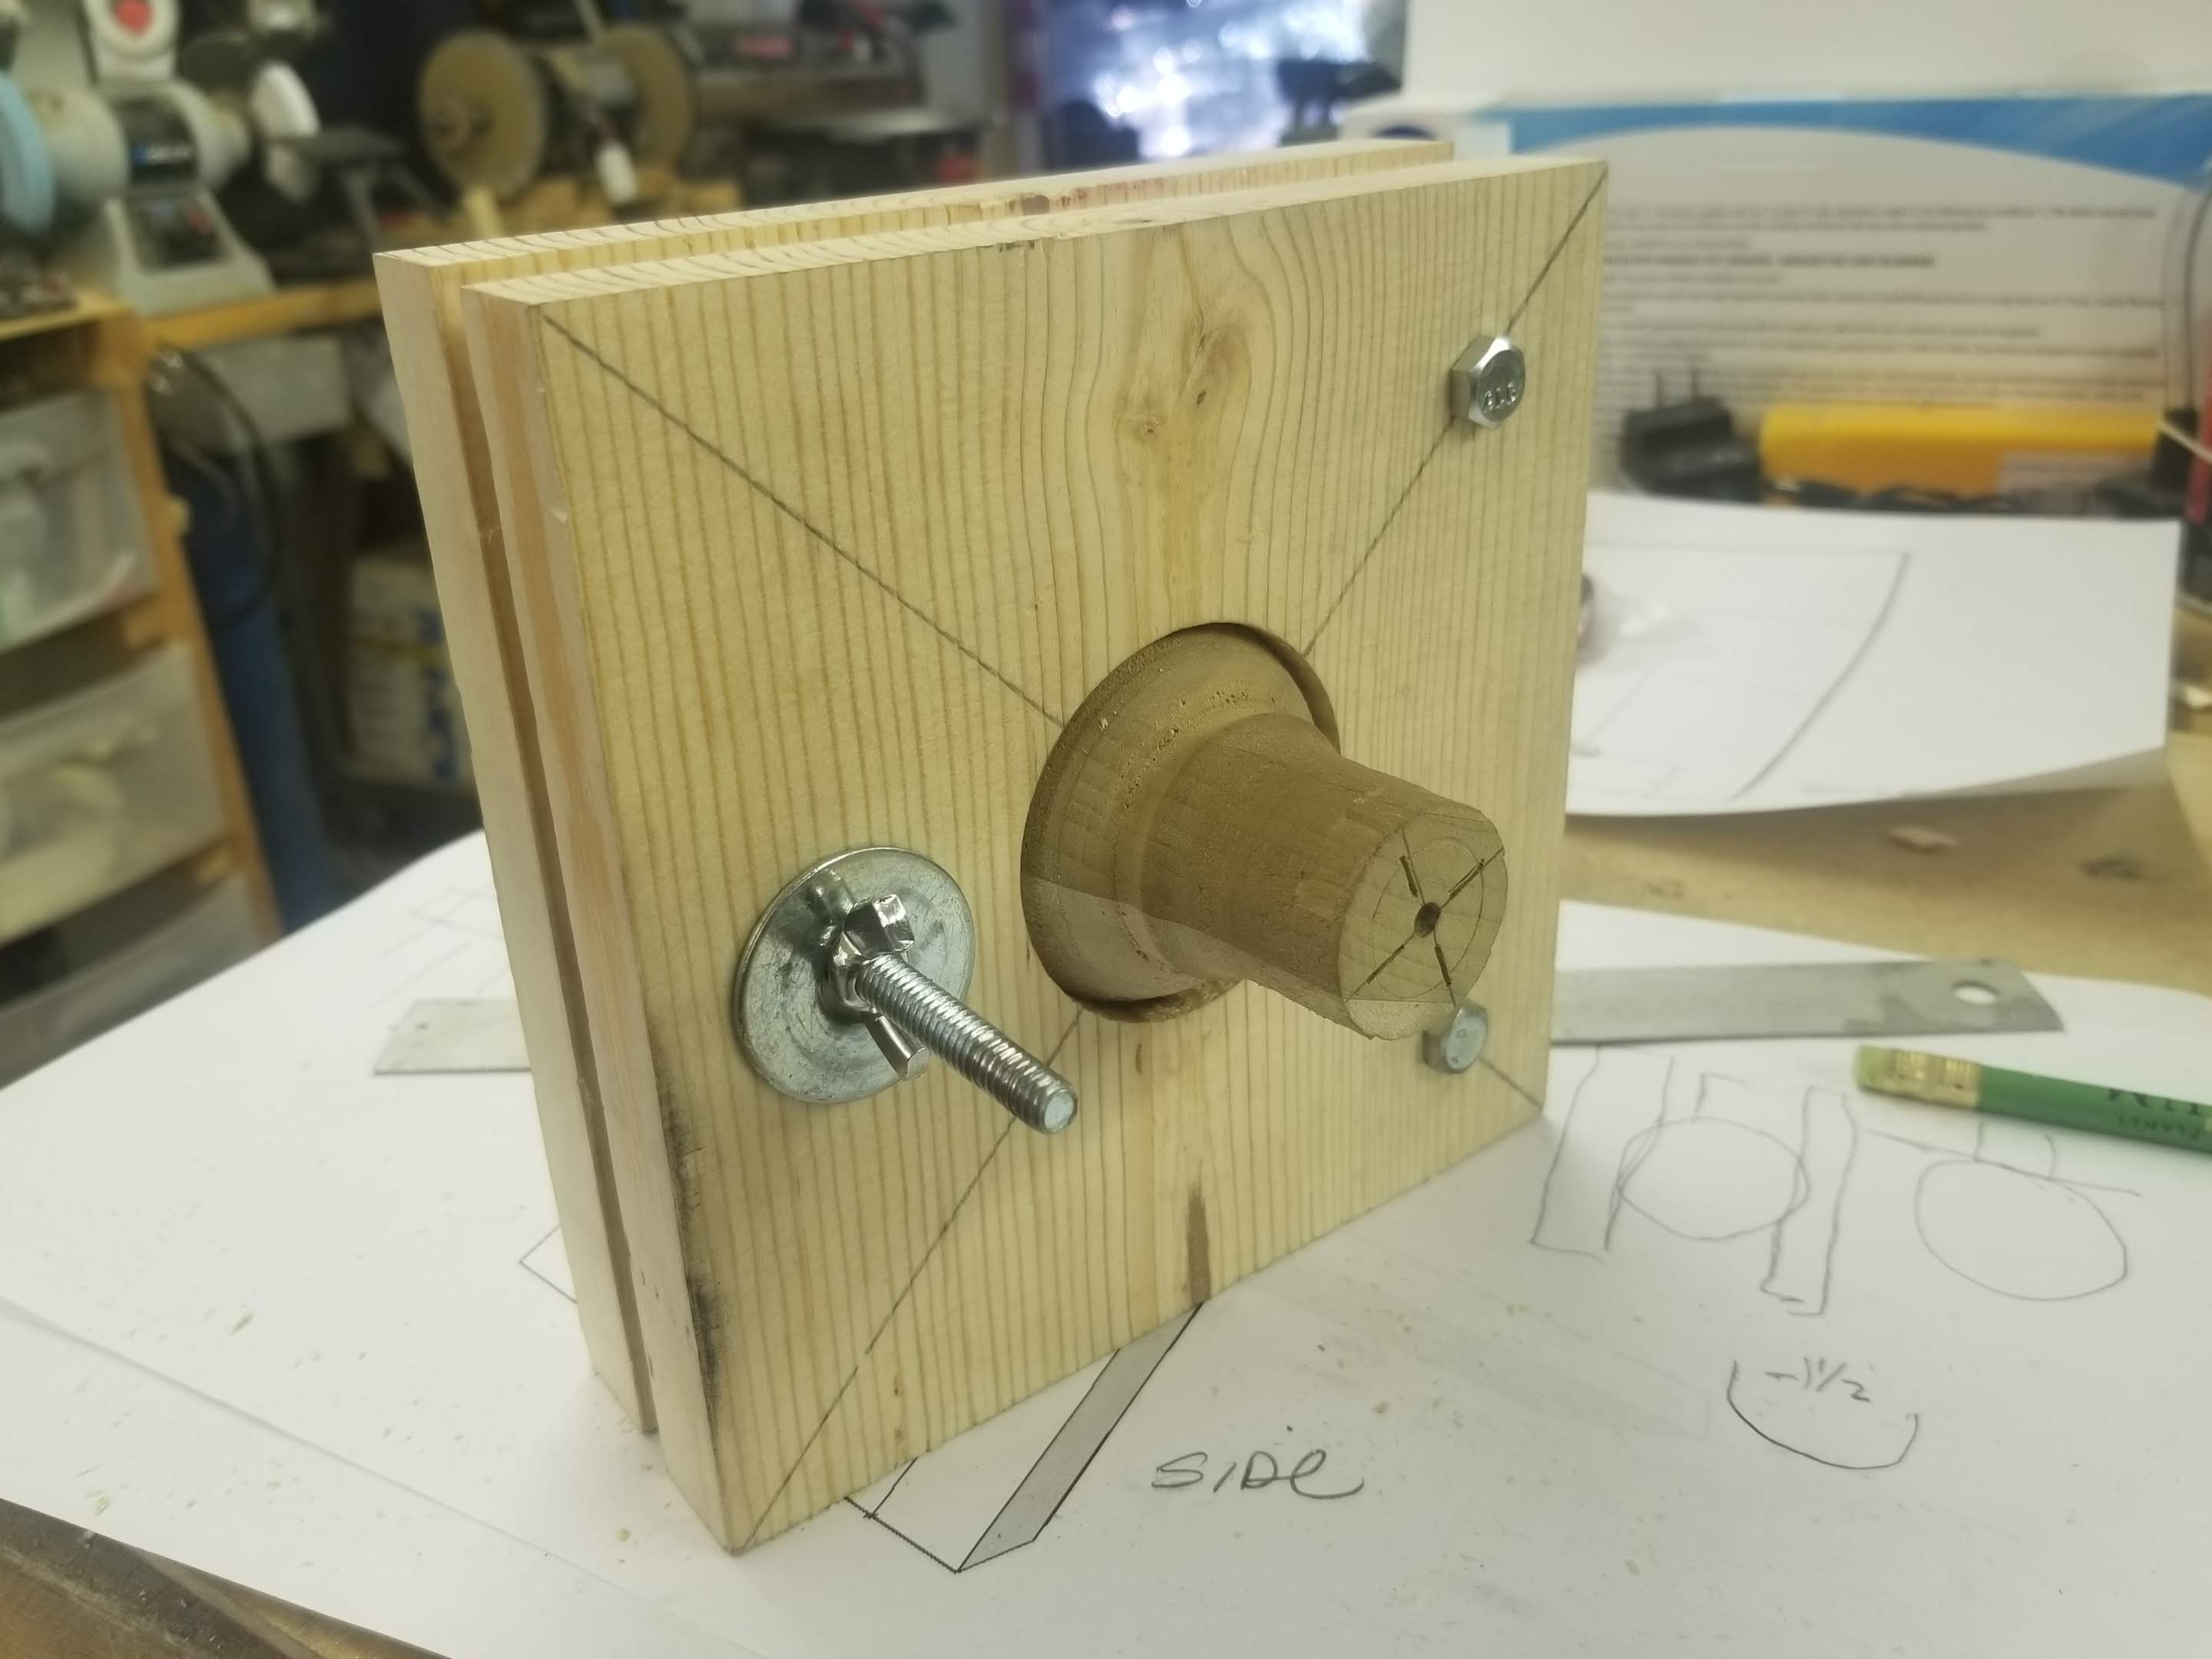
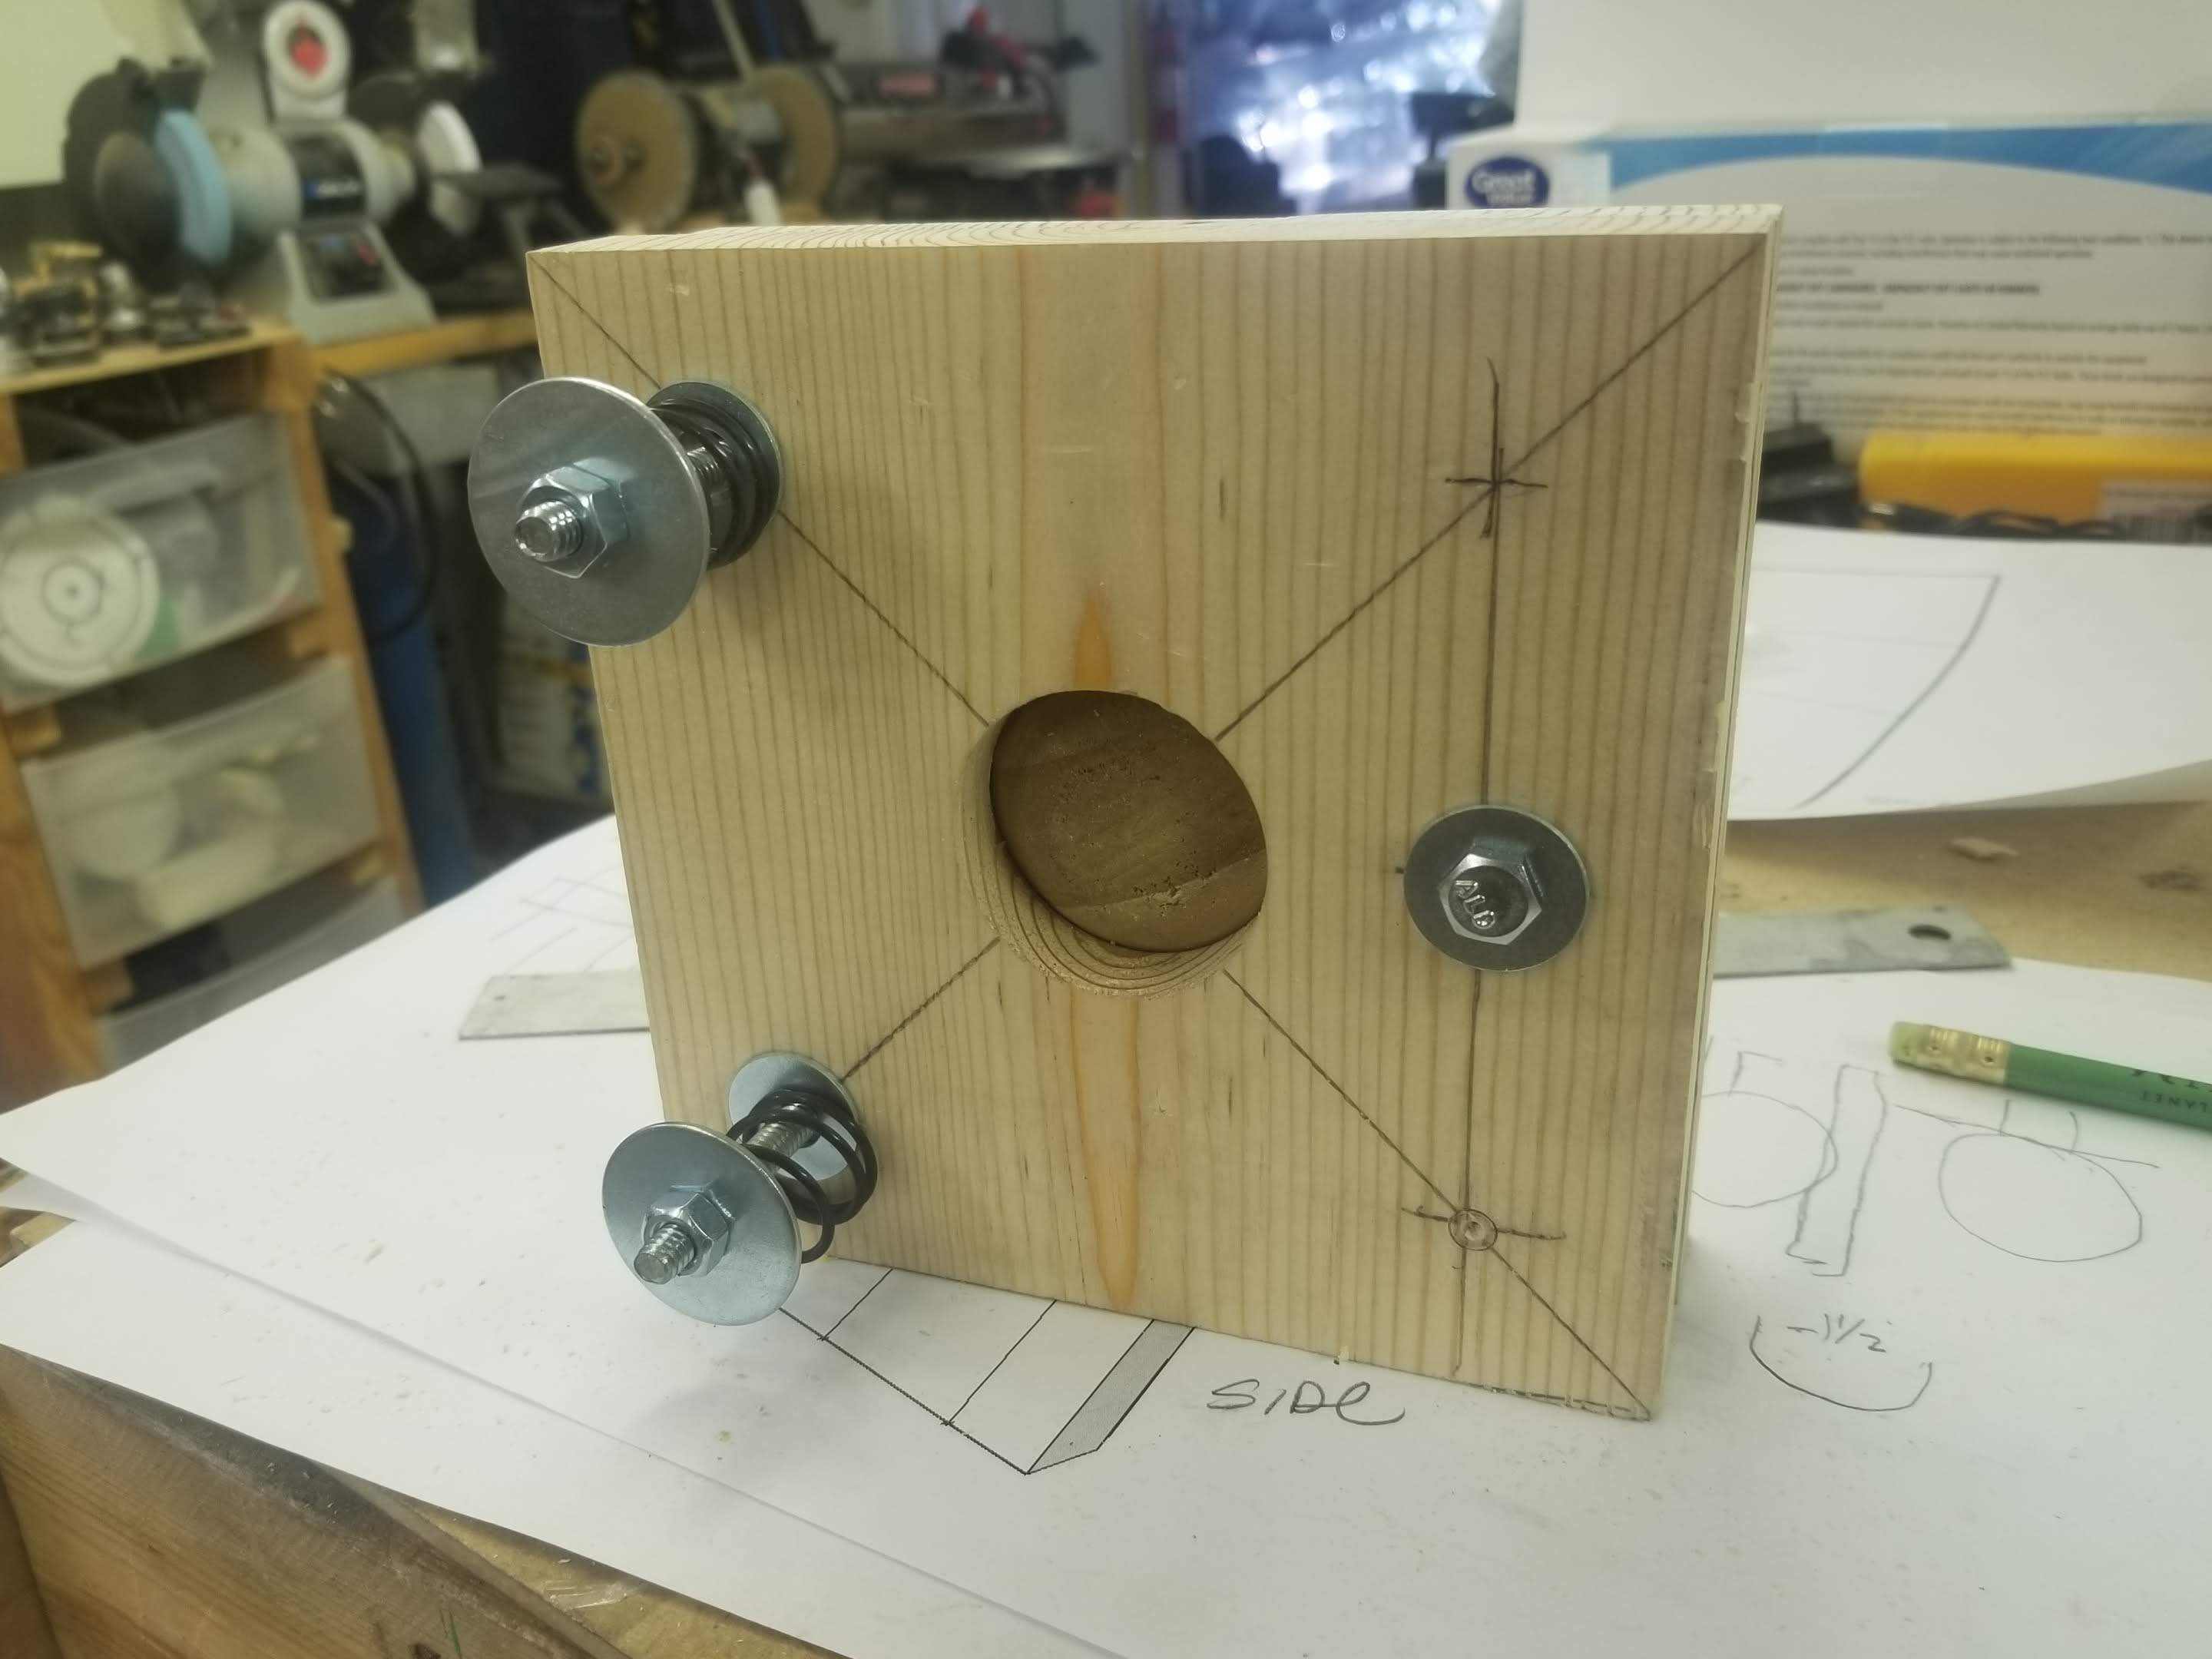
Changed the design of the upper mount to a ball-and-socket (turned on the lathe) locked with a bicycle seat cam. The ball’s seat was made from a carefully sized hole with a 45-degree chamfer routed on the ID.
BALL & SOCKET
A wood turned ball is inserted between two friction plates that are spring-loaded and open/closed with an over-center cam (from my bicycle parts bin).
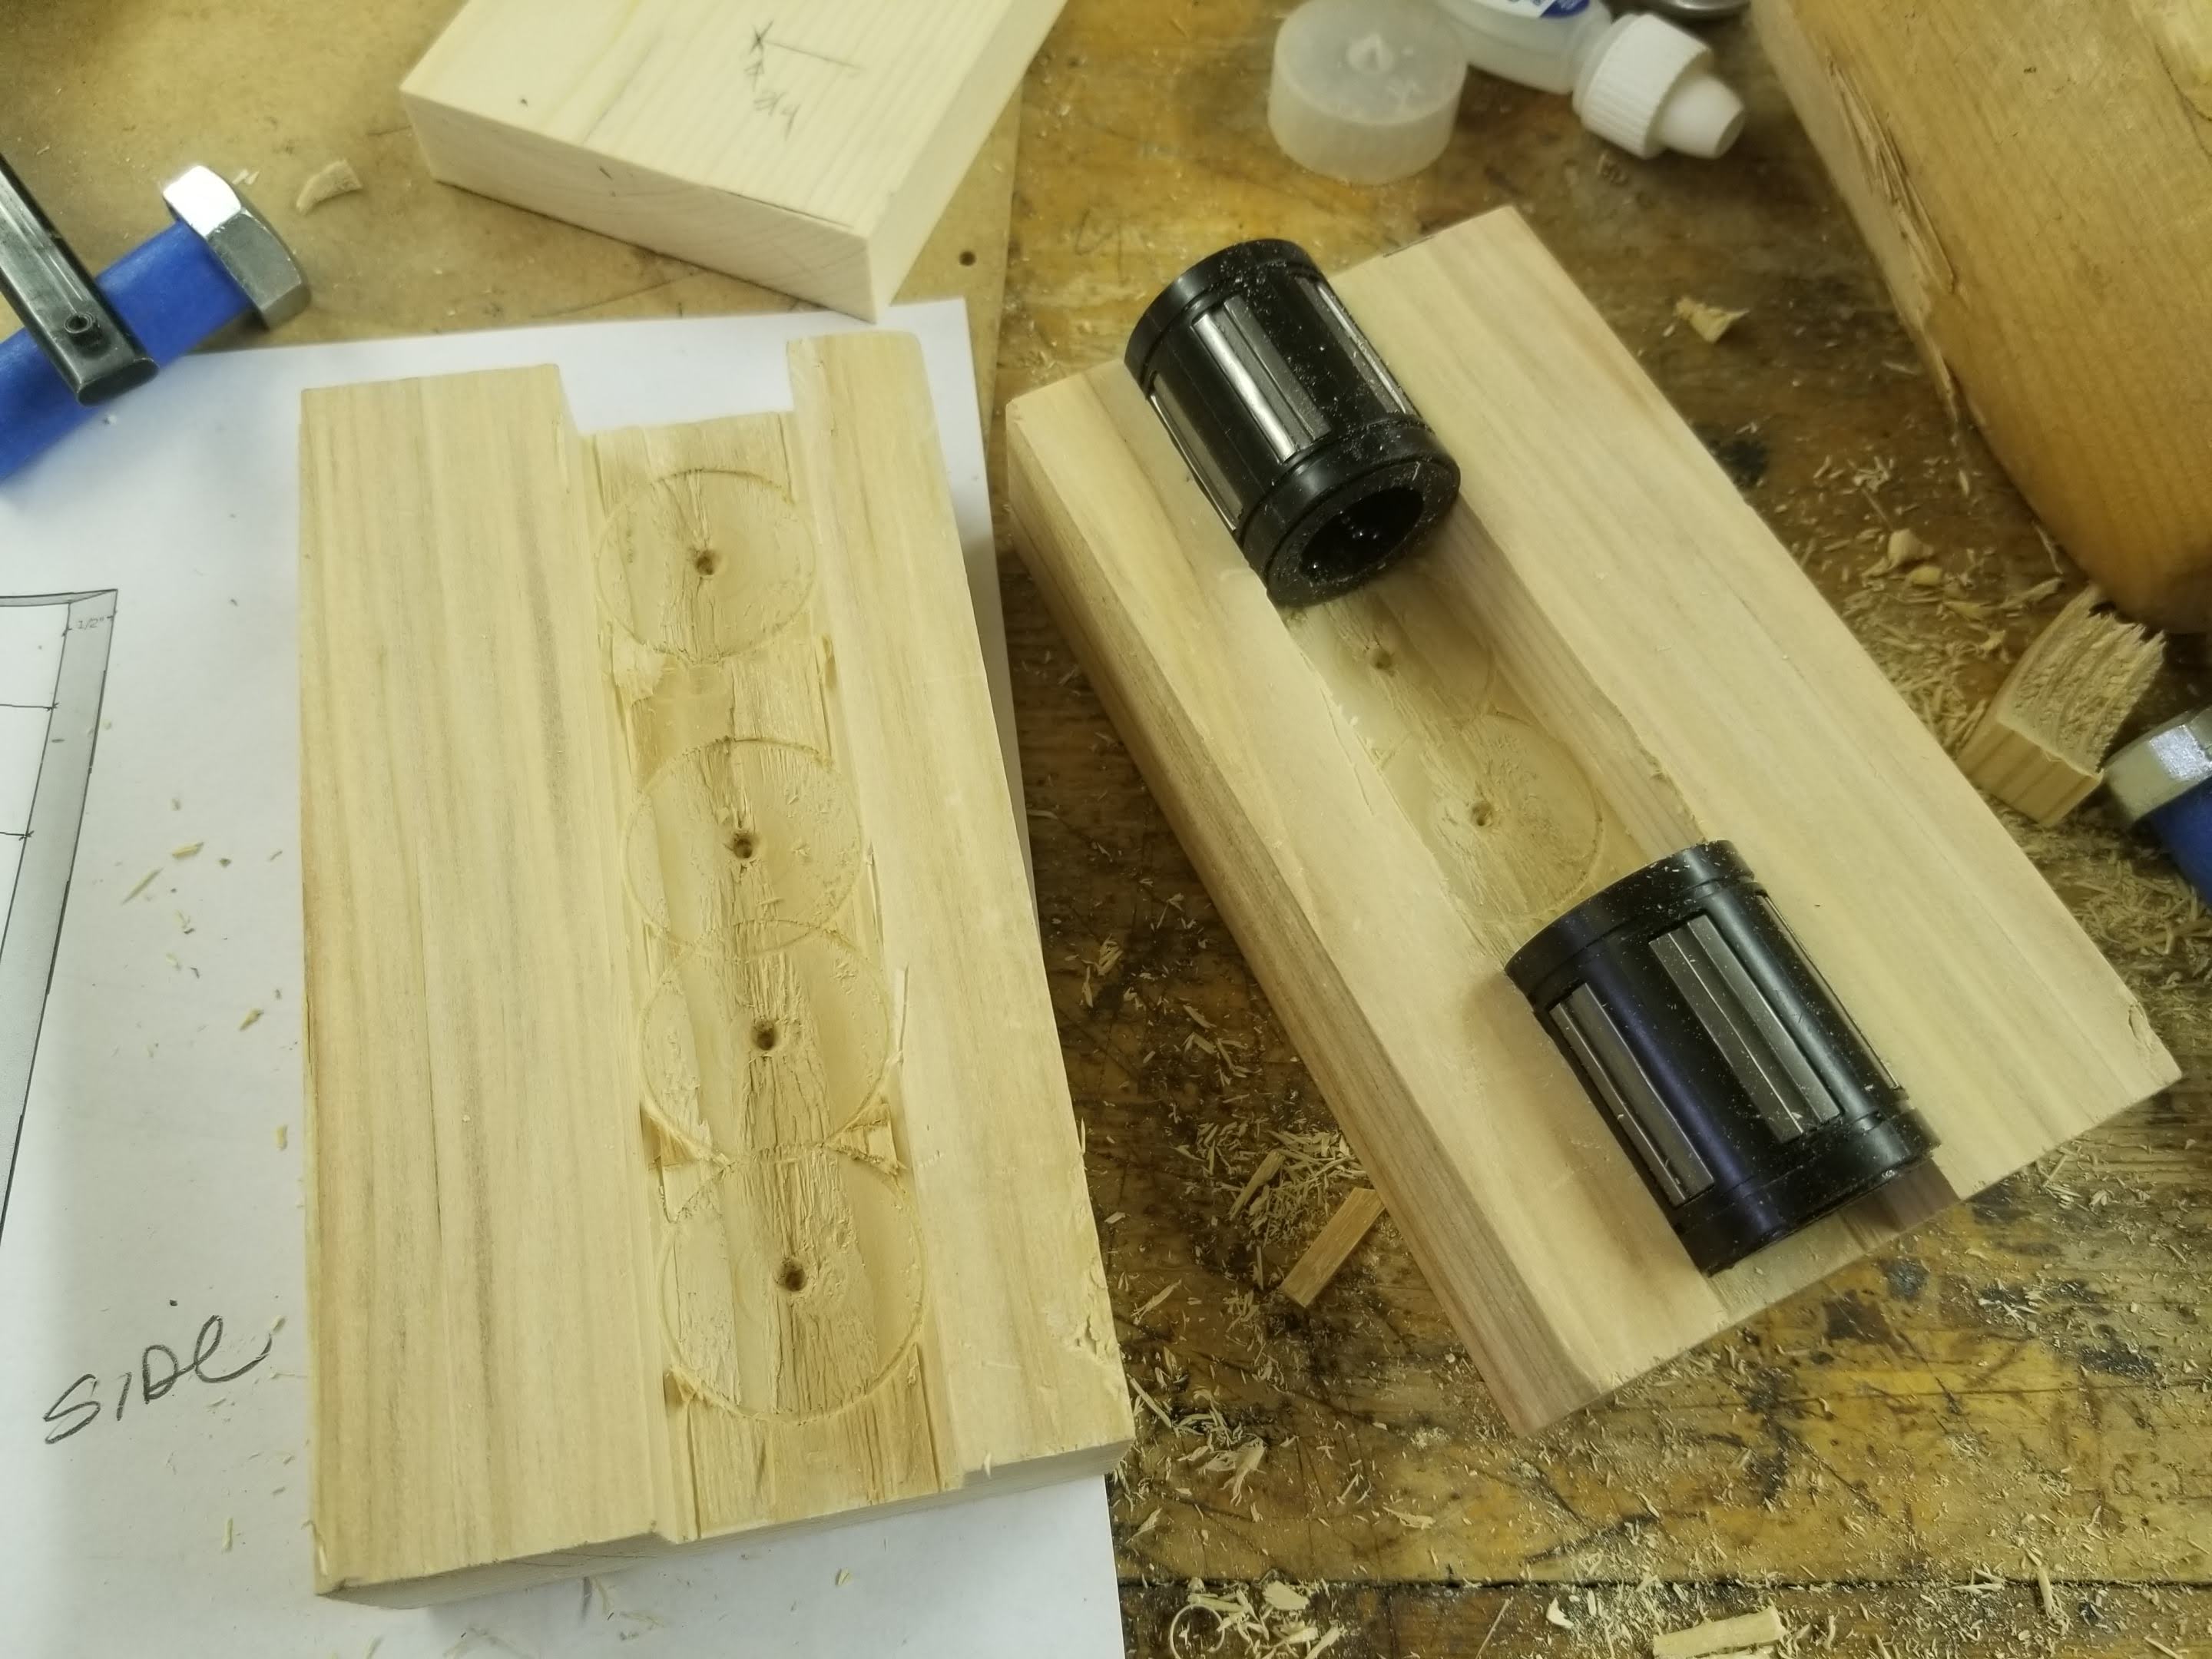
SLIDE ASSY:
Two 1" linear bearings ride on a 3/4 shaft captured inside a carridge assy
TEST ASSY
Shows the entire assy before refinement and mounting
The lights are HF clamp lights with the clamp removed and fitted with LED spotlights. I had two extra :)!
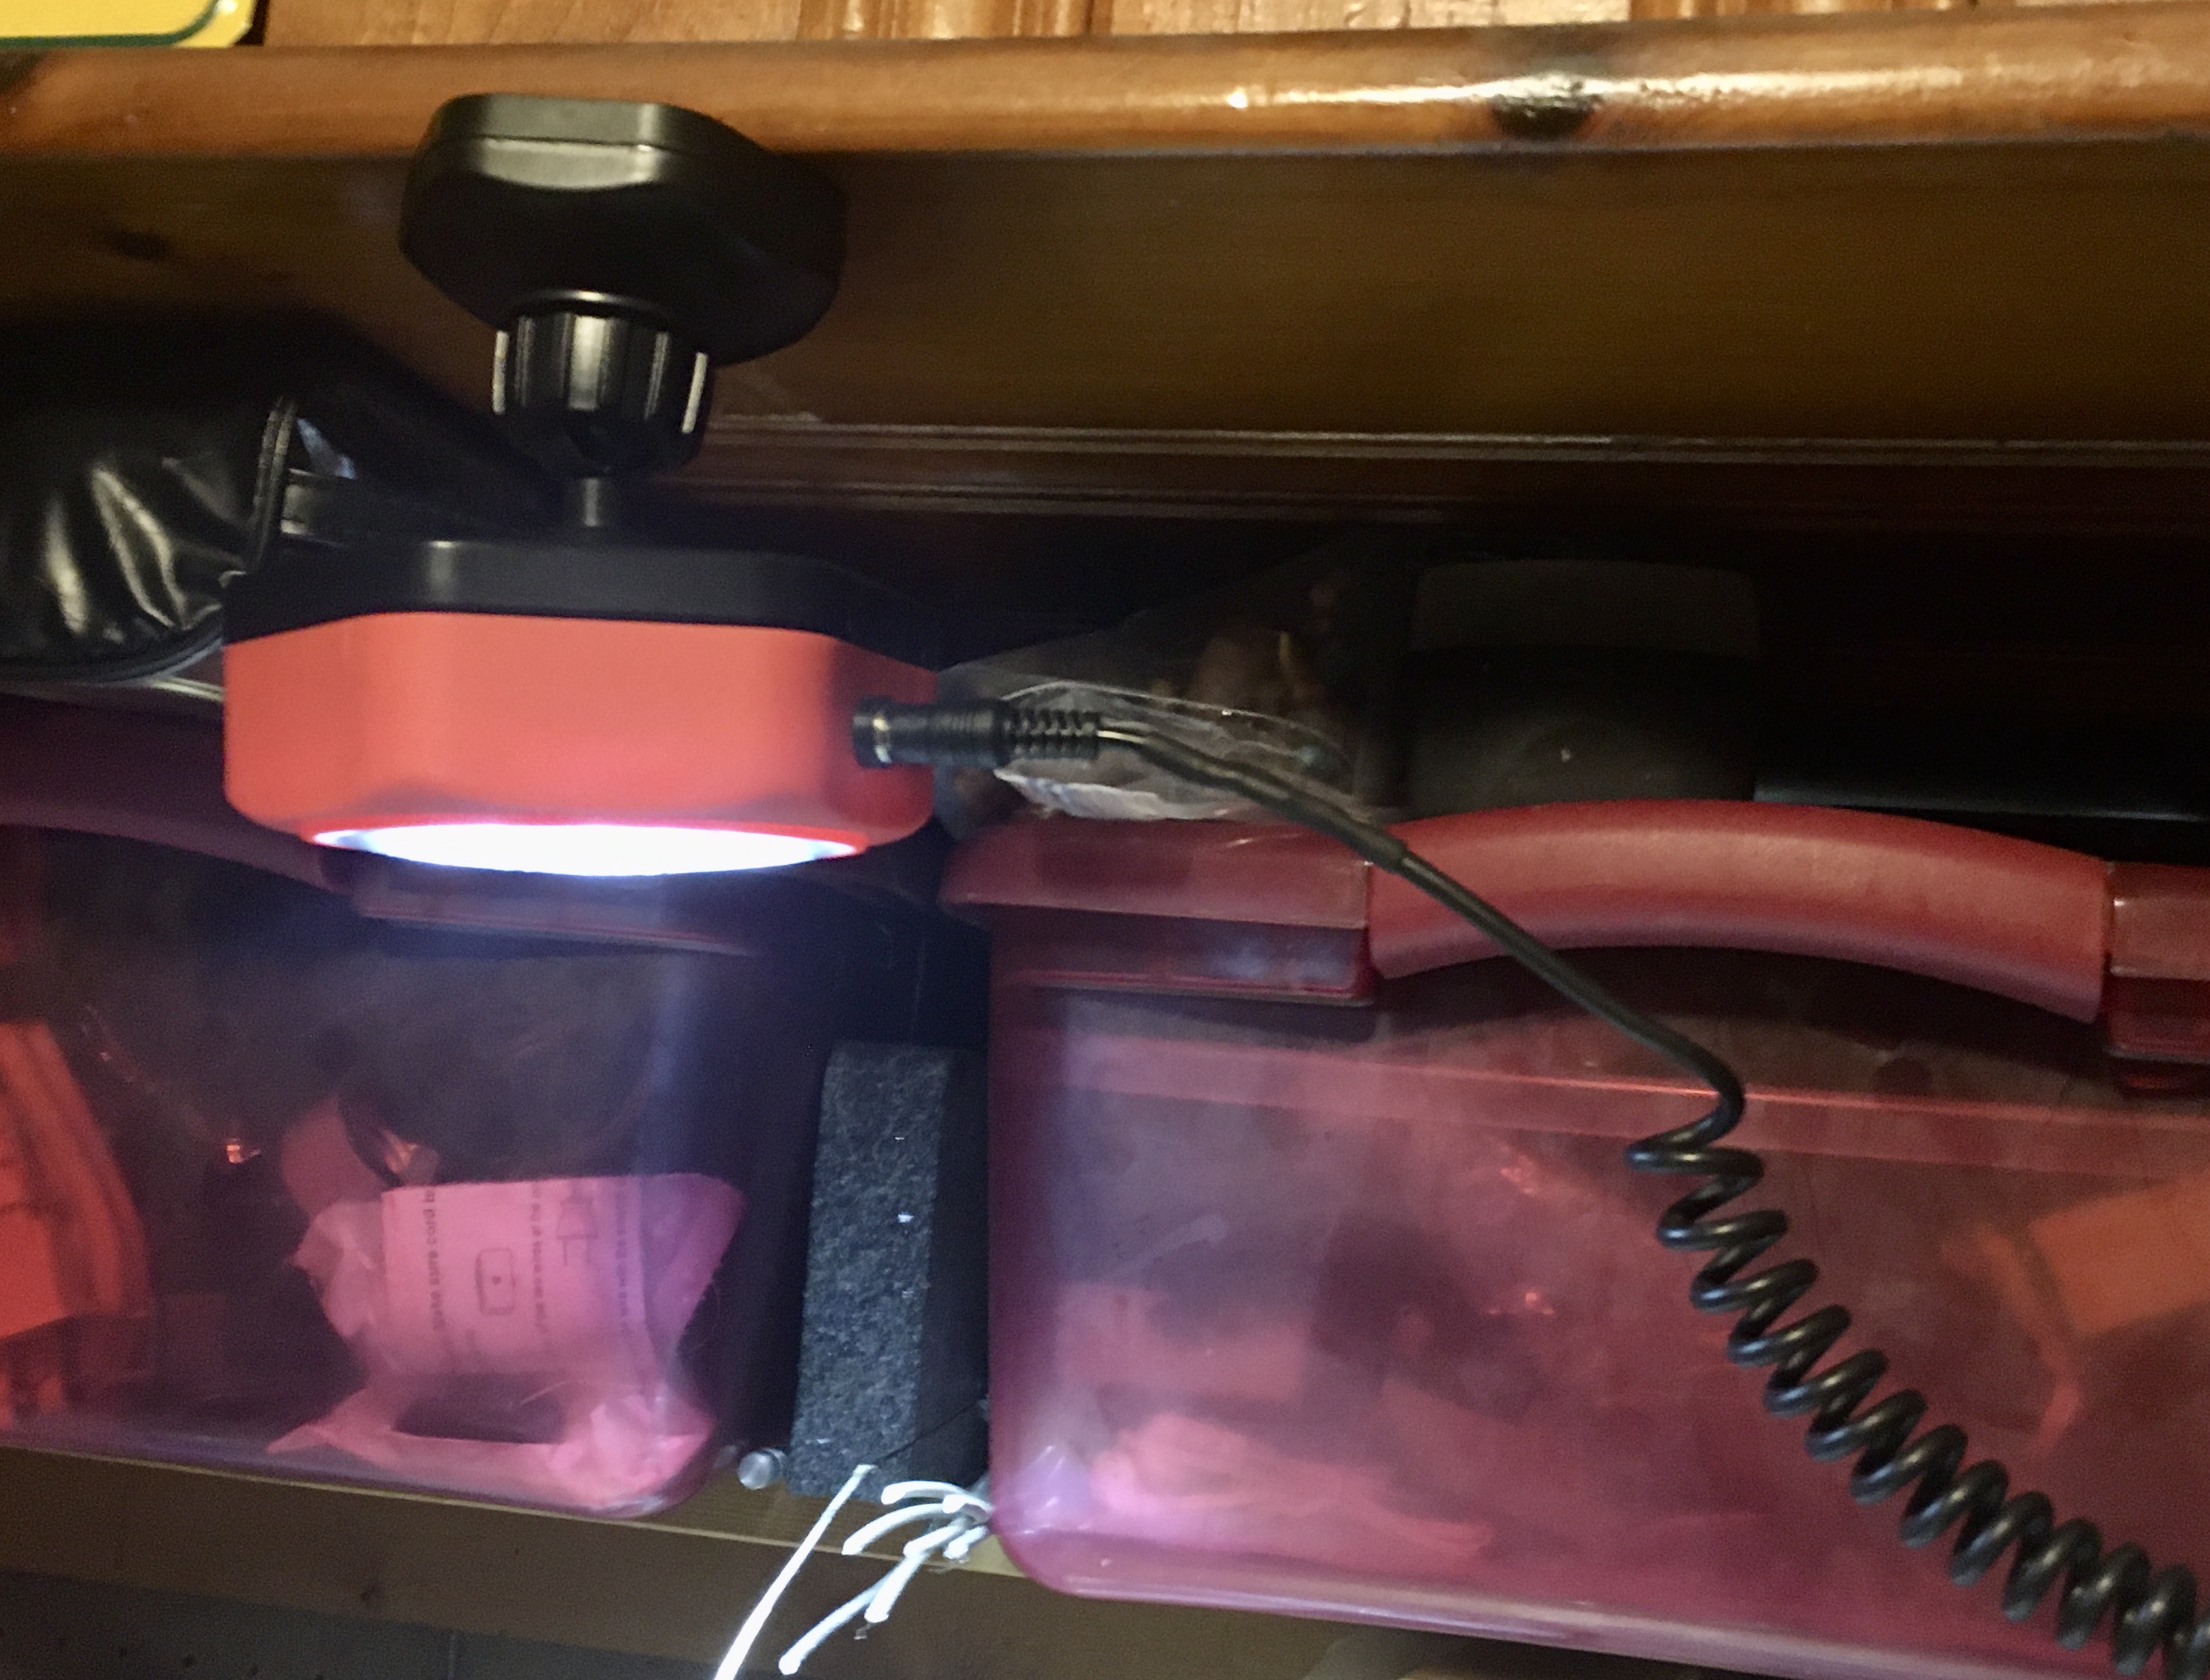
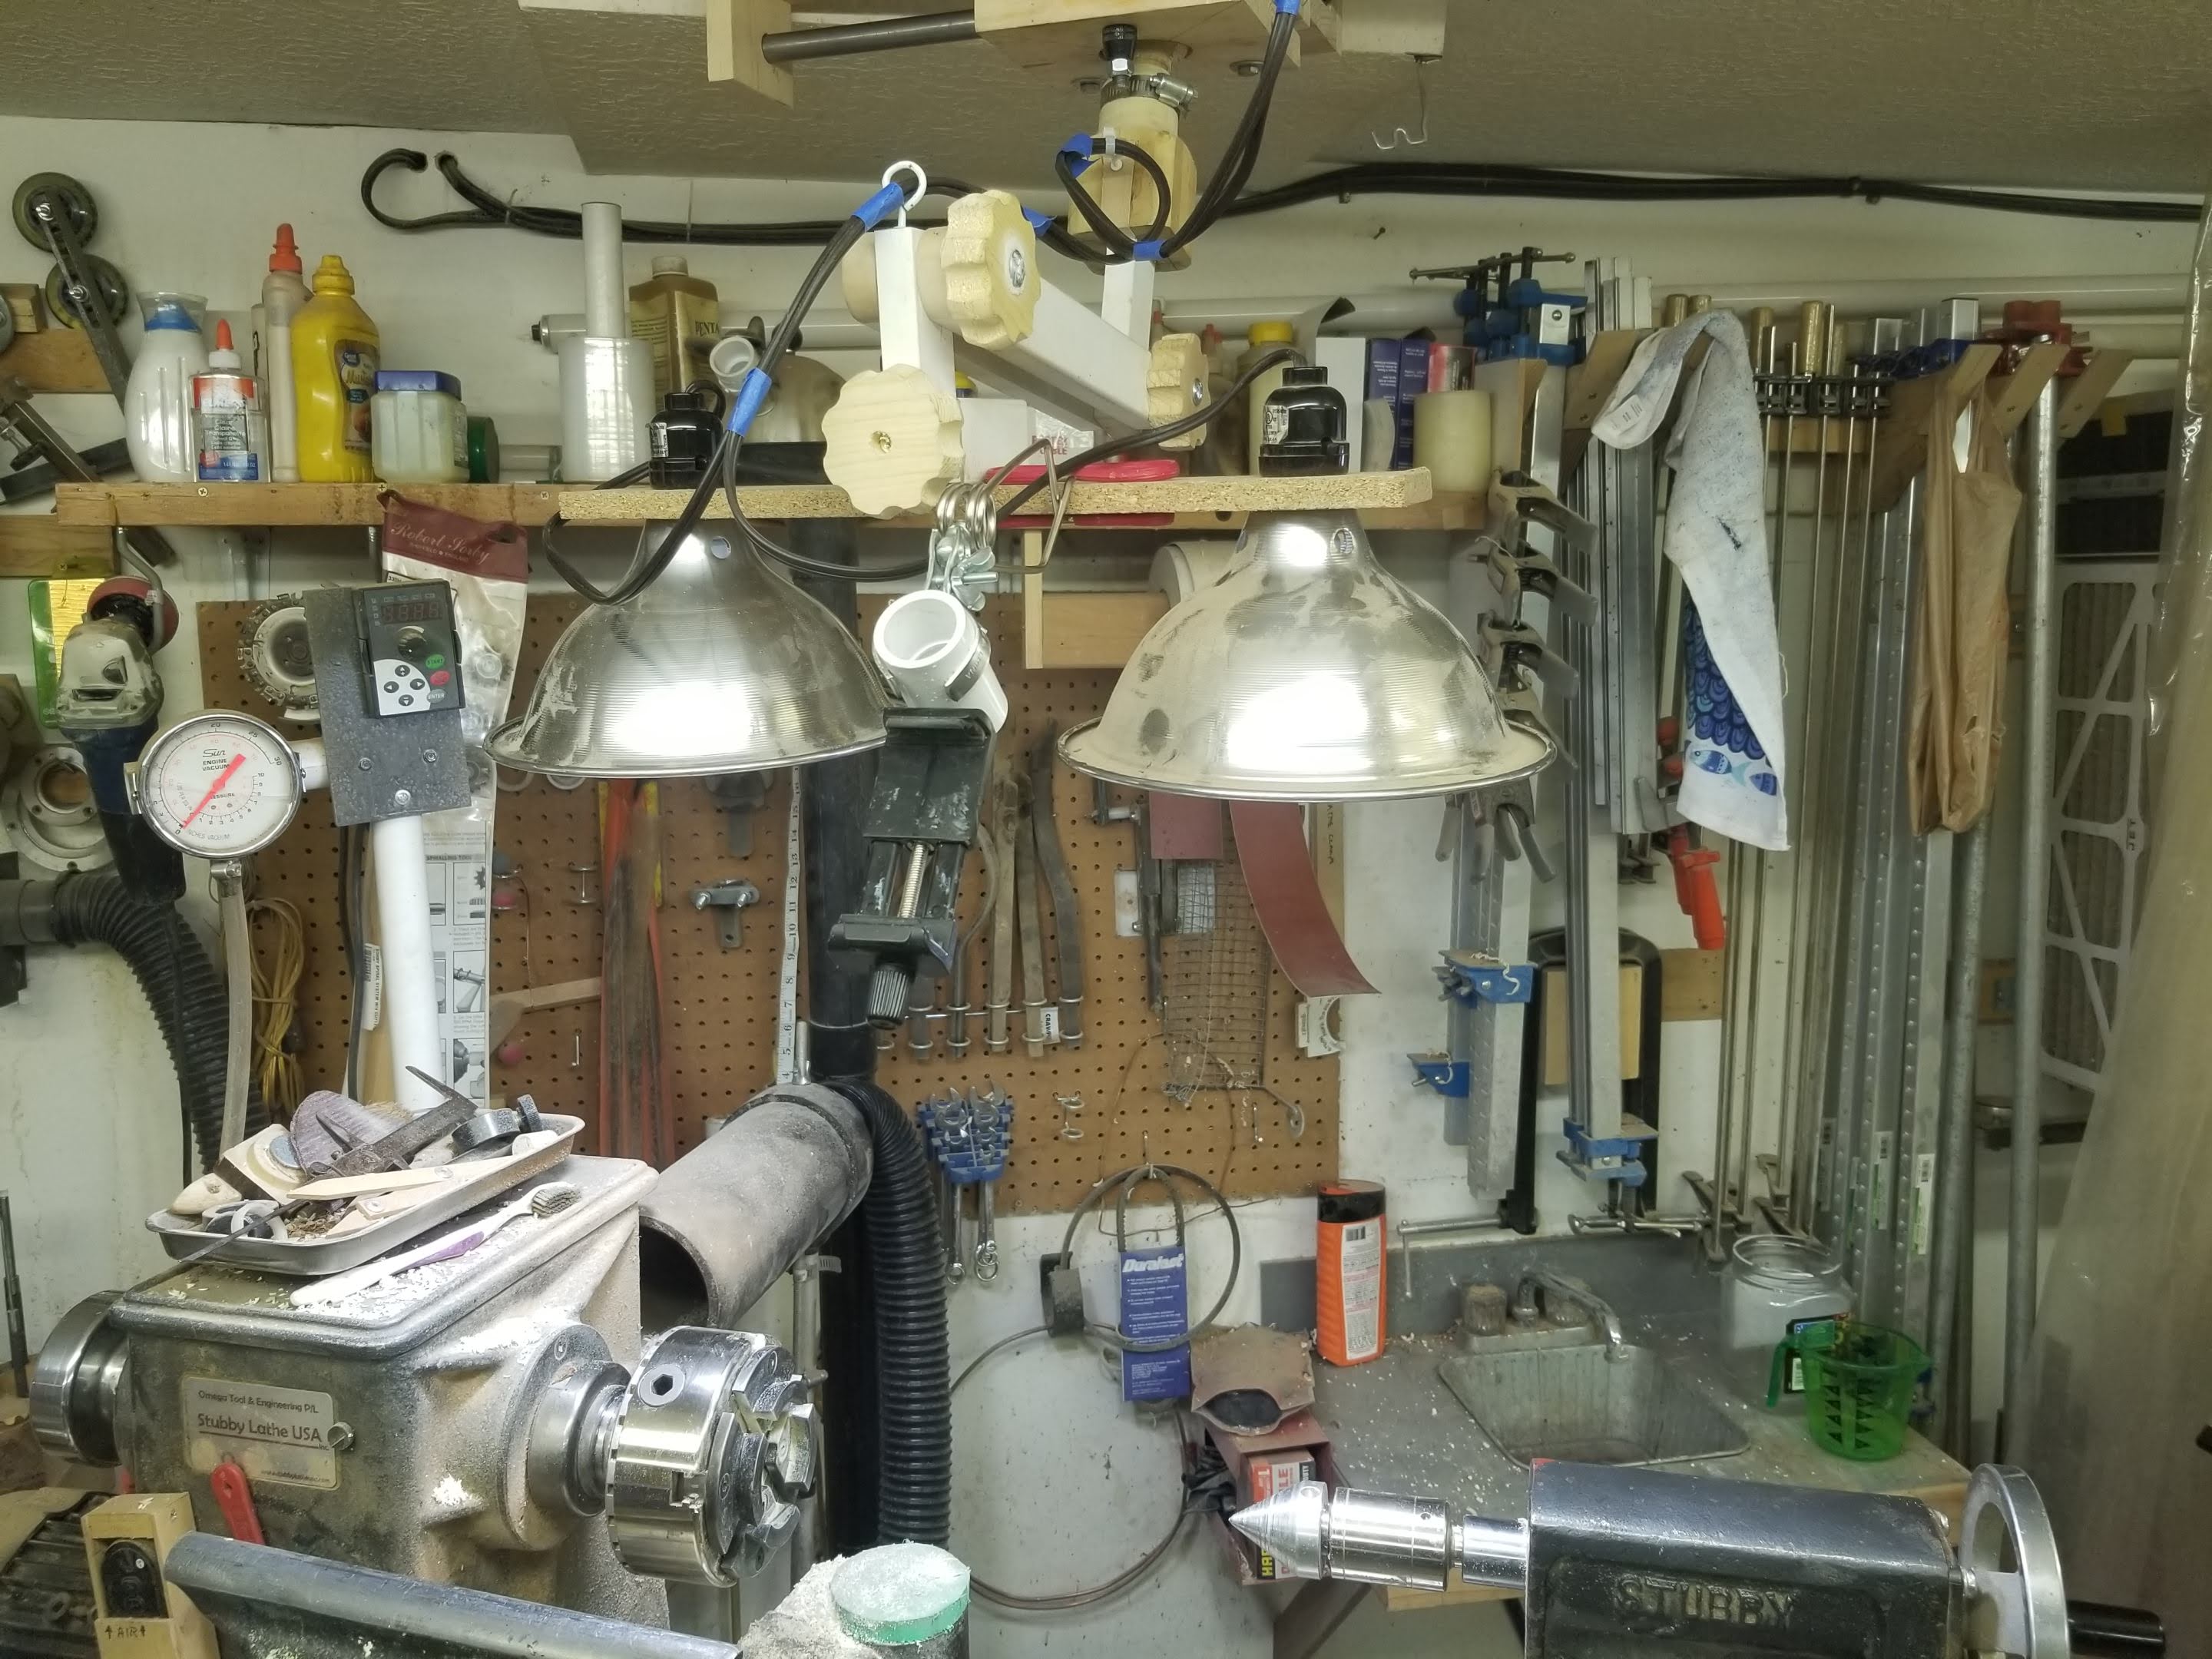
Hangs above the lathe and can slide left to right …
Right side postion

Left side position
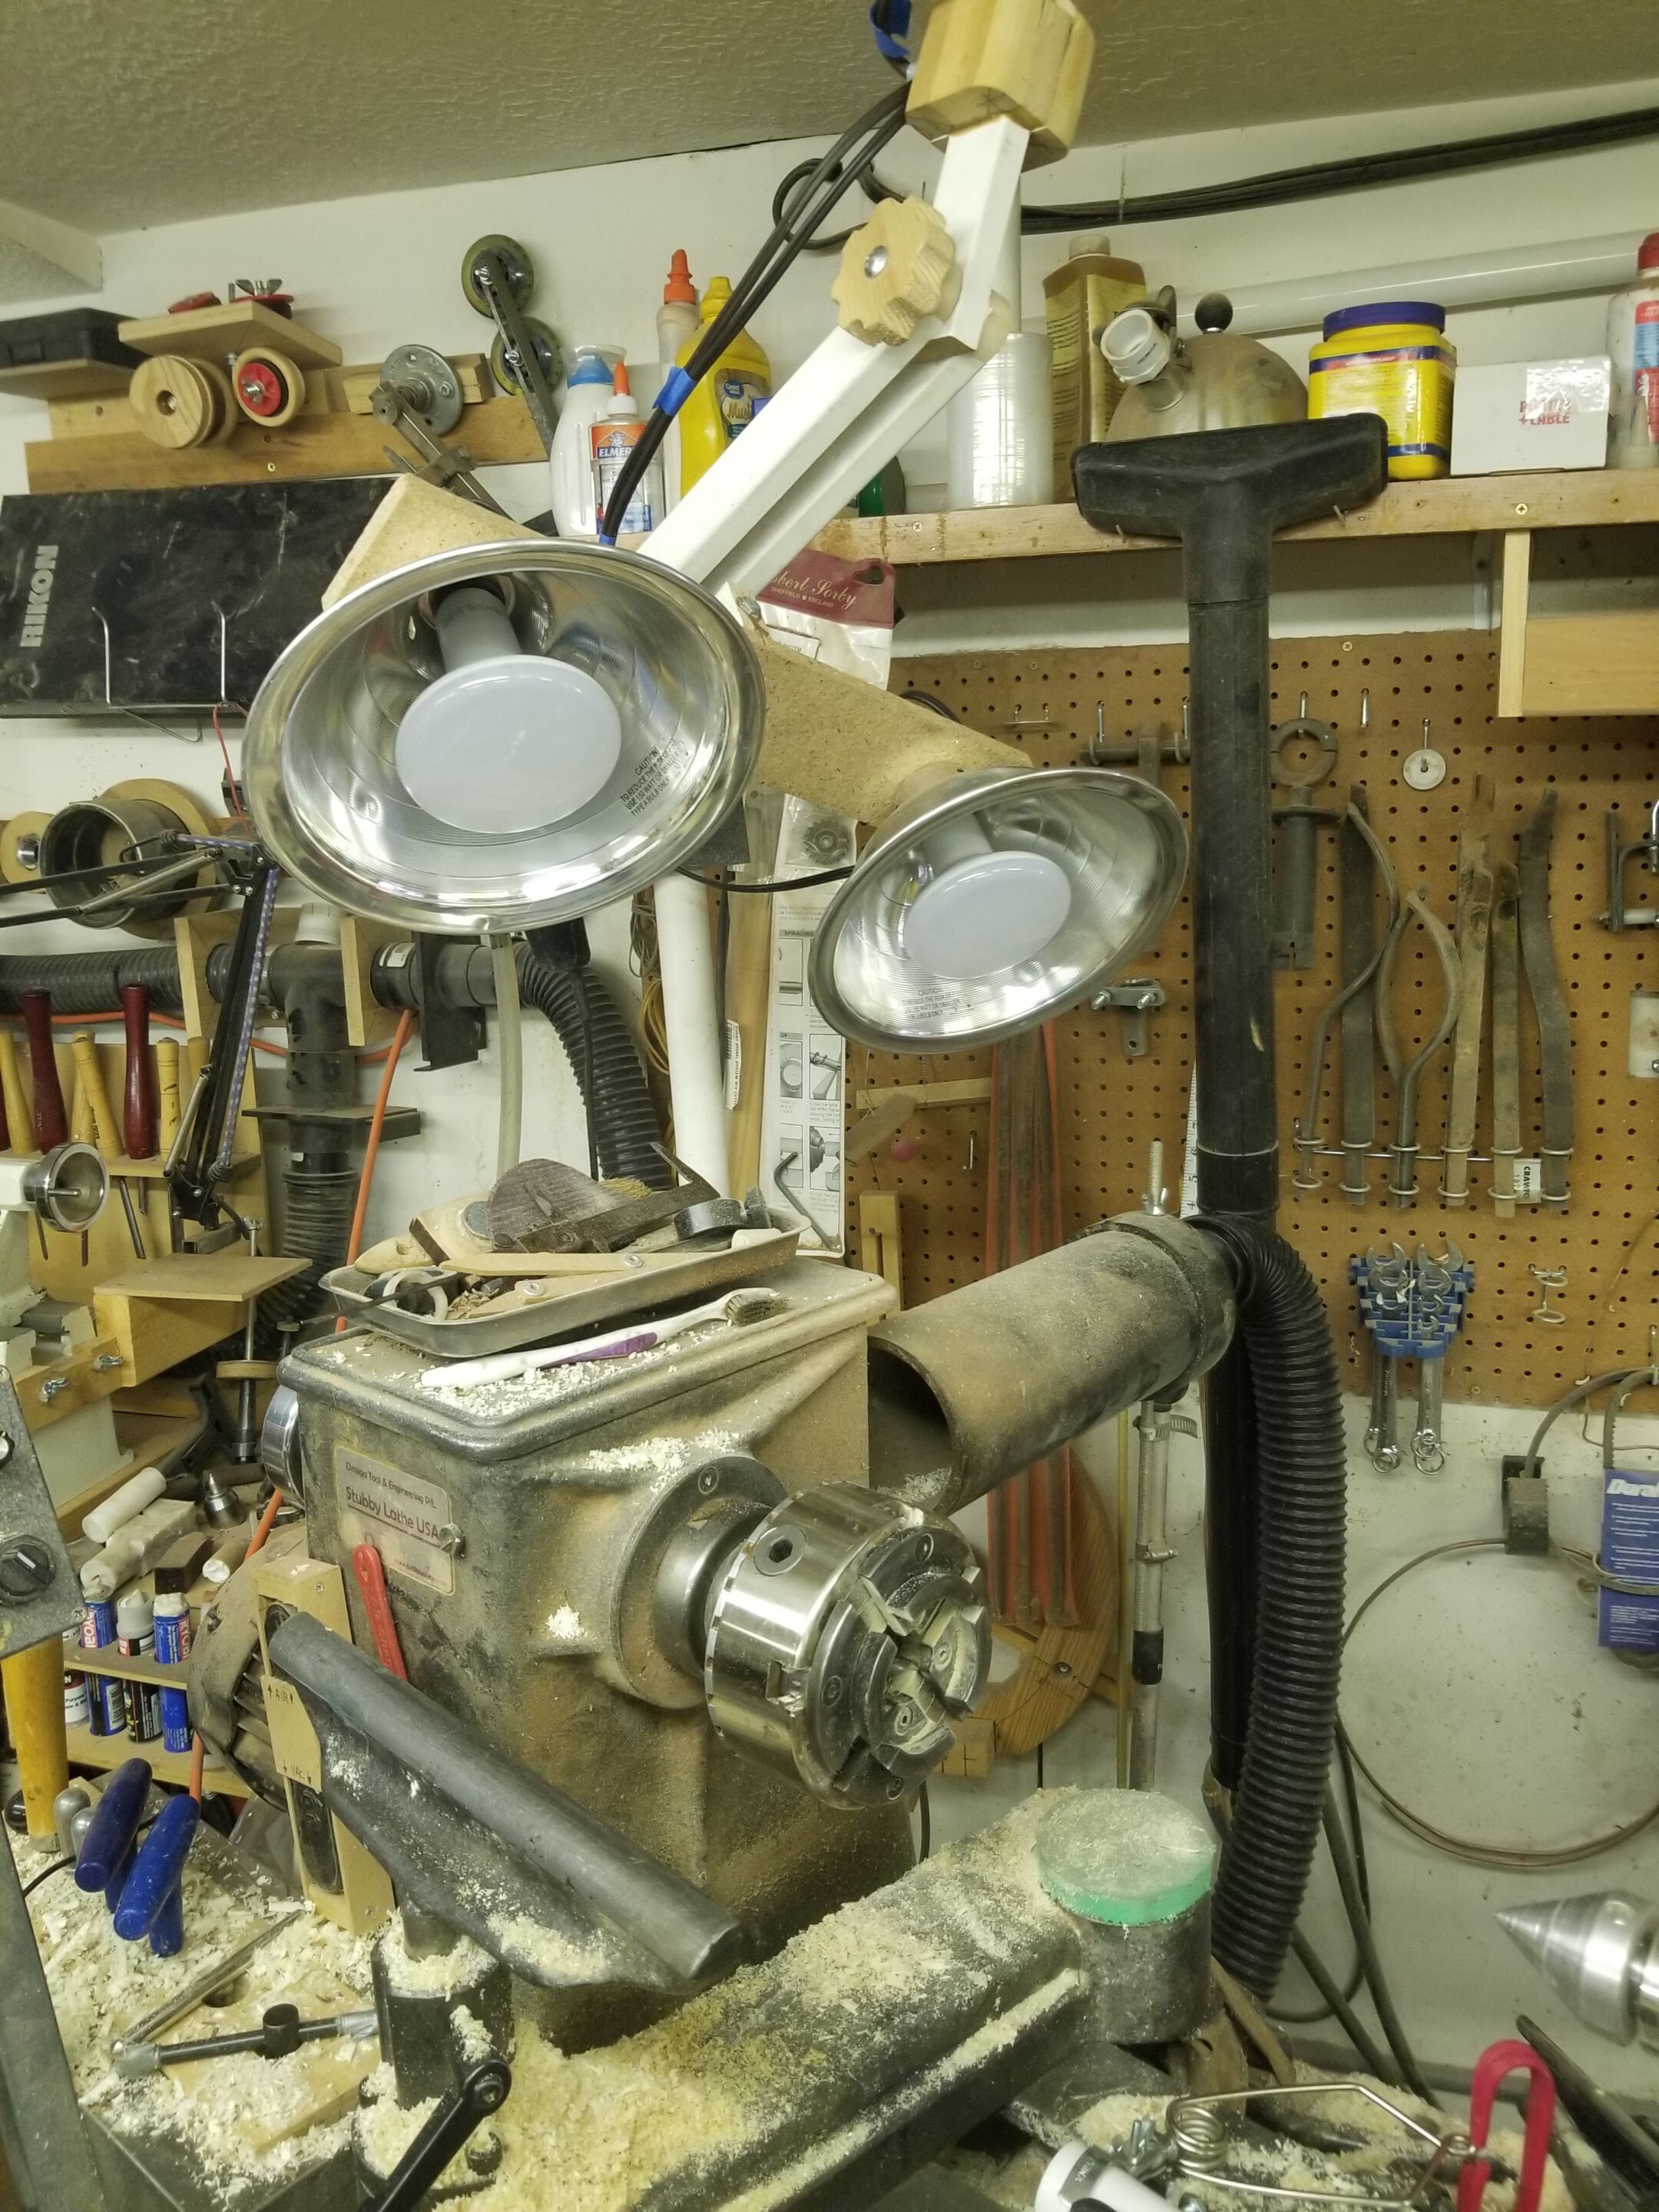
Normal center position
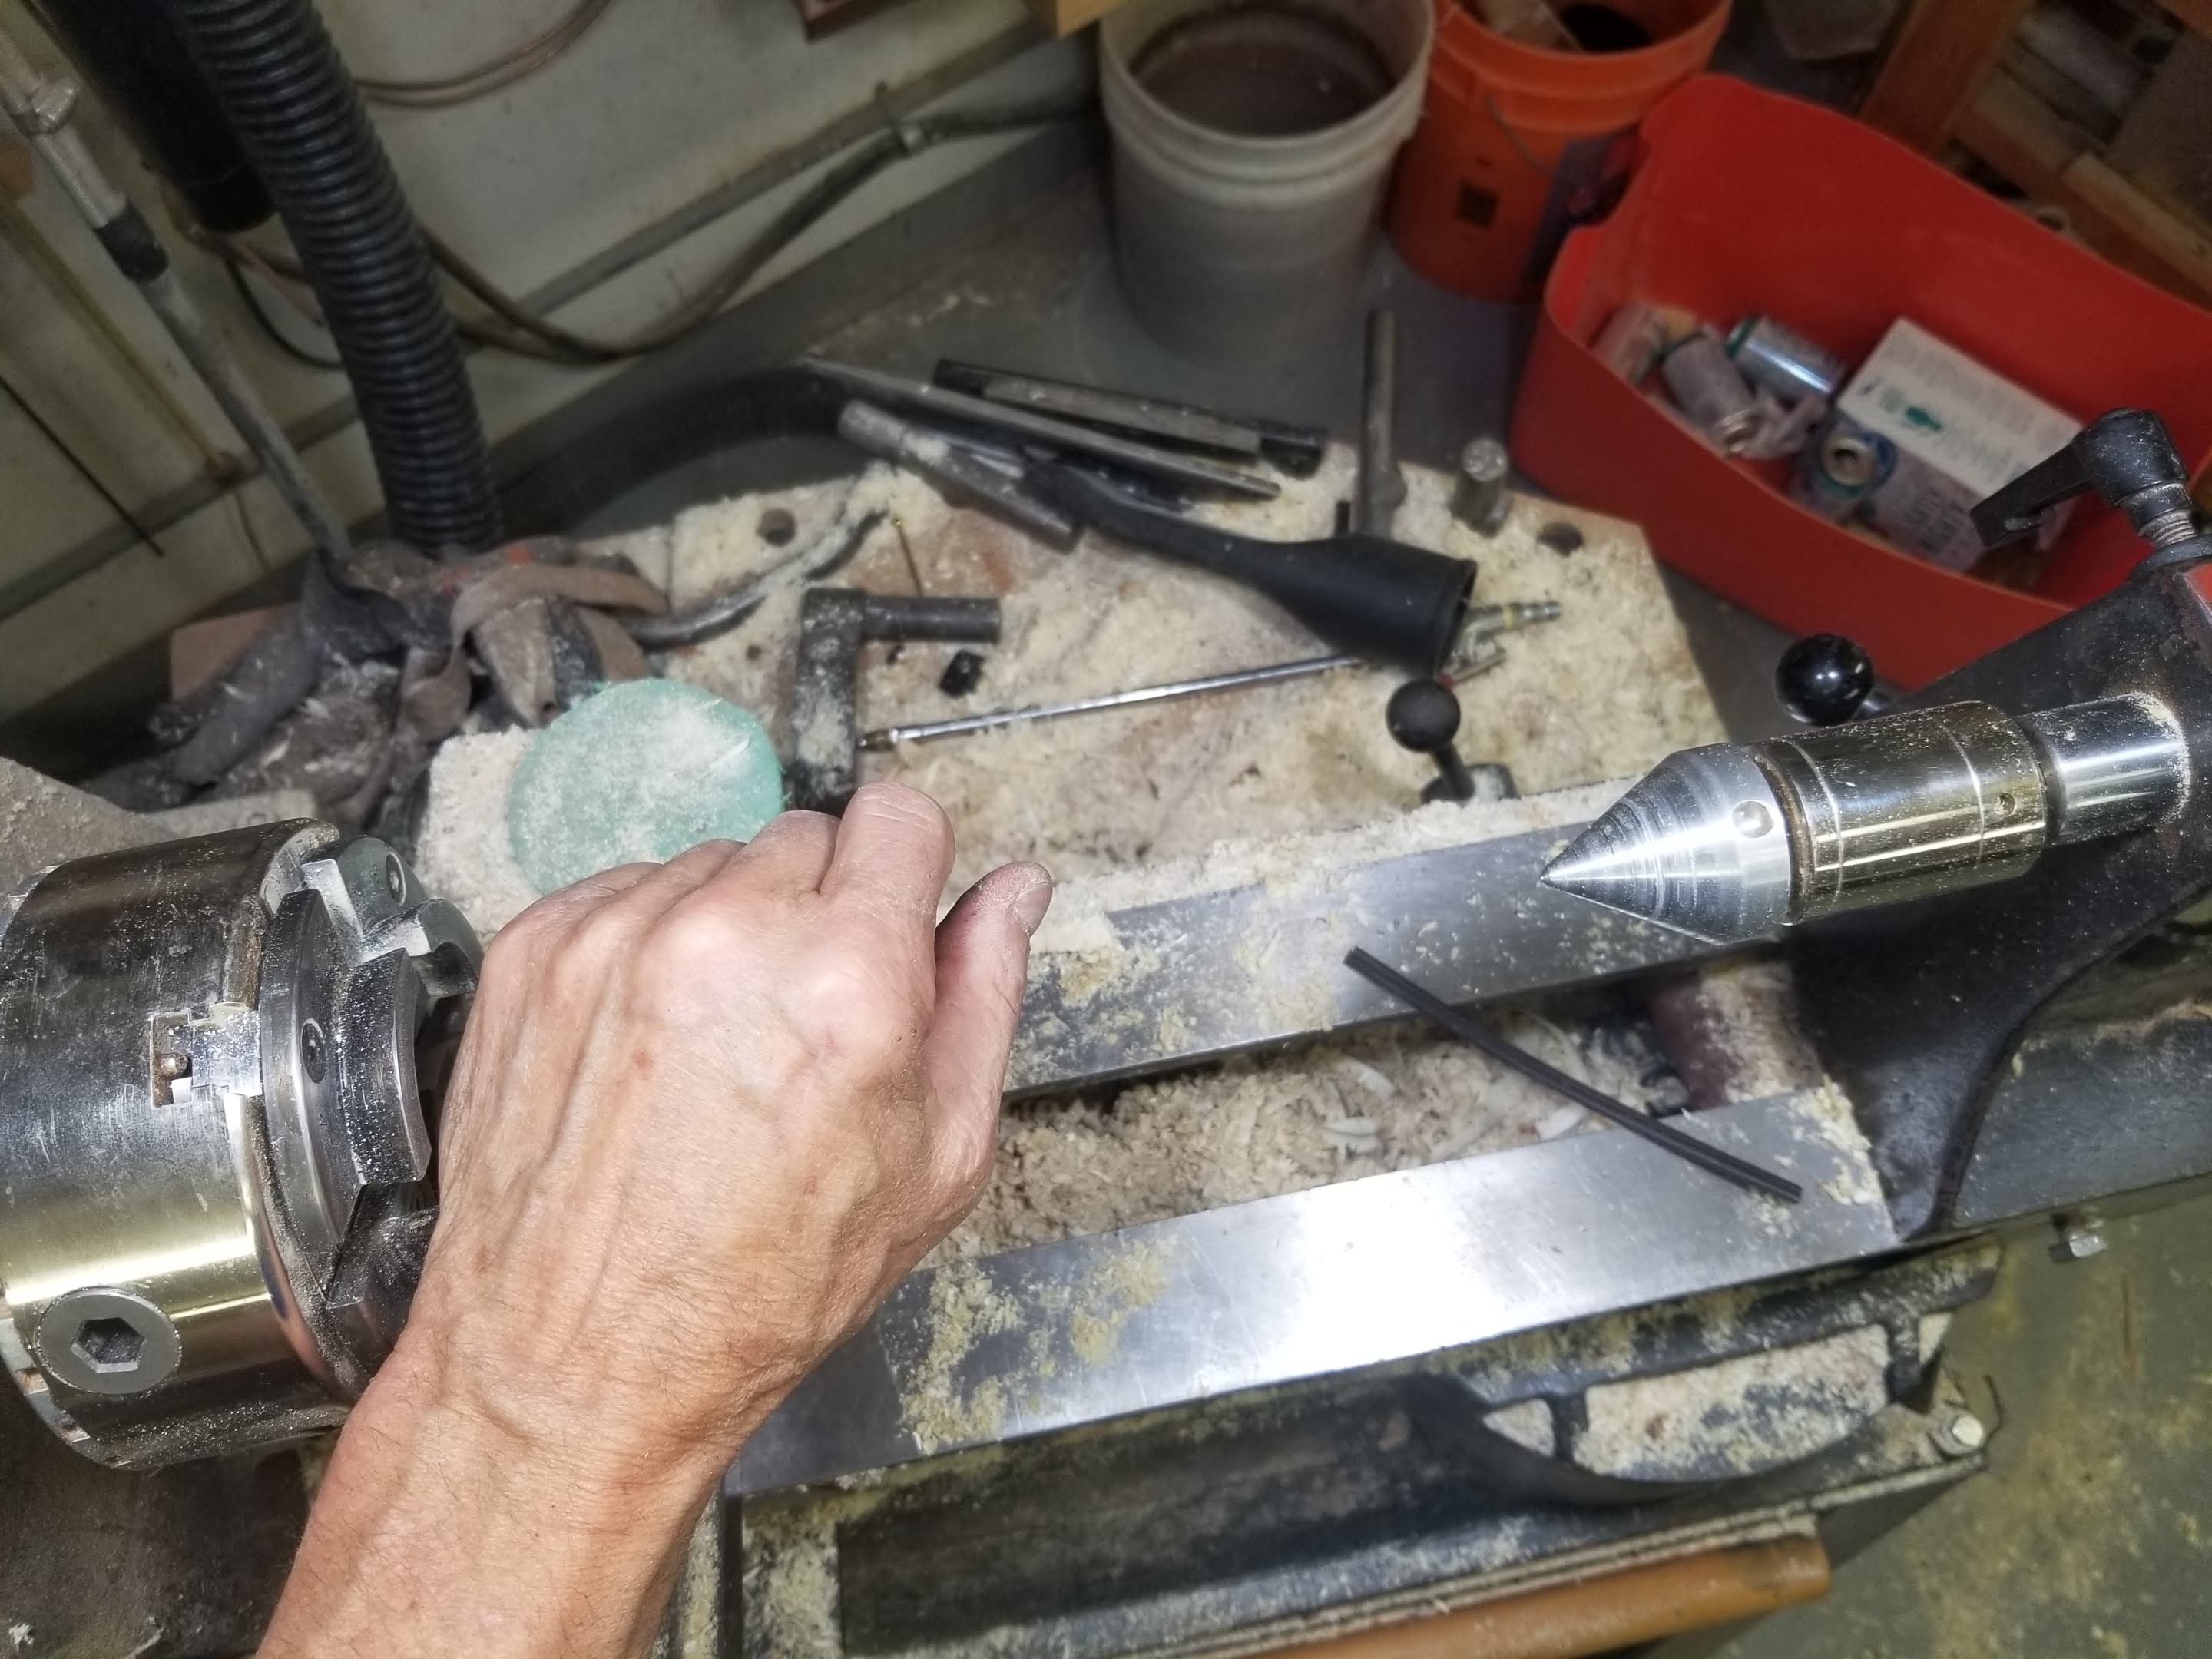
The phone camera mounts on the arm for taking photos and videos without having a separate tripod.

View from the camera
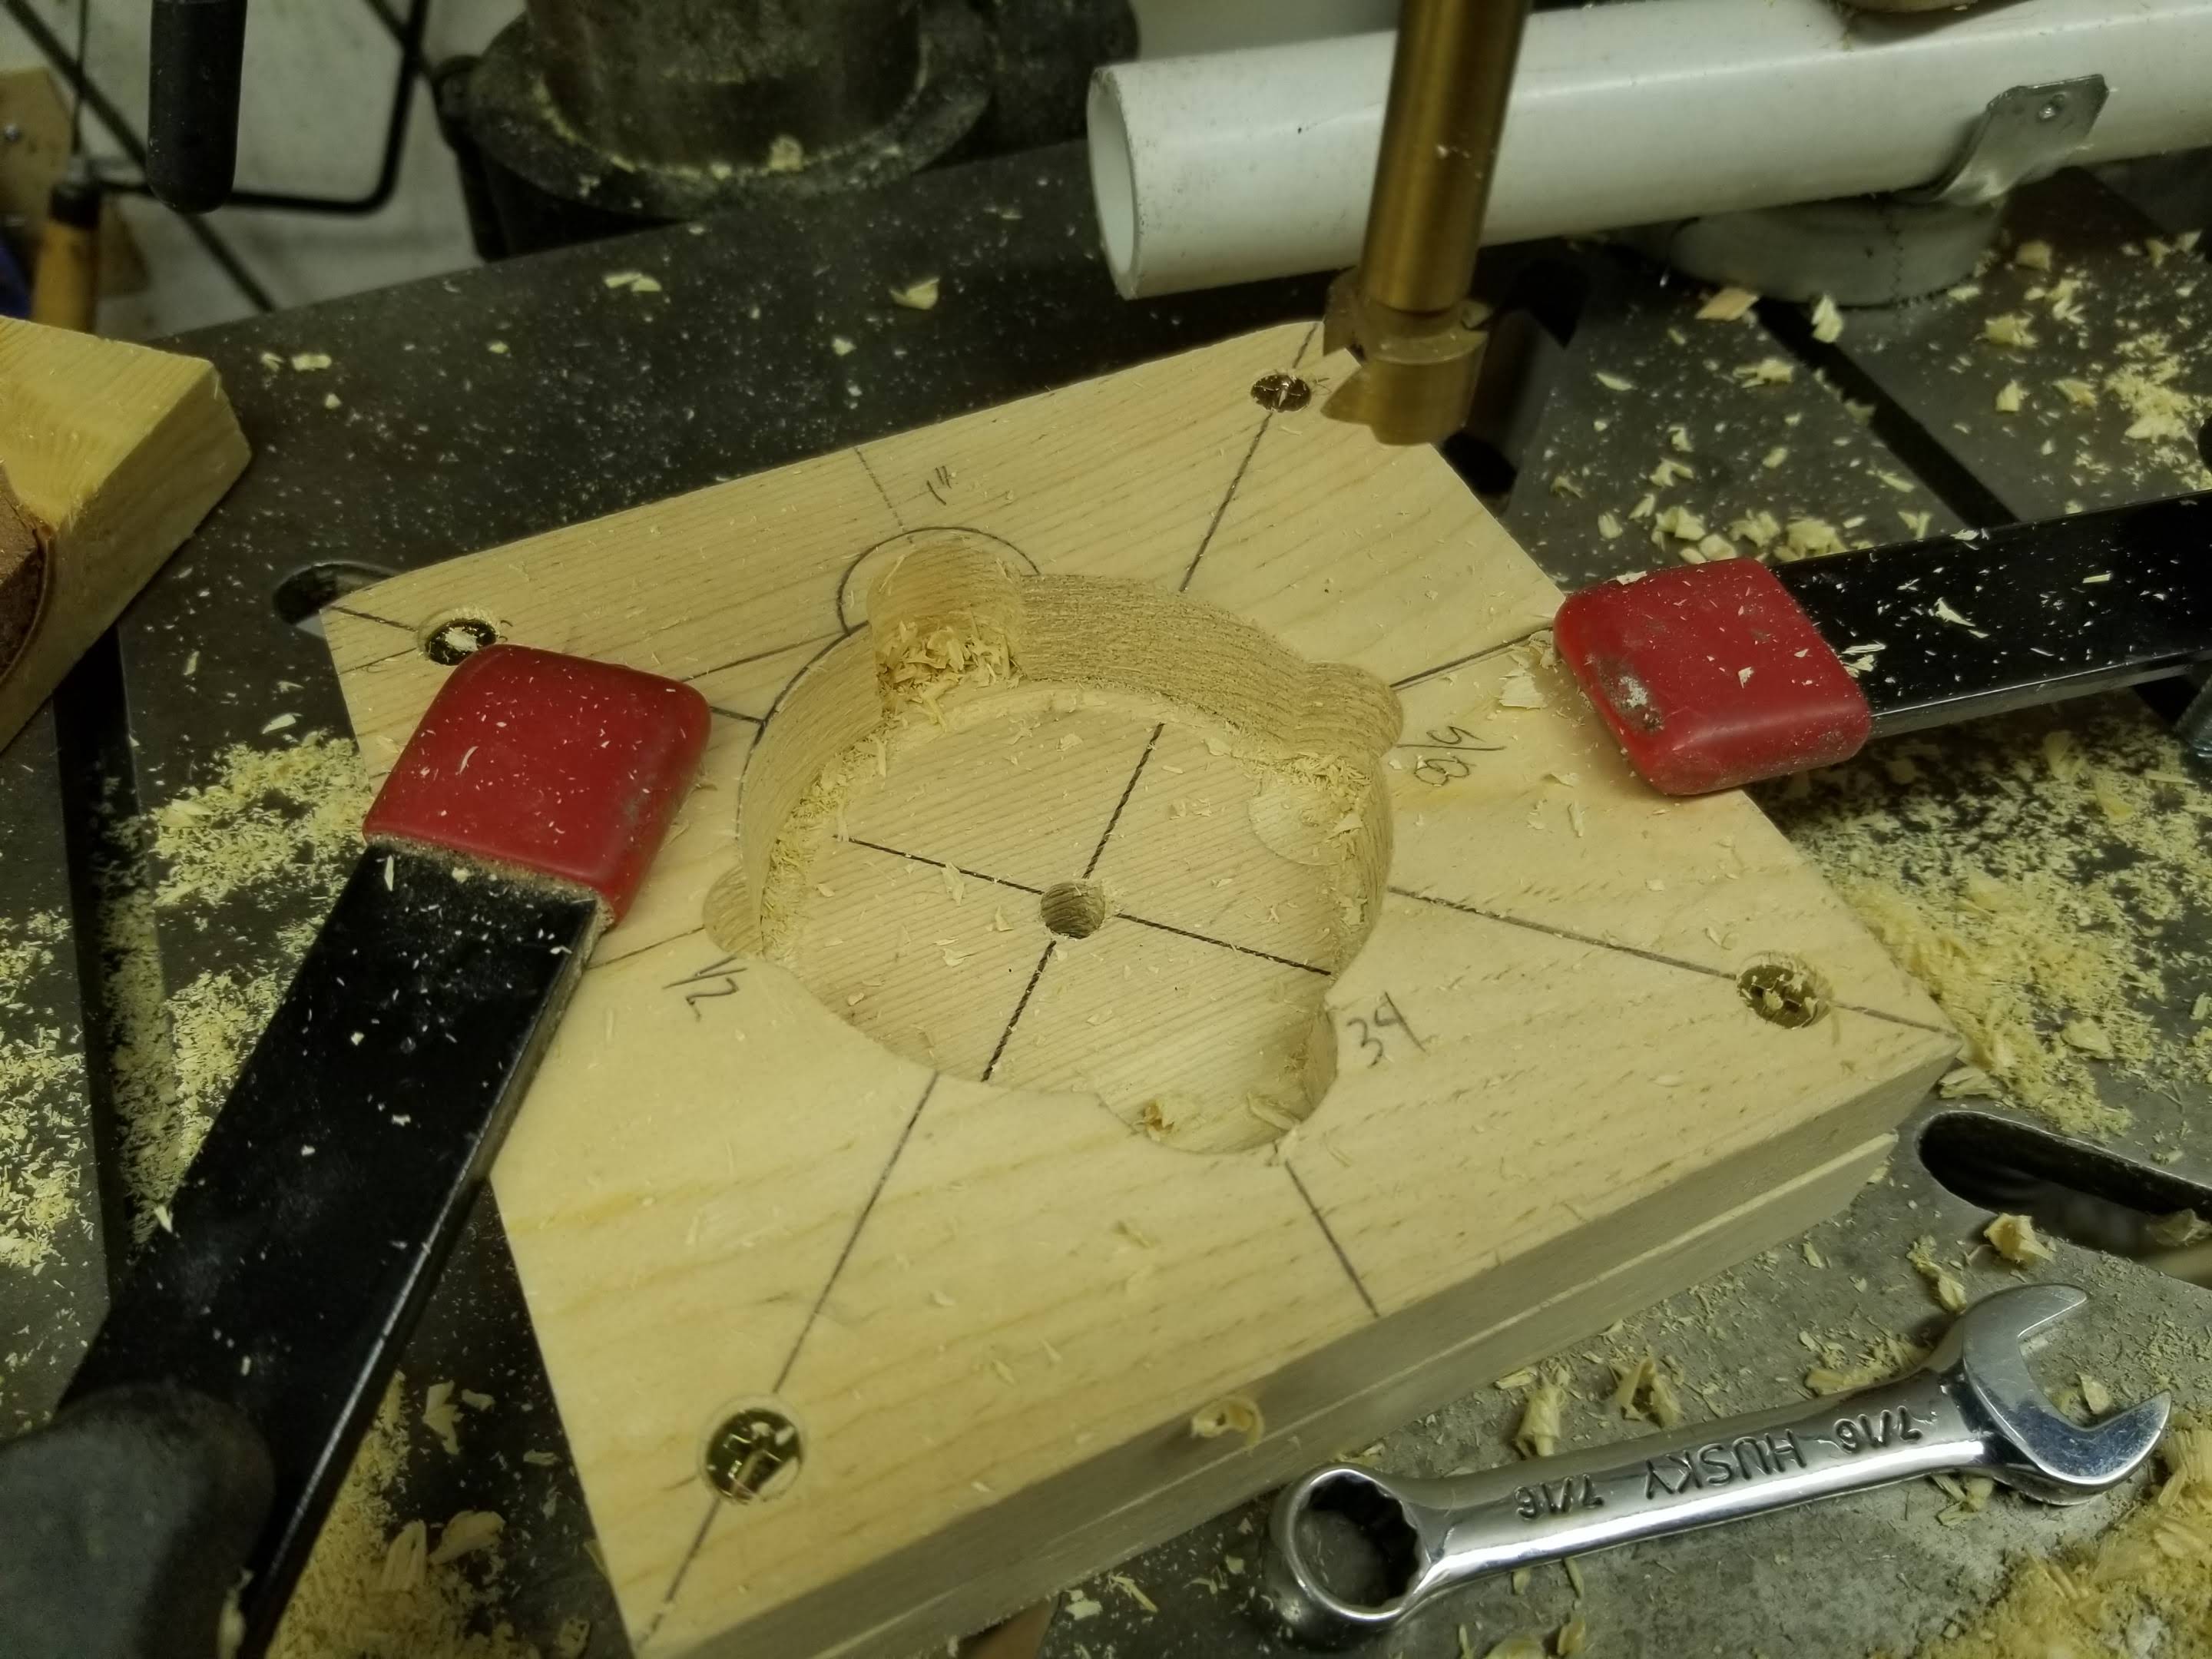
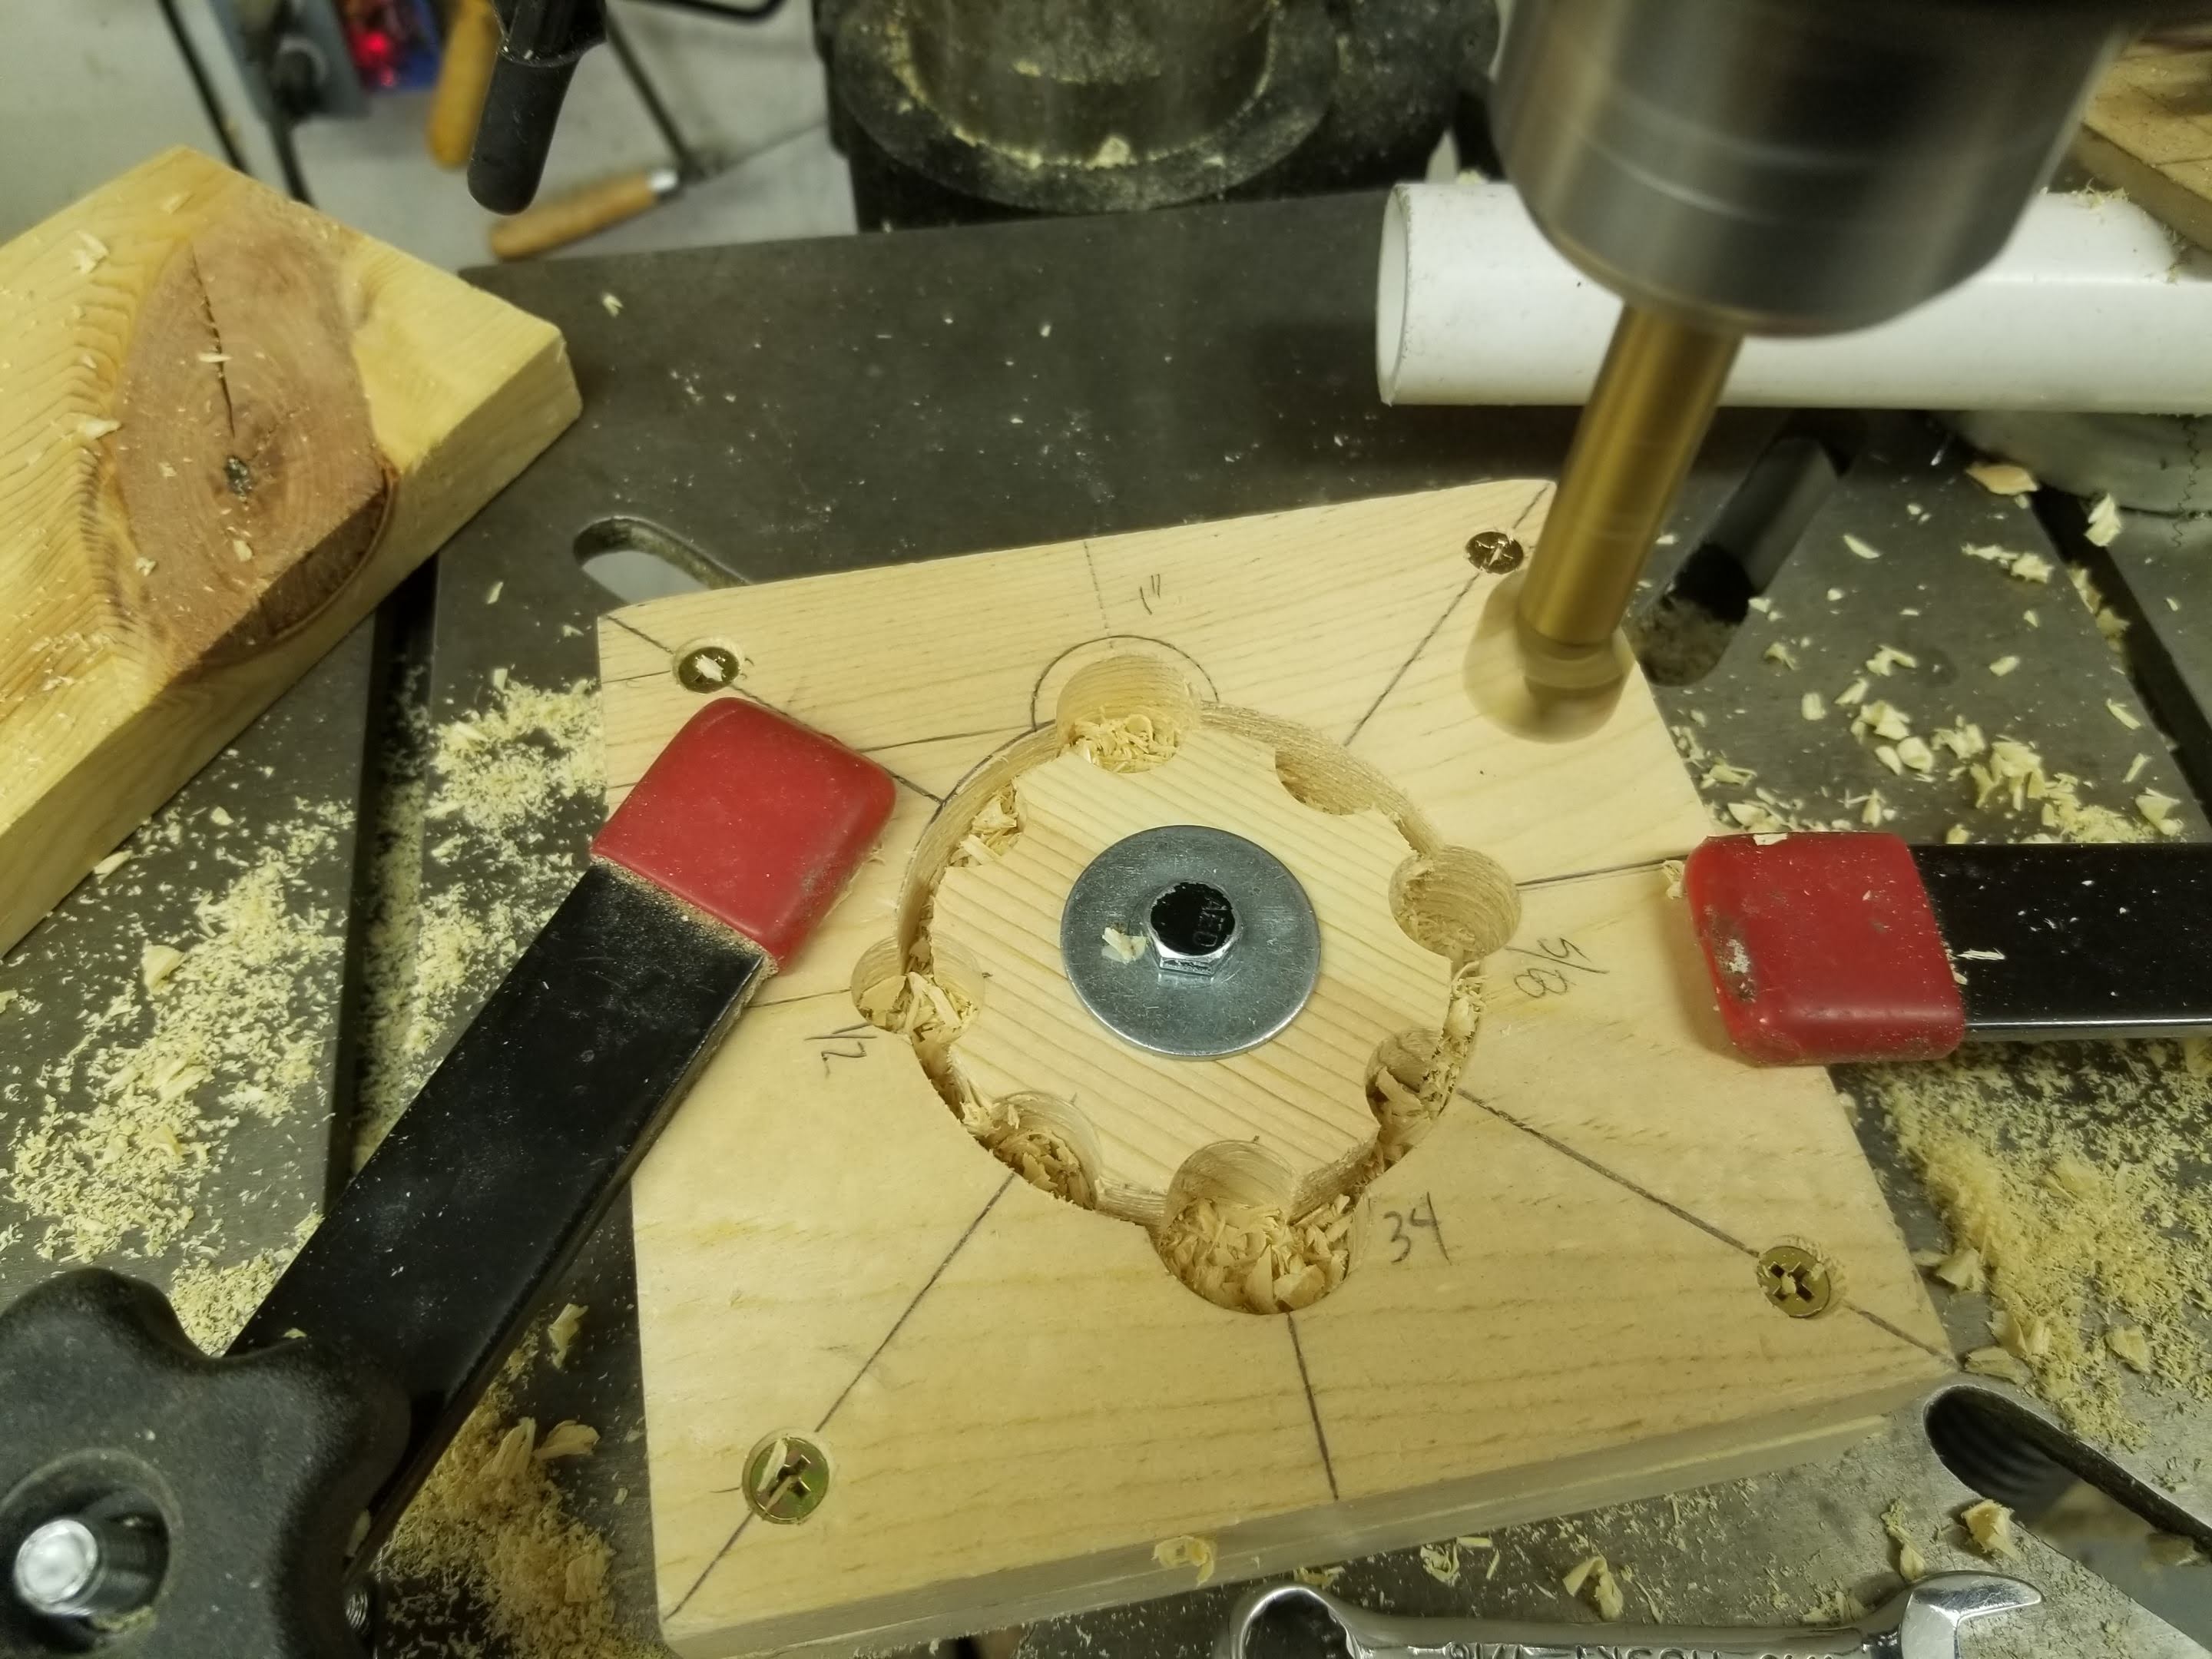
KNOB MAKING JIG
The knobs are shop-made. They use carriage bolts whose square bosses are pressed into holes on the wooden knob. A threaded insert is pressed into the opposite side of the mating arm. The knobs therefore tighten/loosen the arm assemblies joint for positioning.
This knob making jig was invaluable.
IN OPERATION
With this overdesigned lamp I can position light anywhere I want. Given my richly endowed old parts bins, it cost less than $10.
 . Seems like you might want to add a lever arm handle to make positioning easier or is that overkill?